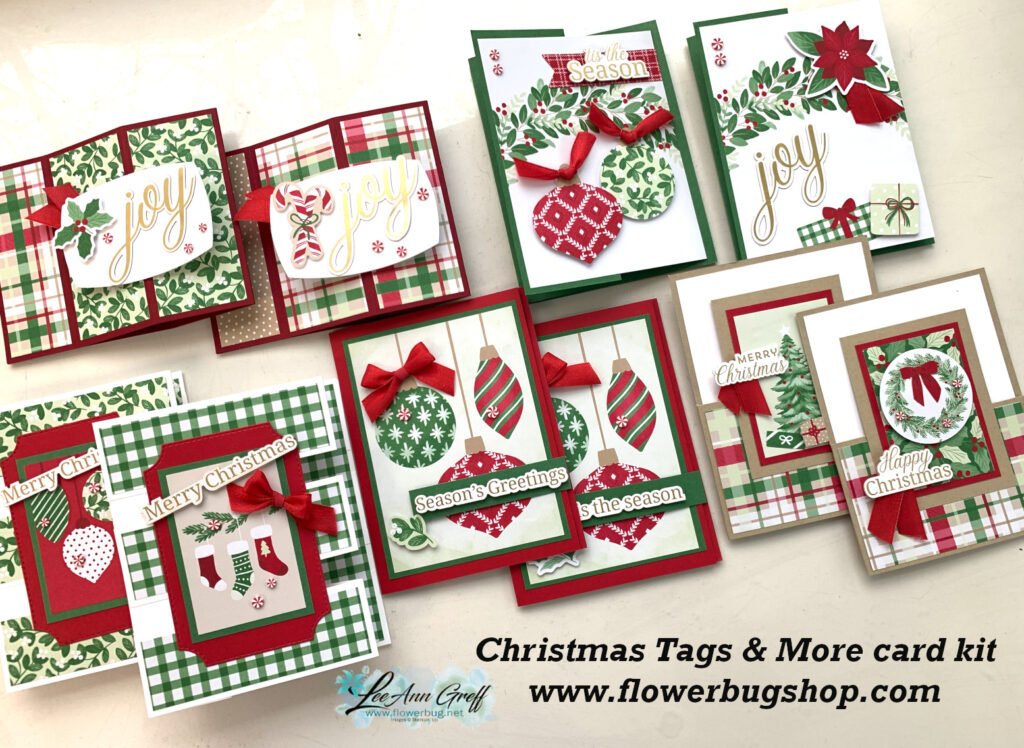
Merry, Bold & Bright card kit to go; for both Christmas & Birthdays!
I chose the Merry, Bold & Bright designer paper for one of my card kits this month because it's filled with fun, bright & colorful designs that can be used for Christmas, Birthdays or other celebrations. They're my theme for these colorful cards I created this month.
Aren't they fun? Each one is a fun fold card that truly shows off the neat prints in the designer paper. I know they don't look like fun folds but they are!
As I usually do with my monthly kits to go I am including approximately $20 in product along with the pre-cut cards. You also have the option of getting the PDF tutorial only.
This is the kit my monthly subscribers will receive. If you'd like to receive a pre-cut cards kit (with extra products to make more) each month click here. It's $28 plus shipping and they get bonus free products every few months.
1/2 pkg of the Merry, Bold & Bright designer paper (6" X 12)
a share of Iridescent white ribbon
a share of the Iridescent Adhesive-backed circles
the pre-cut cards including punched and die-cut pieces
the PDF tutorial (a $15 value)
The PDF tutorial is an option for those who have their own products. It's $15 andcan be found here. It includes photos, step by step directions, measurements and a supplies list.
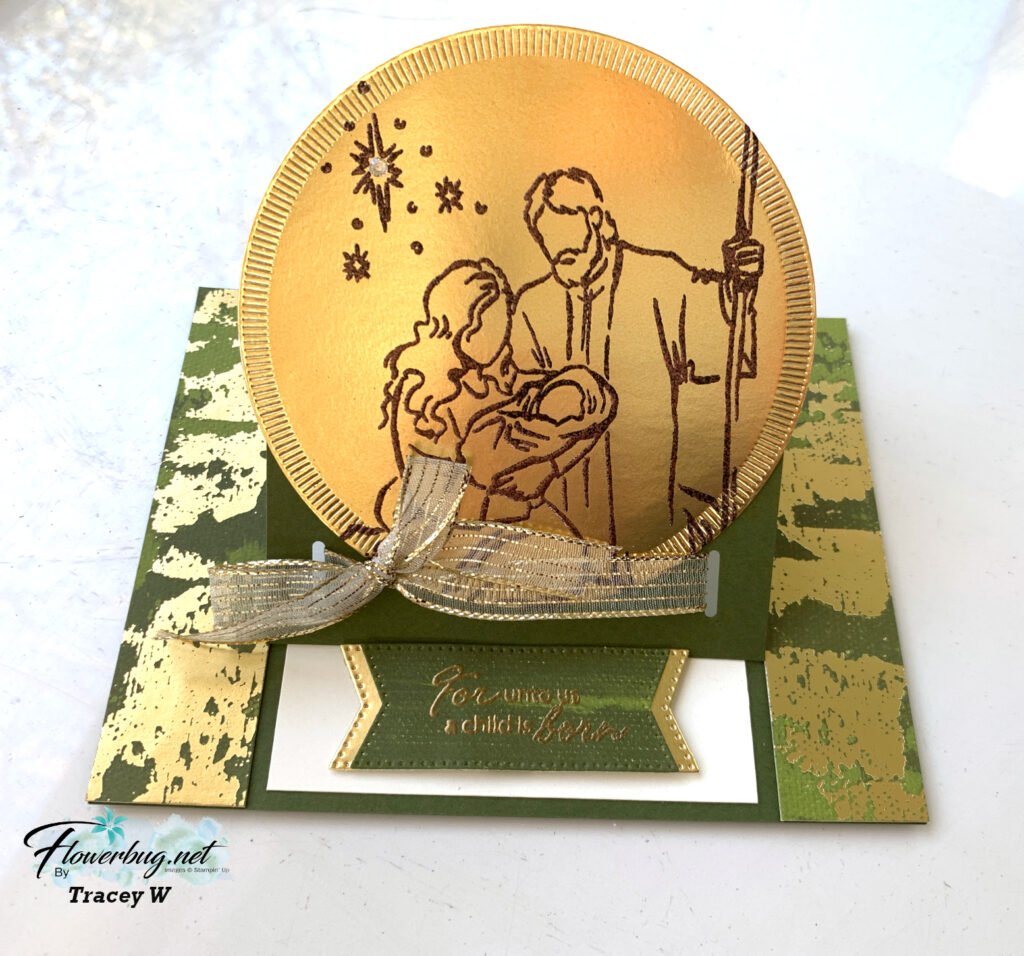
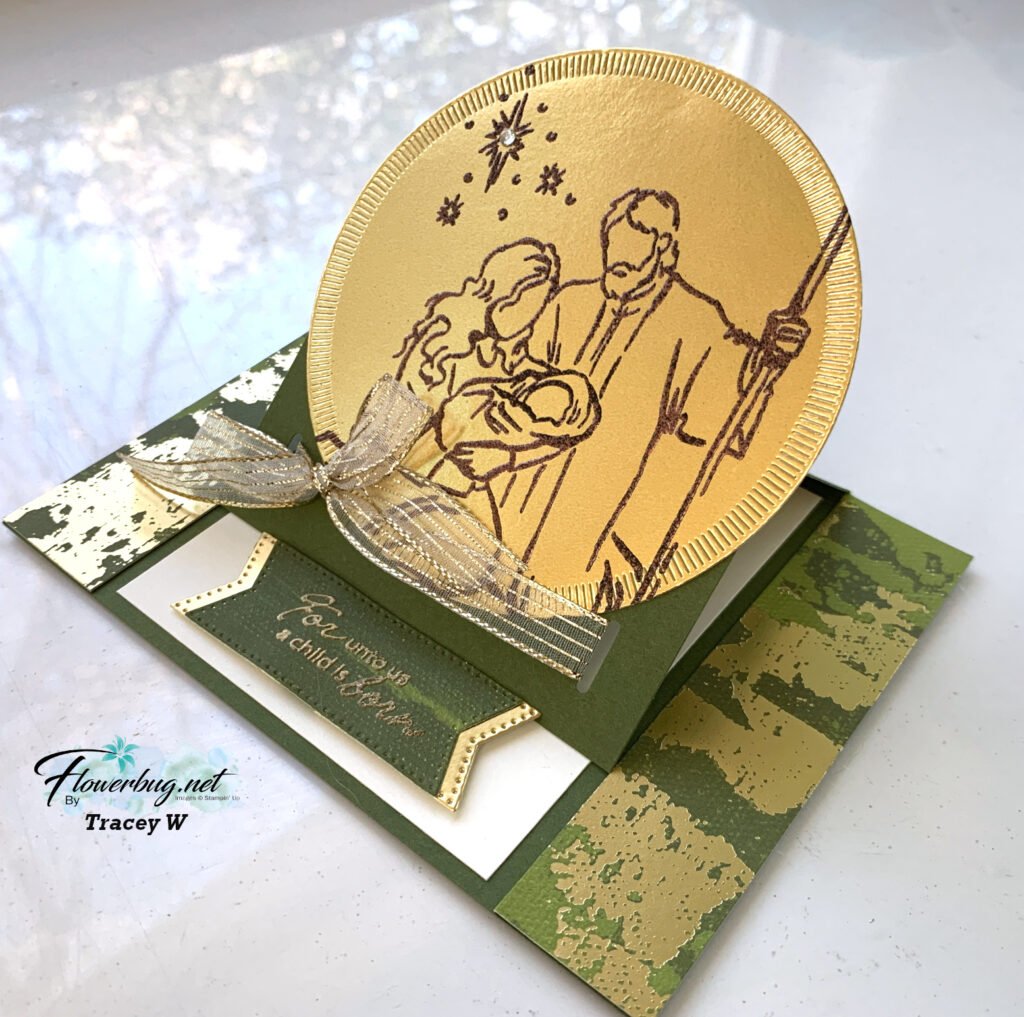
She featured the ‘A Child is Born’ stamp set and heat embossed it on a Gold foil die-cut from the Spotlight on Nature dies. There are tons of details on her gorgeous card; I’ll highlight a few:
I think my favorite thing about her card is what she heat embossed the greeting with. Gold embossing powder wouldn’t show up very well so she mixed Copper and Black embossing powders and used that. Genius!
Measurements: – Mossy Meadow card base 5 1/2″ X 8 1/2″ scored at 4 1/4″. Cut from the center score line down one side at 1″ and again at the other side at 1″. Now score that center piece at 2 1/8″ – DSP strips are 1″ X 4 1/4″ – Gold circle die-cut is approximately 3 7/8″ – inside vanilla is 3 1/4″ X 4″ – Greeting die-cuts are 2 1/2″ long X 7/8″ tall
A stunning Christmas card Tracey!
~~~
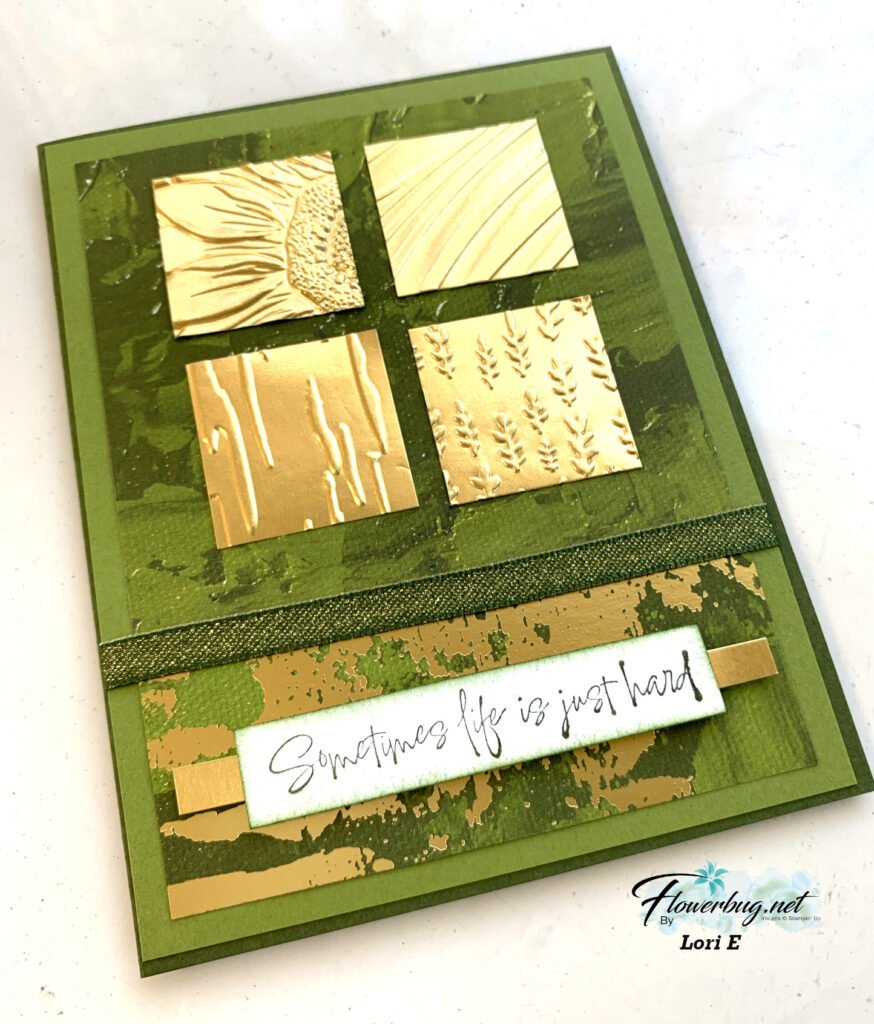
Next is a pretty card made by Lori who used a few of the same products on her card.
She added lots of texture to her card with four different embossing folders. Those include the Sunflower 3D, Birchwood, Gathering Leaves & Soft Waves folders. These are in 1 1/4″ squares.
This kit to go includes a share of the festive designer paper, the ribbon, the peppermint gems, the ephemera greetings, the PDF tutorial and video too. Plus the pre-cut 10 cards that are all fun folds. All for $30 plus shipping. It’s a fabulous deal!
Don’t wait long; I have just a few left.Go here to get yours. *You will need to cut your new designer paper for the cards but my directions make that simple.
~~~
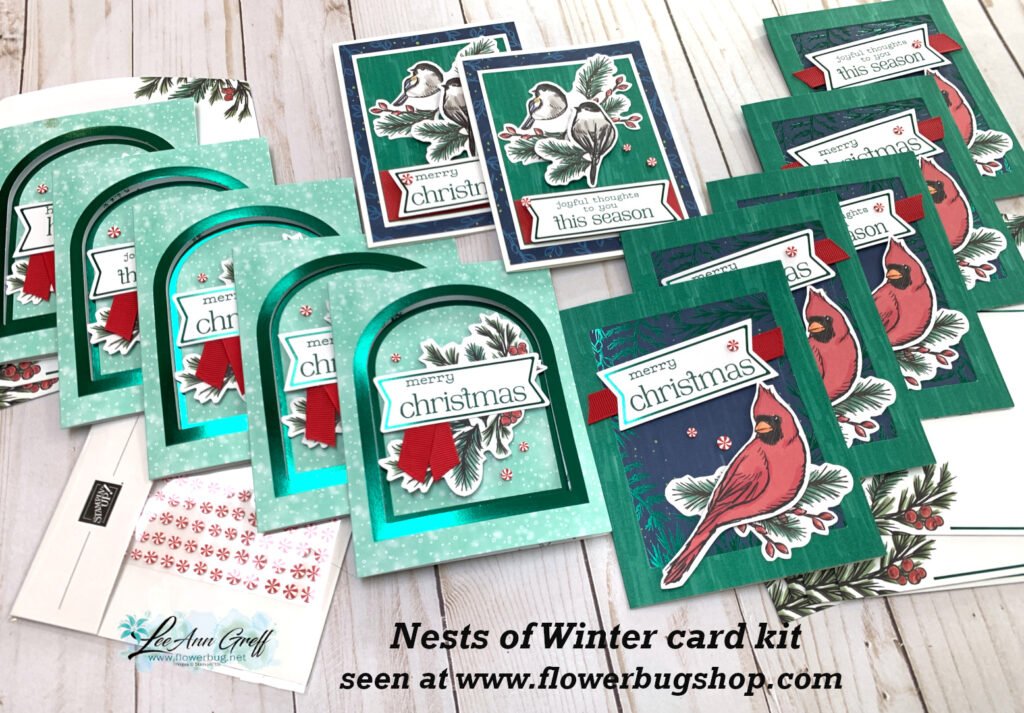
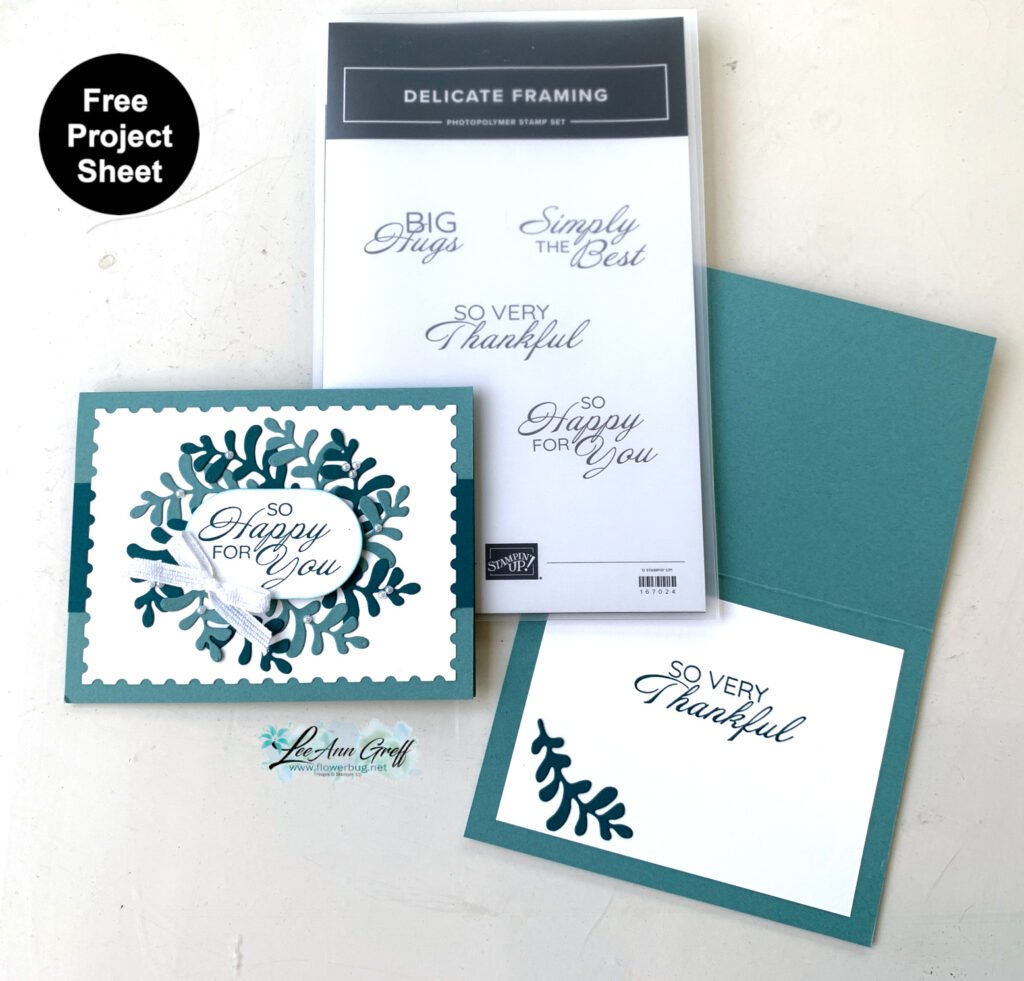
The other kit I created this month is also easy but does require stamped greetings. But there is very little prep & just a little trimming of the card bases to create these beautiful wintery cards:
These cards could be winter or holiday; it’s your choice when you stamp the greetings.
This kit originated from a former Paper Pumpkin kit but I jazzed up the cards and added more to create 12 gorgeous cards. This kit includes 12 envelopes and a share of Peppermint gems plus the PDF tutorial. I have a few left so grab yours soon. This kit is $29 and you can see it here.
**Remember to check out all of my kits to go and tutorials here at my shop; choosing more than one will save on shipping.
~~~
~~~
November Specials
New Online products are available on November 4th. See them here.
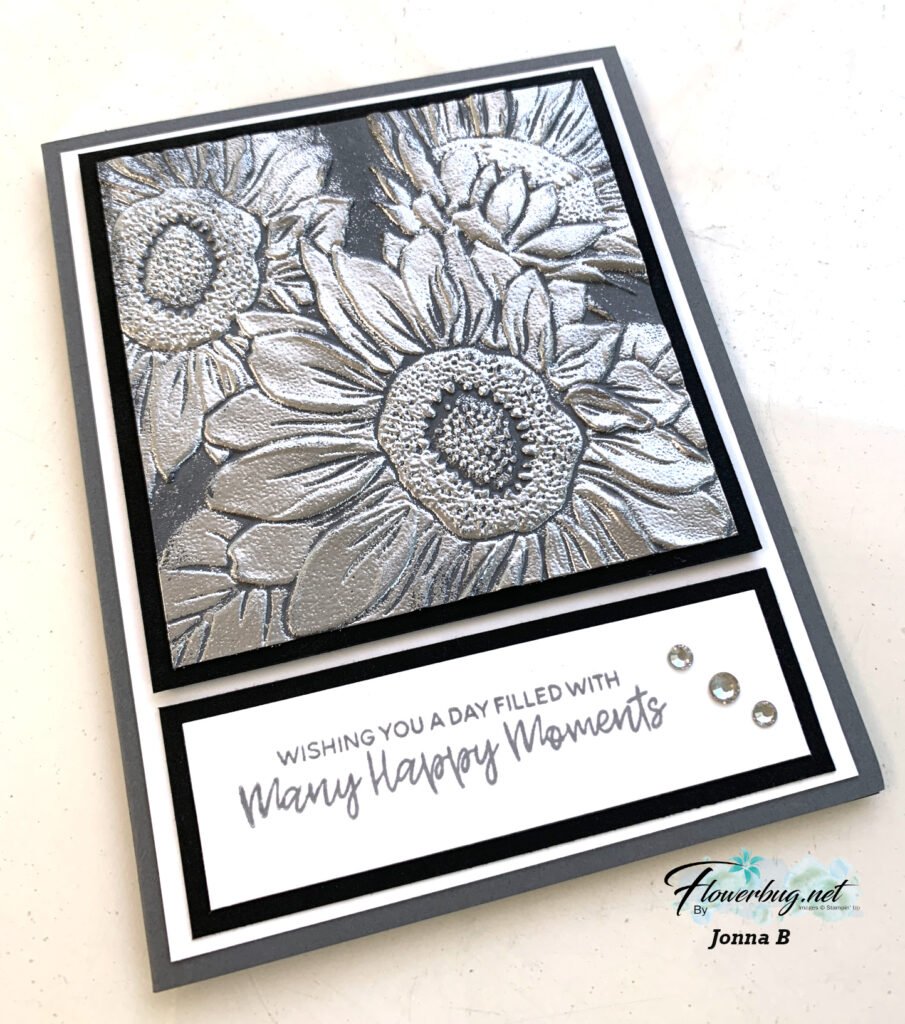
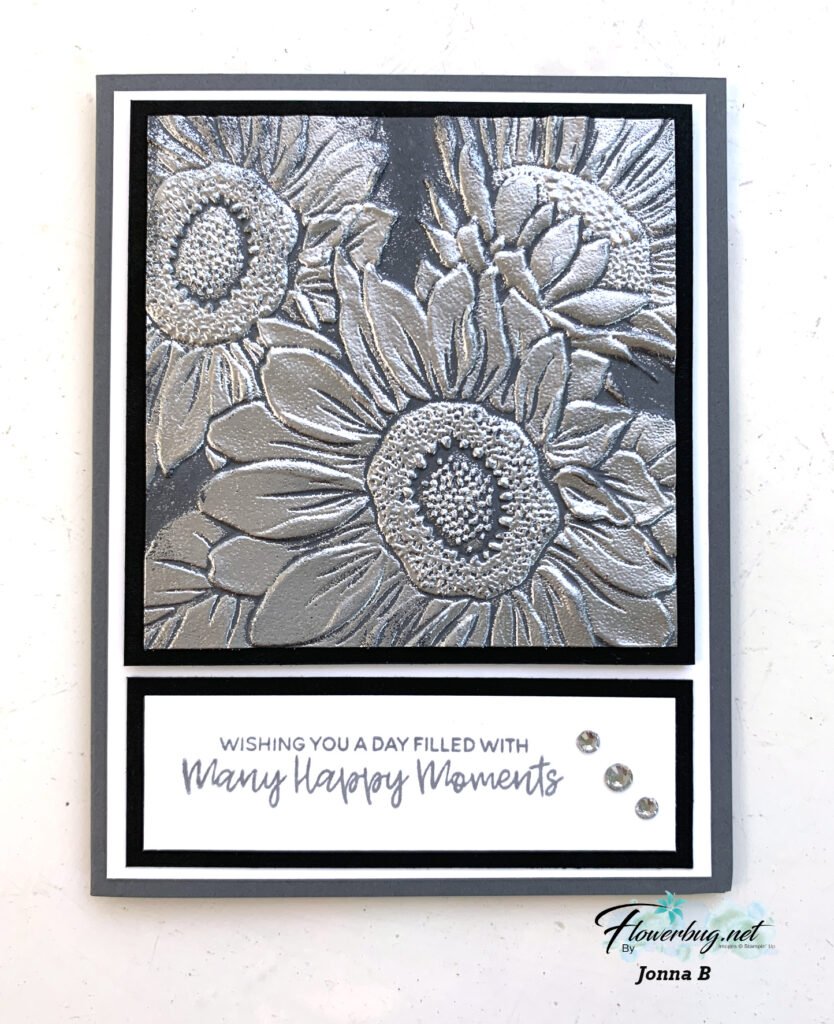
It’s a ‘Wow’ card for sure! She textured the Basic Gray card layer with the Sunflower 3D embossing folder seen here first and then rubbed it with Versamark ink. Then she heat embossed it with Silver embossing powder. Just gorgeous!
Her measurements are as follows: – Embossed layer 3 1/2″ square – Black layer 3 3/4″ square, Black greeting layer 3 3/4″ X 1 1/4″ – White is 4″ X 5 1/4″, White greeting layer is 3 1/2″ X 1″
This kit to go includes a share of the festive designer paper, the ribbon, the peppermint gems, the ephemera greetings, the PDF tutorial and video too. Plus the pre-cut 10 cards that are all fun folds. All for $30 plus shipping. It’s a fabulous deal!
Don’t wait long; I have just a few left.Go here to get yours. *You will need to cut your new designer paper for the cards but my directions make that simple.
~~~
The other kit I created this month is also easy but does require stamped greetings. But there is very little prep & just a little trimming of the card bases to create these beautiful wintery cards:
These cards could be winter or holiday; it’s your choice when you stamp the greetings.
This kit originated from a former Paper Pumpkin kit but I jazzed up the cards and added more to create 12 gorgeous cards. This kit includes 12 envelopes and a share of Peppermint gems plus the PDF tutorial. I have a few left so grab yours soon. This kit is $29 and you can see it here.
**Remember to check out all of my kits to go and tutorials here at my shop; choosing more than one will save on shipping.
~~~
~~~
November Specials
New Online products are available on November 4th. See them here.
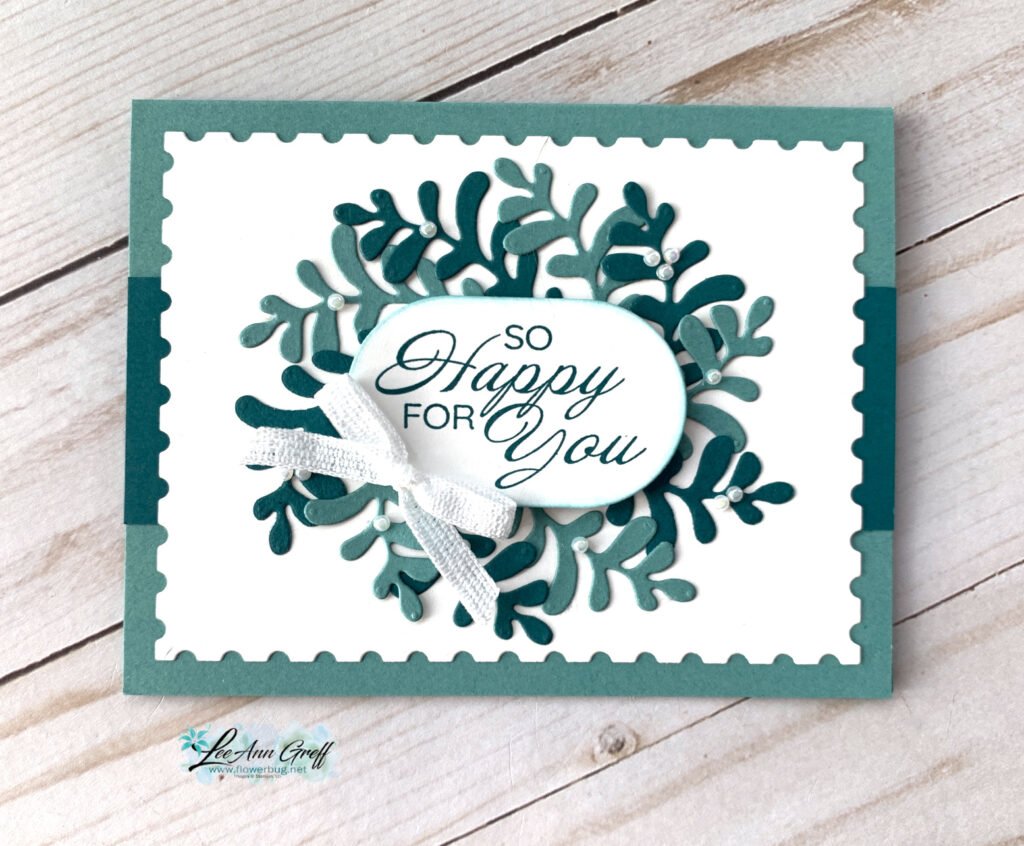
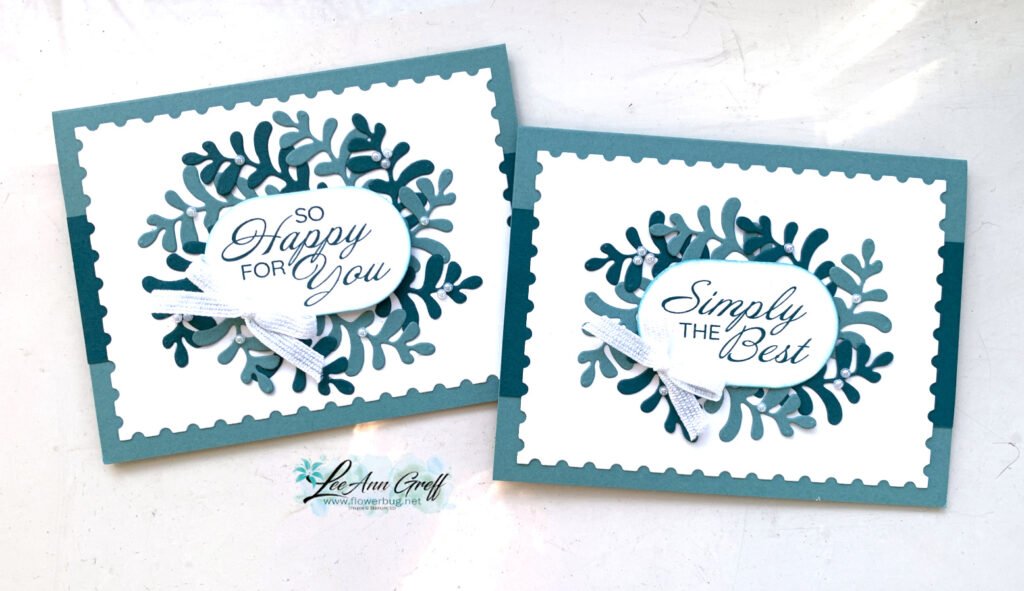
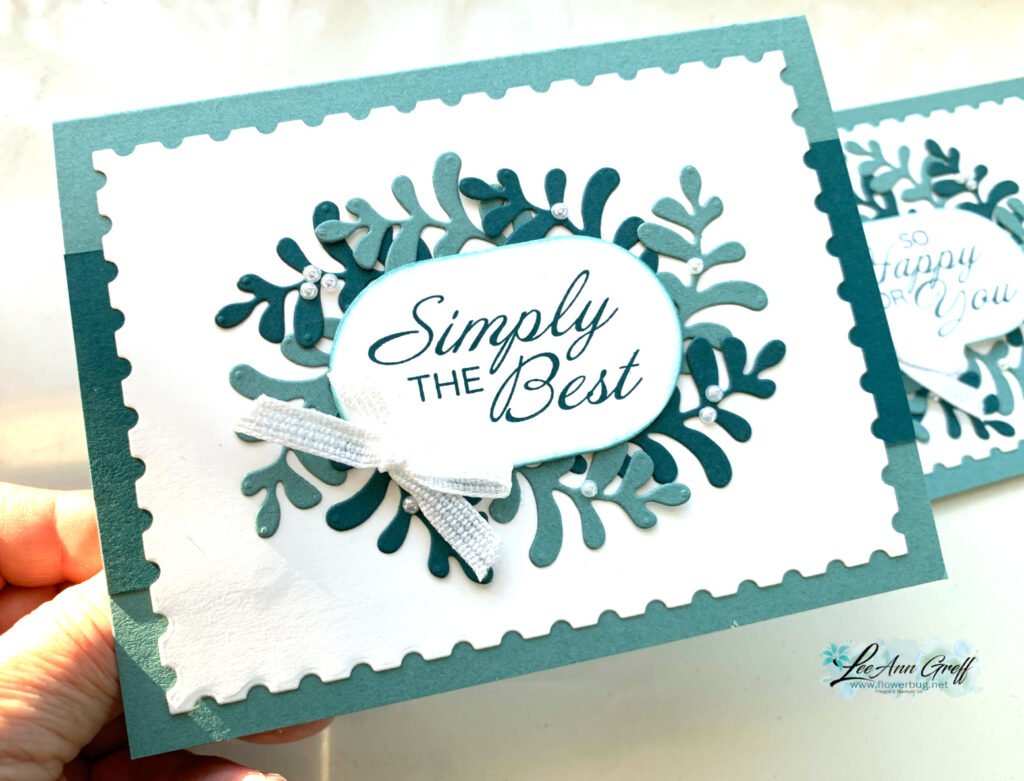
A great way to add multiple pieces with the Press & Seal technique
I shared this pretty card on last week’s video featuring new products and a neat and easy technique. If you’ve ever struggled to add multiple pieces perfectly, as you’ve laid them out, this will help you so much!
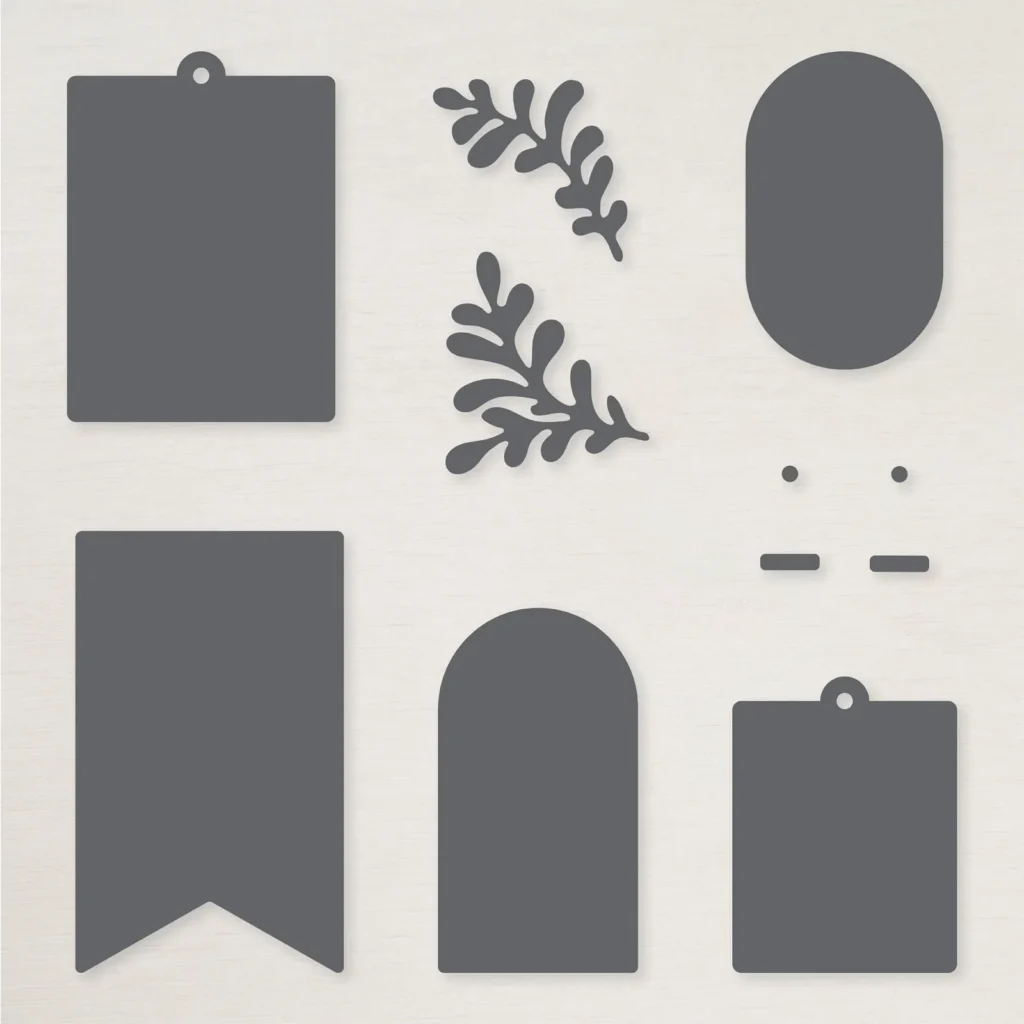
My colors include Pretty Peacock, Lost Lagoon and White. The large die-cut is from the Perennial Postage dies and the greeting & leaves dies are from the Creative Haven dies seen here.
Tips on using Press & Seal to adhere die-cuts perfectly in place: I placed the center greeting piece in the center of the Postage die-cut. Then I tucked each die-cut leaf under and around it placing them just where I wanted them. Next I lifted the greeting piece off and pressed a piece of my Press & Seal kitchen wrap onto the die-cut leaves. Once they were all stuck on the wrap I turned them over and added adhesive to the back. I then turned it over and adhered it to my White layer. Let it dry or set a bit and then carefully peel off the Press & Seal wrap.
This kit to go includes a share of the festive designer paper, the ribbon, the peppermint gems, the ephemera greetings, the PDF tutorial and video too. Plus the pre-cut 10 cards that are all fun folds. All for $30 plus shipping. It’s a fabulous deal!
Don’t wait long; I have just a few left.Go here to get yours. *You will need to cut your new designer paper for the cards but my directions make that simple.
~~~
The other kit I created this month is also easy but does require stamped greetings. But there is very little prep & just a little trimming of the card bases to create these beautiful wintery cards:
These cards could be winter or holiday; it’s your choice when you stamp the greetings.
This kit originated from a former Paper Pumpkin kit but I jazzed up the cards and added more to create 12 gorgeous cards. This kit includes 12 envelopes and a share of Peppermint gems plus the PDF tutorial. I have a few left so grab yours soon. This kit is $29 and you can see it here.
**Remember to check out all of my kits to go and tutorials here at my shop; choosing more than one will save on shipping.
~~~
~~~
November Specials
New Online products are available on November 4th. See them here.
Notice: LeeAnn Greff, Independent Stampin’ Up! Demonstrator, Manager. The content of this website is my sole responsibility as an independent Stampin’ Up! demonstrator and the use of, and content of, the classes, services, or products offered on this website is not endorsed by Stampin’ Up! Copyright 2025


Leave a Reply