/


Latest Post

Trusty Toolbox Bridge fold card with free project sheet & video tutorial


If you love fun folds you'll appreciate my weekly videos. I like to share fancy fold cards or techniques in my Tuesday Live videos – seen each week at 11 am CT. If you enjoy watching Live please subscribe to my Facebook page here.  Or watch them later on my YouTube channel here.  

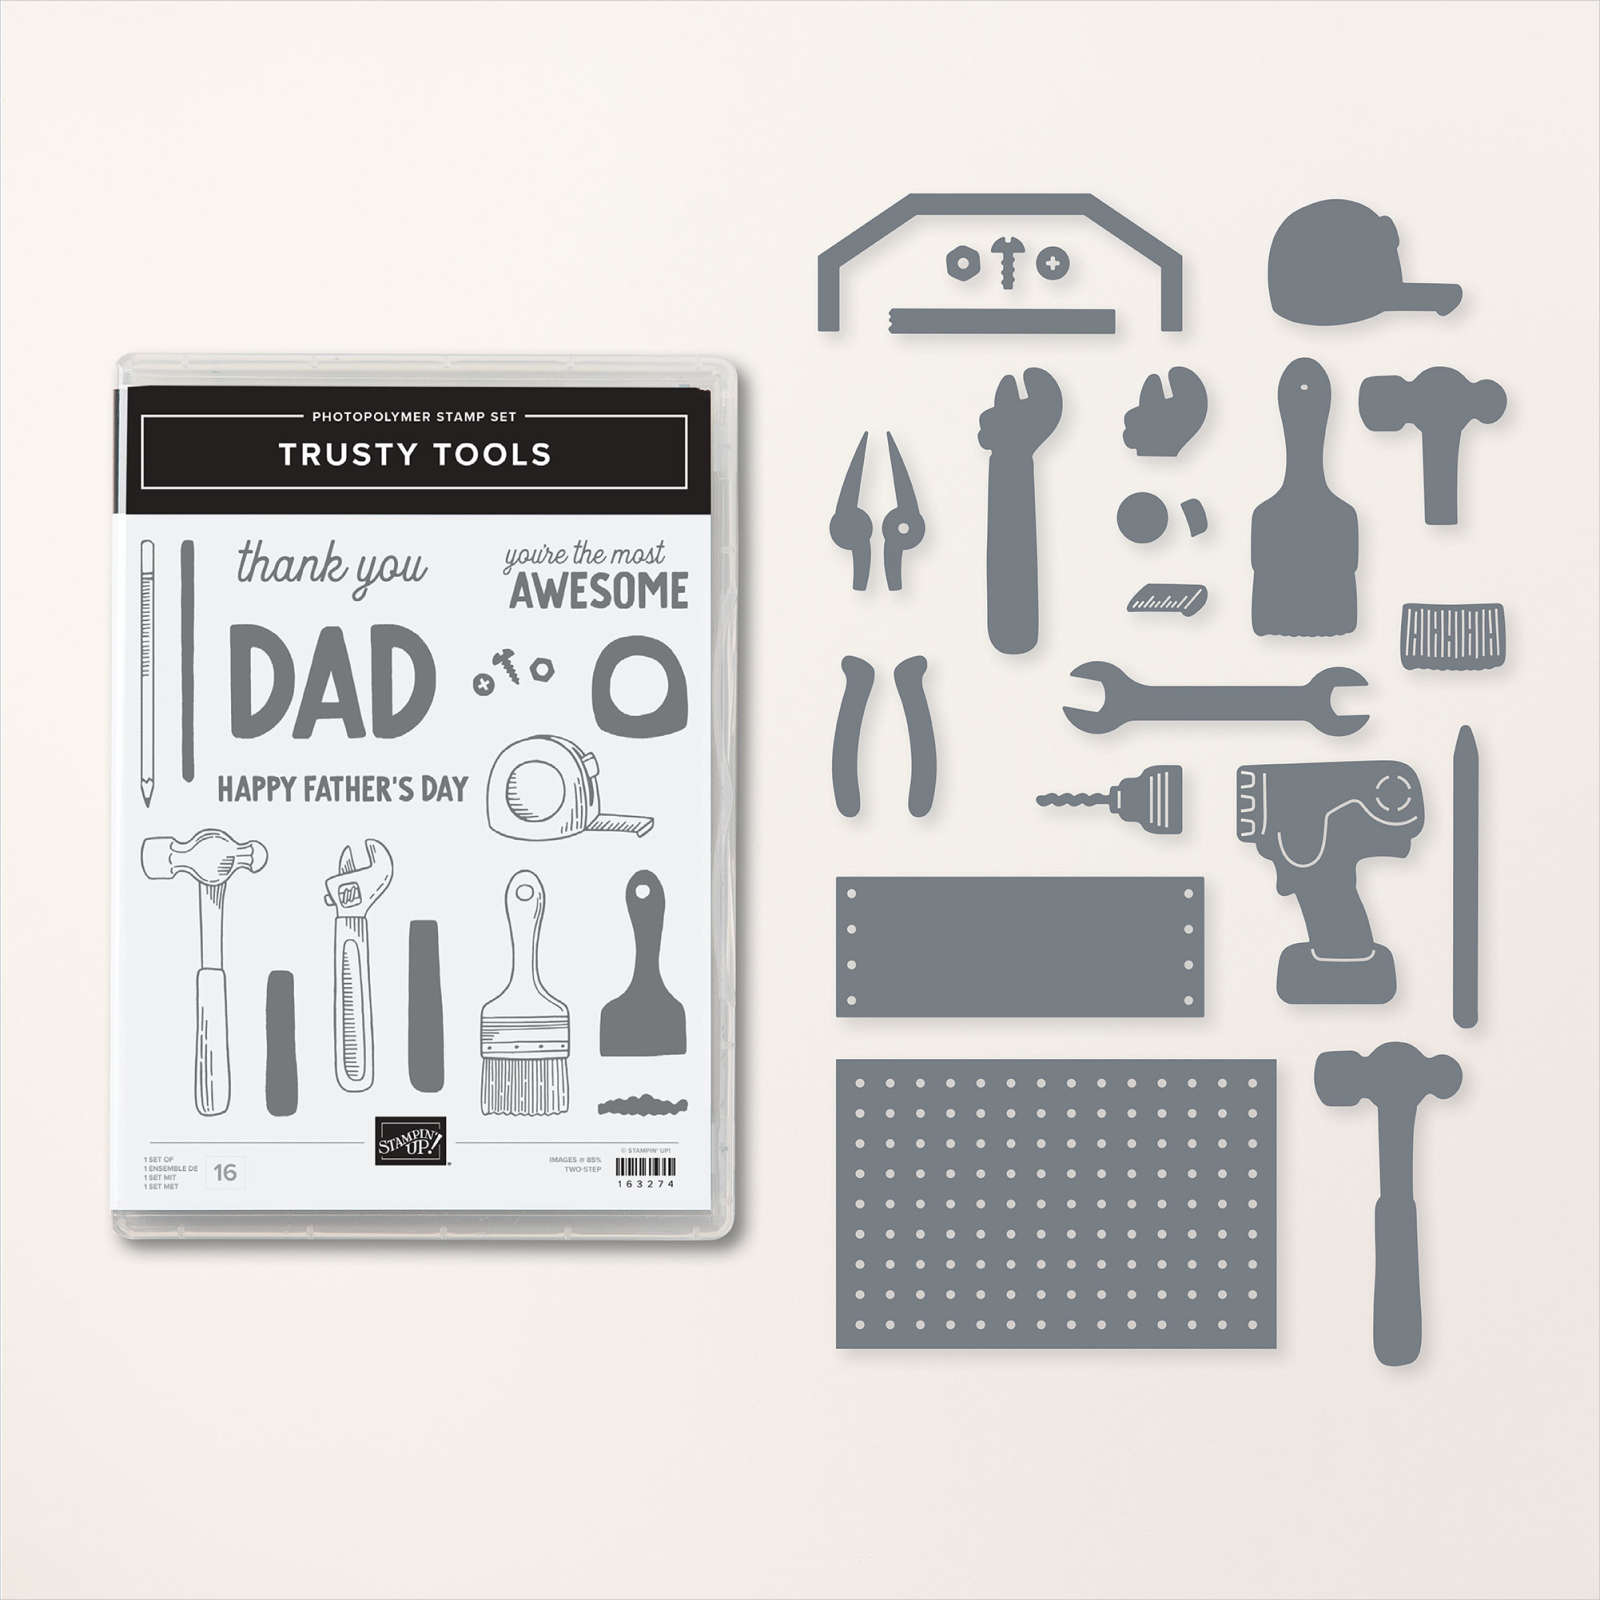
Don't you love this special card?!  Men's cards can be hard to make; many of use gals lean towards florals don't we? I appreciate when Stampin' Up! brings us products we can make for our men. 

My colors include Black, Poppy Parade, Pebbled Path, Gray Granite & White. This special designer paper can be earned free now during Sale-a-Bration with any $50 purchase through Stampin' Up!.  See it here. I think Stampin' Up! was so clever to create designer paper that mimics tools, toolbox and peg board!

I suggest ordering the Trusty Toolbox bundle and then choose the designer paper as your free Sale-a-Bration choice.  See the bundle here online.  

Below you can see both projects I shared during the video. I'm loving this amazing bundle & designer paper combo! 

I shared this sweet Hot Air Balloon bridge card in the video too.  The measurements are the same for both cards. 

You can download the free project sheet here: Download Trusty Tools Bridge-fold card

Don't forget to subscribe to my blog so you don't miss a thing.  You can subscribe on the right column under 'Get email updates'. I post Monday – Friday and include multiple free projects each week! They're all seen here in one place too. 

Of course you should also subscribe to my YouTube channel here too.  

Click here to watch the video tutorial or click on the photo below.  Don't forget to subscribe to my YouTube channel!  

~~~

January Specials: 

Earn free products during Sale-a-Bration!

*click on the photo below  

Get a free embellishment from the 2024 Spring catalog

with an online order over $55


*current host codes: TU26GCPZ or H6QQ73FG

~~~

Reserve your Spring & Sale-a-Bration designer paper share

$18 for 78 sheets! (plus $7 shipping). Email me here

~~~

I have several pre-cut card & scrapbook kits to go; ready to mail out!

Click here to see them all.

All Posts

  • Look at this Amazing Gift!


    I received quite a wonderful surprise in the mail last week from Jakelle; a demonstrator in eastern North Dakota.  Look at what she made me!  

    It's a 5 X 7" board on an easel and her craftmanship is incredible! She used sooo many different dies & products to complete it. 

    • Tasteful Labels, Playful Alphabet & So Much Happy dies
    • Lovely Labels Pick a Punch
    • In Good Taste Designer Series Paper
    • Nothing's Better Than stamp set

    She sent this gorgeous card too, congratulating me on my Million Dollar in Sales achievement.  

    Isn't it beautiful?  She used the Celebrate Sunflowers stamp set and dies bundle and the In Good Taste DSP.  If you want to know how to make this Double-point fun fold card here's a link to a video I made.  

    I am so grateful for the fabulous friends I've made; both online and in person.  I would say I have the best job ever; but it doesn't feel like a job!  I'm loving it.  And like my stamp set says, Life is Beautiful!

    ~~~

    Current Host code is 7VPEDARH

    Get a free package of All the Trimming embellishments in September with an

    online order over $55. 

    *Remember that if your order is over $150 do not use the host code above.  You'll get your own host benefits!  

    And if it is over $99 I recommend you choose the Starter kit instead!  It just makes sense! 

    Order online here

     Get my Beautiful Autumn pdf tutorial free with any online order in September!


    It includes directions, photos and measurements for 13 cards!

    Leave a Reply

    Your email address will not be published. Required fields are marked *

  • Life is Beautiful Apple Tree; get the secret to easy apples!


    Here's one more card with my Life is Beautiful stamp set. We made this one at my August Card Clubs.  

    The colors are the new In Color Just Jade with Early Espresso & Real Red.  See the tiny 'apples' on the tree?  Well I wanted just a few apples from the large bokeh dots image. I have a surprising way of stamping just a few of the stamp image.  I dare you to try it!  Watch the video below to see what I did! 

    That pretty stitched shape is from the Celebration Label dies seen here.  There are 5 sizes of this shape in the set! 


    I'm so happy with all of the projects people are making with this stamp set!  It's been fun to see how much everyone seems to like it!  

    Measurements: 

    • Just Jade card base 5 1/2" X 8 1/2"
      Very Vanilla 4 3/8" X 3 1/8" die-cut
      Early Espresso 2" X 4 1/4"
      Real Red 1" X 5 1/2"


    ~~~

    Current Host code is 7VPEDARH

    Get a free package of All the Trimming embellishments in September with an

    online order over $55. 

    *Remember that if your order is over $150 do not use the host code above.  You'll get your own host benefits!  

    And if it is over $99 I recommend you choose the Starter kit instead!  It just makes sense! 

    Order online here

     Get my Beautiful Autumn pdf tutorial free with any online order in September!


    It includes directions, photos and measurements for 13 cards!


    Leave a Reply

    Your email address will not be published. Required fields are marked *

  • Cool technique with the Wink of Stella pen!


    There are times I like to color and others that I don't. I came up with this cool technique using the Wink of Stella pen and White Craft ink to highlight my main image. 

    I pressed a clear block directly onto my White Craft ink pad and used that to pick up the ink with my Wink of Stella pen. You sure don't have to use a clear block but I didn't want to get Wink of Stella in my ink pad. You could use a paper plate or any other non porous surface.   

    I used Purple Posy, Pool Party and Seaside Spray on the cards below. 

    Technique tips:

    • Light colored card stock works best here; the White ink can obscure the stamped image on dark card stock.
    • Squeeze out a bit of the Wink of Stella liquid to make a small puddle to mix with the White ink for easier painting. 
    • Paint the image once and go back and highlight parts of it if you want more 'lightness'. 
    • Black Memento ink works fine to stamp your image
    • This should work nicely on a heat embossed image! 
    • You can use the White Craft ink refill instead of an ink pad but a little drop goes a long way! 

    I also used Versamark to create a background effect on the card base, stamping the main image multiple times. I love how soft a Versamark background is and I don't use it near enough.  This repetitive stamping could be very busy if done in black or a darker color.  

    Here's the video with 3 different coloring techniques! 

    Click on the photo below to get this stamp set and the Queen Anne's Lace set and an 8 cards pre-cut kit for each one; free! 

    ~~~

    Current Host code is 7VPEDARH

    Get a free package of All the Trimming embellishments in September with an

    online order over $55. 

    *Remember that if your order is over $150 do not use the host code above.  You'll get your own host benefits!  

    And if it is over $99 I recommend you choose the Starter kit instead!  It just makes sense! 

    Order online here

     Get my Beautiful Autumn pdf tutorial free with any online order in September!


    It includes directions, photos and measurements for 13 cards!

    Leave a Reply

    Your email address will not be published. Required fields are marked *


Notice: LeeAnn Greff, Independent Stampin’ Up! Demonstrator, Manager. The content of this website is my sole responsibility as an independent Stampin’ Up! demonstrator and the use of, and content of, the classes, services, or products offered on this website is not endorsed by Stampin’ Up! Copyright 2025