/


Latest Post

Time of Giving for your Holiday projects with video tutorial.


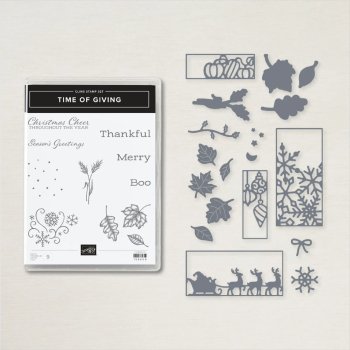
On last Tuesday's FB Live I focused on the Time of Giving bundle in the current 2021 Holiday Catalog.  This bundle is for many occasions and more fun and versatile than I thought! 

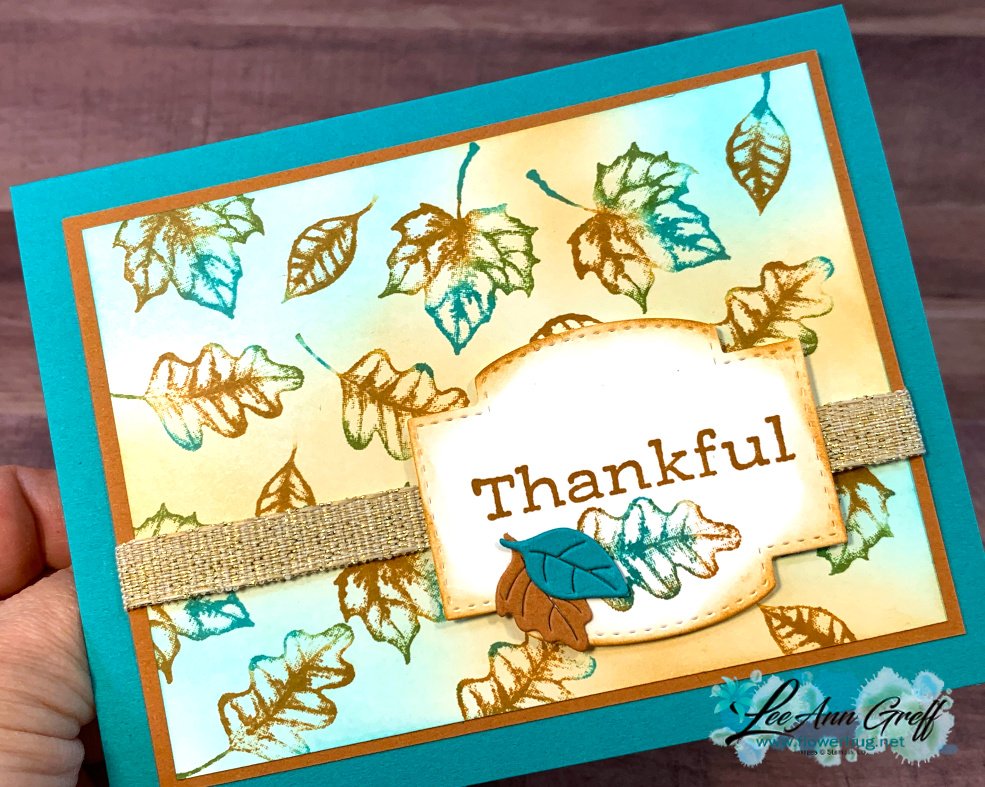
I'll start with the autumn card featuring the baby wipe technique.

Isn't it pretty?!  My colors are Bermuda Bay, Pumpkin Pie & Old Olive. Those are the ink refills I used on my baby wipe. If you haven't done the baby wipe technique please watch the video below or click here.  It's so simple and all you need is a folded baby wipe and a few colors of ink refills.  

The little die-cut leaves on the greeting are also in this bundle.  The Gold Fine Art ribbon is from the annual catalog as well as the white die-cut for the greeting.  It's in the Stitched So Sweetly set.

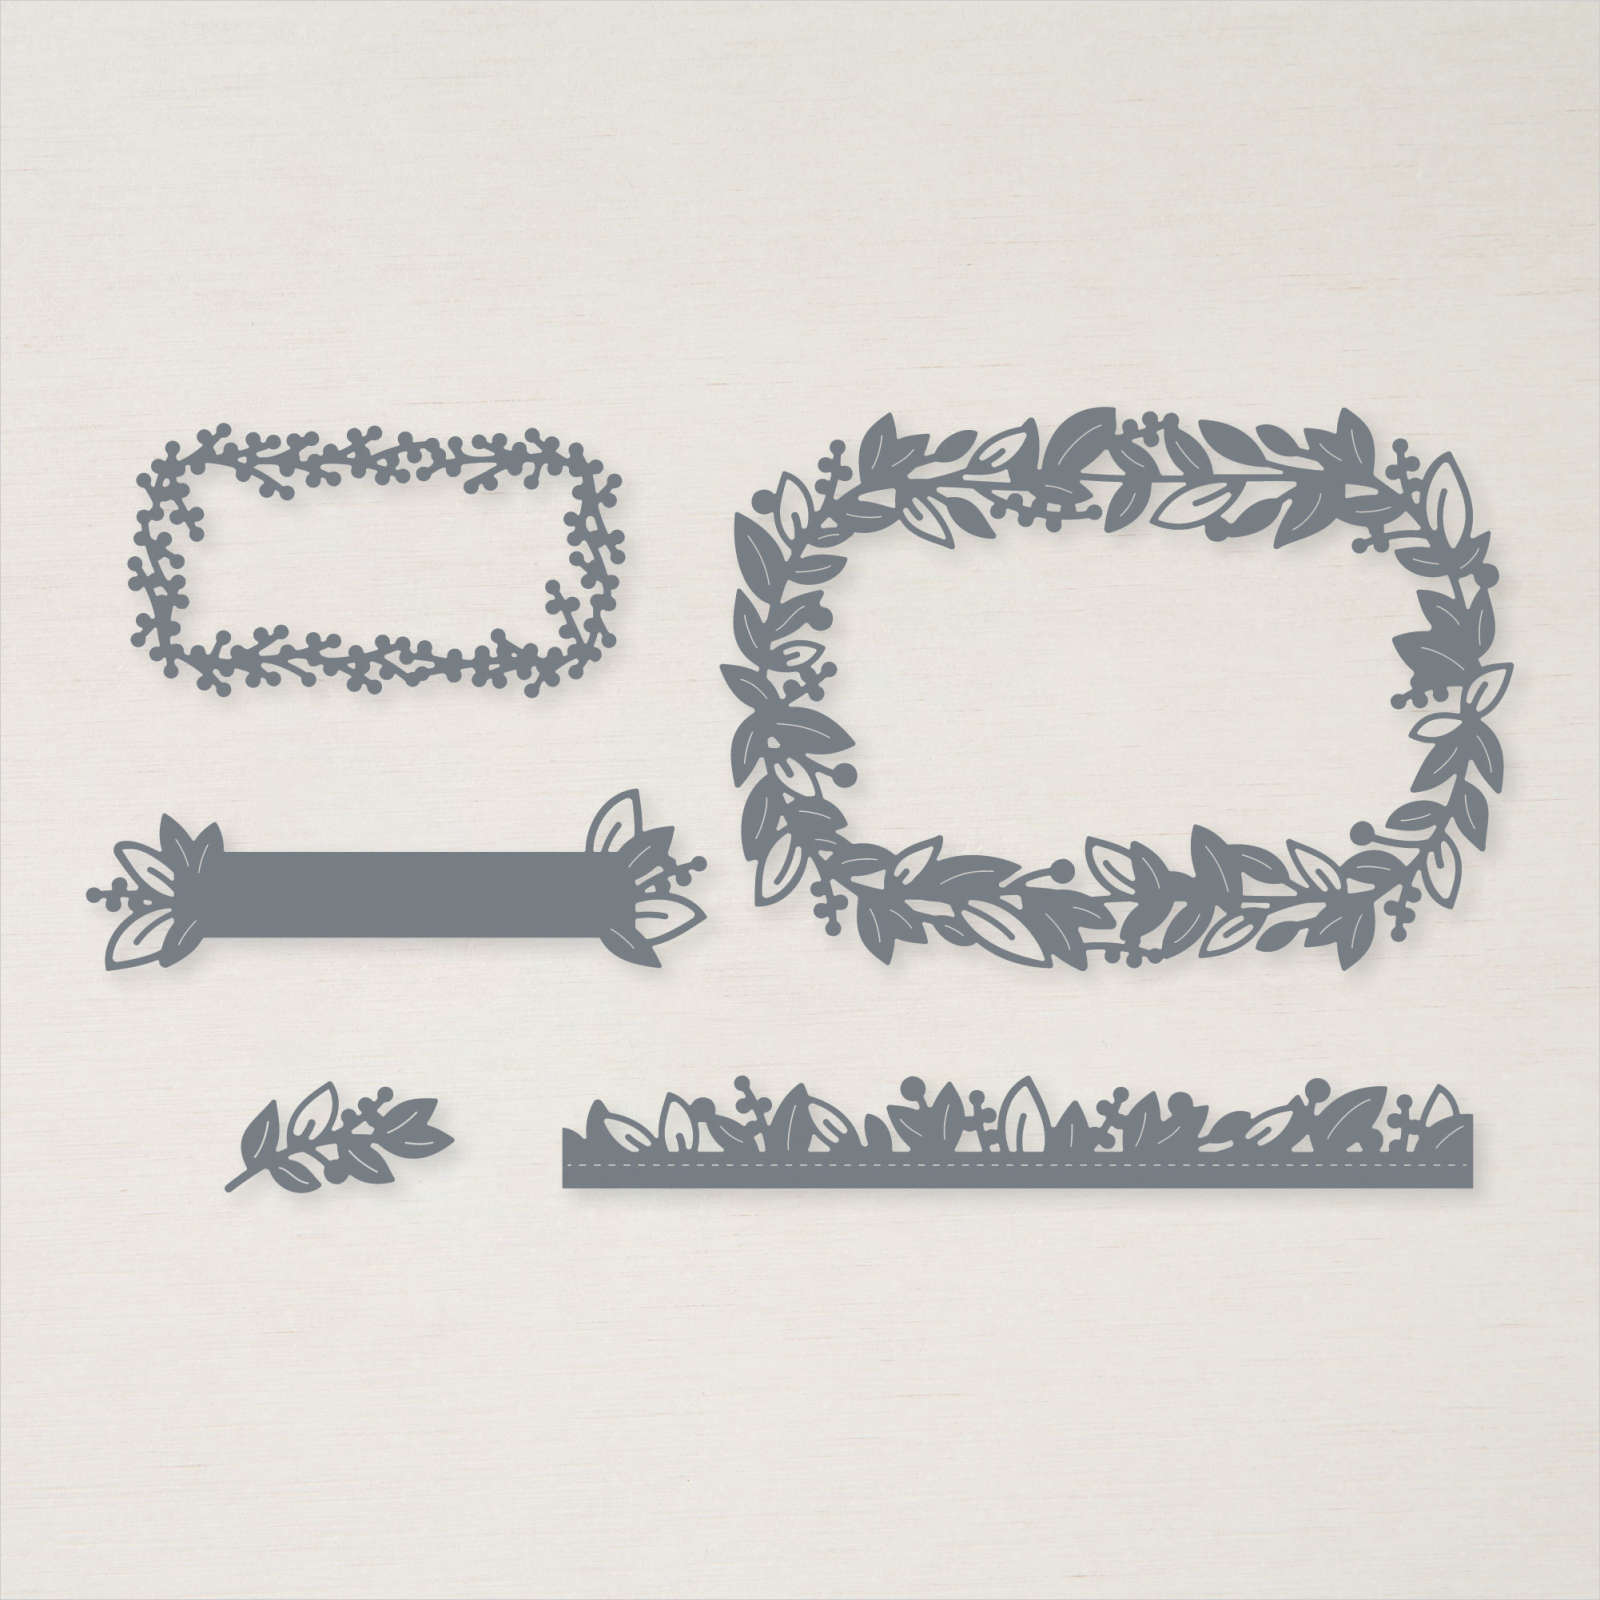
  All of these images & dies are from this Tidings of Giving bundle seen here. 
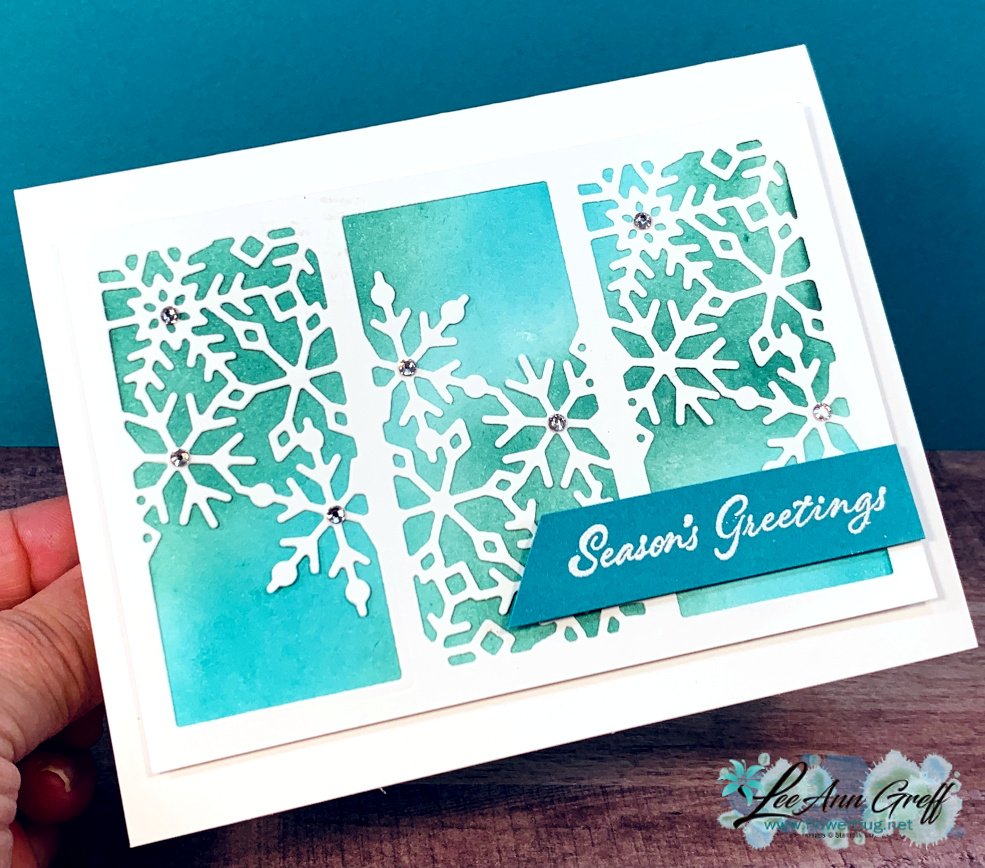
Next is a beautiful snowflake card that's mostly white but the pop of colors shows off this pretty die wonderfully!  It creates a 'window' effect.  I die-cut three dies in a row on my White CS and for the soft colors under it I used my blending brushes with Just Jade & Bermuda Bay ink.
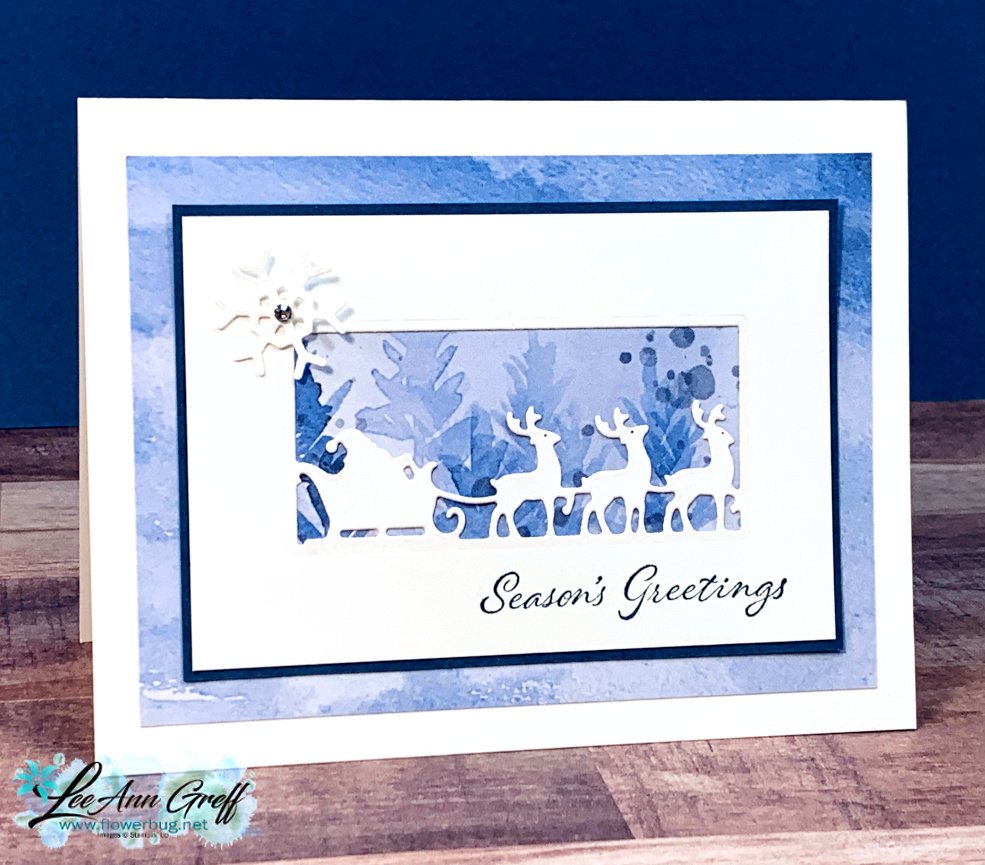
For this next card I chose the Santa & sleigh die.  As you can see I left a wide border on this one so I could stamp the greeting directly on it.  This pretty background paper is from the Beauty of the Earth DSP in the Stampin' Up! annual catalog seen here. 
And here is a card using the ornament die.  Again I cut three in a row, lowering the die each time.  Another bit of the Beauty of the Earth designer paper on the side and a greeting added with the Double Oval Punch.  Glittered white ribbon finishes it off. 

And below is the video where you can see how I achieved these techniques.  I hope you watch!  *Don't forget to subscribe to my YouTube channel here too! 

~~~

October Specials

Host code: G3FX9NGA

*click here to order

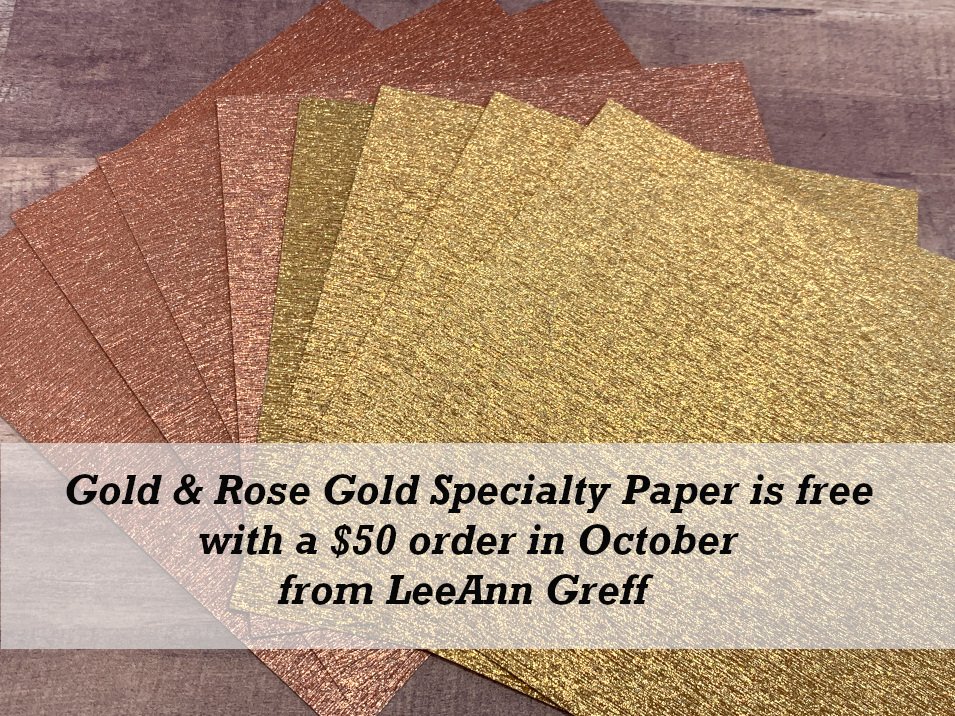
Get a free package of Gold & Rose Gold Metallic specialty paper from me with a $50 online order in October! 
All online orders will receive my October PDF tutorial free! 

This month it features the Gingerbread & Peppermint suite.


All Posts

  • Ready to Ride card kit to go; it’s for both guys & gals!


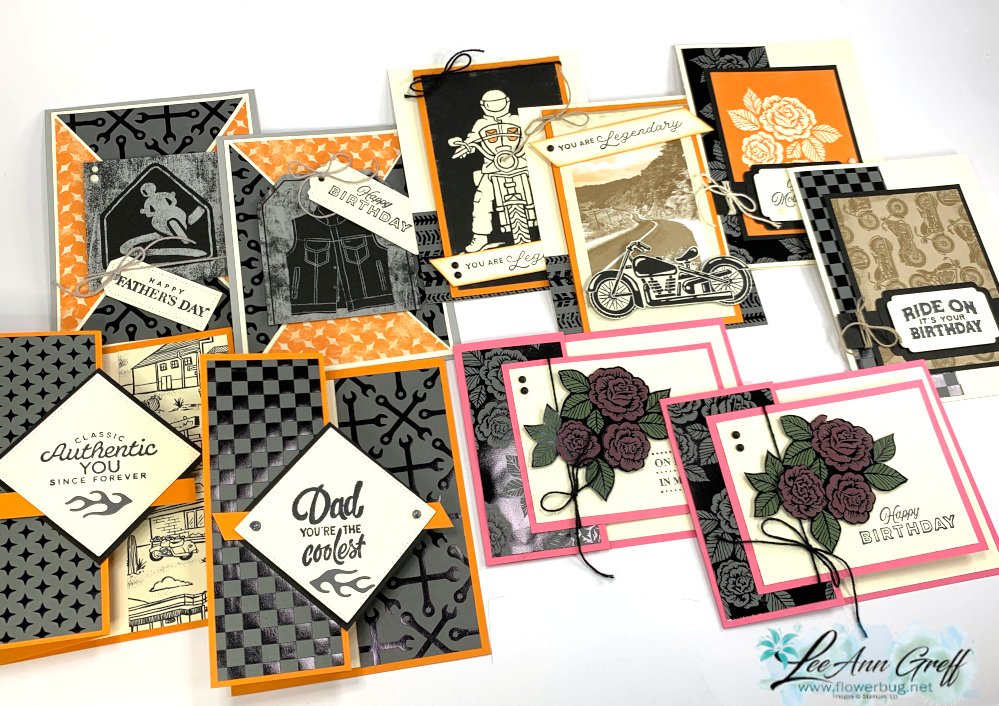
    I chose the Ready to Ride specialty designer paper for one of my April card kits to go; it has wonderful black foil designs on one side and fun prints on the other.  It even has a few flowers for the gals; it's not all about men here! 

    These cards include multiple fun folds as I like to do; they add a fun element for both the creator and the recipient.   

    There 2 each of 5 designs in this card kit.  There's a pre-cut kit to go option AND a PDF tutorial only option in my store here.  

    The pre-cut kit to go includes 1/2 pkg. of the Ready to Ride specialty DSP (6" X 12"), a share of both Classic Matte dots and Baker's Twine Essentials pack.  The pre-cut card pieces, die-cuts and punched pieces are all included. 

    Supplies needed:

    • Black ink & adhesives
    • a paper trimmer to cut your new DSP (using the measurements in the tutorial).
    • Greeting images – I used the Legendary Ride and Celebrating You stamp sets, but you can substitute any greeting images you already own.

    The PDF tutorial is added on free and includes step by step directions, photos, measurements and a supply list.  It's $20 in product for just $28!  The tutorial is sent to you via email immediately after payment from my Shop here.  

    The other option is my PDF tutorial seen here.  It's $15 and it's emailed to you immediately after payment.  

    The neat thing about my kits and tutorials are that you get great ideas for creating; whether it's with this theme or others. 

    *This is the kit my monthly subscribers will receive.  Interested in getting a pre-cut kit to go each month?  Email me here for that option.  

    I have two more new card kits and/or tutorials available this month. Save $$ on shipping by getting more than one! 

    See all of my tutorial & kit to go options here.

    ~~~

    April Specials:

    See the 2023 Last Chance list here 

    *current host code: SYZD4PH2 or SFHU3WMT

    Get a free specialty paper sampler with online orders over $55 using a host code above plus an embellishment if your order is over $100

    Earn free products with my loyalty rewards! 

    Click here to download yours and earn a $50 shopping spree!

    Leave a Reply

    Your email address will not be published. Required fields are marked *

  • Check out this fun & unique way to use up those card stock scraps!


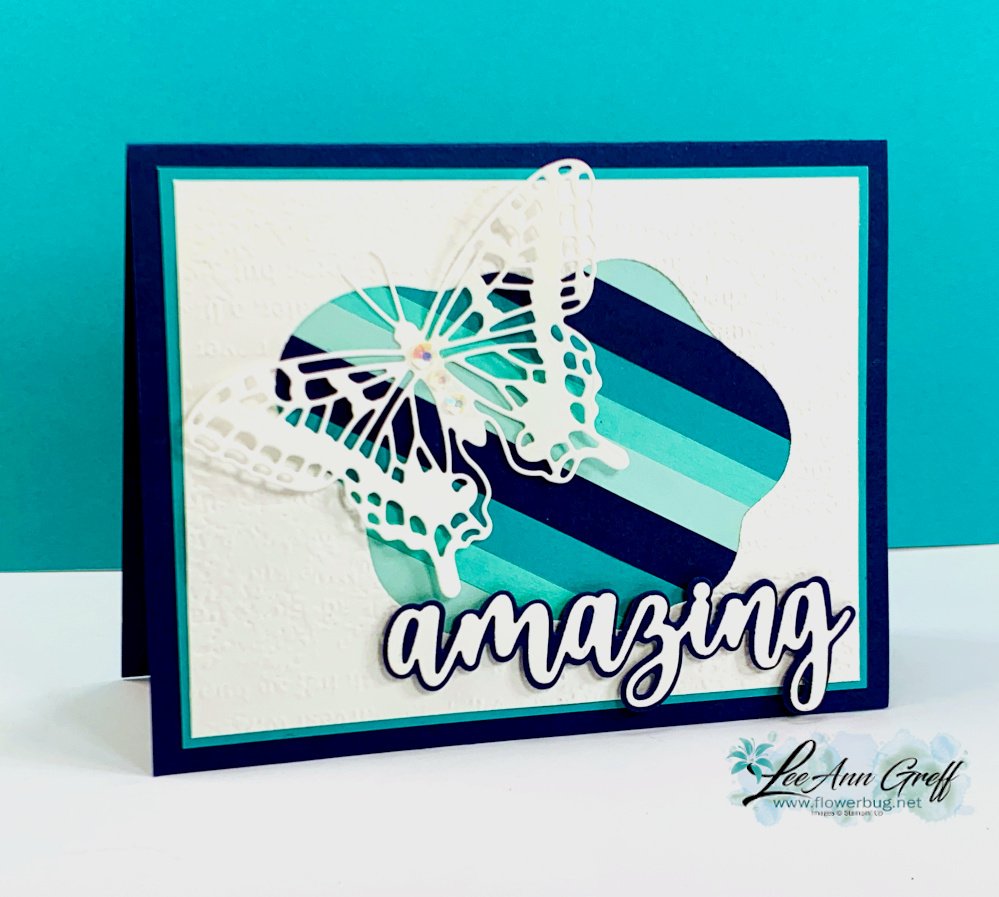
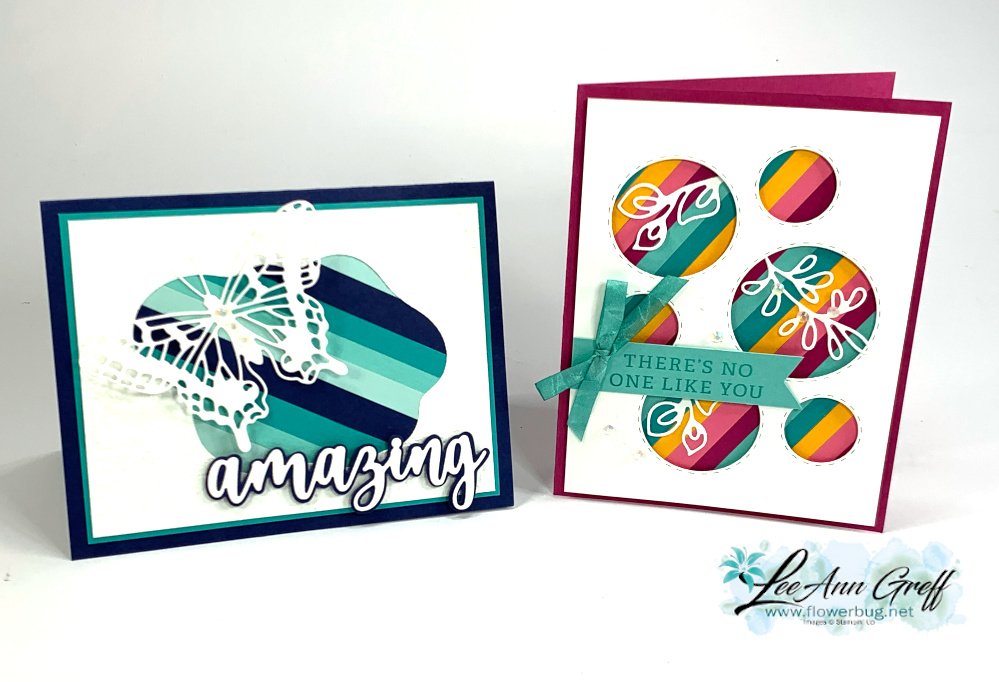
    Look at this gorgeous card!  It's so bright, colorful and just plain fun! I made it on this week's Live video. My theme was to feature Bermuda Bay (a favorite of mine) and some sets of retiring dies I'll miss a lot! 

    I used the 'Picture This' dies seen here for the multiple circle windows.  The White delicate leaves die-cuts are from the Splendid Stems dies; which I thought were still current!  Oops! 

    Isn't it striking?  It's almost like a rainbow effect with these bright colors.  I adhered 1/4" strips of card stock to another layer of White (under the White window die).  It's slightly smaller than the top one. Watch the video here to catch my tips on this technique

    I used Coastal Cabana, Bermuda Bay, Mango Melody, Polished Pink and Berry Burst.  The only two colors that will be in the next catalog are Coastal Cabana and Berry Burst!  But I know we'll learn to love the new color line too.  It's always sad to say goodbye to some of our favorites.  

    Next I shared a fun card featuring blues/greens and the Layering Diorama dies. They're discounted to $20.30 now. 

    The other dies used are the Amazing Thanks dies seen here (these were $27 and are now just $10.80). 

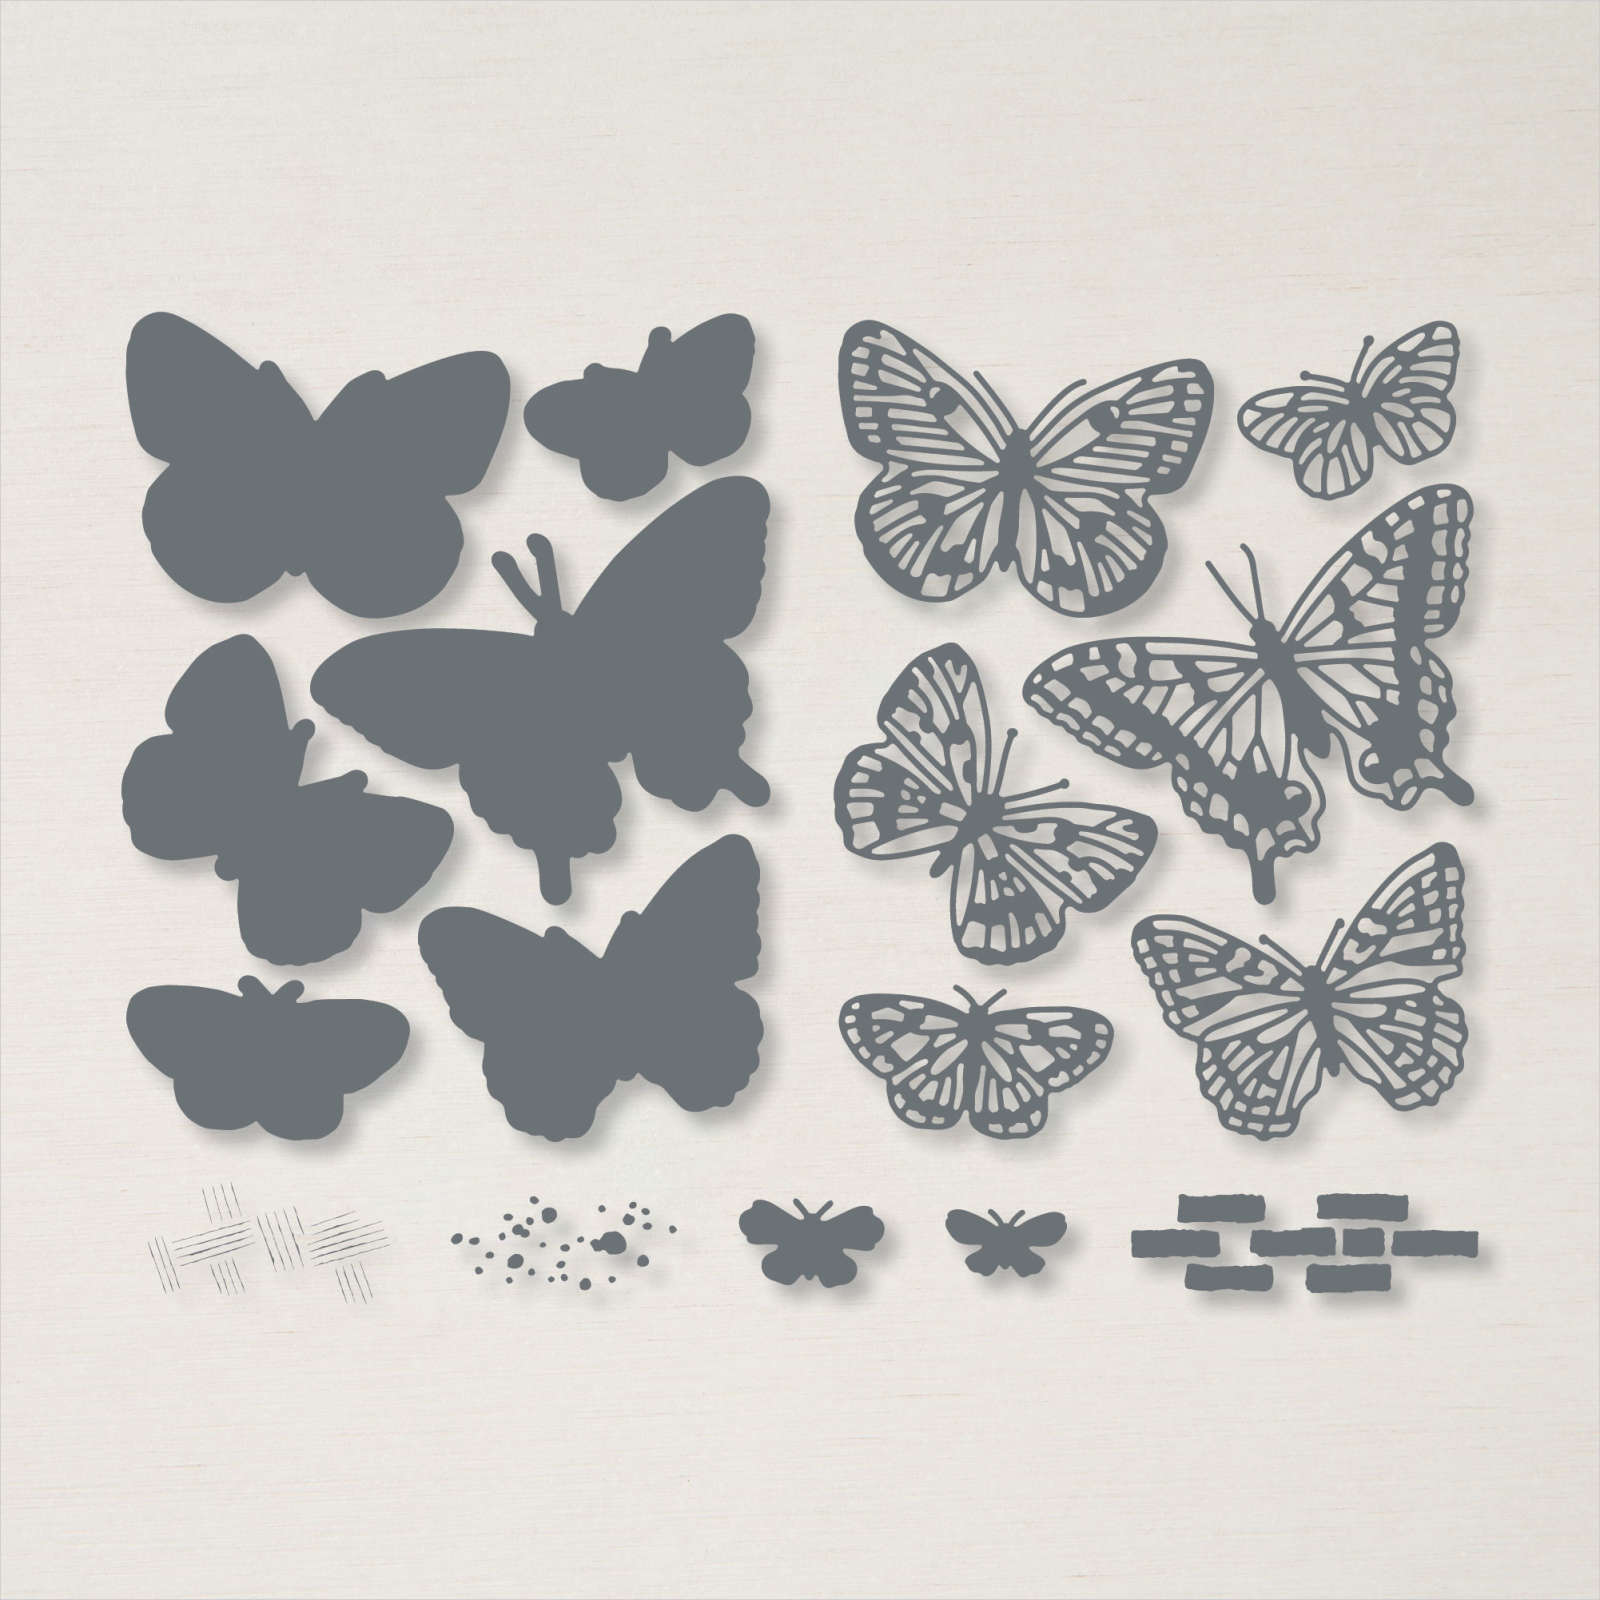
    And the Brilliant Wings dies shown above which include tons of butterflies in both solid and detailed dies that layer perfectly.  They were $44 and are now just $17.60.  See them here. 

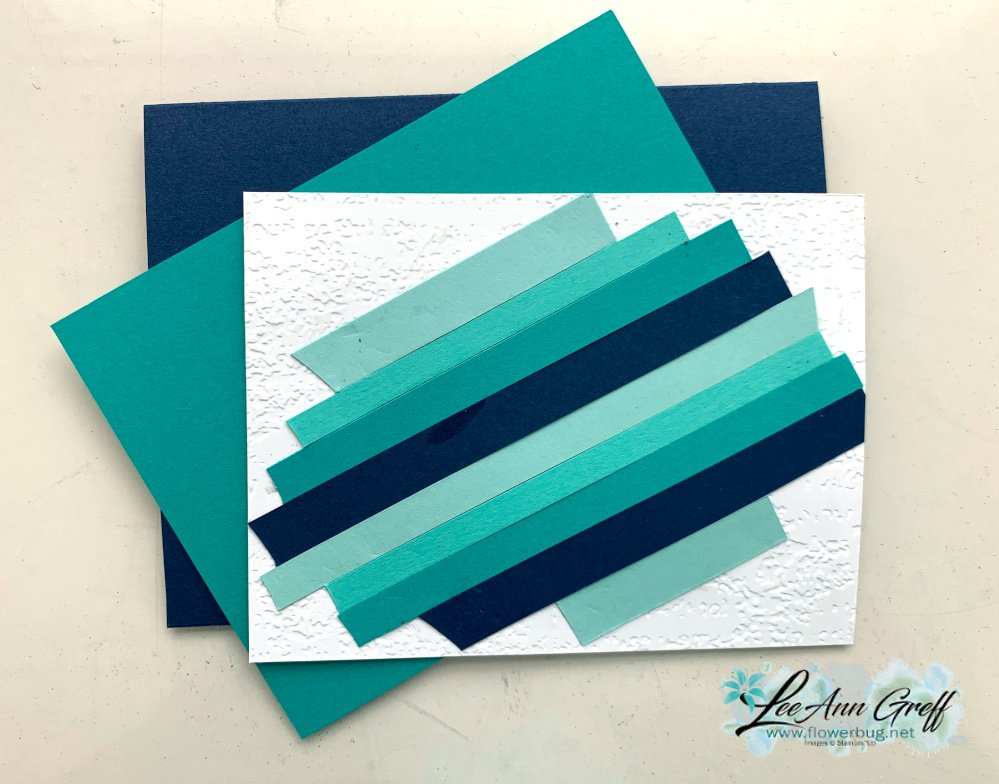
    Here's how I adhered the strips to the back of the White die-cut piece. I die-cut the Layering Diorama shape first and then added these strips on the back side. It's a super fun way to show off your die-cut shape and use up those scraps you just cannot throw out! 

    Here are both projects shown together.  I hope this inspired you to use up some of those paper scraps you're saving for 'someday'!  

    Here's the video I shared how to make the window card with the Picture This dies.  Plus two other cool projects using up card stock strips! Click on the photo below.  Don't forget to subscribe to my YouTube channel!  

    ~~~

    April Specials:

    See the 2023 Last Chance list here 

    *current host code: SYZD4PH2 or SFHU3WMT

    Get a free specialty paper sampler with online orders over $55 using a host code above plus an embellishment if your order is over $100

    Earn free products with my loyalty rewards! 

    Click here to download yours and earn a $50 shopping spree!

    Leave a Reply

    Your email address will not be published. Required fields are marked *

  • Eden’s Garden & Forever Fern; a fun way to use the Picture This dies


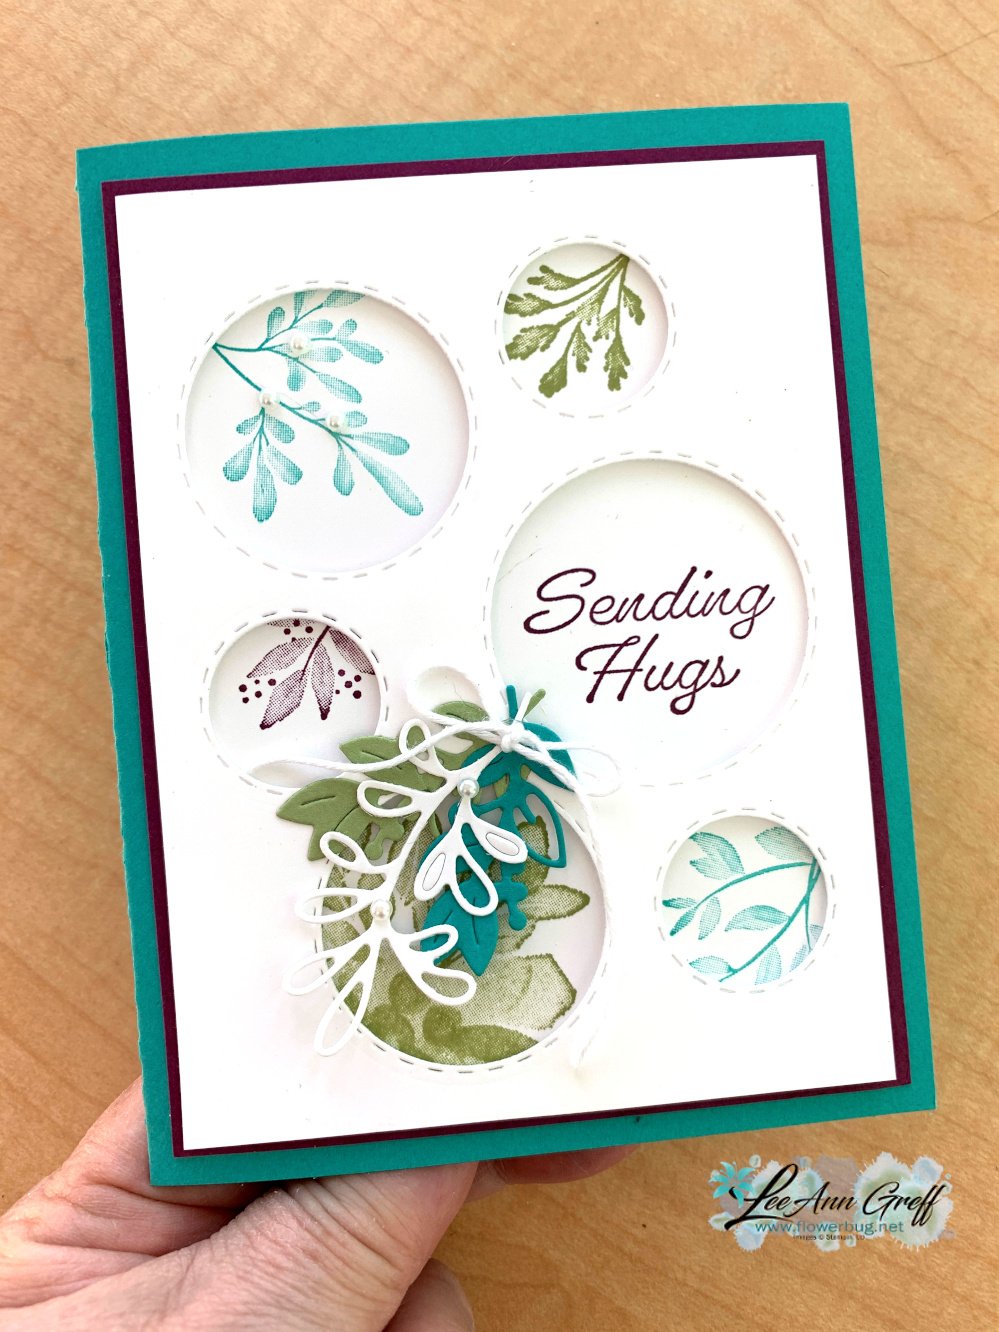
    Monday evening I created projects with the Forever Fern bundle for my weekly Tuesday Facebook Live. But by the next morning the Forever Fern stamp set was sold out; gone.  So I had to switch gears a bit and decided to substitute Forever Fern with Eden's Garden. I think it turned out lovely!  

    See the Eden's Garden set here.  It was $22 and is now just $9.20, while supplies last.  

    There are dies to match called the Eden dies seen here. They were $35 and are now just $14. 

    I used all retiring inks and card stock – Bermuda Bay, Rich Razzleberry & Pear Pizzazz.  I had to focus on my Bermuda Bay; I'll sure miss this color!  The card stock, ink and refill are already sold out.  

    I wanted to feature the Picture This dies too; I honestly love these dies and use both the full windows die-cut and the stitched label pieces left over. Each side is stitched! They're perfect for greeting labels. This 2 piece set of dies is now $27.20; it was $34.  See them here.

    Measurements:

    • Bermuda Bay card base 8 ½” X 5"
    • White die-cut piece is 3 ¾” X 5”, White stamped piece is 3 5/8" X 4 7/8"
    • Rich Razzleberry 3 7/8” X 5 1/8”

    Below you can see the Forever Fern card on the left and the Eden's Garden card on the right.  

    I think the color combination is beautiful.  I'll sure miss these colors!  

    Below are the three cards I shared on the video.  I think the Forever Fern stamp set is one of the most gorgeous set of stamps Stampin' Up! has ever made. The distinktive quality of the images gives a true multi-hued effect; it's my very favorite type of stamp.  I'm sorry it retired and that it's already sold out.  You can get it in French still…..


    Things are flying off the shelves on the retiring Last Chance Sale.  Thank you to all who have placed orders with me this week!  I sure appreciate it!!!

    Here's the video I shared how to make the window card with the Picture This dies.  Plus two other cool projects using up card stock strips! Click on the photo below.  Don't forget to subscribe to my YouTube channel!  

    ~~~

    April Specials:

    See the 2023 Last Chance list here 

    *current host code: SYZD4PH2 or SFHU3WMT

    Get a free specialty paper sampler with online orders over $55 using a host code above plus an embellishment if your order is over $100

    Earn free products with my loyalty rewards! 

    Click here to download yours and earn a $50 shopping spree!

    Leave a Reply

    Your email address will not be published. Required fields are marked *


Notice: LeeAnn Greff, Independent Stampin’ Up! Demonstrator, Manager. The content of this website is my sole responsibility as an independent Stampin’ Up! demonstrator and the use of, and content of, the classes, services, or products offered on this website is not endorsed by Stampin’ Up! Copyright 2025