/


Latest Post

These pretty cards are the last of the Monochromatic Team swaps


I’ve been sharing our Team swaps this week that all feature a Monochromatic theme. This means the colors should include hues of similar colors. 

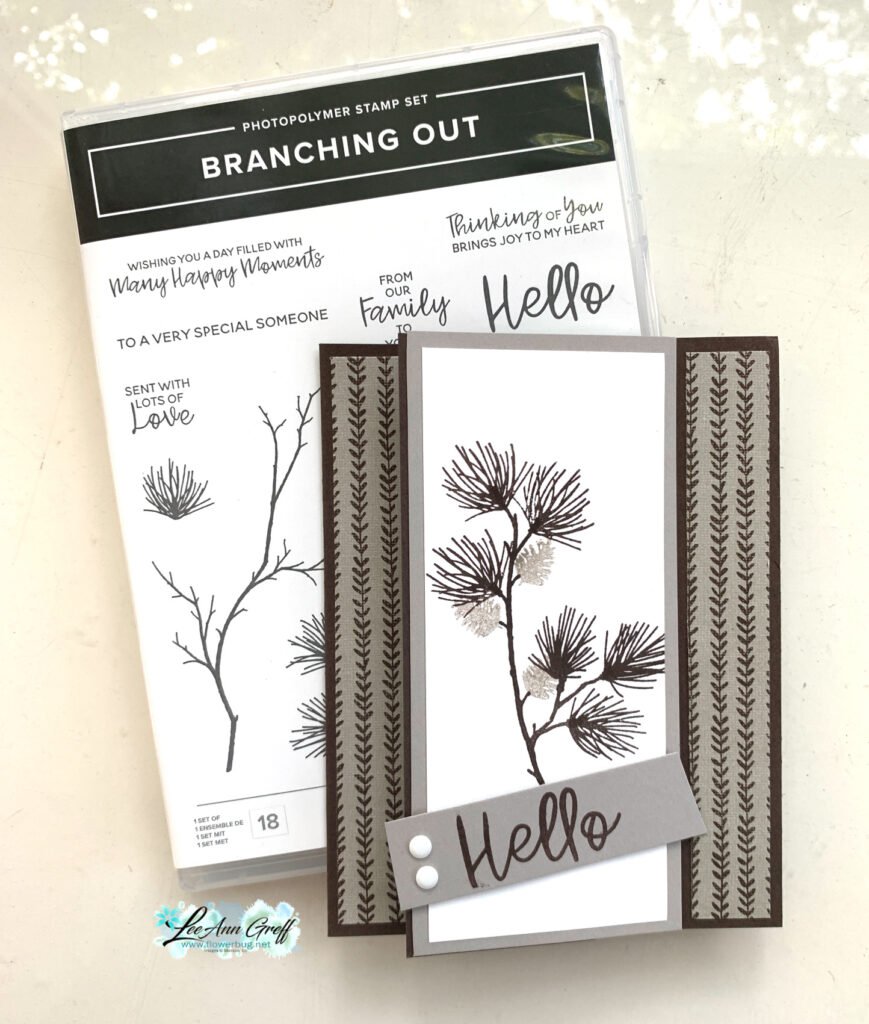
First is a pretty and soothing card made by Jacki.   

She used the Prairie Grass stamp set seen here.  Her colors include Very Vanilla with Crumb Cake.  Her greeting is from the  stamp set seen here.  

I love how the grass image repeats itself on the Vanilla layer in the background.  
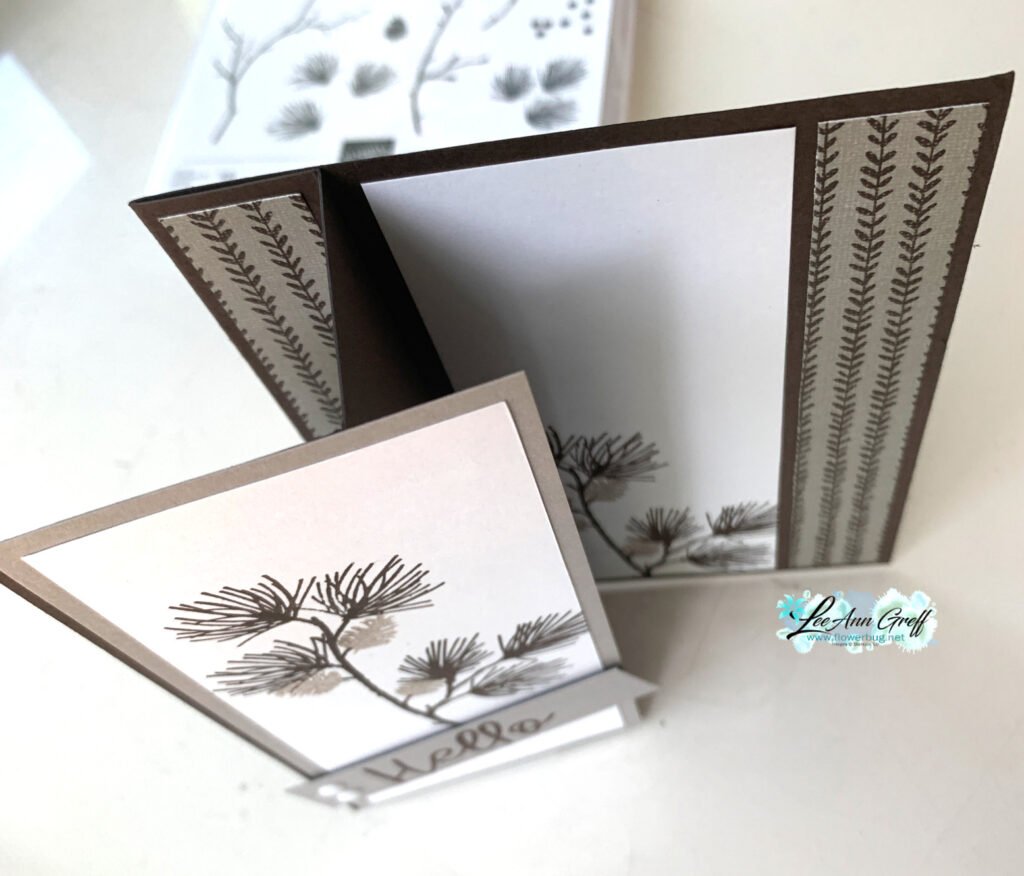
Measurements:

  • Crumb Cake 8 1/2″ X 5 1/2″ score at 4 1/4″, 3″ X 4 1/4″
  • Vanilla 4″ X 5 1/4″, 2 3/4″ X 4″ 

~~~

Next is a pretty wedding or anniversary card made by Marla.  

She used the Lifetime of Love stamp set seen here and the coordinating dies seen here.  I love how these delicate dies inlay so perfectly.

Her colors include Navy, Misty Moonlight, Crumb Cake & White. She also used a new embossing folder called Jolly Holly Hybrid seen here.  These leaves allow her to lift them a bit to add more dimension. 

The Designer paper is 2 5/8″ wide and is the Country Lace pack and is discounted and on the Last Chance list now.  See it here. 

~~~

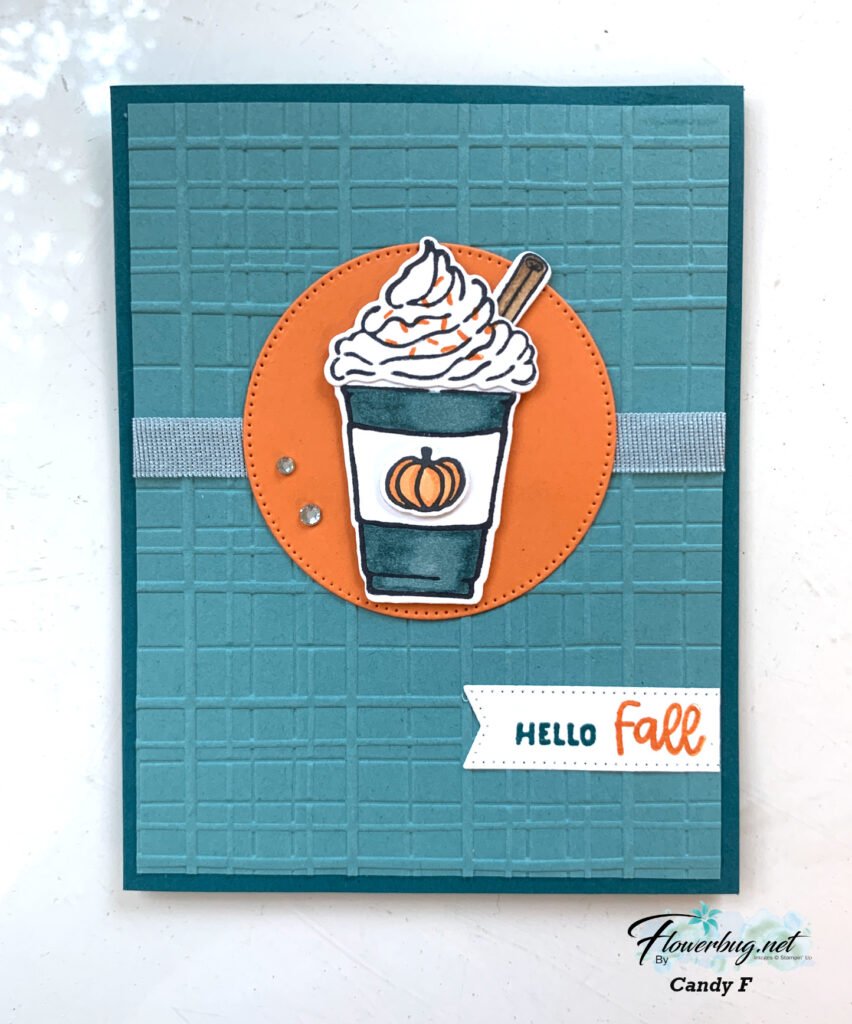
And lastly is this soft & pretty card made by Paula. 

Her card features the blue tones of Blueberry Bushel with Azure Afternoon. Her stamp sets are Elements of Text seen here and Textured Notes seen here. The greeting is from the Label Me Grateful stamp set seen here. 

I hope you enjoyed seeing the beautiful Monochromatic swaps this week.  I have a super talented team! 

~~~

August Specials

Lots of In Color products are discounted in August!!

Go here to see them all. 

Get a free card class with any online order over $55 during August!

Order online here

The last chance list has new products! See them here. 

All Posts

  • How to add color to the Peaceful View stamp – video tutorial too!


    Today I'm sharing the second card I made during last week's live video.  Both featured the amazing and beautiful Peaceful View stamp set seen here.  

    I used Balmy Blue, Pecan Pie and White card stock.  Inks include Balmy blue, Old Olive, Granny Apple Green and Pecan Pie. I used a Blending Brush with Balmy Blue ink to lightly color the sky before stamping. 

    Notice the fence. If you look closely you'll see the woodgrain in the fence. This was done by using an Early Espresso Stampin' Write marker to add to the stamped fence directly on the cardstock. It was mostly Pecan Pie colored before.  

    How did I color the image?  I inked the trees with Old Olive ink first using the direct to stamp method. The I used Pecan Pie on the grass and fence.  I used a sponge dauber to remove ink from the plants on the bottom so I could add Green ink to them with a sponge dauber.  I used Pecan Pie ink and a sponge dauber to add color to the trunk as well.  I hope you'll watch the video below to watch this in action. 

    For the greetings I stamped the More Messages stamp a few times and used the coordinating die to cut them all out.  I had lots to choose from this way and can save them to use whenever I need it. Here I added Balmy Blue ink lightly to color the greeting.

    What I love about this new messages bundle is that the greetings and die-cuts are such a nice size; larger than ever before. See the bundle here. 

    Here's the free project sheet with measurements and supplies for you: Download Multi-colored Peaceful View

    Below is the video for this card and another where I show you how to use this stamp on pretty designer paper for a stunning background. I shared that yesterday here. 

    ~~~

    July Specials:

    New Online Exclusives are here!  

    ~~~

    Last Chance List has been updated!  see it all here. Don't miss out on the deals!

    ~~~

    Get my Turtle-y Cute PDF tutorial free with any online order in July!

    Leave a Reply

    Your email address will not be published. Required fields are marked *

  • Beautiful Peaceful View card the easy way with video & free project sheet


    For my June card clubs I knew I wanted to feature the Peaceful View stamp set.  This gorgeous stamp makes it easy to create a stunning card with.  I've asked for this type of stamp for years and finally got one! 


    Could you ask for a more perfect background for this image?  Where did it come from?  It's a piece of designer series paper – from the Thoughtful Journey 6" X 6" DSP seen here.   It's absolutely the perfect choice and much easier than creating a coloreful background with ink. 

    The majority of the papers work well for this stamp so my club members could pick their favorite. 

    We inked the tree scene with Secret Sea ink and stamped on the designer paper.  It's then adhered to a full 4 1/4" X 5 1/2" piece of Balmy Blue CS before it's added to the front flap of the card base (front is folded back once).  

    For the greetings I stamped the More Messages stamp a few times and used the coordinating die to cut them all out.  I had tons of greetings for them to choose from.  They then layered them onto another Balmy Blue strip or die-cut. 

    What I love about this latest messages bundle is that the greetings and die-cuts are larger than ever before. See the bundle here. 

    Here's the free project sheet with measurements and supplies for you: Download Peaceful View June Club

    Below is the video for this card and another where I show you how to add color to the stamp. I'll share details on that project tomorrow.  

    ~~~

    July Specials:

    New Online Exclusives are here!  

    ~~~

    Last Chance List has been updated!  see it all here. Don't miss out on the deals!

    ~~~

    Get my Turtle-y Cute PDF tutorial free with any online order in July!

    Leave a Reply

    Your email address will not be published. Required fields are marked *

  • A gorgeous scene made with Wooded Acres; on the Last Chance List


    I was playing around with the Wooded Acres stamp set and made a pretty scene by adding a blended background. 

    You may know I love creating pretty scenes with my stamps, ink and blending brushes. 

    Here are the steps:

    1. I stamped this image on a long post-it note and fussy cut the area above the ground off.  I stamped it on my White CS and then added the post-it note to mask the sky. 
    2. Now I added Garden Green ink with a Blending Brush for grass. 
    3. I removed the post it and replaced it with the other half to sponge the sky. I used Timid Tiger, Calypso Coral and Balmy Blue. 
    4. I layered it with Black and White card stock. 
    5. I then stamped the same image on the Balmy Blue card base to extend the trees.  

    What do you think?  

    This stamp set is now on sale on the Last Chance List. You can see the stamp set here. 

    If you'd like to get tips on blending a smooth sky please watch this video. 

    ~~~

    July Specials:

    New Online Exclusives are here!  

    ~~~

    Last Chance List has been updated!  see it all here. Don't miss out on the deals!

    ~~~

    Get my Turtle-y Cute PDF tutorial free with any online order in July!

    Leave a Reply

    Your email address will not be published. Required fields are marked *


Notice: LeeAnn Greff, Independent Stampin’ Up! Demonstrator, Manager. The content of this website is my sole responsibility as an independent Stampin’ Up! demonstrator and the use of, and content of, the classes, services, or products offered on this website is not endorsed by Stampin’ Up! Copyright 2025