/


Latest Post

Shabby Chic Lovely & Sweet card with video tutorial & free project sheet!


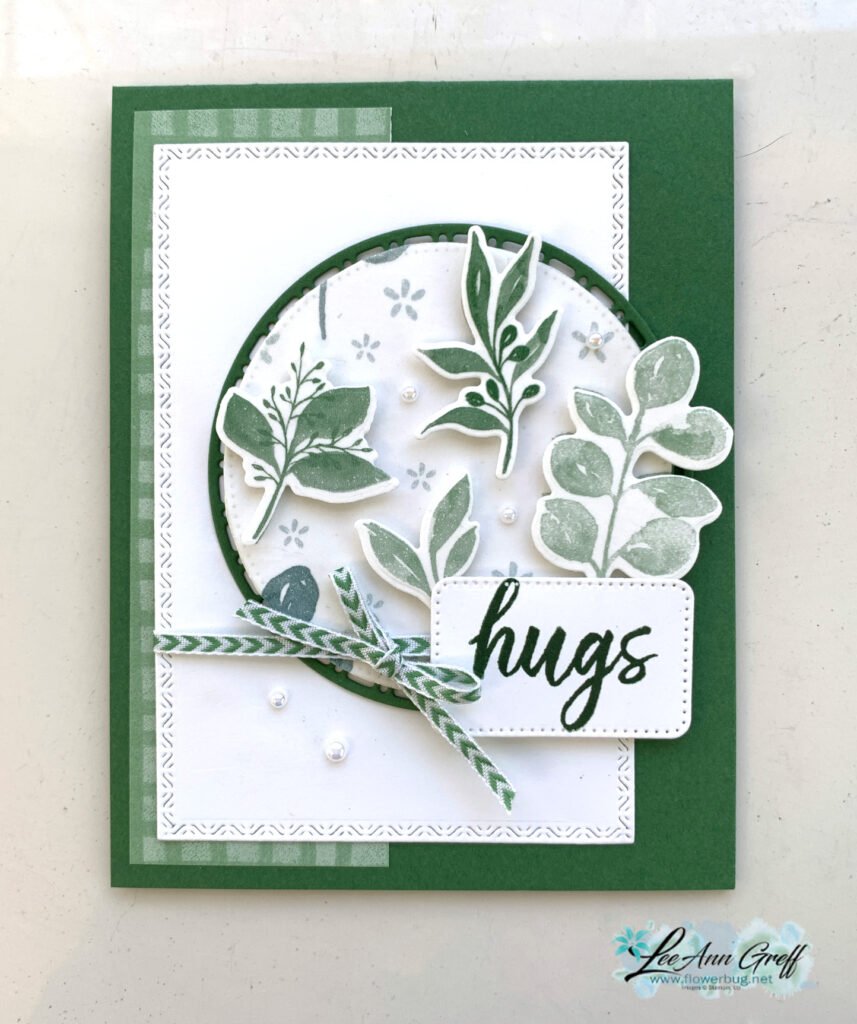
Here's the last card made in last week's video featuring the Nature's Sweetness suite. I absolutely love this color palette! 

It's Pecan Pie with Pebbled Path & Gold accents with a rich monotone look. Look closely at the layout. It's basically a few random layers with only one that's layered.  Adding a few smaller elements creates the balance here. 

Details & tips:

  • Note the distressed edges on a few of the layers. That is done by rubbing your open scissor blade over the edge of the paper.  Fast and fabulous results! *watch how I do it in the video below.
  • The large stamped Pecan Pie layer and the DSP square are both sponged with Pecan Pie ink to age them a bit. 
  • That butterfly is one of our Paper Butterfly Accents colored with a Light Natural Tones blends marker. I added some Gold Enamel Effects in streaks all over it. *see how in the video
  • I added Gold Enamel Effects as berries on the tall leaf die-cut on the left. 

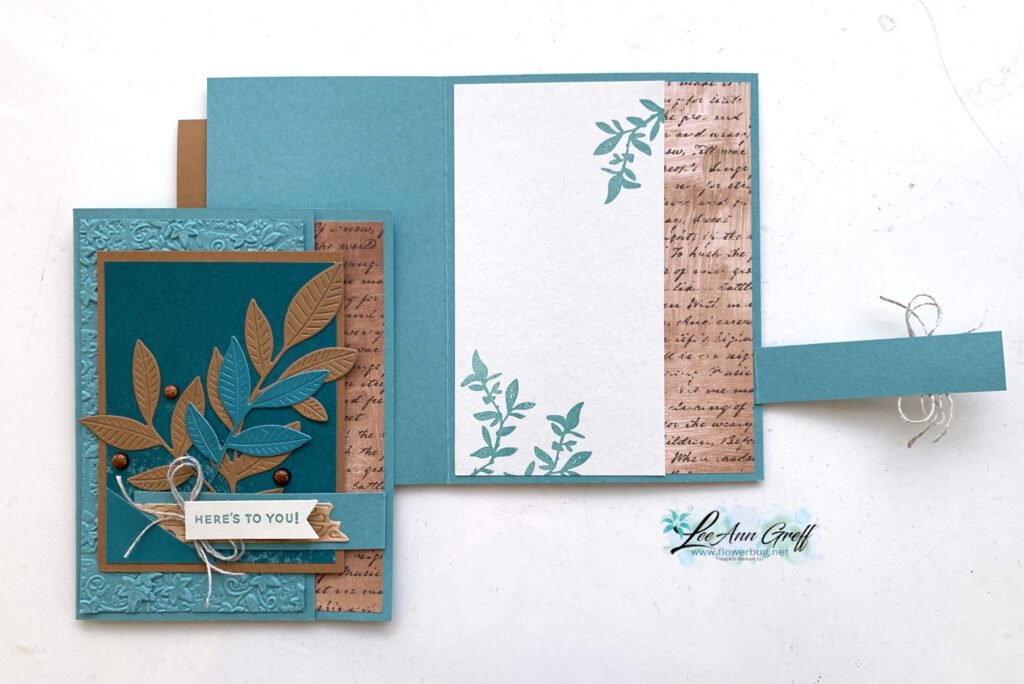
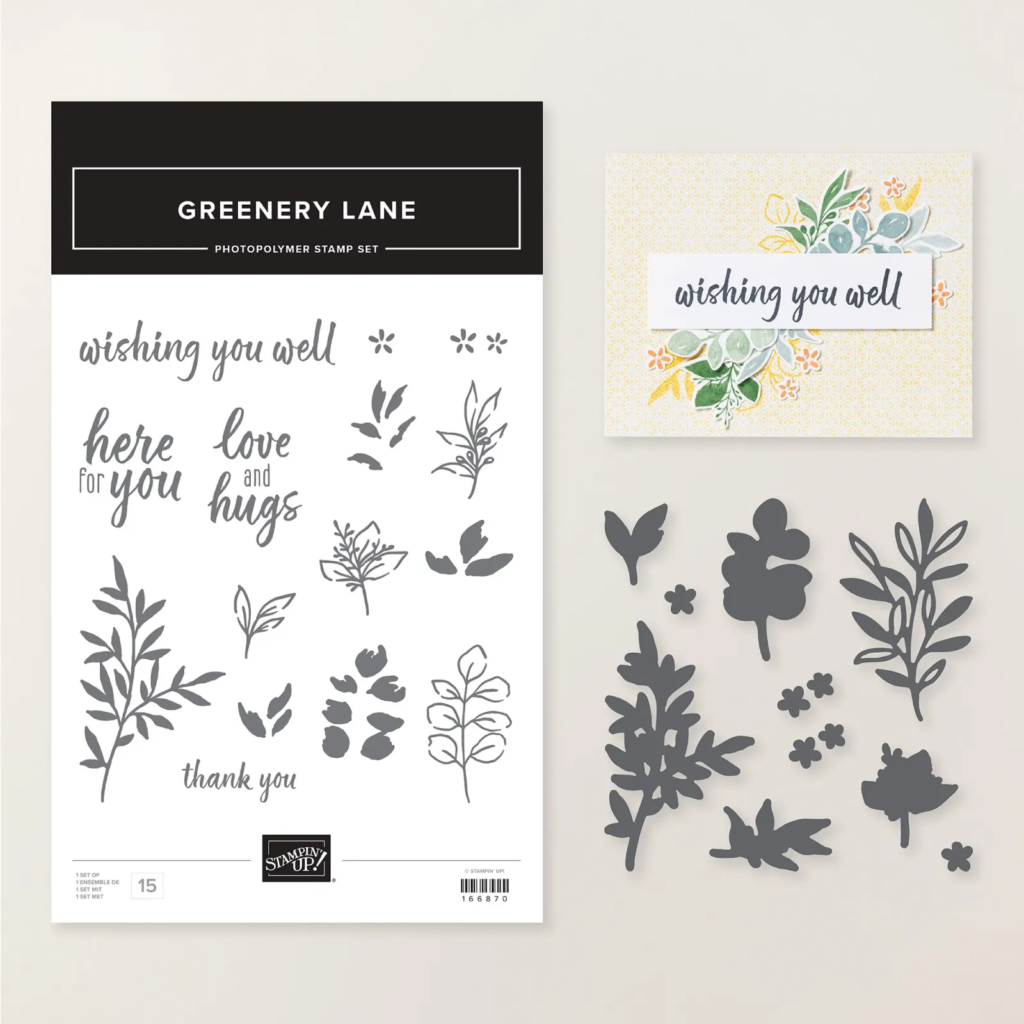
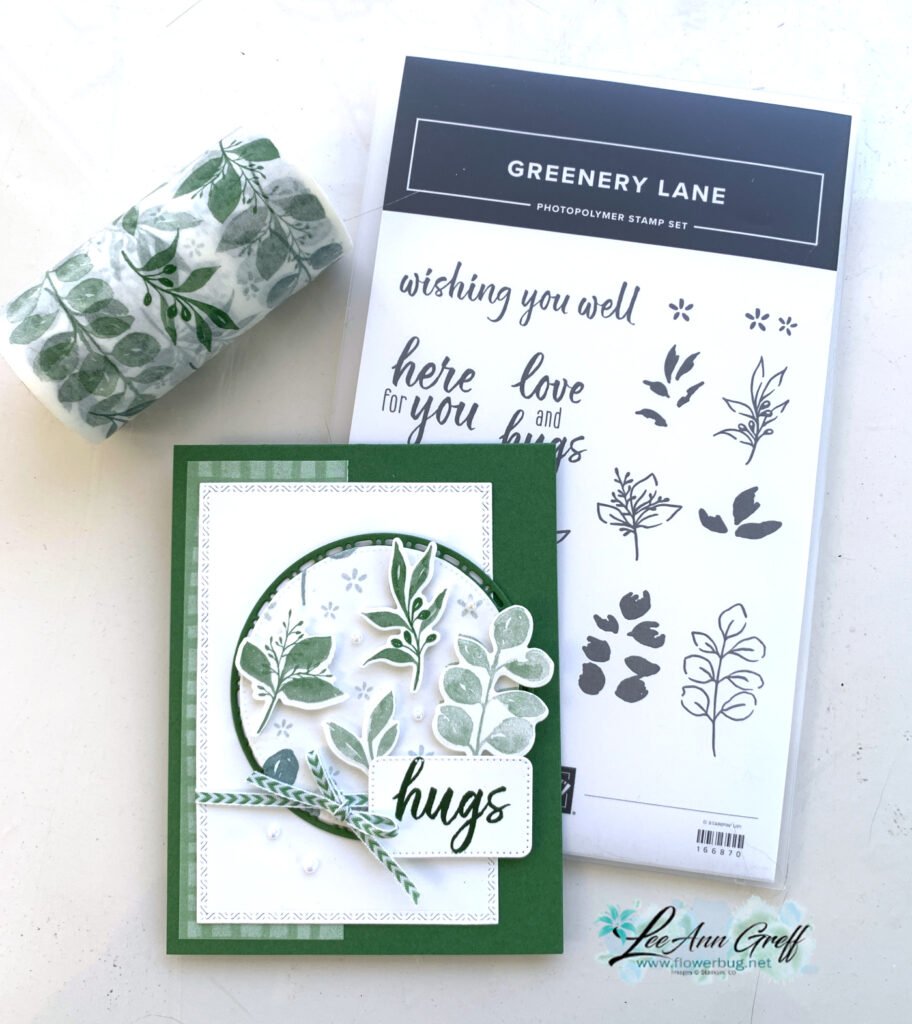
Here's how I stamped the inside.  The greeting is from the Softly Sophisticated stamp set from Sale-a-Bration. 

Here's a picture of the Lovely & Sweet bundle I used here. See it online here. 

Get the project sheet with dimensions, directions and products here: Download Lovely & Sweet Butterfly card

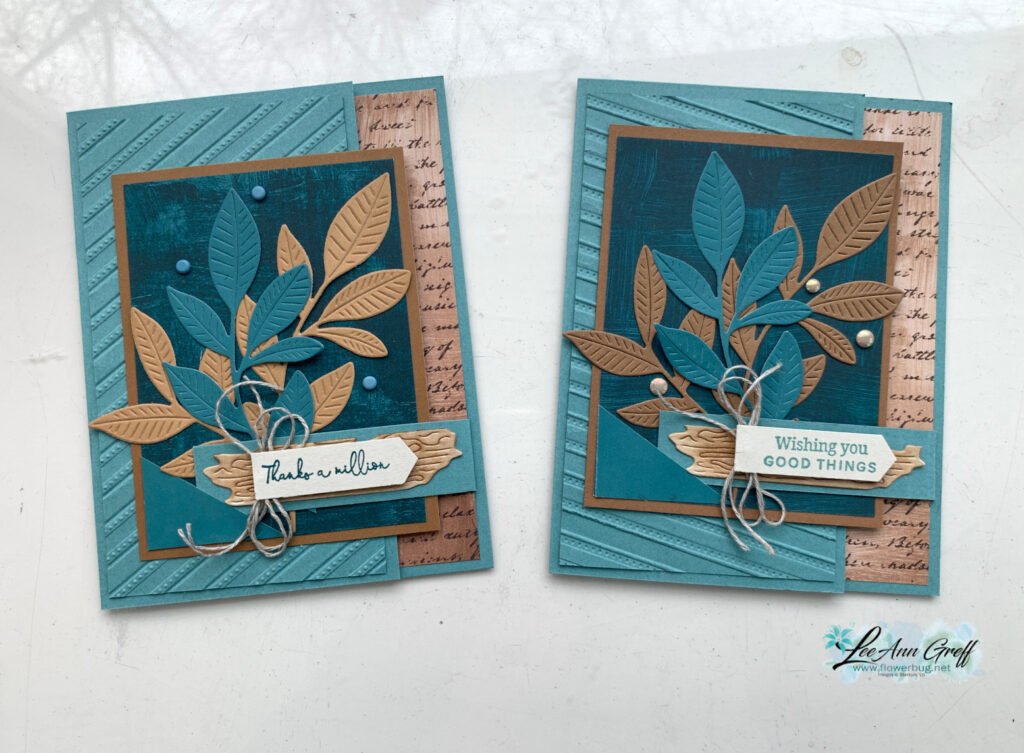
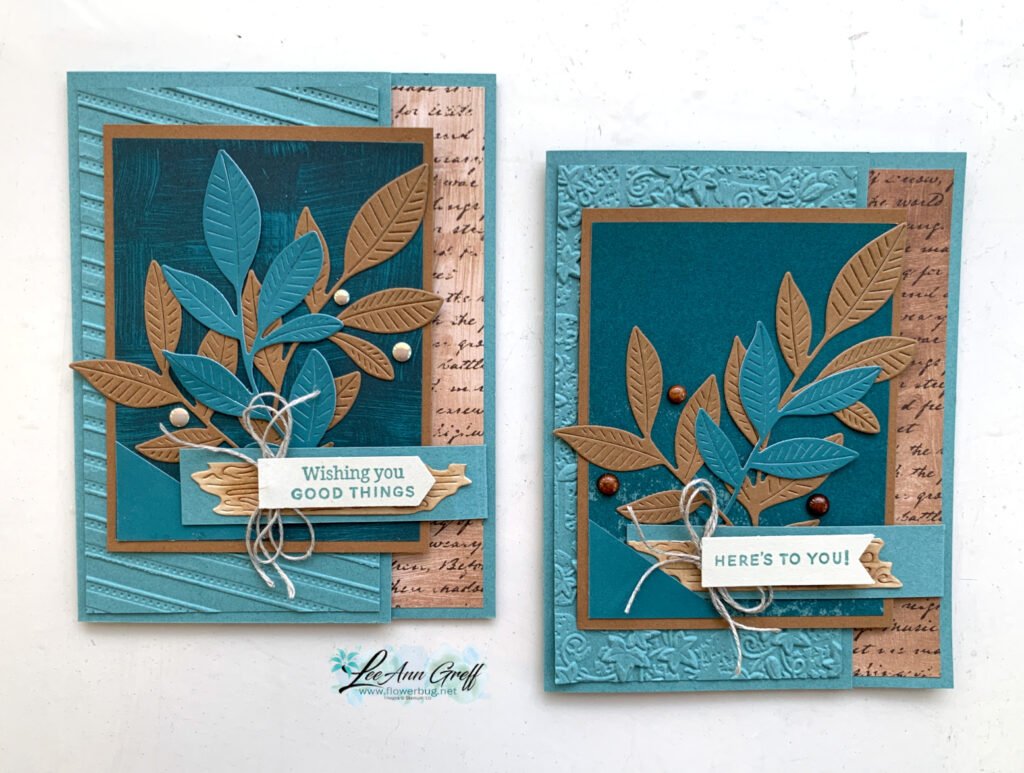
These are the three cards I share in the video below: 


So is the shabby-chic look for you?

You can see how I made all of these cards in the video replay here.  Or click on the photo below to watch it.  Don't forget to subscribe to my YouTube channel! 

~~~

January Specials: 

Earn FREE products with your Stampin' Up! purchase during

Sale-a-Bration! *click here

*current host code link:  M7NAN4HT

It's the best time to get a pre-paid Sale-a-Bration subscription

& earn free Sale-a-Bration products!  


~~~

Get a free embellishment from the 2024 Spring catalog

with an online order over $55

All Posts

  • A stunning Holiday card with free project sheet & video tutorial


    Here’s the other card I made on last week’s video. I loved playing with the Joyful Tidings stamp set seen here; it’s just my style!

    My colors include White, Basic Beige & Gold. Soft, pretty & classy.

    Here are the products I used:

    – Gathering Together designer series paper
    – Gold Striped ribbon
    – Low-profile dots (now retired)
    – Gold heat embossing powder
    Creative Haven dies seen here for the leaf die-cuts

    I created a free project sheet for this pretty card. Click here to download or print it.

    You can also watch the video tutorial below. I shared a neat trick to place the leaf die-cuts on the greeting circle element. Press & Seal wrap saves a ton of time!

    ~~~

    November Specials

    New Online products are available on November 4th.
    See them here.

    Get the Peaceful Garden suite tutorial FREE with any online order in November!

    Leave a Reply

    Your email address will not be published. Required fields are marked *

  • The Black Friday sale starts today!! Nov 25th – Dec 1st!


    Grab deals on lots of Stampin’ Up! products during the big sale this week.
    From November 25th through December 1st you can save up to 40% off select products!

    It includes Stampin’ Blends, Paper Trimmer, Blades & Ink bundles at 40% off!

    Plus 25% off select adhesives and 15% off select card stock! I’m happy to save on products I purchase regularly.

    ~~~

    Leave a Reply

    Your email address will not be published. Required fields are marked *

  • A gorgeous card with the Joyful Tidings set


    This beautiful card has tons of Gold accents plus there are lots of neat tips you’ll appreciate. I made it during last week’s video.

    It was originally created for our November Team swap. The theme was to use foil or metallic heat embossing. I did both!

    Notice the background stamping on the right side; I used the Amber Autumn set with Versamark ink. The greeting is from the Ornamental Christmas set. The gold foil ‘wheat’ die-cuts are from the Amber Autumn dies
    The wreath stamp set is Joyful Tidings and can be seen here. I’ve always loved wreaths and used to collect them.

    Here I simply heat embossed the partial wreath in Gold embossing powder. It’s stamped on a die-cut from the Spotlight on Nature dies. See the pretty gold hoop? Those are available here and are applied with either mini glue dots or thin lines of Multipurpose Liquid Glue (which I did).

    My colors include Basic Beige, Mossy Meadow and Gold foil. I textured the Mossy Meadow layer with the Wreath 3D embossing folder. I also used the Labeled with Love punch to achieve the ‘ticket’ shaped corners.
    *look at your punches to see if you can use them in new ways!

    This card is a slightly different fold because the second layer is what opens. I created a free project sheet for this card for you. Click here to download or print it.

    I also have a video tutorial seen below for this beautiful card and one more beautiful card featuring the Joyful Tidings stamp set that I’ll share Wednesday.

    ~~~

    November Specials

    New Online products are available on November 4th.
    See them here.

    Get the Peaceful Garden suite tutorial FREE with any online order in November!

    Leave a Reply

    Your email address will not be published. Required fields are marked *


Notice: LeeAnn Greff, Independent Stampin’ Up! Demonstrator, Manager. The content of this website is my sole responsibility as an independent Stampin’ Up! demonstrator and the use of, and content of, the classes, services, or products offered on this website is not endorsed by Stampin’ Up! Copyright 2025