/


Latest Post

See them all! Two different versions of this fun fold card with gift card option


Monday night we made these neat fun fold cards on FB Live. If you're not following me on Facebook you can do so here.  I do 6 Facebook lives a month!  

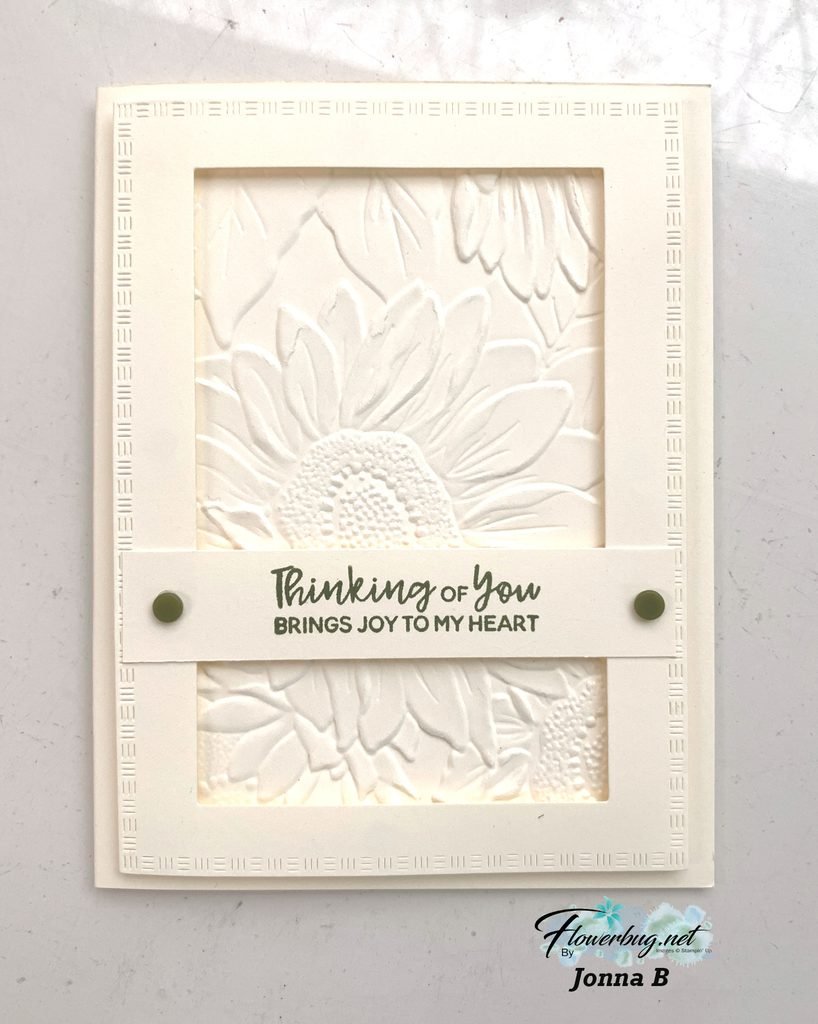
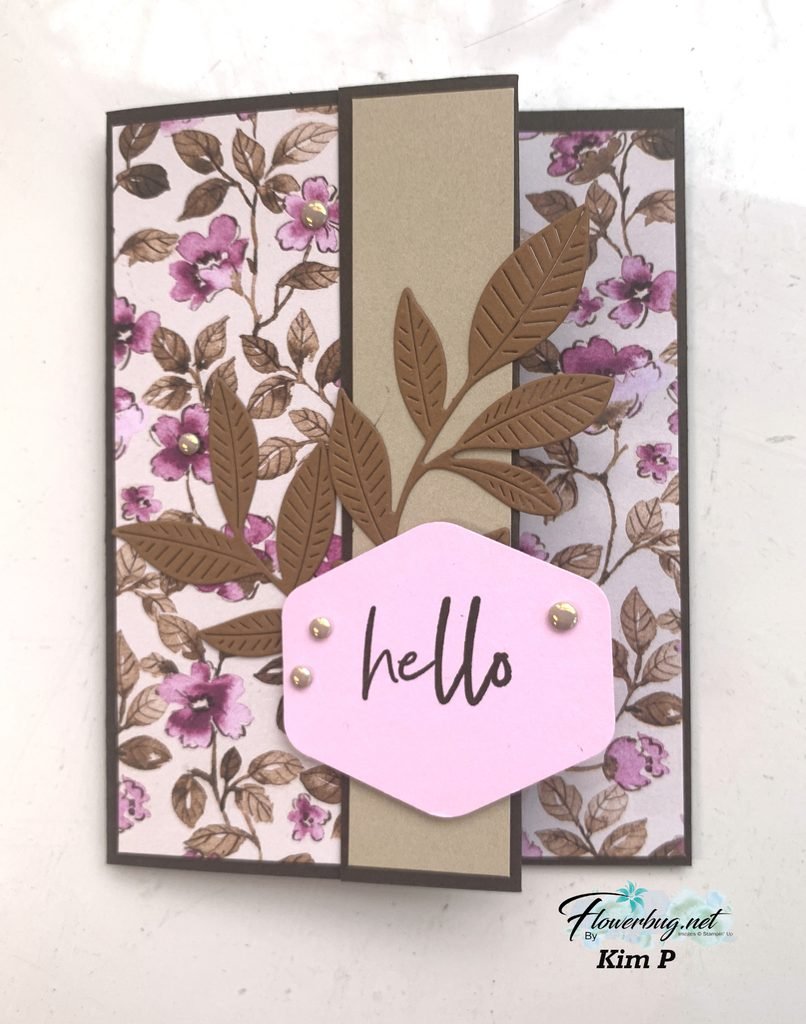
The top two cards feature the Tidings & Trimmings bundle & the Tidings of Christmas 6 X 6" DSP. Both are in a suite seen in the annual catalog on pages 88-89 or here. 

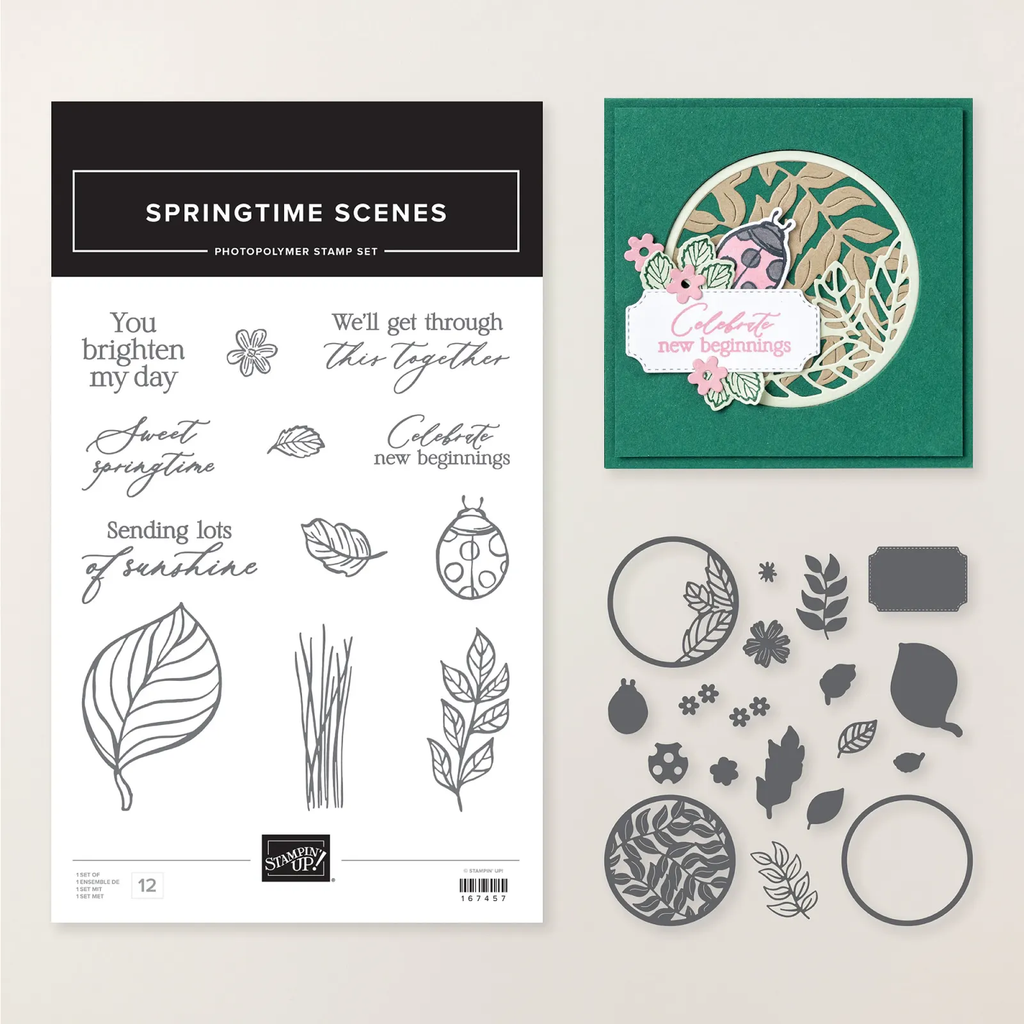
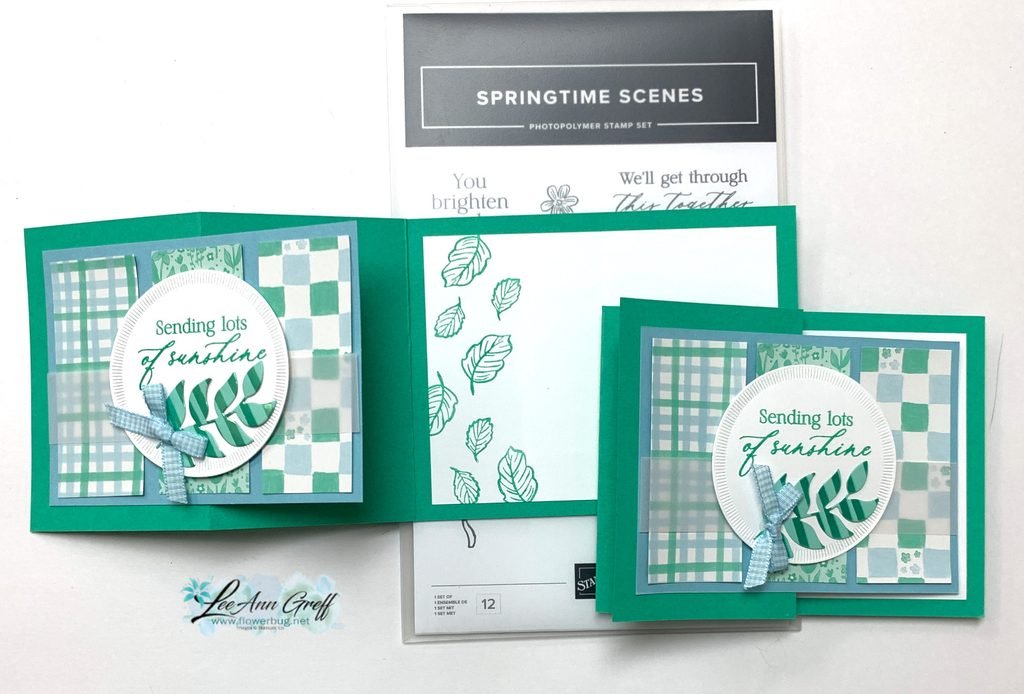
The bottom two cards feature the new Eden's Garden stamp set & the Ever Eden specialty designer paper.  See them both here. 

Measurements:

  • Card base 5 1/2" X 8 1/2" scored at 4 1/4" plus 1" X 4" strip for embossed layer. *To cut the front flap, cut at the 4 1/4" point to the score line. 
  • Cherry Cobbler card stock 4" square, plus 3/4" X 5" strip
  • DSP 1 7/8" squares X 4 (can be 1 3/4" to leave a space between like the card on the lower left)
  • White inside layer 3 1/2" square

Do you see the difference in the two cards below?  Note the space between the designer paper squares on the left card. The DSP squares on the left are 1 3/4" in size.  The DSP on the right card are 1 7/8" in size so they have no space in between. 

*If you love this stamp set & Designer Paper you should get it this month.  I'm giving away a free cards kit with online orders this month plus a PDF tutorial with 22 projects! See details below. 


Share your version of this card in my FB group here by November 21st to get in the drawing for a door prize! 

See how the card is cut partway?  The flap on the right is adhered down. But, you can leave it partially open enough to add a gift card in the pocket!  


You can watch the video below or click here. 

~~~

Host codes: EXBDBRGY or RY3EDVMZ

*click here to order

Online orders over $50 get a pre-cut card kit of 4 cards & PDF tutorial.
*Orders over $80 will receive the card kit PLUS 24 Iridescent snowflakes!

All online orders will receive my Eden's Garden PDF 22 project tutorial free! 

Get any of the tutorials or kits to go below in my Kit & Tutorial shop here:

Gingerbread & Peppermint Kit or Tutorial:

Eden's Garden Kit or tutorial 


Christmas cards stamp a stack; limited supply! 

All Posts

  • The Branching Out bundle is retiring! Check out this fun fold card with video tutorial!


    We made this card earlier this fall and I realize I haven’t shared it with you yet. I also made a video too – scroll down….

    The colors include Pecan Pie with Crumb Cake, Early Espresso & Shaded Spruce. I used various wood-like designer series papers for the side panel. See how it has a double fold?

    Also notice the ‘white’ snow on the pine boughs plus snow in the background. You can achieve that without heat embossing. We used White Craft ink and stamped over the pine. Easy & a fun accent!

    The stamp set is retiring but the dies are not. The bundle is on the last chance list now. Click here to see it.
    It’s been one of my favorite products in our Holiday catalog this year. It’s timeless and can be used for fall, winter or Christmas!

    Besides the video tutorial here’s a free project sheet for you too. Click here to download or print it.

    I’m glad the dies are not retiring but I have to say the stamp set is among my top 5 favorites!

    Below is the video tutorial which gives you tips on stamping the branches with the pines and pine cones.

    *You’ll receive a PDF with multiple projects featuring this product
    after the 20th of the month.
    ~~~

    The Last Chance list has been updated!
    Click here to shop.

    Get a free PDF tutorial with any online order from me in December!

    Leave a Reply

    Your email address will not be published. Required fields are marked *

  • Easy Holiday cards made from tags! Free project sheet & video tutorial.


    I look forward to receiving my Paper Pumpkin boxes each month. November’s Wrapped in Cheer kit featured holiday tags and I couldn’t waste an opportunity to make cards from them. I need a lot more Christmas cards than I do tags!

    I didn’t change the tag from the original except for the linen thread bow at the top. But I did add it to a Basic Beige textured layer and then onto a Cherry Cobbler card base.
    Now that is an easy card!

    To create the colored leaves inside the card I used the empty piece of paper from the kit where the leaves had been removed. I’m always looking for easy ways to add to the inside of my cards.

    There were two different tags in this kit. Aren’t they pretty?

    I used the embossing folder called Traditional Wreath 3D folder; it can be seen here. It’s discounted and available while supplies last.
    *The greeting is from the stamps in the kit.

    Below is the video tutorial for this card and more information on Paper Pumpkin.

    *You’ll receive a PDF with multiple projects featuring this product
    after the 20th of the month.
    ~~~

    The Last Chance list has been updated!
    Click here to shop.

    Get a free PDF tutorial with any online order from me in December!

    Leave a Reply

    Your email address will not be published. Required fields are marked *

  • Wrapped in Cheer tags for Christmas


    I shared the November Paper Pumpkin kit on last week’s live video. I just love receiving my crafty box in the mail each month! Easy crafting without a plan or step it up and use your creativity to change the projects.

    There were two different tags in this kit and each one includes multiple pieces. Aren’t they pretty? The embossing folder is called Traditional Wreath 3D folder and can be seen here. It’s discounted and available while supplies last.
    *The greeting is from the stamps in the kit.

    I used the tags to make Christmas cards which you can see below. All I did was add a textured layer and a card base. *I’ll share more details tomorrow.

    Remember that each month my subscribers and Team receive my bonus projects PDF. Lots of unique ideas to create with the contents of each box. Subscribe to Paper Pumpkin here.

    Below is the video where I share this kit, last months and how to make the cards too.

    *You’ll receive a PDF with multiple projects featuring this product
    after the 20th of the month.
    ~~~

    The Last Chance list has been updated!
    Click here to shop.

    Get a free PDF tutorial with any online order from me in December!

    Leave a Reply

    Your email address will not be published. Required fields are marked *


Notice: LeeAnn Greff, Independent Stampin’ Up! Demonstrator, Manager. The content of this website is my sole responsibility as an independent Stampin’ Up! demonstrator and the use of, and content of, the classes, services, or products offered on this website is not endorsed by Stampin’ Up! Copyright 2025