/


Latest Post

Pretty Soft Seedlings card & video; an easy fun fold layout


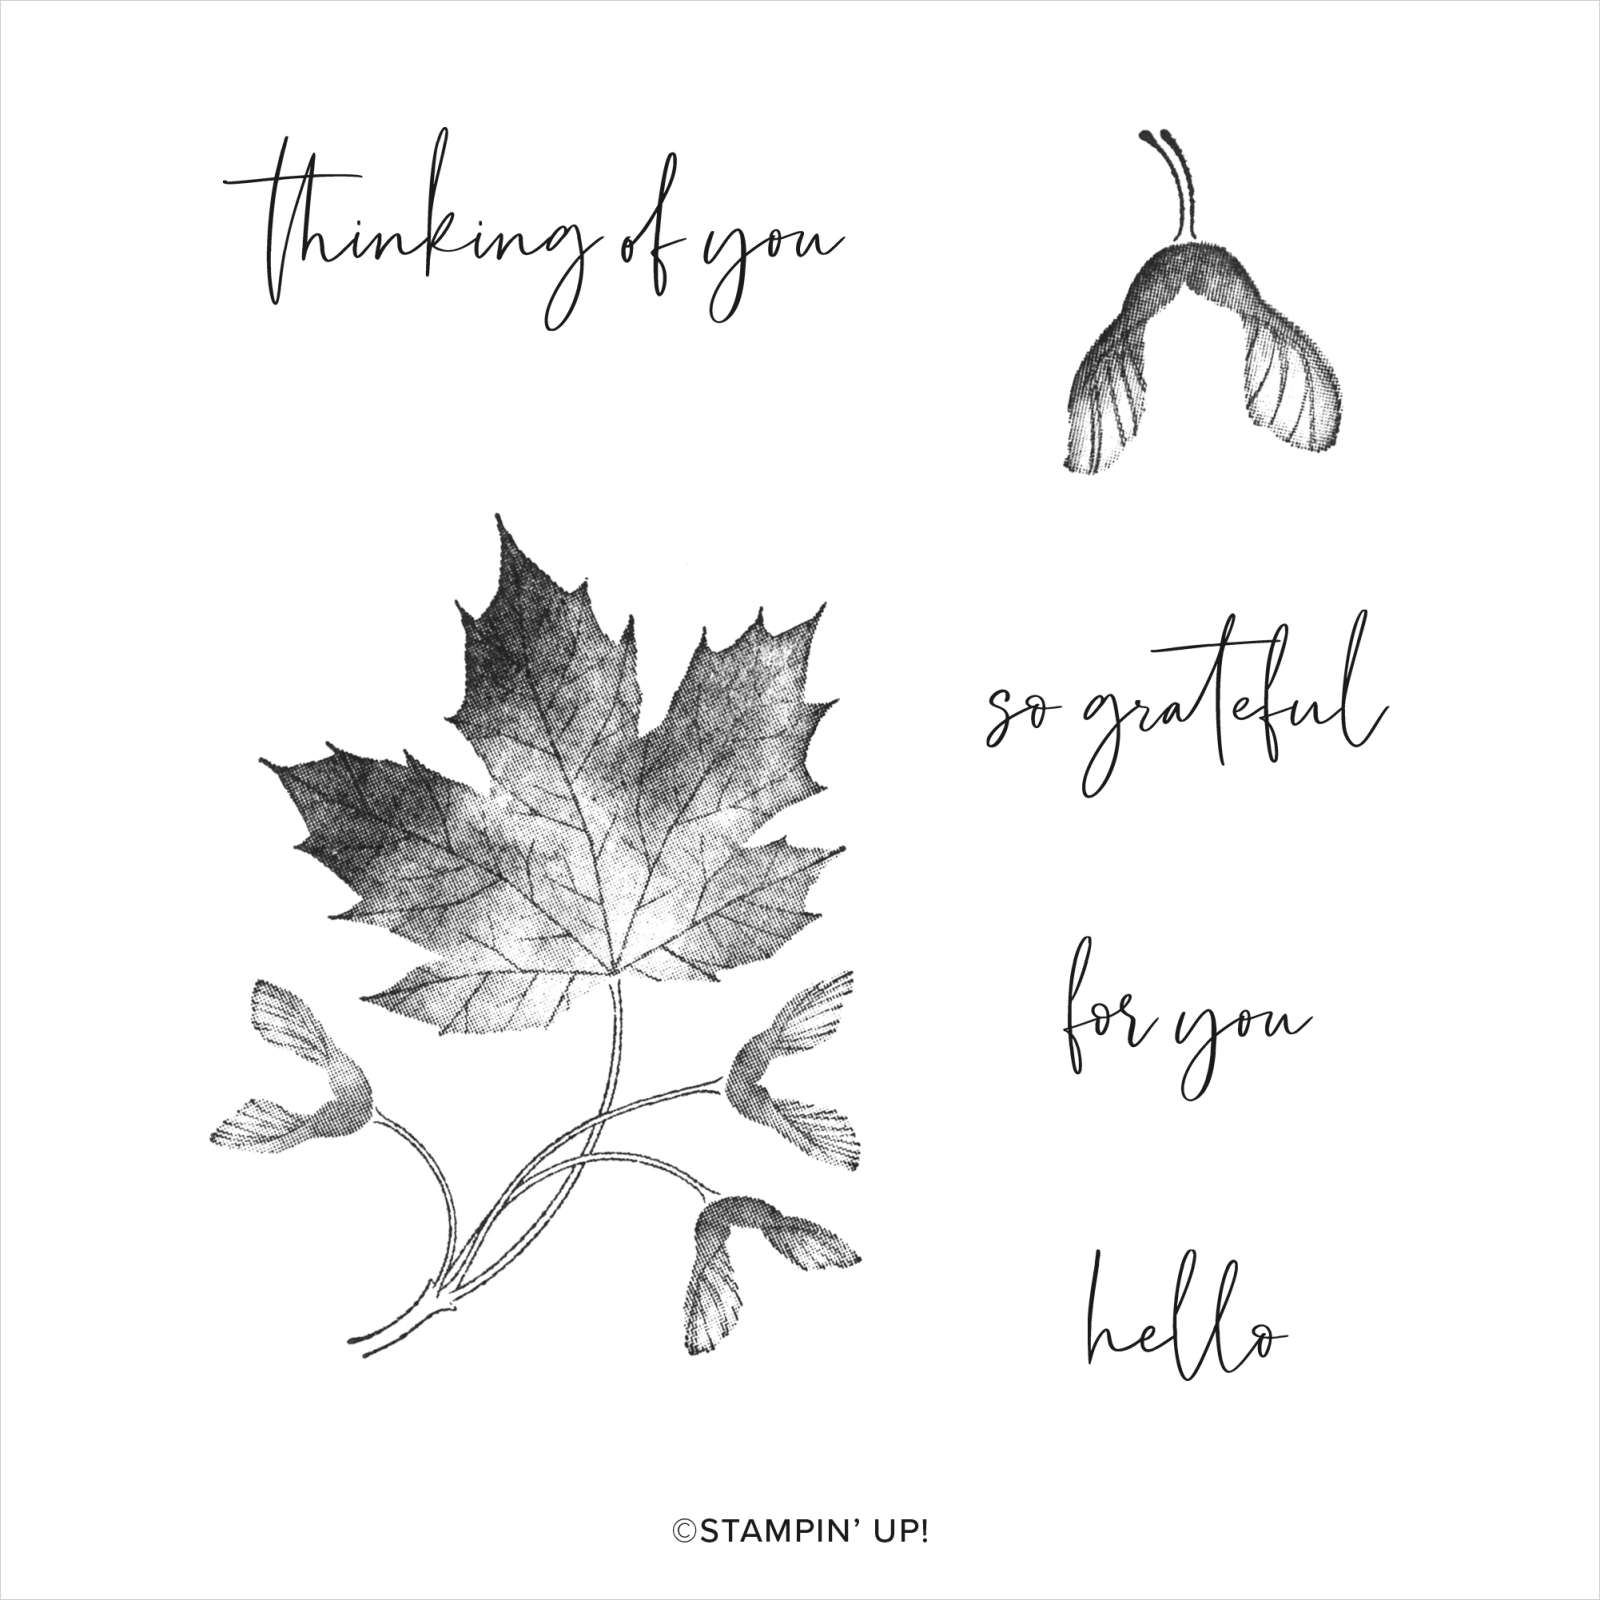
I've sure been enjoying the Soft Seedlings stamp set.  The pretty maple leaf has so much texture and depth and the greetings are some of my favorites. I think I've used it more than any set in the Holiday catalog! 

 We just purchased a red maple tree and planted it in our backyard this weekend.  It's red foliage is beautiful! 

For this card I chose to stamp the leaves in two colors – Soft Suede & Coastal Cabana.  I know they're not correct leaf colors, but it's fun to go outside the box at times.  

It's one of my favorite fun folds; so easy to do and it can be jazzed up easily with elements & greetings.  

I chose to stamp directly on one of the Leaf Label elements in the Leaf Label & Amber gem combo pack seen here.  Unfortunately they are out of stock right now; but it will be available again in November. 

The package includes 25 leaves and amber gems too; all for $8. They're so fun to play with; you can add texture, or stamp or sponge color on them. 

It might be hard to see the measurements in the photo above.  Here they are again: 

  • Card base 4 ¼” X 5 ½”
  • Soft Suede 3 ¼” X 11” scored at 5 ½”
  • Vanilla 3” X 5 ¼” (2 pieces)

Here's a photo of the inside.  I kept is simple since I'll use it as a thank you card.  

Click here or on the photo below to watch the video for this card and see two other fun fold cards too! 


~~~

October Specials

Starter Kit special! Get $155 in product for just $99

click here

~~~

Order online here

Host code links: GDCBRHF7 or JPJ4FKYJ

Get a free embellishment from me with online orders over $50!


Earn free products with my loyalty rewards! 

Click here to download yours and earn a $50 shopping spree!

All Posts

  • Waves of Inspiration Sunset


    Here's another card that's included in this month's Waves of Inspiration kit to go.  The colors are gorgeous! 

    This card was inspired by another Demonstrator but I cannot find the name to give credit now.  It's Balmy Blue with touches of Mango Melody.  I used a Blending Brush to achieve that smooth shaded layer of Mango Melody & Balmy Blue.  

    Like I mentioned, this card is included in both the Kit go Go and the PDF tutorial and exclusive videos this month.  The last day to get in on the pre-cut kit is tomorrow, March 17th.  Get the details here.  

    The Kit to Go includes the Waves of Inspiration stamp set & dies, the 6 cards kit and videos & PDF tutorial for 11 cards for $74. Message me here to opt in for it; and I'll send you an invoice via PayPal. 


    Or if you order the Waves of the Ocean collection seen here from me you automatically receive the PDF tutorial and videos.  Make note that the Waves of Inspiration bundle will be in the upcoming Annual catalog but the papers & gems will not.    

    Here is a photo of more of the cards included:

    ~~~

    March Specials: 

    Host codes: FS239K9C

     *click here to order 

    If your order is over $50 you'll receive a free embellishment

    from the Jan-June catalog in your thank you card.

    Email me to opt in for my Waves card kit to go here; it includes the Waves bundle!

    Or the Flowering Fields kit seen here. 


    Don't forget about my loyalty rewards! 

    Click here to download yours and earn a $50 shopping spree!  

    Leave a Reply

    Your email address will not be published. Required fields are marked *

  • Free-form waves using the Floating Technique


    We made this gorgeous 'wave' card at a Team meeting last month.  I used the Waves of Inspiration bundle and a Blending Brush for the sky. 

    The colors are Bermuda Bay, Pacific Point and White.  See those gorgeous gems?  They're called Rhinestone Waves Basic Jewels and there are 168 in a package for just $6.50!  See them here. 

    I had a bunch of curvy foil pieces left over after die-cutting a bunch of these waves from the two blue colors in the Blue Foil paper seen here.  I challenged myself to use them and came up with a free-form wave using the Floating Technique.  

    I adhered various die-cut foil pieces to a Window Sheet using Multipurpose liquid glue and added them to the card with Stampin' Dimensionals.  This take a bit of patience as you can imagine!    

    Here are some tips to achieve this:

    • It's best if you start at the bottom and add just a few pieces. Let it set to dry. 
    • Adding a weight over them while they dry helps keep them flat. The foil likes to curl up.
    • Next form the top of the wave.  I used one of the long curved pieces for this.  
    • Add just a few pieces at a time and let them dry.  They slide easily!
    • Fill in the center of the wave a few at a time. Again, add weight over it all to set & dry.  
    • Trim off the sides of the Window sheet at 4" to fit the White layer. I fussy cut the top to match the foil wave.  
    • I adhered it to the textured 'Bark 3D' White 4" X 5 1/4" piece of CS with mini dimensionals.  

    This card is part of my Waves of Inspiration tutorial and video with 11 projects!  This is available to anyone who purchases the Waves of the Ocean Collection from me or purchases my Waves of Inspiration kit to go. 

    Click here for the details.  Be sure to opt in for the kit by March 17th. 

    ~~~

    March Specials: 

    Host codes: EU76H4H7

     *click here to order 

    If your order is over $50 you'll receive a free embellishment

    from the Jan-June catalog in your thank you card.

    Email me to opt in for my Waves card kit to go here; it includes the Waves bundle!

    Or the Flowering Fields kit seen here. 


    Don't forget about my loyalty rewards! 

    Click here to download yours and earn a $50 shopping spree!  

    Leave a Reply

    Your email address will not be published. Required fields are marked *

  • Fun 4-Way Split Angled card idea; Live video tonight!


    We're making these fun but easy cards on tonight's Facebook Live.  It's at 7:30 pm CT here.  I hope you can join me!  If not it will be added to my YouTube channel here as well.  *Be sure to follow me on FB so you won't miss these lives! 

    Every 2nd & 4th Monday night's I host a 'Stamp with Me' live on Facebook where we create striking cards using Designer Paper or a fun technique.  If you're new to stamping you'll become more comfortable and efficient at it.  If you're a seasoned stamper you'll still enjoy it and get new ideas to create. 

    Tonight I'll share a version of this card; I'm calling it a 4-way Split Angled card. 

    The card above features the Abstract Beauty specialty designer paper in the 2022 January-June catalog by Stampin' Up!  It has splashes of color along with gold highlights.  See it here.  

    If you want to make one of these you'll need card bases, DSP or stamps & ink and a greeting or die-cut like I used here. 

    • card base 4 1/4" X 11" scored in half at 5 1/2"
    • Colored layer 4" X 5 1/4"
    • DSP or stamped layer 3 3/4" X 5" (for a wider split use 3 1/2" X 4 3/4") 

    The Amazing Thanks dies have quickly become a favorite of mine.  See those here. 

    The next example uses the Flowing Flowers stamp set in Calypso Coral, Pear Pizzazz and Daffodil Delight.  I stamped the images before I cut them in 4 pieces. 

    You might wonder – 'how do you cut these into 4 angled pieces?'  Honestly I cut from the top to the bottom first, just estimating my angled cut. Then I held the two pieces back together and cut from the bottom left to the right side. 

    It does not have to be perfect!  Honestly; just wing it; I dare you to do this without measuring.  

    ~~~

    March Specials: 

    Host codes: EU76H4H7

     *click here to order 

    If your order is over $50 you'll receive a free embellishment

    from the Jan-June catalog in your thank you card.

    Email me to opt in for my Waves card kit to go here; it includes the Waves bundle!

    Or the Flowering Fields kit seen here. 


    Don't forget about my loyalty rewards! 

    Click here to download yours and earn a $50 shopping spree!  

    Leave a Reply

    Your email address will not be published. Required fields are marked *


Notice: LeeAnn Greff, Independent Stampin’ Up! Demonstrator, Manager. The content of this website is my sole responsibility as an independent Stampin’ Up! demonstrator and the use of, and content of, the classes, services, or products offered on this website is not endorsed by Stampin’ Up! Copyright 2025