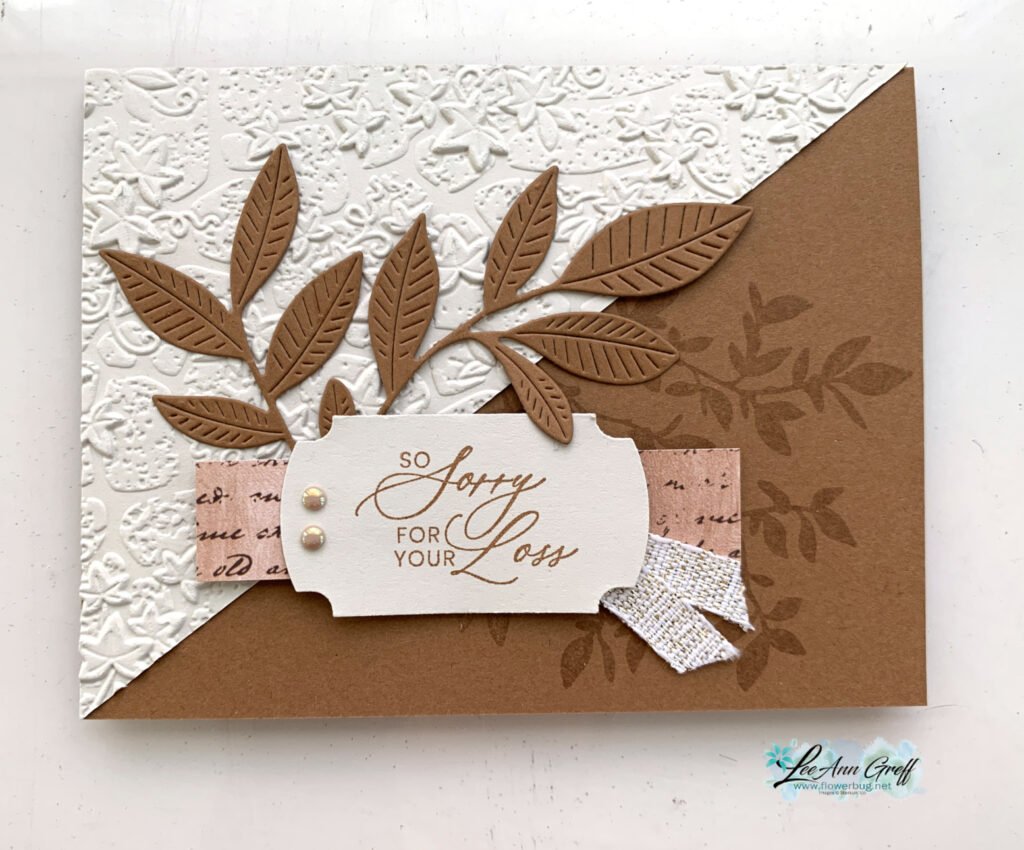
Isn’t it pretty? My colors include Pecan Pie with Basic Beige and a small strip of the Nature’s Walk designer series paper.
The stamp & dies bundle is called Nature’s Symphony. The textured triangle is the new Stone & Vine 3D embossing folder. The greeting is from the new Prayer’s & Promises stamp set – it’s a wonderful new set for sympathy or thinking of you greetings. The greeting is the Labeled with Love punch seen here.
I’ll be sharing lots more new product in the next few weeks. In fact, in my weekly Live video today at 11 am CT I’ll share ALL of the new products I pre-ordered from both the 2026 Spring catalog and the newest Online Exclusives too. Join me here! Don’t forget to follow me so you’ll be notified with I go Live.
This layout is simply one extra ‘diagonal half’ of a 5 1/2″ X 4 1/4″ piece of card stock added to the card front. Easy but has a unique look to it. This could be designer paper or card stock like I did here.
If you’d like the free project sheet click here to print or download it.
Below is the video tutorial I shared last week. It includes a second fun fold card as well.
December Specials:
~~~
Get this product of the month for just $5 with any $75 purchase in December!
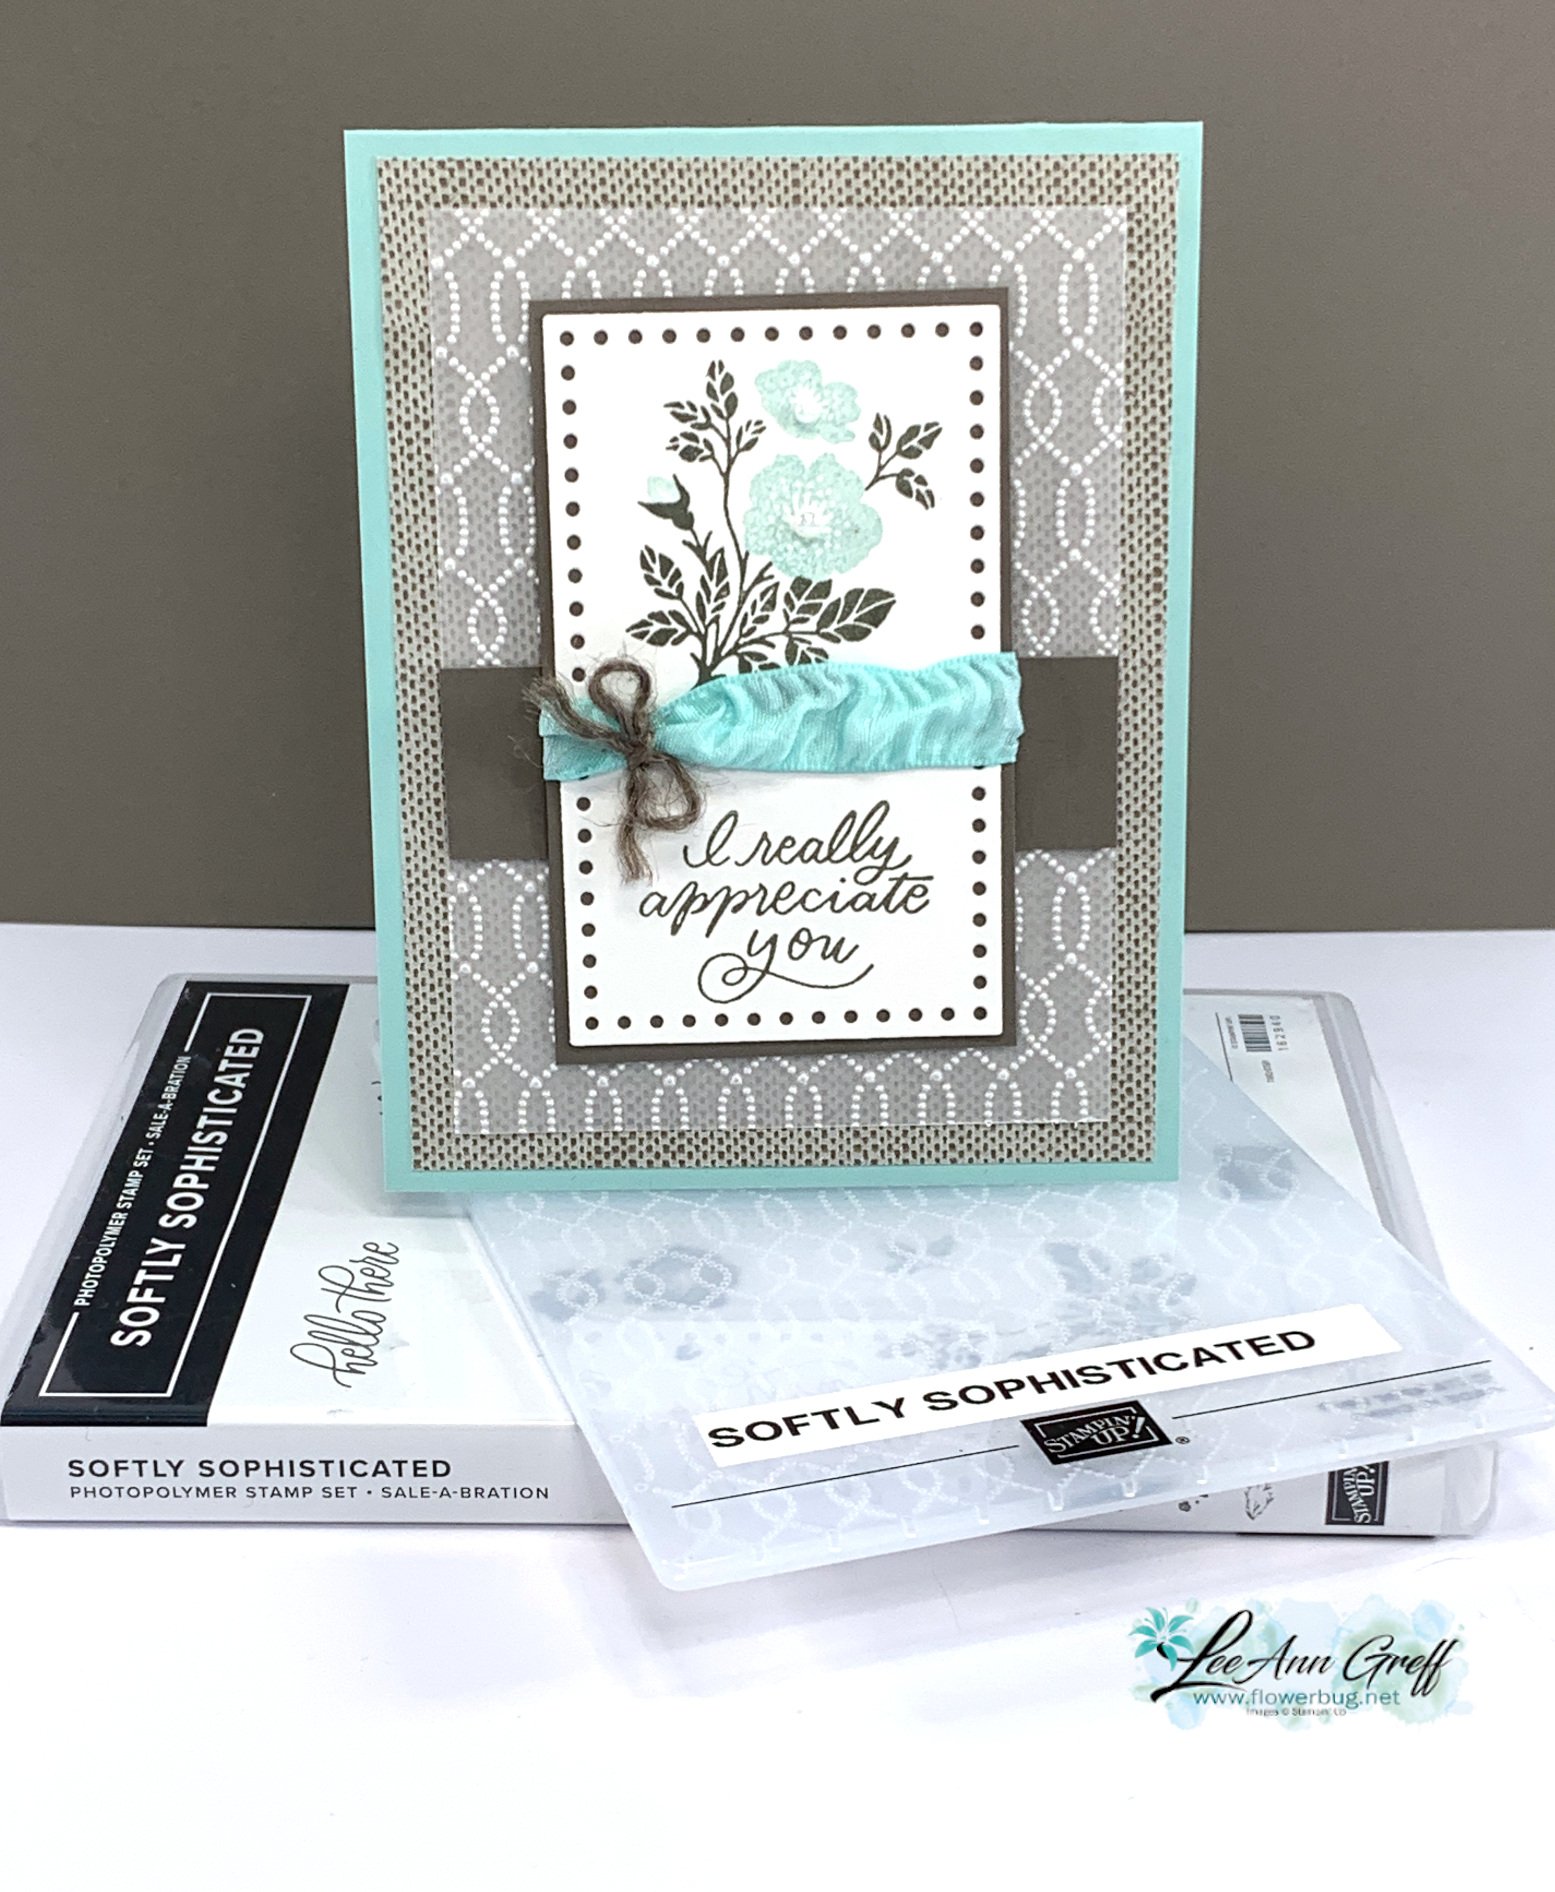
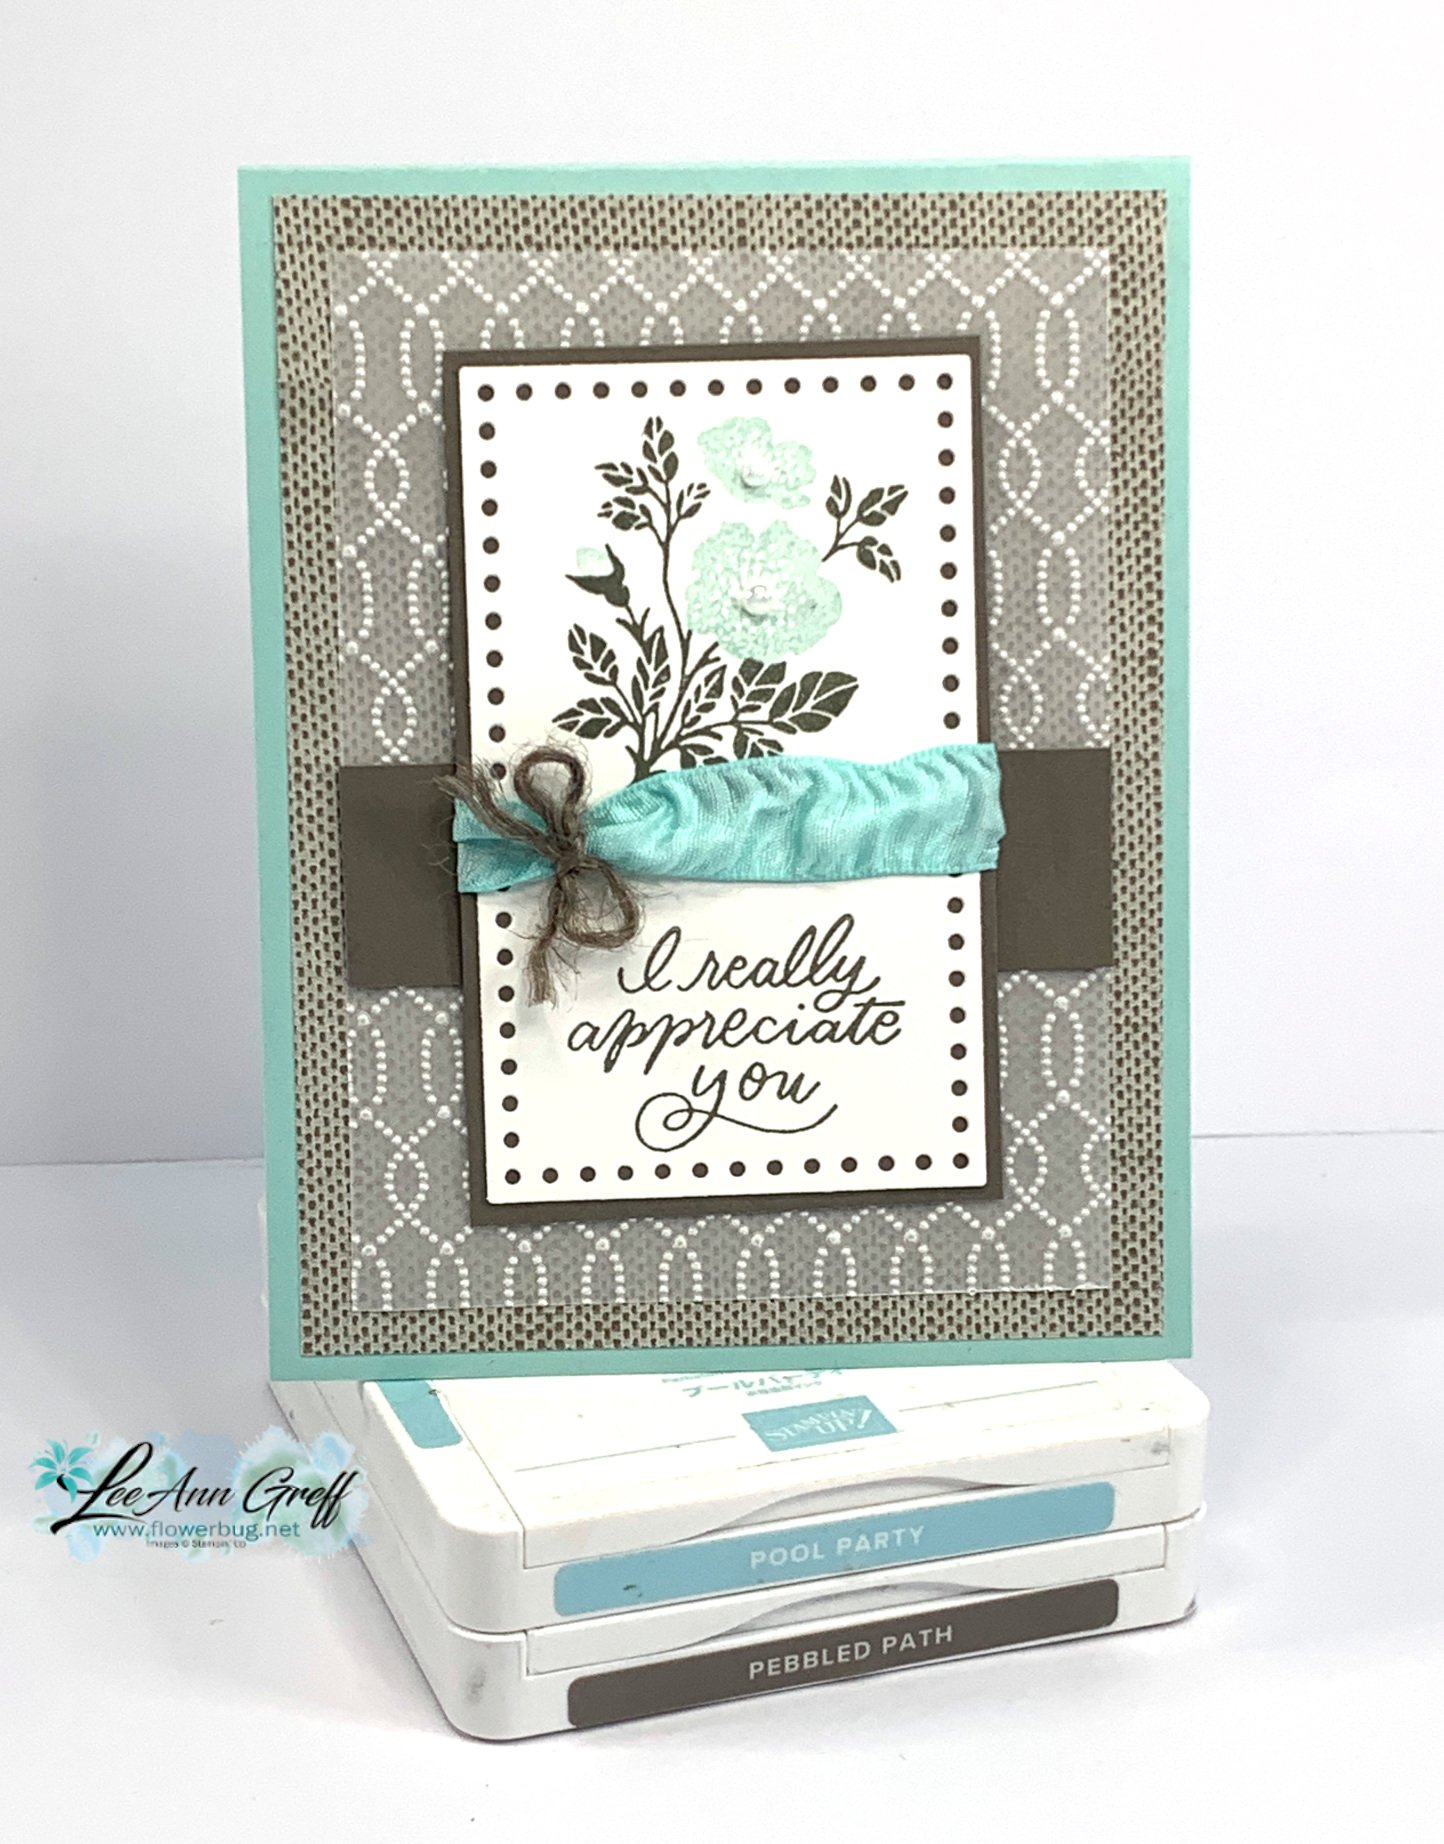
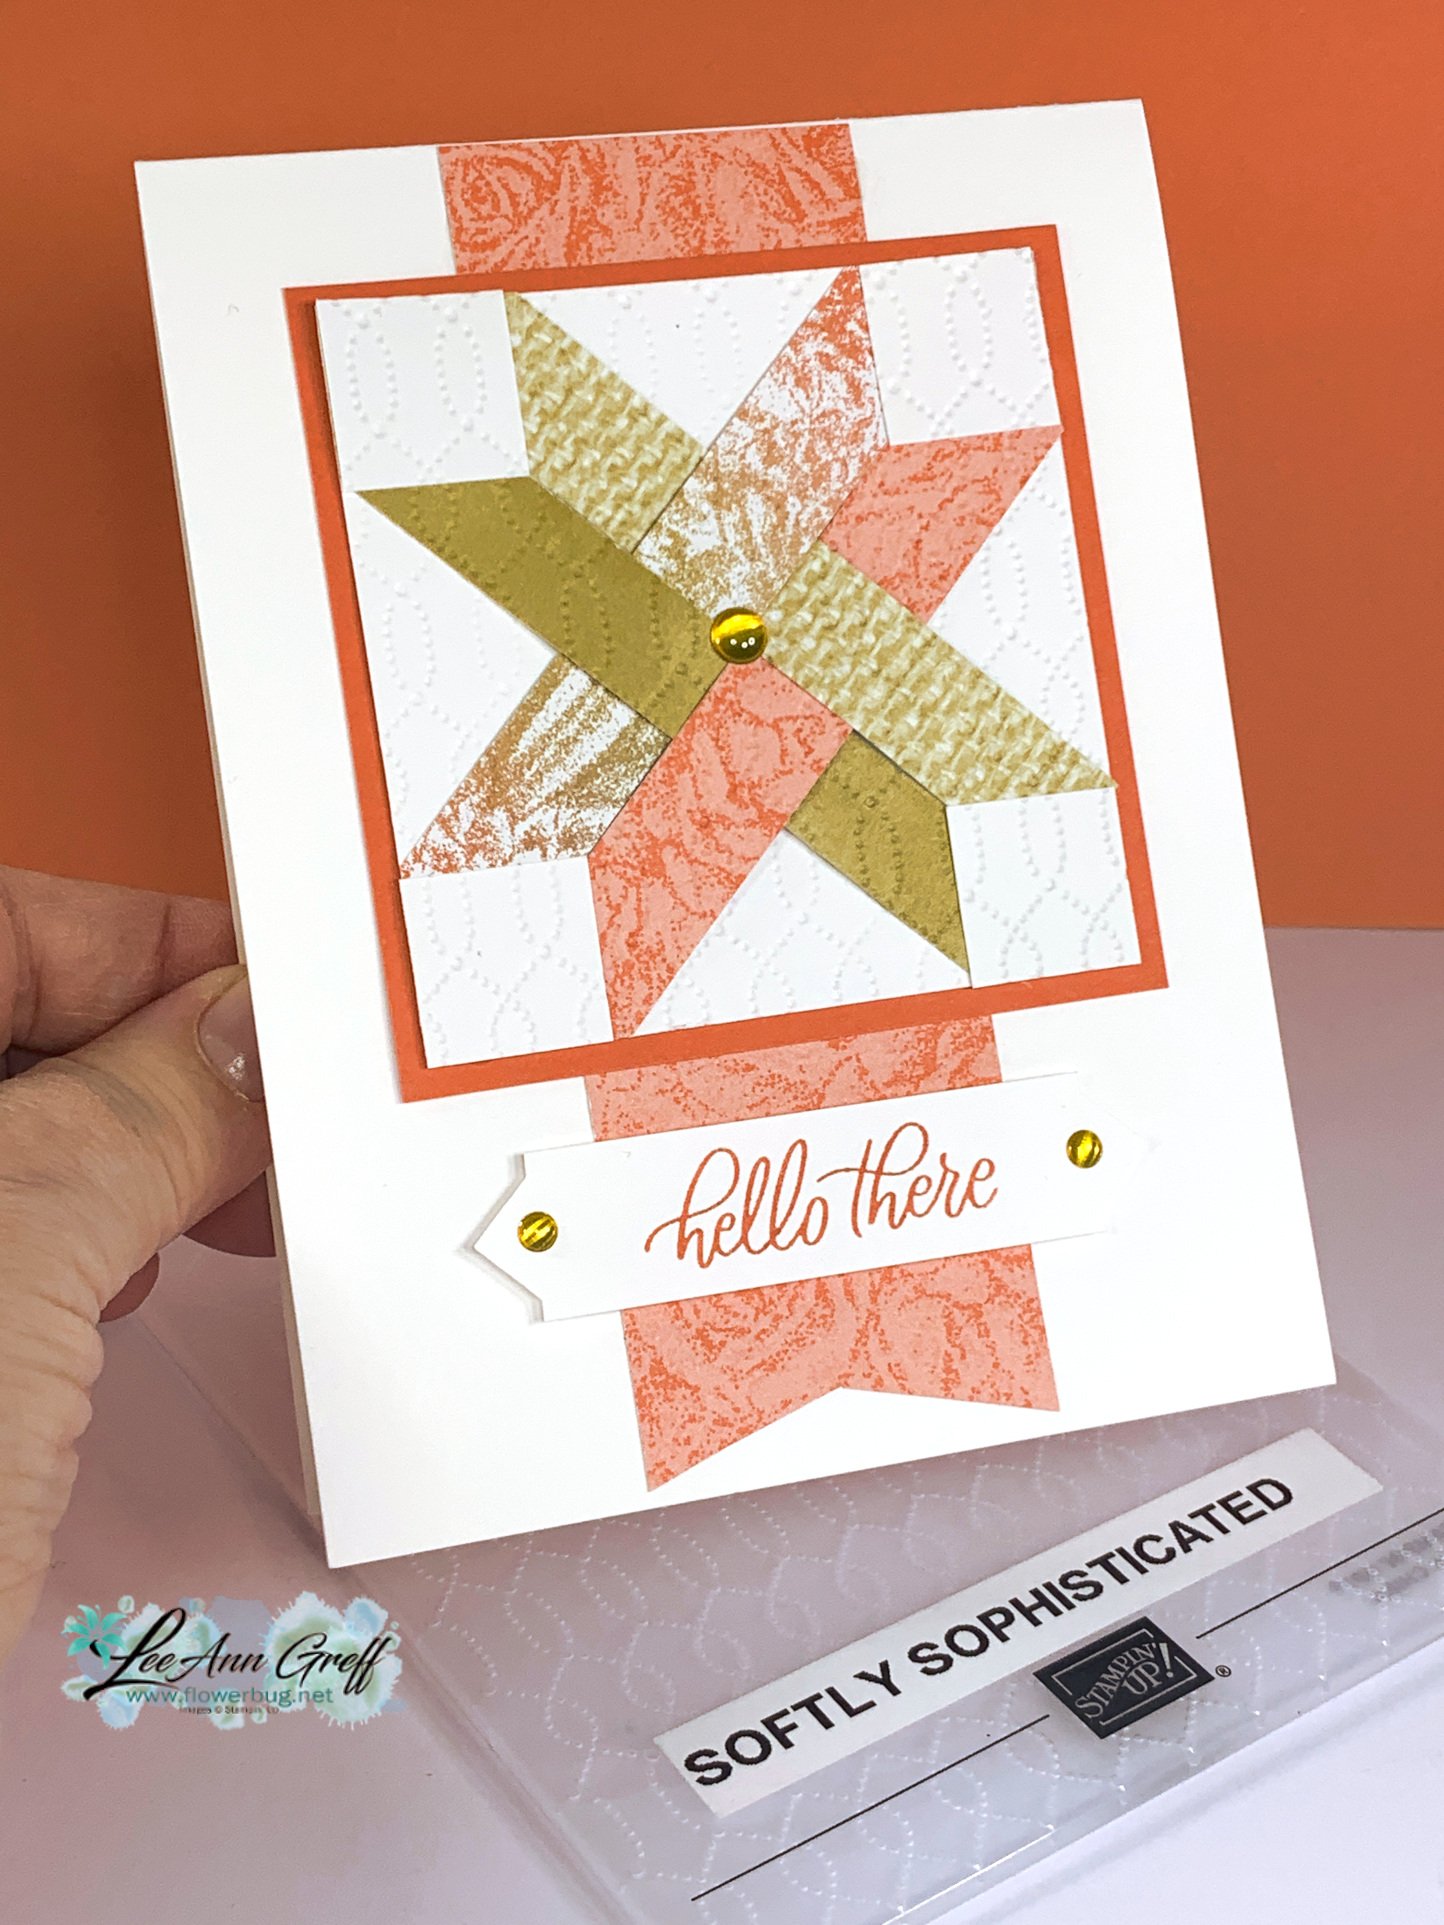
Wow – Texturing Vellum is a fabulous effect! Check out this pretty Softly Sophisticated card
I couldn't stop playing with the Softly Stippled designer paper and the Softly Sophisticated bundle! This card came together by using a sketch layout I saw online.
There are so many neat details on this card; I'll list a few of them.
Check out the textured vellum! It's done with the Softly Sophisticated folder (sale-a-Bration choice). Our vellum cardstock doesn't crack!
The pretty Softly Stippled designer paper seen here in the background adds even more texture.
The dotted rectangle die-cut is from the Everyday Details dies seen here.
Check out the ribbon treatment. I tied a bow around the Pool Party ribbon (Sale-a-Bration choice) with the Pebbled Path jute twine – separated into one strand.
The stamps are from the Softly Sophisticated bundle seen here – gorgeous greetings and 2-step florals.
I've mentioned it before but I'm finding our new Pebbled Path to be a wonderful neutral color with our soft subtle colors. It's brown but with a slight gray tone to it. Lovely!
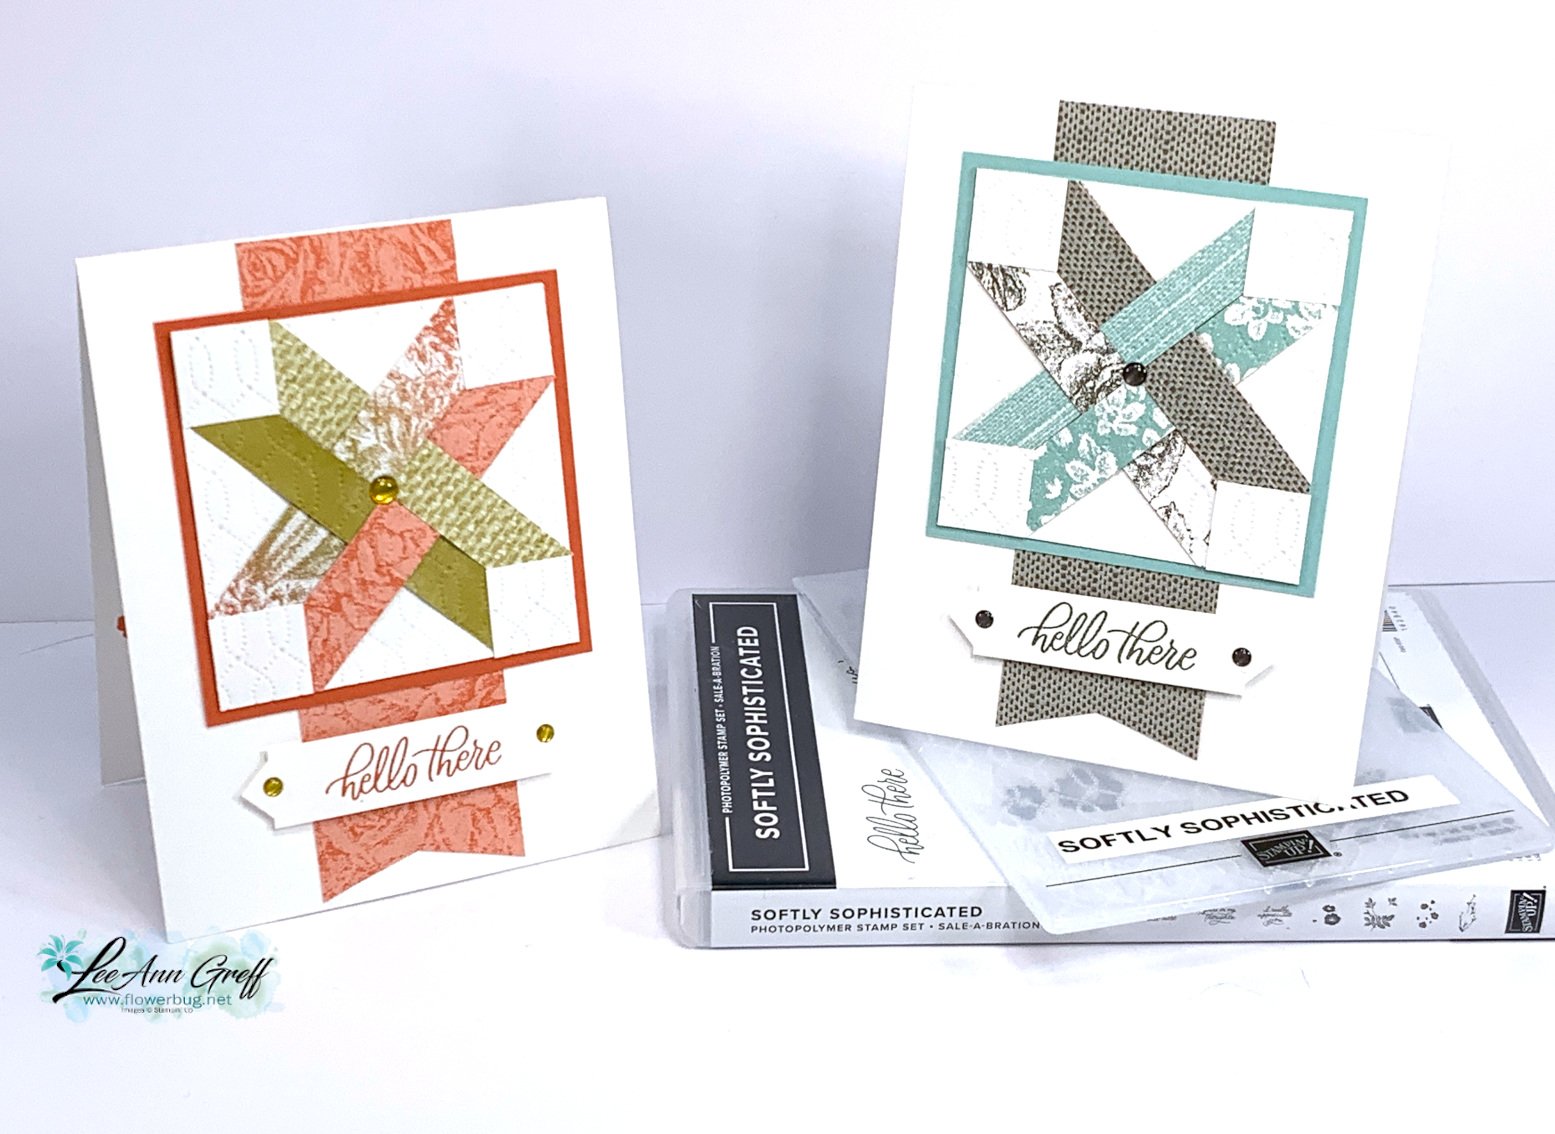
Fabulous & SO Easy ‘Quilted Star’ card with a cool punch trick, a free project sheet & video
One of my team members shared a card like this in our Flowerbug's group and claimed it was so easy she's making lots of these cards. I loved it so much I had to find out how she made it!
I learned how by watching the creators video; her name is Julie Heitz and she goes by the Chirpy Cardmaker. I shared how to make it during last week's Live video.
The products used include the pretty Softly Stippled designer paper from our Sale-a-Bration catalog. It's free with any $50 Stampin' Up! order.See it here.
Colors are Pool Party, White & Pebbled Path. Aren't they beautiful together? Pebbled Path is like a cross between brown & gray; it's a wonderful neutral!
Here's another color combo I tried using the same Softly Stippled designer paper – Calypso Coral with Wild Wheat.
You can see the 'quilting' better on this photo. That is the Softly Sophisticated embossing folder – it's also a free choice in out SAB catalog but is paired with a stamp set (greeting used here) – both are free with a $100 order. See them here.
Creating this quilted star block with paper is super easy. However watching the video helps a lot!
Start by drawing a line from corner to corner on your 3" white card stock square.
Choose 4 strips of designer paper 1/2" X 6". Add two strips to one corner and the other two strips to the corner next to it.
Weave the strips as shown. Then adhere down the opposite ends of each strip to the White square.
Trim off excess.
You might think it would be hard to get those perfect points on your star, right? That was my first thought when I saw this card layout; I'd never get them perfect. Well there's a super easy trick to it!
5. After you add your strips to the white square, trimming off the excess, you'll add four white 3/4" squares to each corner. It creates the points for you! Genius!
6. Run the block through an embossing folder. It helps to 'deboss' it so any stitching is pressed in. When using the Softly Sophisticated folder you'll have the wrong side up on the Stampin' Up! label.
You might notice the unique banner for my greeting. It's created with the Inked & Tiled punch like this:
I start out with a 5/8" white strip and insert the punch in the back of the punch; not the usual place. Wiggle it into the slot and adjust it until it's even and punch. Now you'll start looking at your punches in a new way and likely find some great options for banners! The nice thing is that it doesn't have to be a certain width to work.
Click here or on the photo below to watch my video tutorial on this card and TWO more pretty cards featuring this beautiful designer paper and stamp & embossing folder bundle. The Quilted Star cards are the first cards shown. They loved these project ideas!
~~~
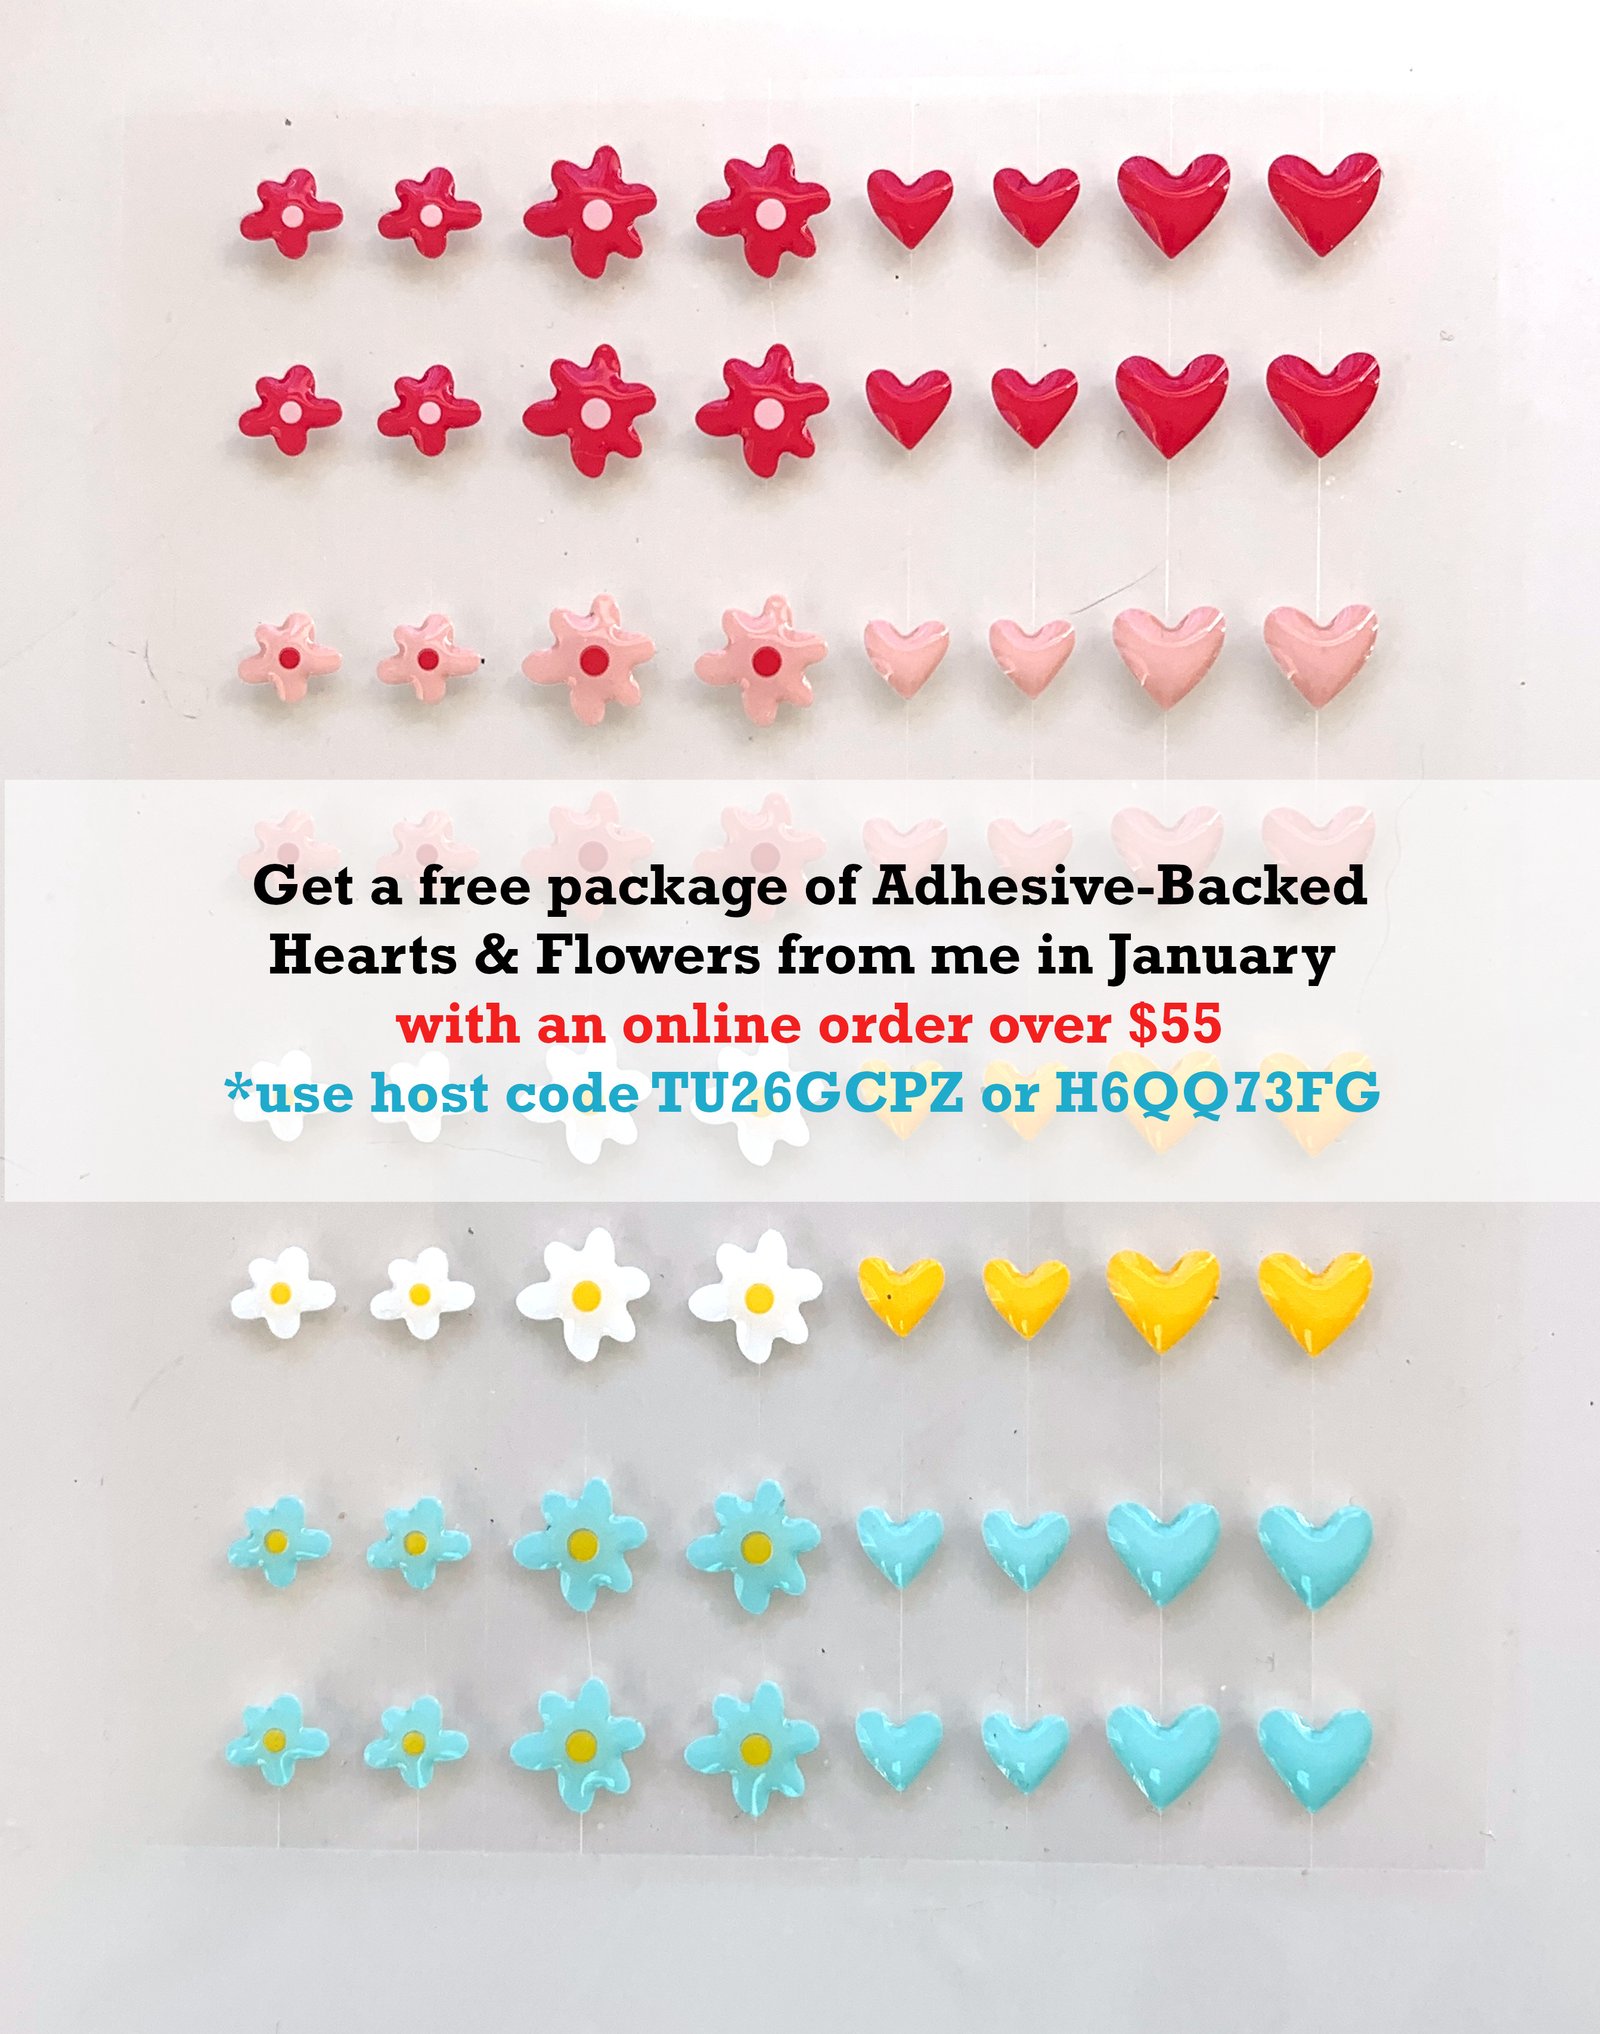
January Specials:
Earn FREE products with your Stampin' Up! purchase during
Notice: LeeAnn Greff, Independent Stampin’ Up! Demonstrator, Manager. The content of this website is my sole responsibility as an independent Stampin’ Up! demonstrator and the use of, and content of, the classes, services, or products offered on this website is not endorsed by Stampin’ Up! Copyright 2025


Leave a Reply