/


Latest Post

Petal Park Sneak Peak from the Spring Catalog


This week I've been sharing some of the cards I made for online swaps I joined.  I hope you're enjoying the sneak peaks! 

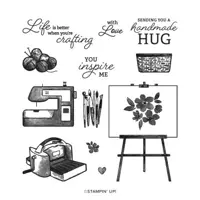
Today I'm sharing a card made with a new stamp & punch bundle called Petal Park.  It includes a new flower trio punch from the Spring catalog. 

I chose to use the new Regency Park 6 X 6" designer paper; that's where I got the color combination of Balmy Blue, Night of Navy and Mango Melody.  I love them together!  

Measurements:

  • The card base is 7 1/2" X 5 1/2".  (I cut off 1" from a traditional 5 1/2" X 8 1/2" card base)
  • The designer paper is 1" X 5 1/4" on the inside right edge.  
  • white panel is 2 3/4" X 3 3/4"
  • Navy is 3" X 4" and the Mango strip is 1" X 4".  
  • The slanted die-cut greeting is from the Something Fancy dies

In the stamp set there are two sets of flowers – solid and outline.  Plus two sets of leave images as well; outline and solid.  I used both of the flower images, stamping them in Mango Melody & Balmy Blue.  Then just the outline leaves for a lighter background.  I did add some of the small dots in Mango all over the flowers & leaves.  

I curled the petals after punching so they had a bit more dimension to them.  I added pearls to the centers.  

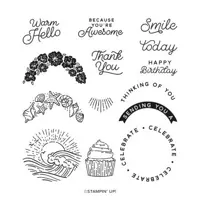
The greetings are from another new stamp set called Kind & Sincere.  It has both large and small greetings so you can mix & match your words.  I love this one!  


Stay tuned for another sneak peak tomorrow!  

~~~

Clearance Rack Refresh!

Last Chance list is here!  

Order online using the link below:

Host code link:  QFTB9AST

Choose a free stamp set with online orders over $55 when using the host code above! 

 Earn free products with my loyalty rewards! 

Click here to download yours and earn a $50 shopping spree!

All Posts

  • Last set of ‘Create your own Background’ swap cards


    Today I'm sharing the last three cards in our July Team card swaps.  I shared the others in this post and this one.  Our theme was to create our own backgrounds; not using designer paper.  They were quite creative!  

    First up today is a cute card made by Candace.  She chose the Little Monkey bundle.  

    Can you tell what her background die-cut is?  She used the Aspen Tree dies for her Crumb Cake layer. But underneath that is a shaving cream technique!  It's fun to make and different every time. 

    Tip: to make a shaving cream background, spray the cream on a plate or container and spread it out.  Drop a few drops of ink refill onto the cream. Swirl it in with a knife or utensil.  Press your paper onto the cream.  Remove and wipe off the excess cream.  Let dry.

    You can usually get a few pieces done in the same batch of colored cream. The first few will be darker and the last will get lighter in hue.  It's really fun.  

    Next is a CUTE card made by Marla featuring the Supremely Awesome stamp set. She stamped the background and colored the images in with Blends markers. 

    Her colors include Real Red, Pebbled Path and Daffodil Delight.  The pizza slices look quite real!  

    ~~~

    Next is a pretty card made by Rita. She used the Cheerful Daisies bundle. 

    It's in Berry Burst, Old Olive and White. She stamped her background using the open daisy image; tone on tone. Then added a large daisy die-cut (sponged) and some leaves from the Bough punch. 

    It's a gatefold card. She scored it 2 3/4" from each long end. *card base is 11" X 4 1/4"

    Here are all of the fabulous 'create your own background' swaps from our July swap.  


     ~~~

    July Specials: 

    Bonus Days!

    Get a $5 coupon for each $50 order you place in July.  Redeem in August!


    Clearance Rack update!

    See all items available here

     NEW Online Exclusives will be available

    See them all here

    ~~~

    Get a free card kit & a new Beautifully Happy stamp set 

    with online orders over $65; must use a host code.

     *current host code: XNYX2DWG

    Leave a Reply

    Your email address will not be published. Required fields are marked *

  • Stamp Sale; TODAY ONLY!


    Today is the day ALL stamps from the Annual Catalog are discounted 15%.

    *this excludes host sets and online exclusives/clearance rack. 

    If you have a wish list of stamps, why not get them on sale today?  

    In September our Holiday catalog will be out and you'll be focused on that (we all do it!).  So get those favorites today!

    I've made a list of my top 15 stamp sets in the Annual catalog.  You can see each one below. 

    *Remember to use my Host code. XNYX2DWG

    PLUS: If your order is over $65 you get both a free stamp set and 8 card kit from me plus a $5 bonus days coupon to use in August!   

    Leave a Reply

    Your email address will not be published. Required fields are marked *

  • 4-Card Wonder – free PDF tutorial, template, measurements & video!


    Before we get to the projects today I want to share the sale Stampin' Up! just announced:


    Check over your wish list and see how many stamp sets are on it.  Might be a good time to place an order. With the Bonus Days happening you can double dip!

    Plus the Trucking Along bundle is back in stock!  See it here; get it while you can.  

    I'm extremely excited & proud to share this project with you.  If you know me well, you know I love to create one sheet wonders. I've made quite a few over the last 10 years or so.  I'm so lucky that my husband is willing to create the templates for me; I'm not sure I'd love them as much without his help!  

    I'm calling this project a 4-Card Wonder because it creates 4 cards.  I originally made this for a Team meeting project. I wanted it to be quick, create multiple cards and of course be easy and cute!  

    I shared this project & template on my weekly Live video but did record it and it's now on my YouTube channel as well. Scroll down to see the video.  

    Here's the template – it's meant for a 1/2 sheet of card stock – 8 1/2" X 5 1/2".  

    Grab your favorite colors of ink and stamp your own background.  Then cut it up using the measurements above!  It's so fun to create your own stamped paper. It's a bit addictive!  

    *Tip – choose stamps that include large & small images. When stamping your paper start with the largest stamps first and finish with the smallest; filling in any empty areas. 

    I chose the Beautiful Balloons bundle.  My colors include Bubble Bath, Berry Burst, Pool Party & Parakeet Party. 


    I kept the cards quite simple but you could sure jazz them up a bit more.  Make the cards like mine or this can be a starting point for your creative process.  

    You can watch the video on this project here.  It's the first project. Or click on the photo down below to watch it below.  *Remember to follow me on either my FB page here (Tuesday Live videos) or my YouTube channel here. 

    Here's the full PDF tutorial for you.  Download it here.

    ~~~

    July Specials: 

    Bonus Days!

    Get a $5 coupon for each $50 order you place in July.  Redeem in August!


    Clearance Rack update!

    See all items available here

     NEW Online Exclusives will be available

    See them all here

    ~~~

    Get a free card kit & a new Beautifully Happy stamp set 

    with online orders over $65; must use a host code.

     *current host code: MY4YDGEM

    Leave a Reply

    Your email address will not be published. Required fields are marked *


Notice: LeeAnn Greff, Independent Stampin’ Up! Demonstrator, Manager. The content of this website is my sole responsibility as an independent Stampin’ Up! demonstrator and the use of, and content of, the classes, services, or products offered on this website is not endorsed by Stampin’ Up! Copyright 2025