/


Latest Post

Peaceful Wishes kit; 20 Christmas cards with envelopes!


Are you sad you missed the beautiful Peaceful Wishes Paper Pumpkin kit?  Well no worries!  I ordered extra refills because I love it so much and am offering this big kit just in time for Christmas. See it here.

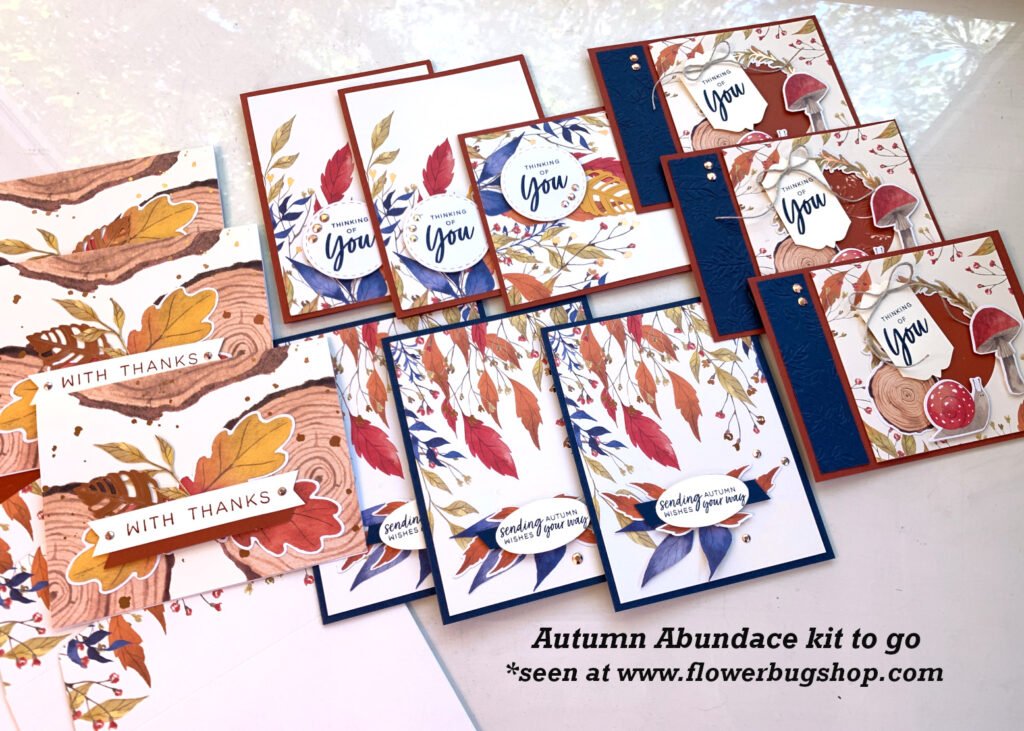
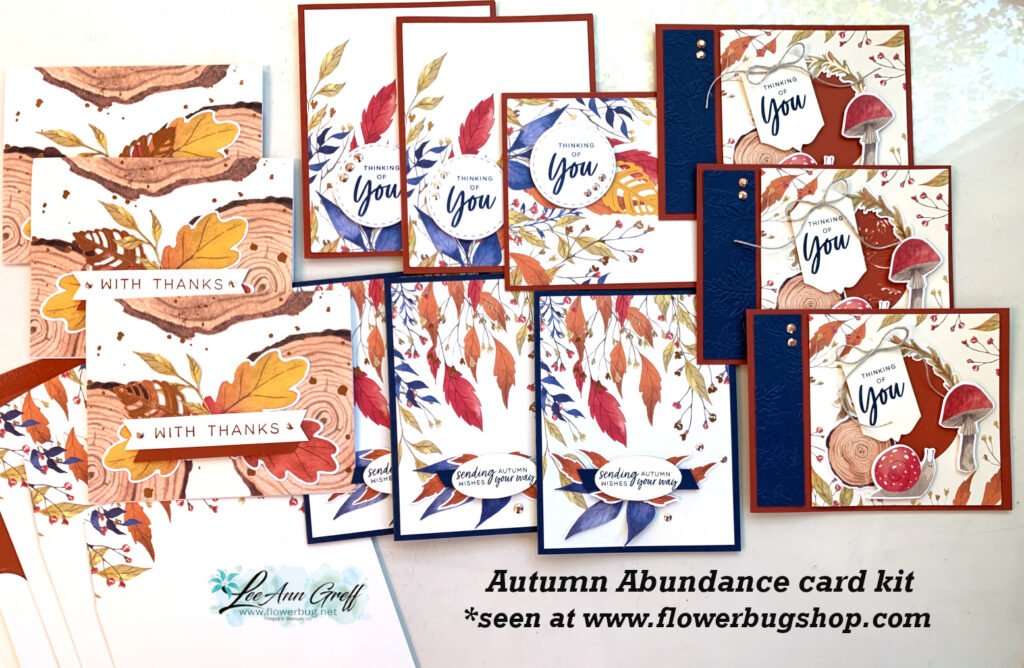
I've jazzed it up to make more cards than ever! The stunning cards are gorgeous and you'll be so proud to send these out this year for Christmas!

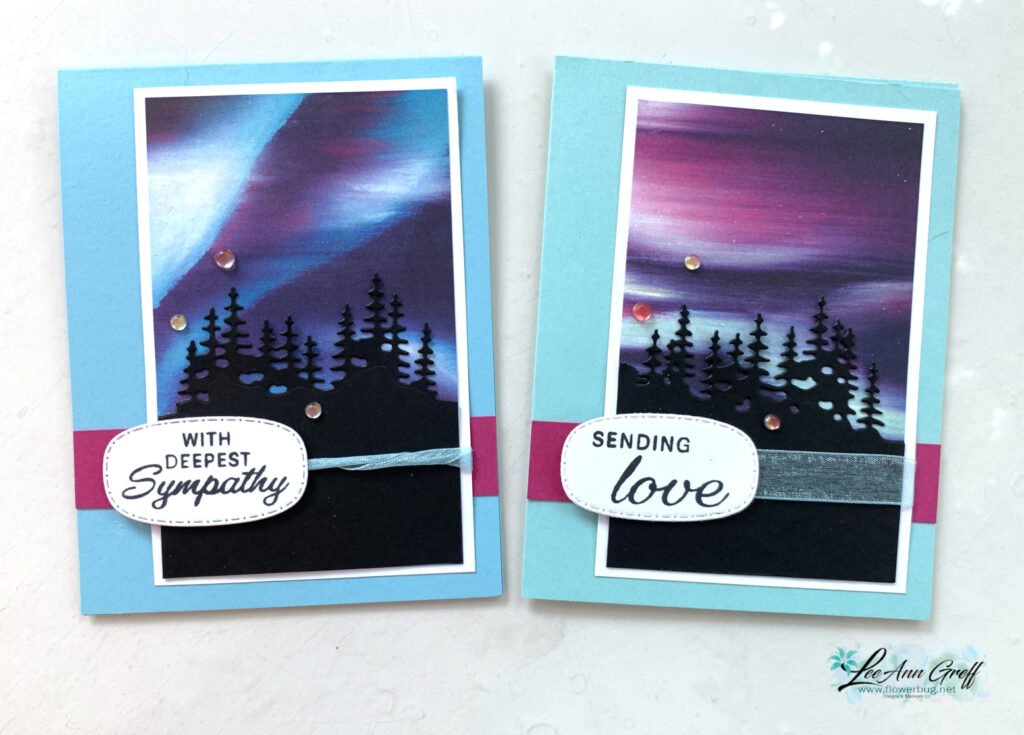
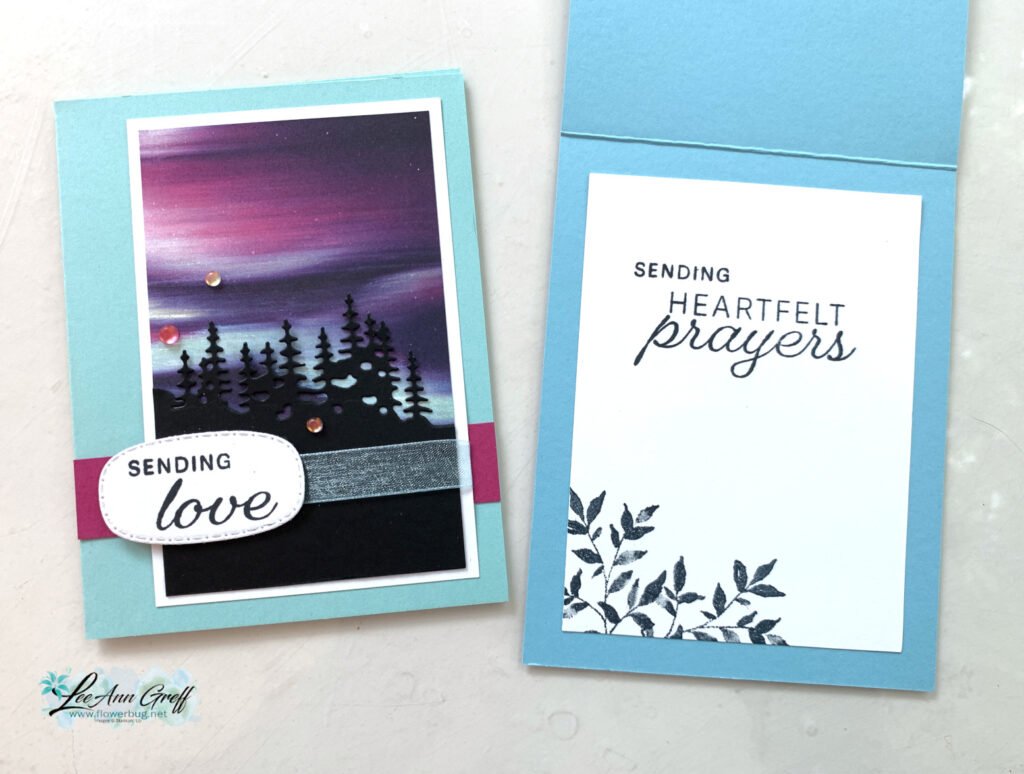
This kit to go includes supplies to make 20 cards with envelopes!  You'll make 5 of each card and you'll receive the beautiful box as well. 

Click here to order yours while supplies last; there's a limited supply! 

You'll receive the PDF tutorial immediately after payment and the kit ships separately from other kits via Priority Mail. 

It's $25 and includes all pre-cut & punched pieces, 20 envelopes (10 green & 10 White), sparkly gems, Dimensionals, mini glue dots, Red Twine & ribbon and the PDF tutorial. It does not include stamped images. 

You will need the following to complete the cards like mine: 

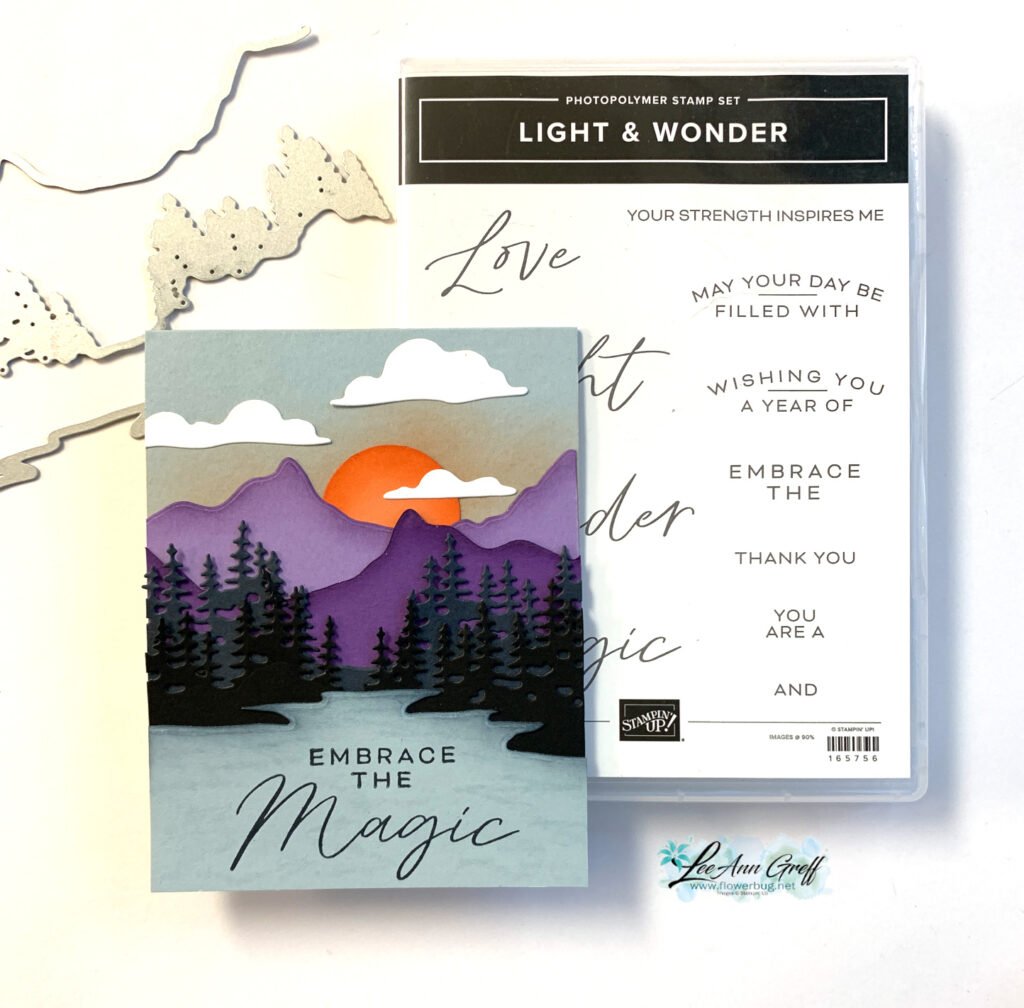
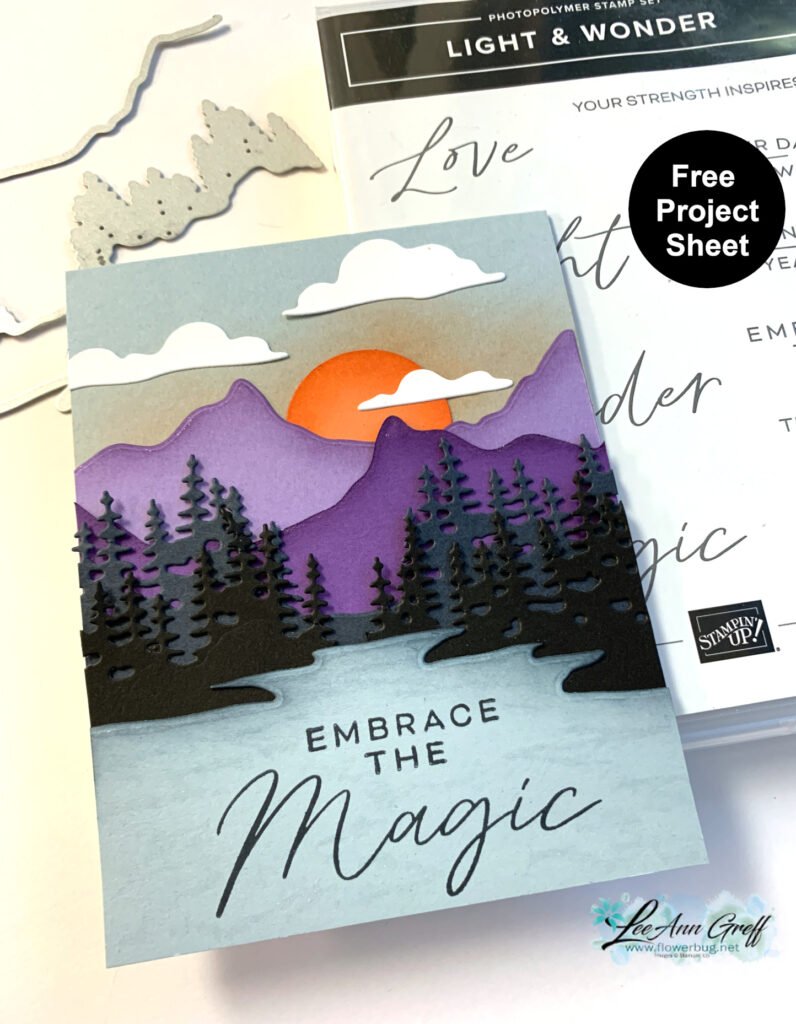
  • Shaded Spruce & Black ink & Christmas greeting images
  • adhesive, a paper trimmer, Red, colored or clear rhinestones 

I used the Heartfelt Wishes & stamps in the original PP kit on my cards but I'm sure you have greeting you can easily substitute. 

~~~

Host codes: EXBDBRGY or RY3EDVMZ

*click here to order

Online orders over $50 get a pre-cut card kit of 4 cards & PDF tutorial.
*Orders over $80 will receive the card kit PLUS 24 Iridescent snowflakes!

All online orders will receive my Eden's Garden PDF 22 project tutorial free! 

Get any of the tutorials or kits to go below in my Kit & Tutorial shop here:

Gingerbread & Peppermint Kit or Tutorial:

Eden's Garden Kit or tutorial 


Christmas cards stamp a stack; limited supply! 

All Posts

  • Cheers & Sips card with the Everyday Arches dies; video & free project sheet too!


    A simple fun fold with the Everyday Arches dies and the Cheers & Sips suite.  

    I fussy cut the two drinks from the designer paper for the front arch.  The inside arch has the drink, umbrella and greeting stamped from the images in the set.  The card base is Old Olive and scored at 2 1/8" & 4 1/4". To get the arches lined up I encourage you to adhere the inside arch first and then close the card.  Now adhere the front arch to match. Easy! 

    There's a free project sheet I created for you here. Click on the following link to print or download it.  Download Cheers & Sips Celebratory card

    The Cheers & Sips bundle is unavailable right now; but should be back in stock any day now. Click here to see it.  

    Below is the video for this card and TWO more with this neat bundle and the coordinating Celebratory Sips DSP seen here.   I love this colorful & unique paper; it's something completely different! 

    Click below to watch the video for this and two other cards! 

    ~~~

    July Specials:

    New Online Exclusives are here!  

    ~~~

    Last Chance List has been updated!  see it all here. Don't miss out on the deals!

    ~~~

    Get my Turtle-y Cute PDF tutorial free with any online order in July!

    Leave a Reply

    Your email address will not be published. Required fields are marked *

  • Super neat fun fold card that’s easy with my tips! Free project sheet & video tutorial


    You're going to love this neat fun fold card I'm sharing today.  

    It doesn't look like much of a fun fold card does it? Look a bit closer to the right pink flap on this card; see how it's sticking up a bit at the bottom? That's where it opens.  

    I featured the Sentimental Framing stamp set seen here on the pretty greeting here. 

    The layered circles are from the Spotlight on Nature dies and the 2 3/8" circle punch. The leaf die-cut is from the Gallery Blooms dies. My colors include Bubble Bath with Mossy Meadow & Blackberry Bliss.  

    Here's how it opens. The horizontal strip holds the right side of the card base closed with a type of 'latch'.  

    I hope you watch the video below to see how easy this fold is.  

    Here's the free project sheet with measurements & a supplies list: Download Sentimental Framing latch fold card

    Below is the video for this card and TWO more with this neat bundle and the coordinating Celebratory Sips DSP seen here.   I love this colorful & unique paper; it's something completely different! 

    Click below to watch the video for this and two other cards! 

    ~~~

    July Specials:

    New Online Exclusives are here!  

    ~~~

    Last Chance List has been updated!  see it all here. Don't miss out on the deals!

    ~~~

    Get my Turtle-y Cute PDF tutorial free with any online order in July!

    Leave a Reply

    Your email address will not be published. Required fields are marked *

  • 3 Stamping Tips you need to know!


    I thought I'd share some of my favorite tips with you today.  

    • how to use a ruler – some people find this extremely challenging
    • standard card sizes and layers
    • which ink to use when coloring with markers

    First up is the ruler and card measurements.  Understanding measurements can make card making so much easier!

    I hope the above graphic helps you when you're creating a card. Save it or print it out. 

    ~~~

    Next I have a helpful photo for coloring your stamped images.  It's very important to use the correct ink to prevent smearing as you color. 

    I do also want to share a few more tips for coloring:

    • Use Stazon ink when coloring with colored pencils, blender pens, water painters or when picking up our Classic ink from your ink pad.

    ~~~

    Lastly is a list of the three types of stamps Stampin' Up! offers.  It might be hard to read so I'll share the details in this list:

    1. Photopolymer stamps are entirely transparent and adhere to your clear block. They're flexible and easy to use; especially with 2-step use.  
    2. Clink stamps are made of high-quality rubber. They cling like crazy to our clear blocks. 
    3. Distinktive stamps are a photo-realistic image with a special texture that give added depth and dimension with a single stamp. 

    *I hope one or more of these tips help you.  Let me know which one or two you learned from today.  

    ~~~

    July Specials:

    New Online Exclusives are here!  

    ~~~

    Last Chance List has been updated!  see it all here. Don't miss out on the deals!

    ~~~

    Get my Turtle-y Cute PDF tutorial free with any online order in July!

    Leave a Reply

    Your email address will not be published. Required fields are marked *


Notice: LeeAnn Greff, Independent Stampin’ Up! Demonstrator, Manager. The content of this website is my sole responsibility as an independent Stampin’ Up! demonstrator and the use of, and content of, the classes, services, or products offered on this website is not endorsed by Stampin’ Up! Copyright 2025