I used the Heartwarming Hugs designer paper seen here) and the Encircled in Warmth & Christmas Season bundle.
It's made from a 5 1/4" X 12" piece of designer paper; score it every 4". Trim off one angle for the pocket and adhere it to a 4 1/4" X 5 1/2" card base.
Inside I added a 4 3/4" X 3 1/2" piece of White CS that I textured with the Star-Crossed embossing folder. I decorated the front & inside with stamped & die-cut images from the Christmas Season bundle seen here.
Depending on how you decorate this card it can be quite easy to make! Below is the video for this one & 2 more gift card options. I'll share details on another tomorrow.
She heat embossed the gingerbread outline on Pecan Pie card stock and die-cut it with the coordinating die. She also stamped the hat and scarf images with heat embossing too. Love the sheet-pan effect the Silver Foil paper gives here! So cute!
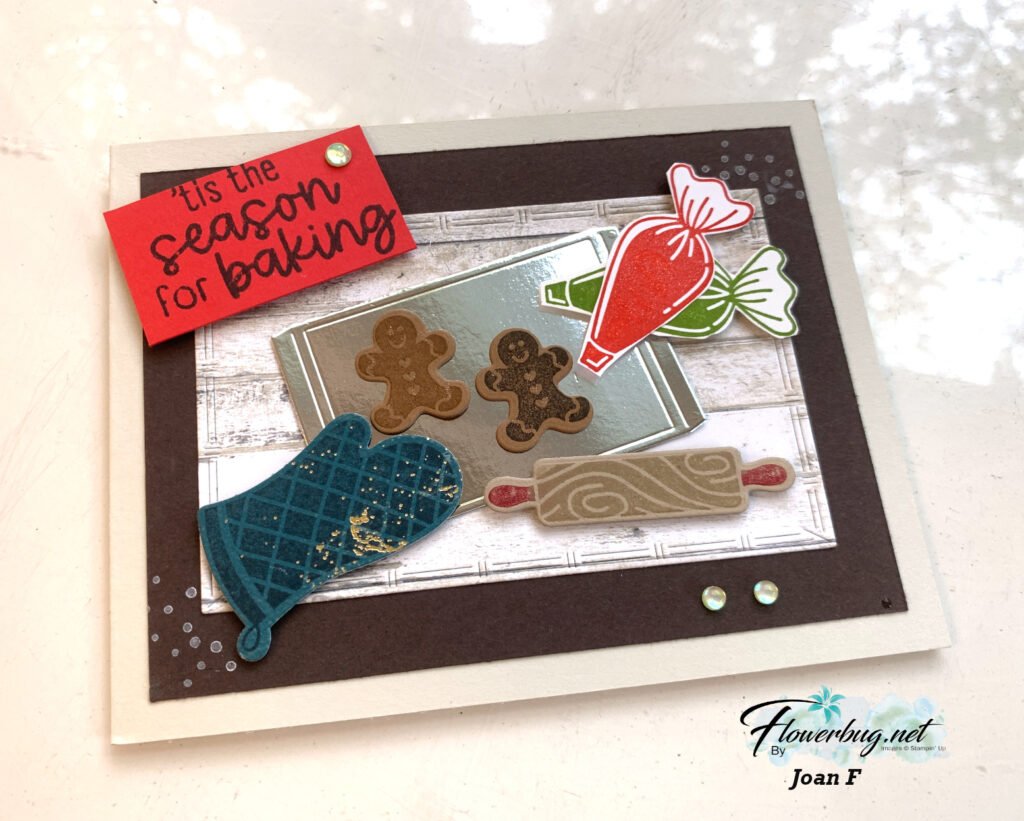
Next is an adorable card made by Joan who featured the Homemade Treats bundle seen here. Another sheet pan with gingerbread on it! So cute.
Her colors include Basic Beige, Real Red, Silver, Early Espresso & Pecan Pie. Each of the elements are stamps & coordinating dies from this cute Homemade Treats bundle seen here.
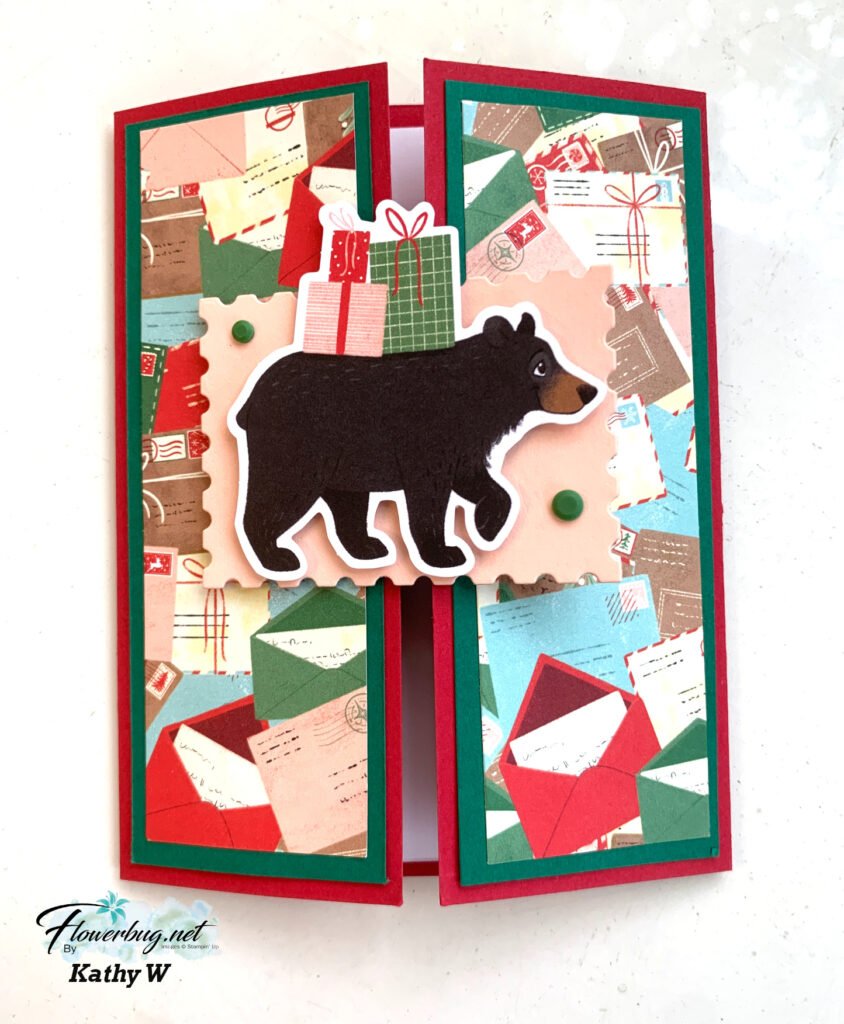
The next card is made by Kathy who used the North Pole Delivery designer series paper for this gatefold card:
And get the Starter kit here.*Choose your deal – $35 or $99 plus $90 in free products including free shipping, free Paper Pumpkin kit & free catalogs/business supplies!
~~~
All online orders from me will receive a beautiful PDF of projects featuring the Modern Christmas suite.
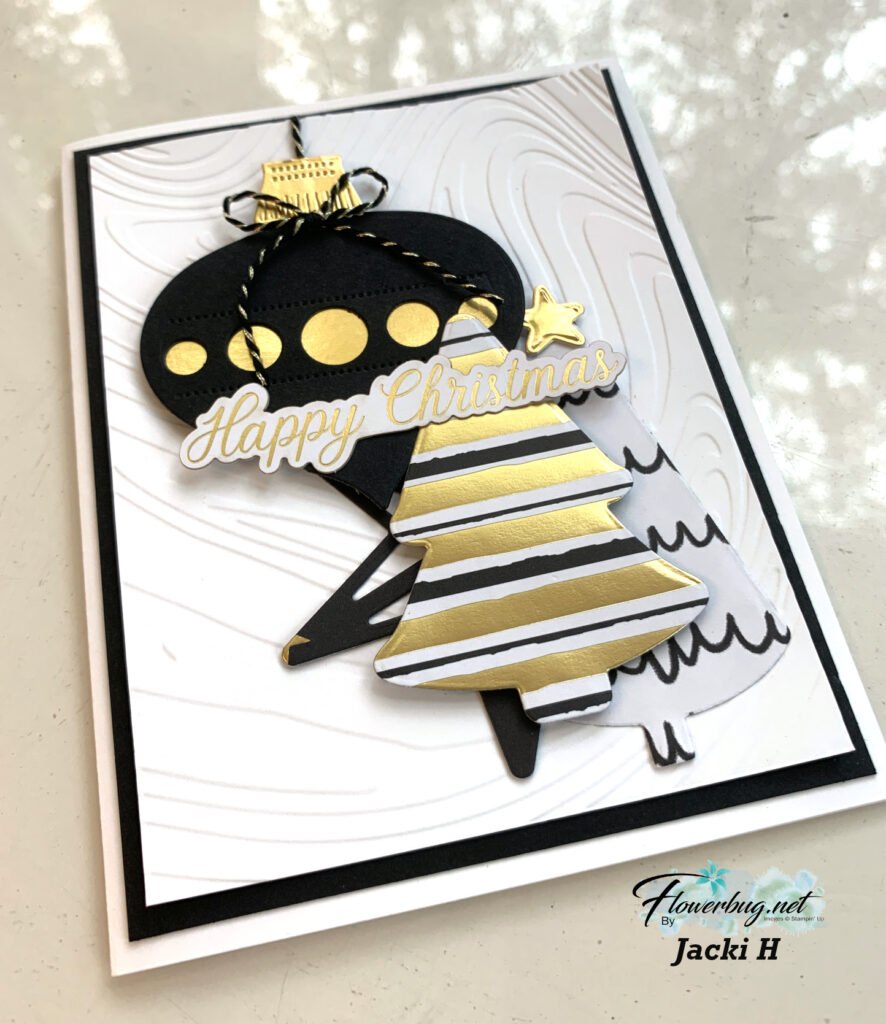
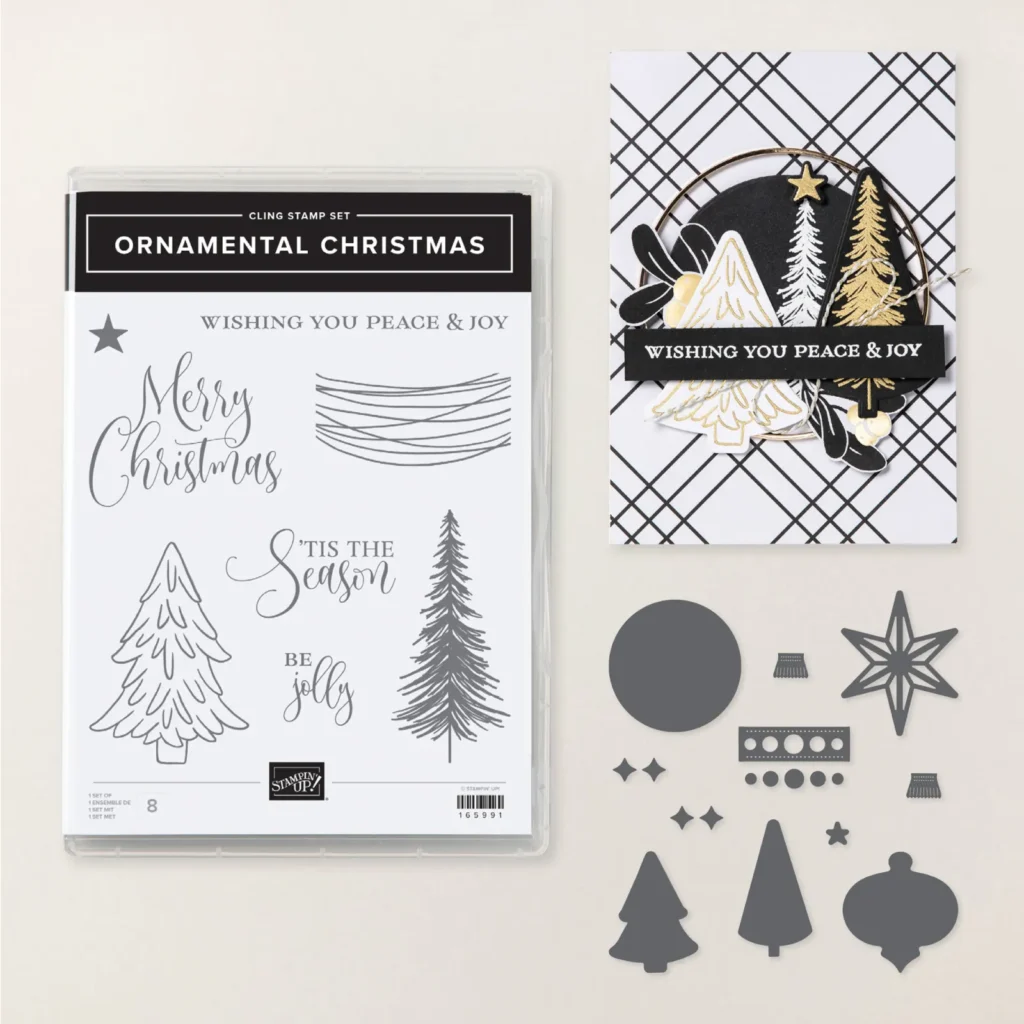
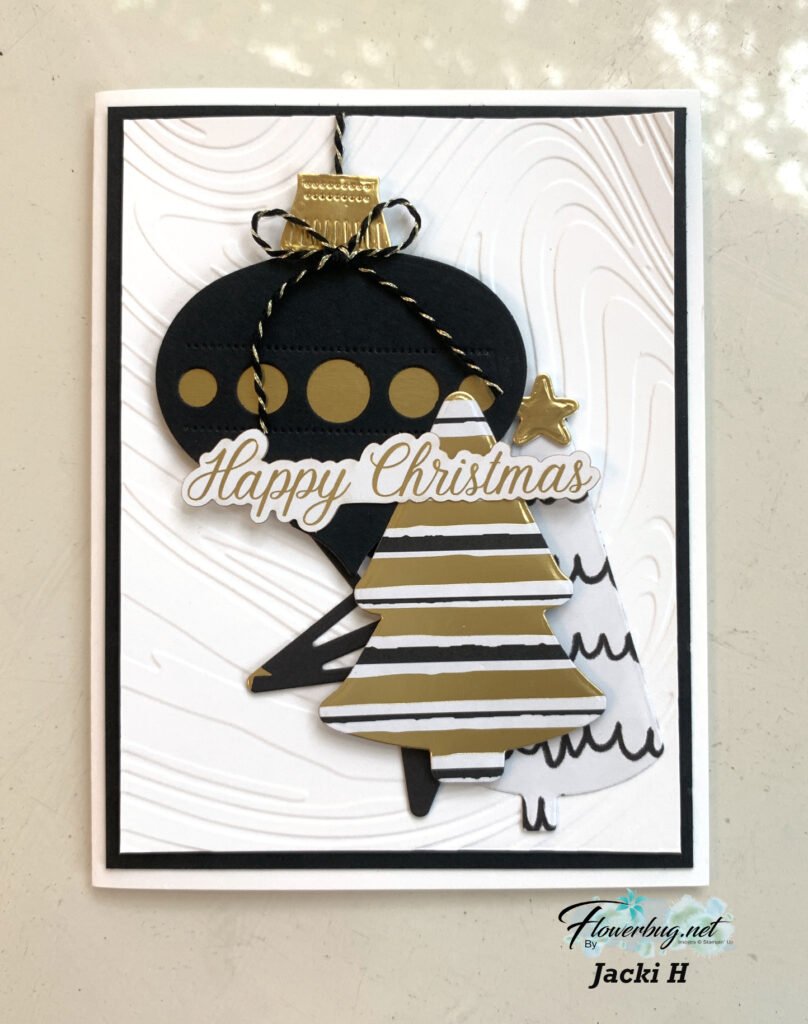
Today I have a gorgeous Christmas card idea from our October Team swap. Each month my Flowerbug’s swap cards with a chosen theme. This first card was made by Jacki who chose the Modern Christmas suite.
Her colors include White, Black and Gold foil accents as indicated by the gorgeous Modern Christmas designer paper seen here. If you love it I have a pre-cut card kit or PDF tutorial you can opt in for too. And it’s also my free tutorial of the month for any online order.
The embossing folder is the So Swirly 3D and her greeting is from the Greetings for You Mix & Match ephemeraseen here. This pack of greetings has 6 sheets of gold foil printed greetings!
And get the Starter kit here.*Choose your deal – $35 or $99 plus $90 in free products including free shipping, free Paper Pumpkin kit & free catalogs/business supplies!
~~~
All online orders from me will receive a beautiful PDF of projects featuring the Modern Christmas suite.
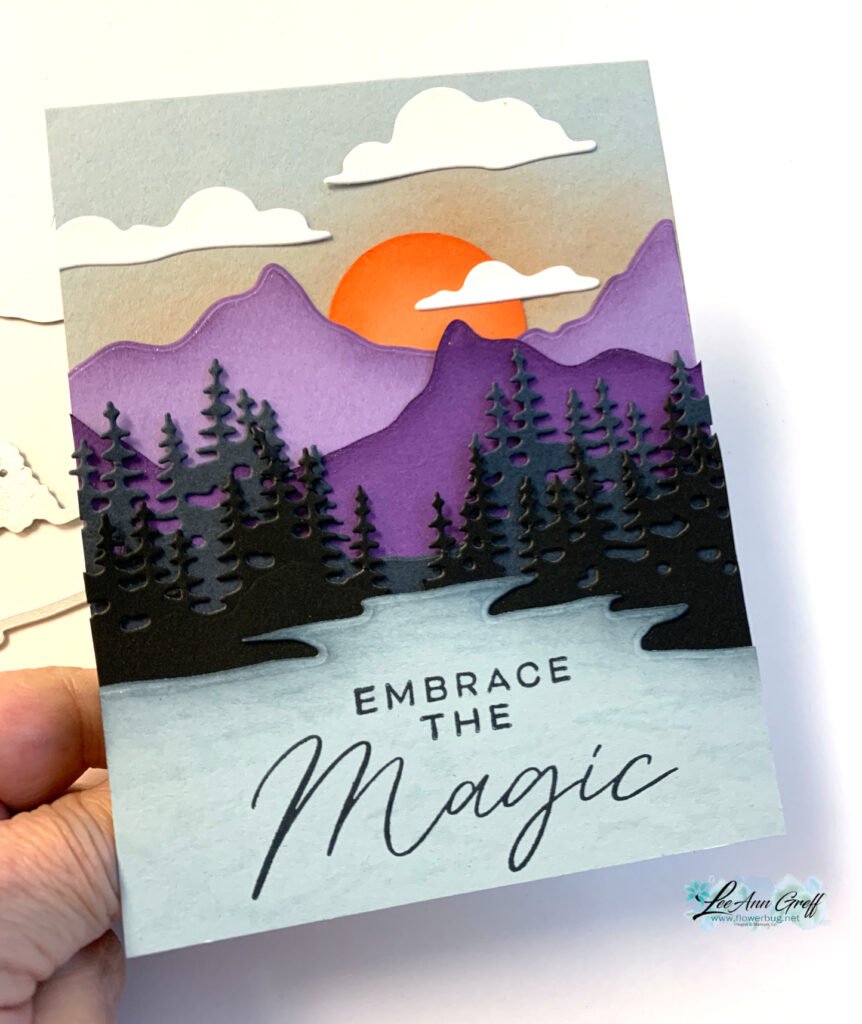
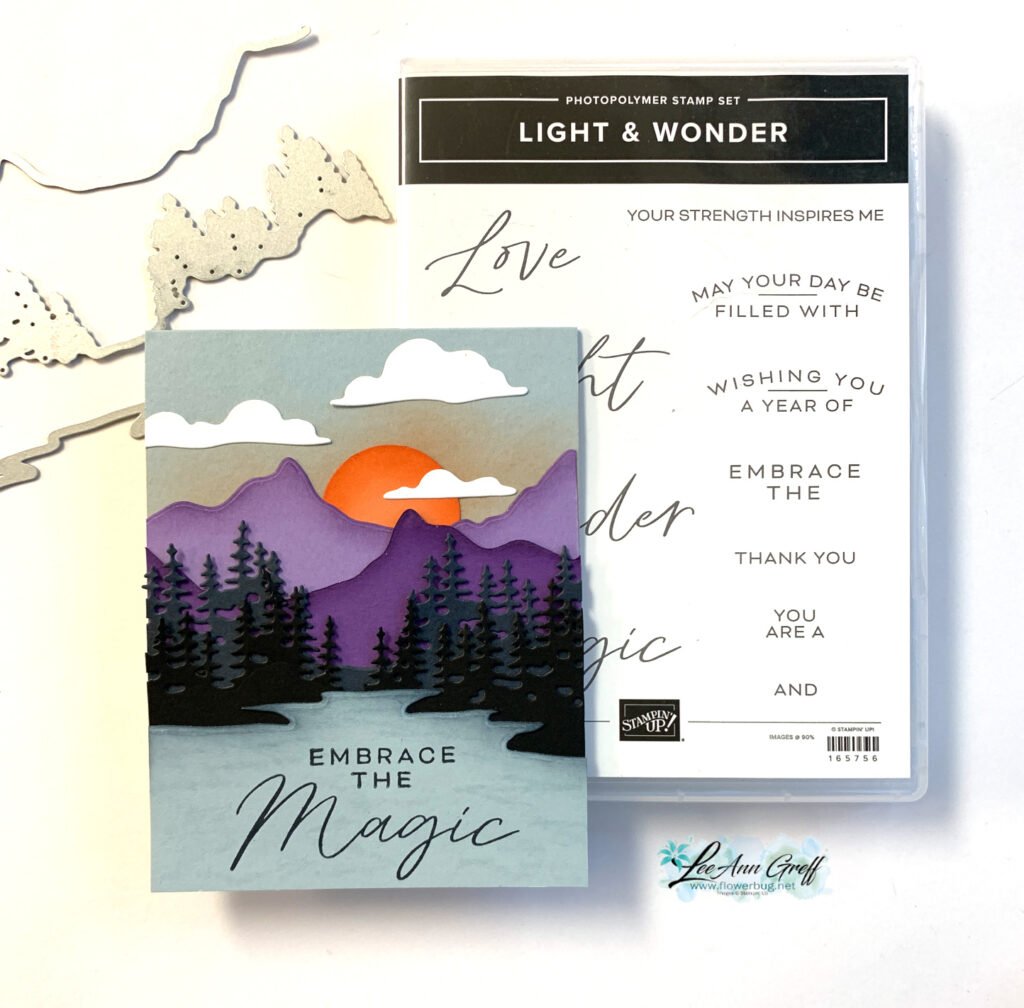
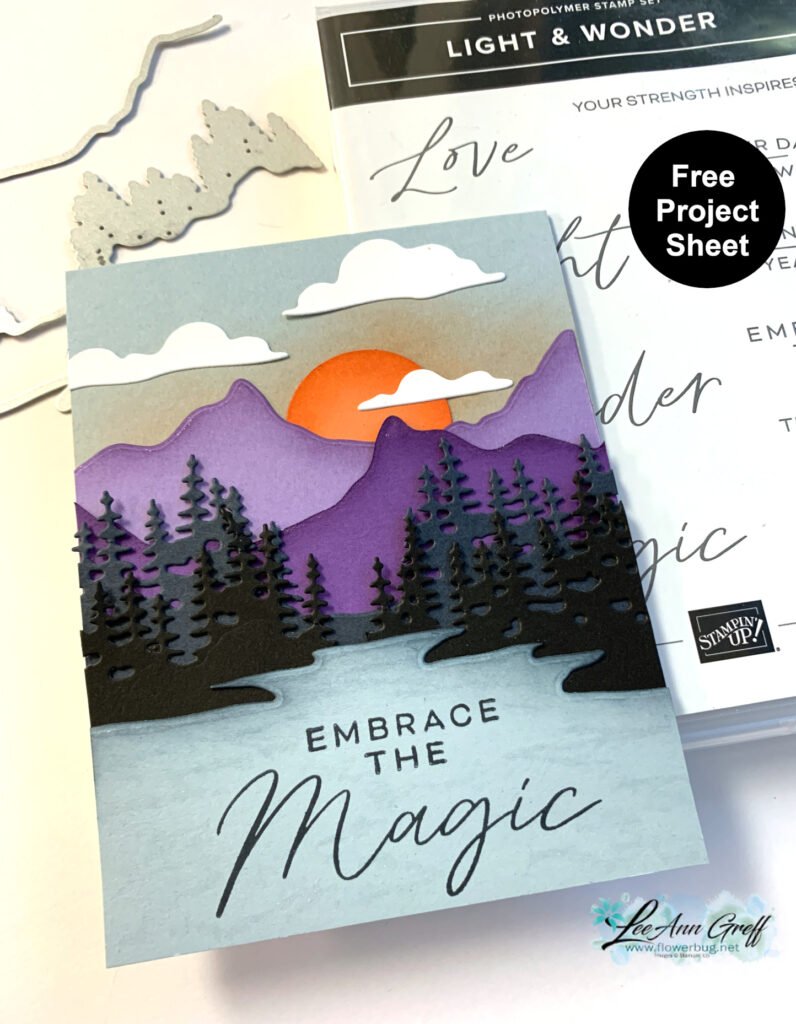
My colors include Cloud Cover, Black, Misty Moonlight, Gorgeous Grape, Highland Heather, White & Timid Tiger. Inks are Highland Heather, Cloud Cover, Black & Timid Tiger.
It’s made with the Light & Wonder bundle seen here. The dies are amazing at creating scenes! Look at the layered mountains, trees and that water die-cut! Sponging makes a big difference! I sponged the top of the mountains with purple ink, the water with Cloud Cover ink and the sun with Timid Tiger ink.
Tip: Can you see the ‘water lines’ I created with a Wink of Stella pen? So cool!
I got the layout idea for this card from Amanda Mertz on Pinterest but changed it up a bit. I love creating scenes and when I saw this suite it was an absolute must have for me. See it here.
And get the Starter kit here.*Choose your deal – $35 or $99 plus $90 in free products including free shipping, free Paper Pumpkin kit & free catalogs/business supplies!
~~~
All online orders from me will receive a beautiful PDF of projects featuring the Modern Christmas suite.
Notice: LeeAnn Greff, Independent Stampin’ Up! Demonstrator, Manager. The content of this website is my sole responsibility as an independent Stampin’ Up! demonstrator and the use of, and content of, the classes, services, or products offered on this website is not endorsed by Stampin’ Up! Copyright 2025


Leave a Reply