/


Latest Post

The last of the Beautiful Fun Fold card swaps


This is the last bunch of Fun Fold cards this week; each one has been made by my talented Flowerbug's Team.  

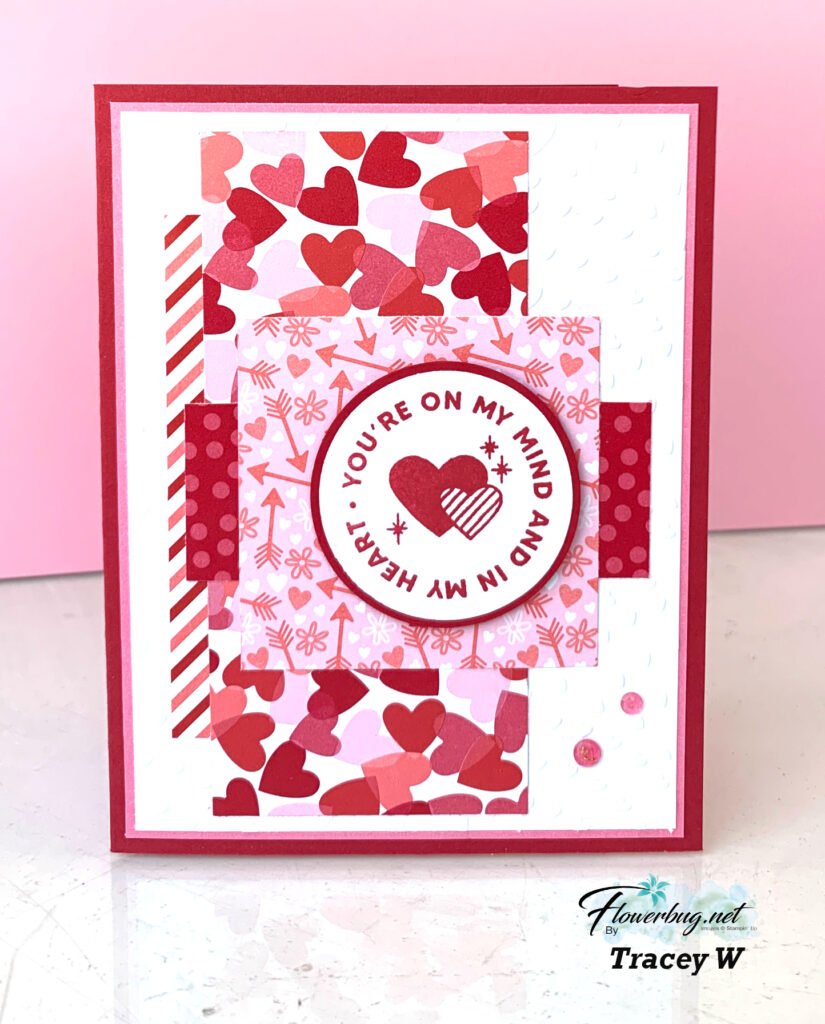
Sue made this pretty and unique card using the Positive Thought stamp set. 

She is super creative and loves to create her own ideas.  Look at this unique card!

She used the Positive Thoughts stamp set and the Cross of Hope dies (on sale right now for just $10.80; they were $27.00!)

Measurements:

  • Petal Pink – 5 1/2" X 4 1/4"
  • Blackberry Bliss 6 3/4" X 5 3/4" scored at 4"
  • Whisper White – 7 1/2" X 5" scored at 3 5/8"

Next is Karen's pretty card featuring the Magnolia Blooms stamp set and the Magnolia Lane designer paper.  This pretty paper is also on sale; at $8.05 right now while supplies last here.  She colored the flower in with the Petal Pink blends markers. 

Measurements:

  • Petal Pink 4 1/4" X 11" scored at 2 3/4" and 5 1/2", small layer is 3 1/4" square
  • White inside is 4" X 5 1/4", front is 2 3/4" square
  • Black is 3" square 

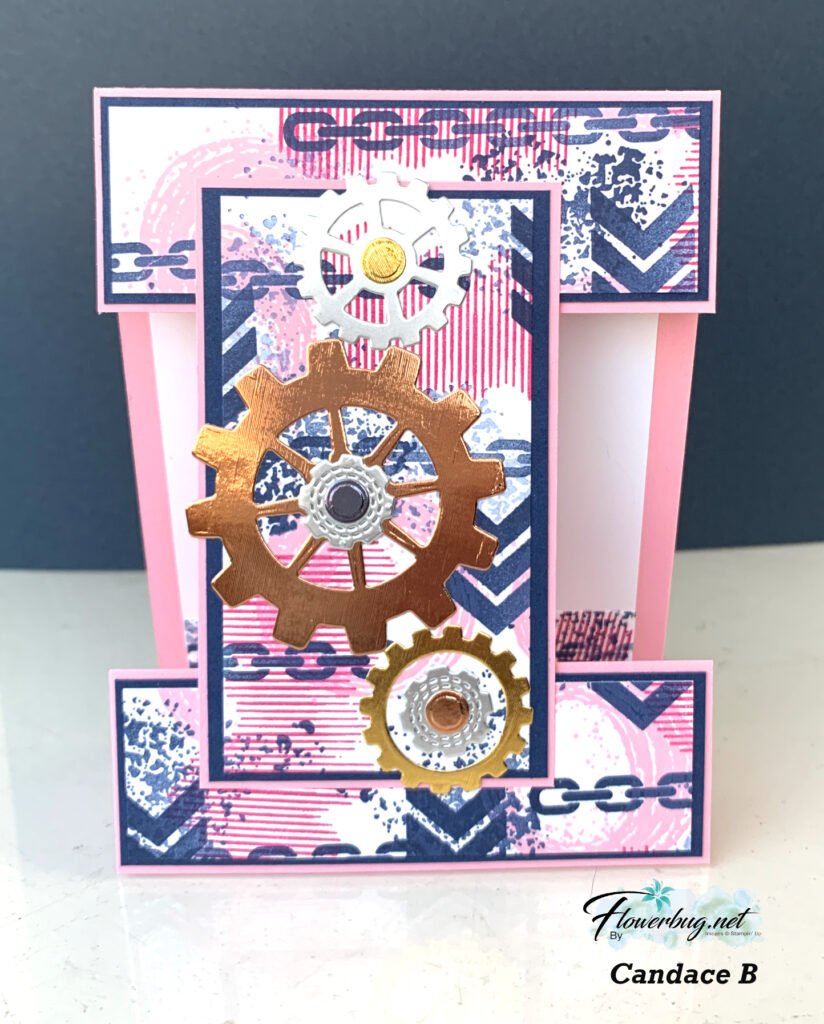
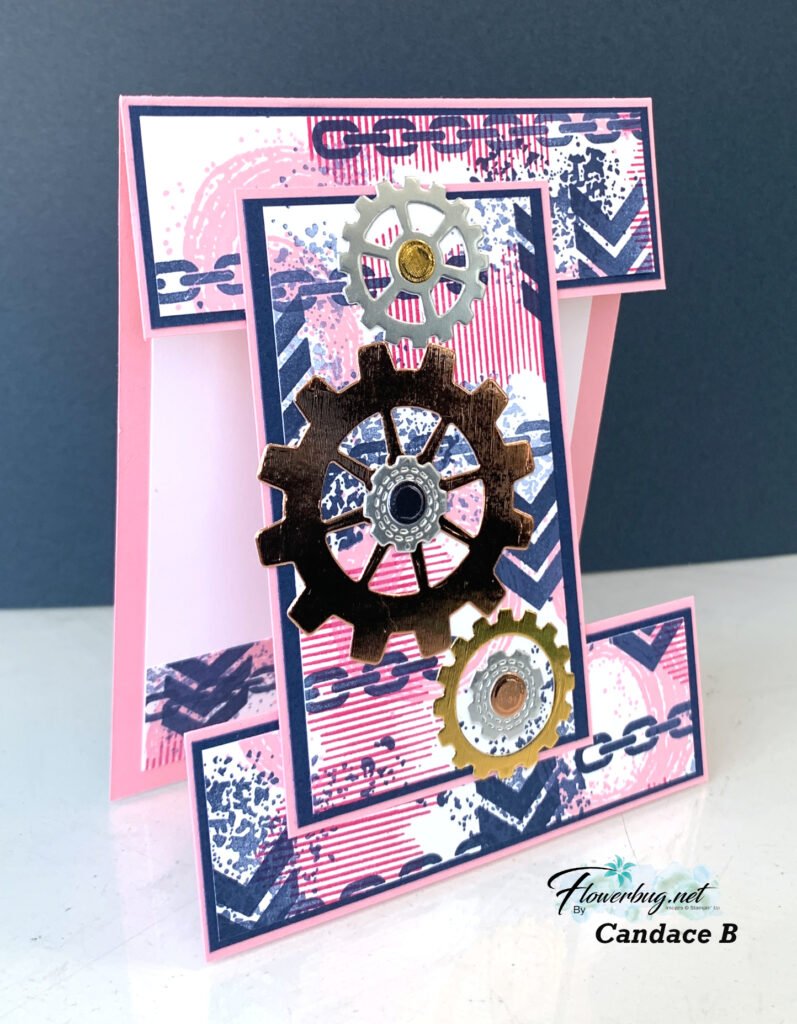
Candy made this beautiful card, also with the Positive thoughts stamp set and coordinating Nature's Thoughts dies.  

That gorgeous rectangle die-cut is from the Ornate Layers dies here.  They're amazing!!!  Her colors are Rich Razzleberry, Very Vanilla, Crumb Cake and a splash of Coastal Cabana.  Here's the inside view:

Measurements:

  • Rich Razzleberry 5 1/2" X 8 1/2" scored at 2 1/8" from each end
  • Very Vanilla inside is 5 1/4" X 4", plus a piece for the rectangle die-cuts
  • Crumb Cake pieces are 1 7/8" X 5 1/4"

Mary made this pretty card using the Free as a Bird stamp set and the Bird Ballad designer paper. 

The Bird Ballad designer paper is on the Last chance list now; it's on sale for $8.05 while supplies last.

She colored the birds with Blends markers; so soft and pretty!

Measurements:

  • Whisper White 5 1/2" X 8 1/2" scored at 2 1/8" from each end. The inside White Nested Label die-cut is 4 3/4" X 2 5/8"
  • Front stamped layer and Bird Ballad designer paper piece are 2 1/4" X 3 3/4".  
  • Pool Party layers 2 1/2" X 4" 

I hope you enjoyed this week of incredible fun folds.  If you missed any, click here, here and here to see them all! 


~~~

May Specials


Get my 'ALL Fun Fold cards tutorial' free with any online order.

It includes directions, photos and measurements for 18 fancy card folds!


May Host code is EYDJ4MQN

Get a free pkg. of Noble Peacock rhinestones from me if your order is over $55. 

Order online here

All Posts

  • The Branching Out bundle is retiring! Check out this fun fold card with video tutorial!


    We made this card earlier this fall and I realize I haven’t shared it with you yet. I also made a video too – scroll down….

    The colors include Pecan Pie with Crumb Cake, Early Espresso & Shaded Spruce. I used various wood-like designer series papers for the side panel. See how it has a double fold?

    Also notice the ‘white’ snow on the pine boughs plus snow in the background. You can achieve that without heat embossing. We used White Craft ink and stamped over the pine. Easy & a fun accent!

    The stamp set is retiring but the dies are not. The bundle is on the last chance list now. Click here to see it.
    It’s been one of my favorite products in our Holiday catalog this year. It’s timeless and can be used for fall, winter or Christmas!

    Besides the video tutorial here’s a free project sheet for you too. Click here to download or print it.

    I’m glad the dies are not retiring but I have to say the stamp set is among my top 5 favorites!

    Below is the video tutorial which gives you tips on stamping the branches with the pines and pine cones.

    *You’ll receive a PDF with multiple projects featuring this product
    after the 20th of the month.
    ~~~

    The Last Chance list has been updated!
    Click here to shop.

    Get a free PDF tutorial with any online order from me in December!

    Leave a Reply

    Your email address will not be published. Required fields are marked *

  • Easy Holiday cards made from tags! Free project sheet & video tutorial.


    I look forward to receiving my Paper Pumpkin boxes each month. November’s Wrapped in Cheer kit featured holiday tags and I couldn’t waste an opportunity to make cards from them. I need a lot more Christmas cards than I do tags!

    I didn’t change the tag from the original except for the linen thread bow at the top. But I did add it to a Basic Beige textured layer and then onto a Cherry Cobbler card base.
    Now that is an easy card!

    To create the colored leaves inside the card I used the empty piece of paper from the kit where the leaves had been removed. I’m always looking for easy ways to add to the inside of my cards.

    There were two different tags in this kit. Aren’t they pretty?

    I used the embossing folder called Traditional Wreath 3D folder; it can be seen here. It’s discounted and available while supplies last.
    *The greeting is from the stamps in the kit.

    Below is the video tutorial for this card and more information on Paper Pumpkin.

    *You’ll receive a PDF with multiple projects featuring this product
    after the 20th of the month.
    ~~~

    The Last Chance list has been updated!
    Click here to shop.

    Get a free PDF tutorial with any online order from me in December!

    Leave a Reply

    Your email address will not be published. Required fields are marked *

  • Wrapped in Cheer tags for Christmas


    I shared the November Paper Pumpkin kit on last week’s live video. I just love receiving my crafty box in the mail each month! Easy crafting without a plan or step it up and use your creativity to change the projects.

    There were two different tags in this kit and each one includes multiple pieces. Aren’t they pretty? The embossing folder is called Traditional Wreath 3D folder and can be seen here. It’s discounted and available while supplies last.
    *The greeting is from the stamps in the kit.

    I used the tags to make Christmas cards which you can see below. All I did was add a textured layer and a card base. *I’ll share more details tomorrow.

    Remember that each month my subscribers and Team receive my bonus projects PDF. Lots of unique ideas to create with the contents of each box. Subscribe to Paper Pumpkin here.

    Below is the video where I share this kit, last months and how to make the cards too.

    *You’ll receive a PDF with multiple projects featuring this product
    after the 20th of the month.
    ~~~

    The Last Chance list has been updated!
    Click here to shop.

    Get a free PDF tutorial with any online order from me in December!

    Leave a Reply

    Your email address will not be published. Required fields are marked *


Notice: LeeAnn Greff, Independent Stampin’ Up! Demonstrator, Manager. The content of this website is my sole responsibility as an independent Stampin’ Up! demonstrator and the use of, and content of, the classes, services, or products offered on this website is not endorsed by Stampin’ Up! Copyright 2025