/


Latest Post

Let’s Chat is cute & nostalgic! See the video & free project sheet


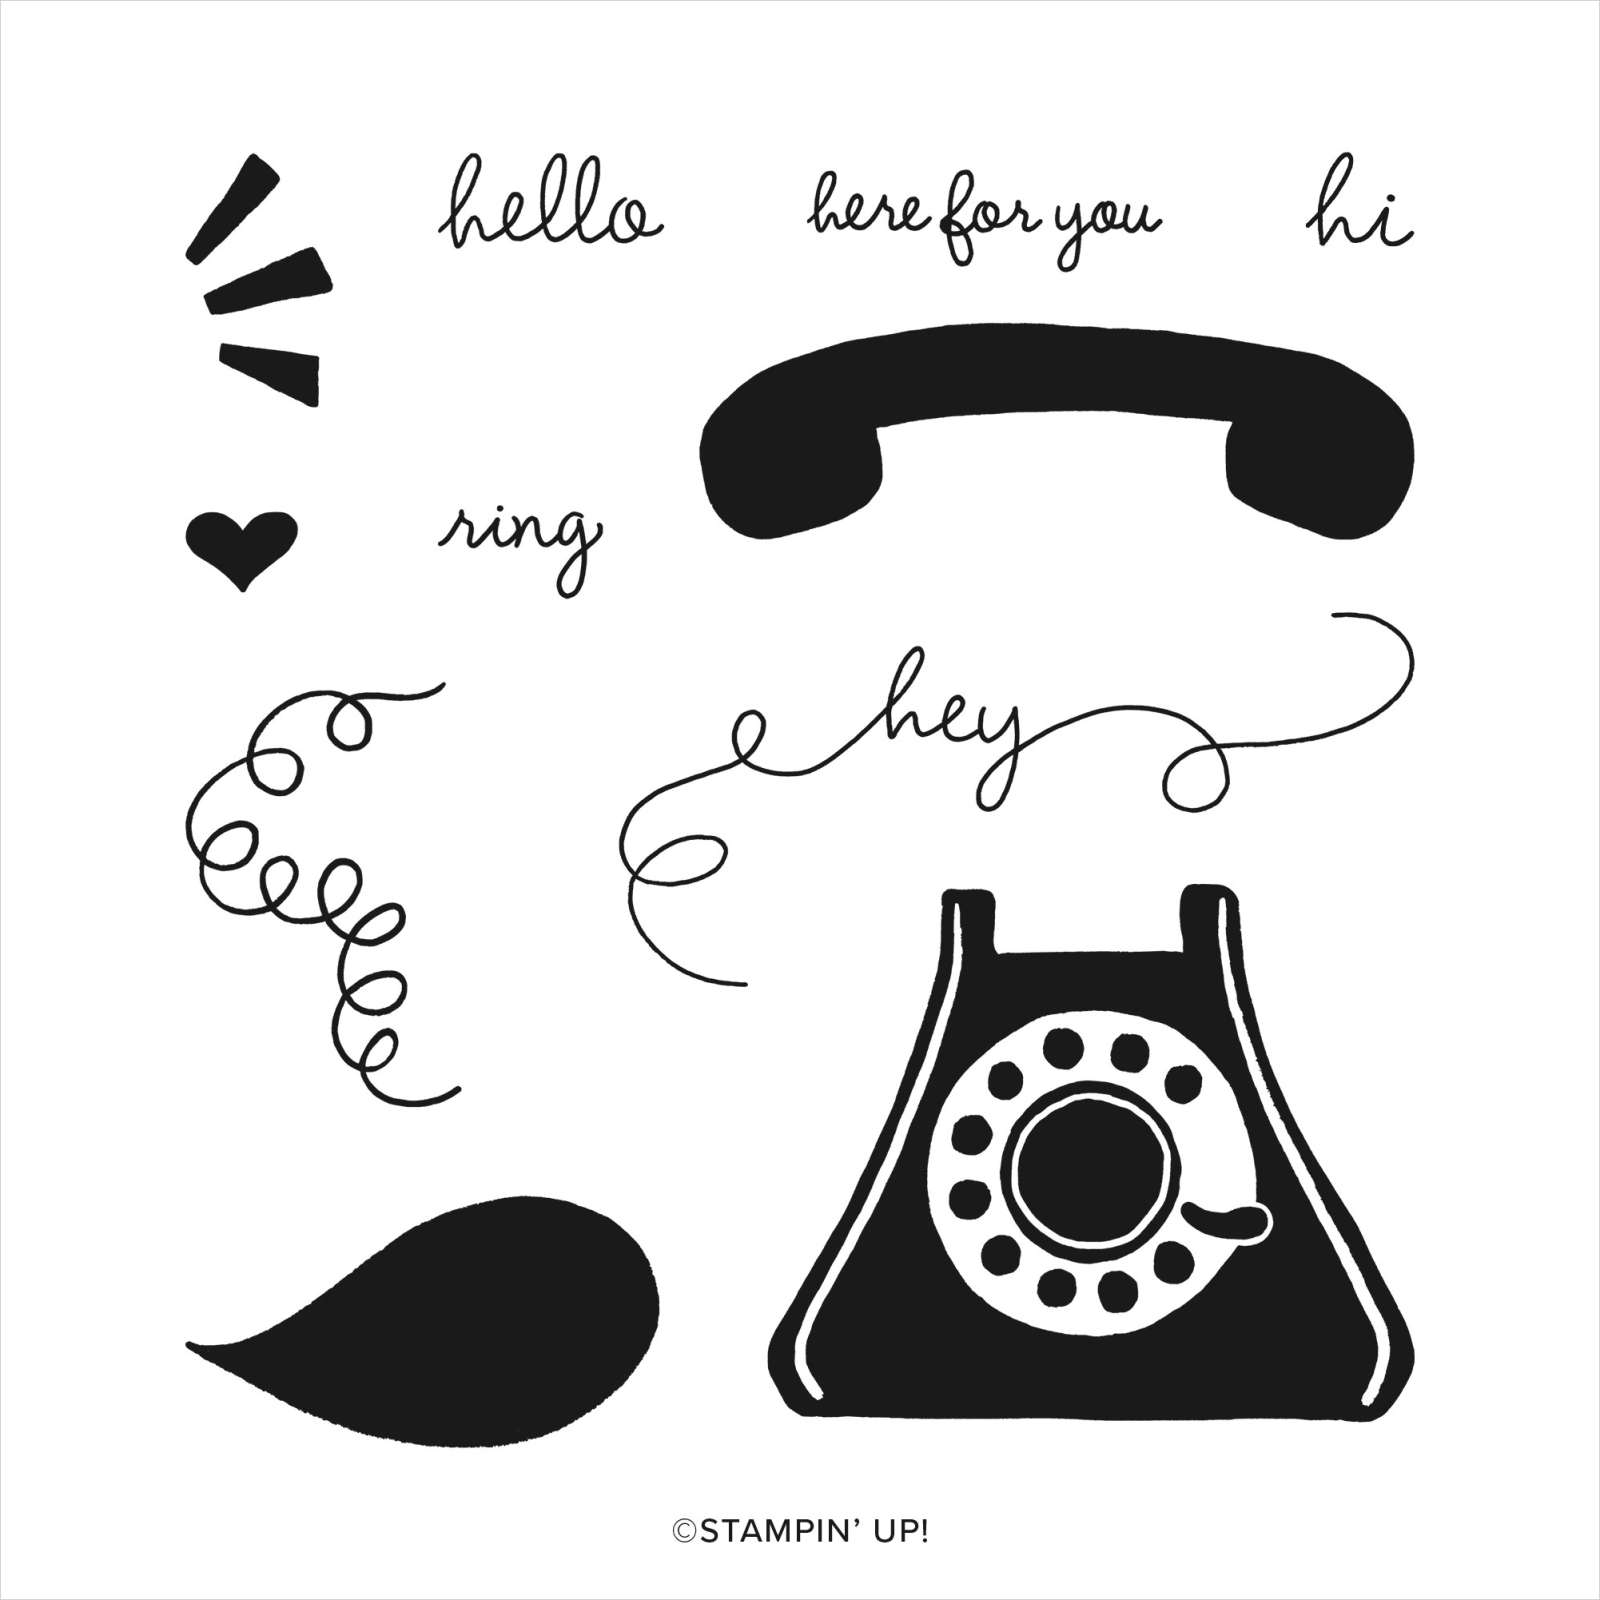
Today I'm sharing one of the Club cards we made during my April Card Clubs. I chose the 'Let's Chat' stamp set seen here. 

I love this set!  Between the fun old-fashioned telephone, the greetings and the curvy 'cord' images it's a blast to create with. 

I chose to use the retiring Hot Air Balloon designer paper seen here for my color palette of Fresh Freesia & Balmy Blue. We did fussy cut the head set to add at the top with Stampin' Dimensionals. 

For the inside of the card I used the Happy Little Things stamp set seen here.  I really like the many greeting combinations you can make. t's one of our online exclusives.  

If you'd like the free project sheet click on this link: Download April 24 Let's Chat

Below is the video on how I made this card along with a few resist techniques featuring new Annual Catalog products. I hope you watch it AND subscribe to my YouTube channel too. 

~~~

April Specials: 

*current host code link:  W62MPU2R

~~~

Here's a link to the Last Chance list 

A free gift with orders in April:

Check out my available Kits & Tutorials here:

All online orders in April will receive a free multi-project tutorial!

All Posts

  • Have a Hoot Bundle; for Christmas!


    At first I thought this bundle was just for Halloween.  But when looking at the images provided it works wonderfully for Christmas too!  

    I made these cards on Facebook Live last week. I've been working with the beautiful Snowflake Splendor designer paper all week; it's simply gorgeous and in so many of my favorite colors!

    Here's the first one.  Did you know the Peek-a-Hoot dies cut out all 3 window at once?!  There's no measuring or figuring out placement at all.  You can see the video below.  

    I stamped directly onto the Snowflake Splendor designer paper here.  I love the pretty purple/blue background!  The two owls are die-cut using the same die set.  I added a bit of color to them with Blends markers and finished with a bit of Balmy Blue glimmer accents and Adhesive Backed Snowflake Sequins. 

    This next card uses two of the tags left when die-cutting the windows on the card above.  I did cut out one extra.  I stamped and colored directly on them. 

    Other details:

    • A glimmer die-cut star covers up the 'spider' on the center panel.  
    • The Highland Heather panel (4" X 5 1/4") is embossed with the Winter Snow embossing folder.
    • the 3/4" X 5 1/4" strip of Snowflake Splendor DSP is under the three stamped tags. 
    • The greeting tag is punched with the Everyday Label punch; start with a 1/2" white strip. Stamp and punch.

    ~~~

    October Specials!

    Current Host code is GRC9VVUU

    Designer Paper Sale; click here!

    Get a free package of Adhesive Backed Snowflakes in October with an

    online order over $45. 


    All online orders will receive my Tutorial of the Month featuring the Poinsettia Petals suite!

    Leave a Reply

    Your email address will not be published. Required fields are marked *

  • Life is Beautiful meets Snowflake Splendor for a beautiful winter card


    I created this card for a recent FB Live.  I was asked to share ideas and samples with my Life is Beautiful stamp set for a private Demonstrator only Facebook group.  What an honor it is to be asked!  

    Here's one of the cards I made.  I'll share more next week!

    I stamped directly onto pieces of the Snowflake Splendor designer paper.  Did you know it's on sale this month?  Check out all 15 packs of paper on sale here. 


    ~~~

    October Specials!

    Current Host code is MJK7R2CU

    Designer Paper Sale; click here!

    Get a free package of Adhesive Backed Snowflakes in October with an

    online order over $45. 


    All online orders will receive my Tutorial of the Month featuring the Poinsettia Petals suite!

    Leave a Reply

    Your email address will not be published. Required fields are marked *

  • Snowflake Wishes Fun Fold card; easy but beautiful!


    Here's another pretty fun fold card with the Snowflake Wishes suite of products.  Marilyn made this beauty. 

    It's a side fold card which is super easy to do!

    She used the Stitched Rectangle dies for her front layers, the Snowflake Splendor designer paper on the left and the Snowflake Wishes bundle for the stamps & die-cuts.   Note the pretty Glimmer snowflake!  Our Balmy Blue Glimmer paper is gorgeous! 

    She used Pacific Point ink on the greeting and the faint snowflakes in the background were done by stamping off a few times to get a lighter hue. 

    Measurements: 

    • Balmy Blue 4 1/4" X 8 1/4" scored at 5 1/2", stitched rectangle die-cut is 3" X 4 1/4"
    • Whisper White inside 4" X 5 1/4", stitched rectangle die-cut is 2 5/8" X 4"
    • Snowflake Splendor DSP 2 1/2" X 4"


    ~~~

    October Specials!

    Current Host code is MJK7R2CU

    Designer Paper Sale; click here!

    Get a free package of Adhesive Backed Snowflakes in October with an

    online order over $45. 


    All online orders will receive my Tutorial of the Month featuring the Poinsettia Petals suite!

    Leave a Reply

    Your email address will not be published. Required fields are marked *


Notice: LeeAnn Greff, Independent Stampin’ Up! Demonstrator, Manager. The content of this website is my sole responsibility as an independent Stampin’ Up! demonstrator and the use of, and content of, the classes, services, or products offered on this website is not endorsed by Stampin’ Up! Copyright 2025