/


Latest Post

Gorgeous Joseph’s Coat technique with free project sheet & video


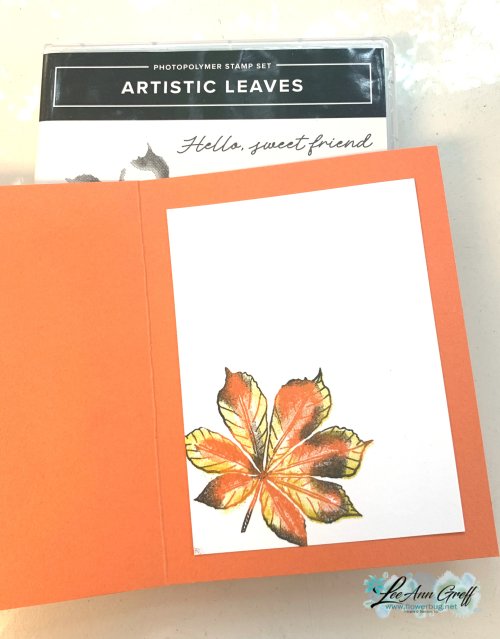
Here’s another beautiful card made with the Joseph’s Coat technique. I shared it on last week’s Live video.  It’s so fun!

My colors include Secret Sea, Timid Tiger and Darling Duckling.  The stamp set is called Artistic Leaves and can be seen here. 

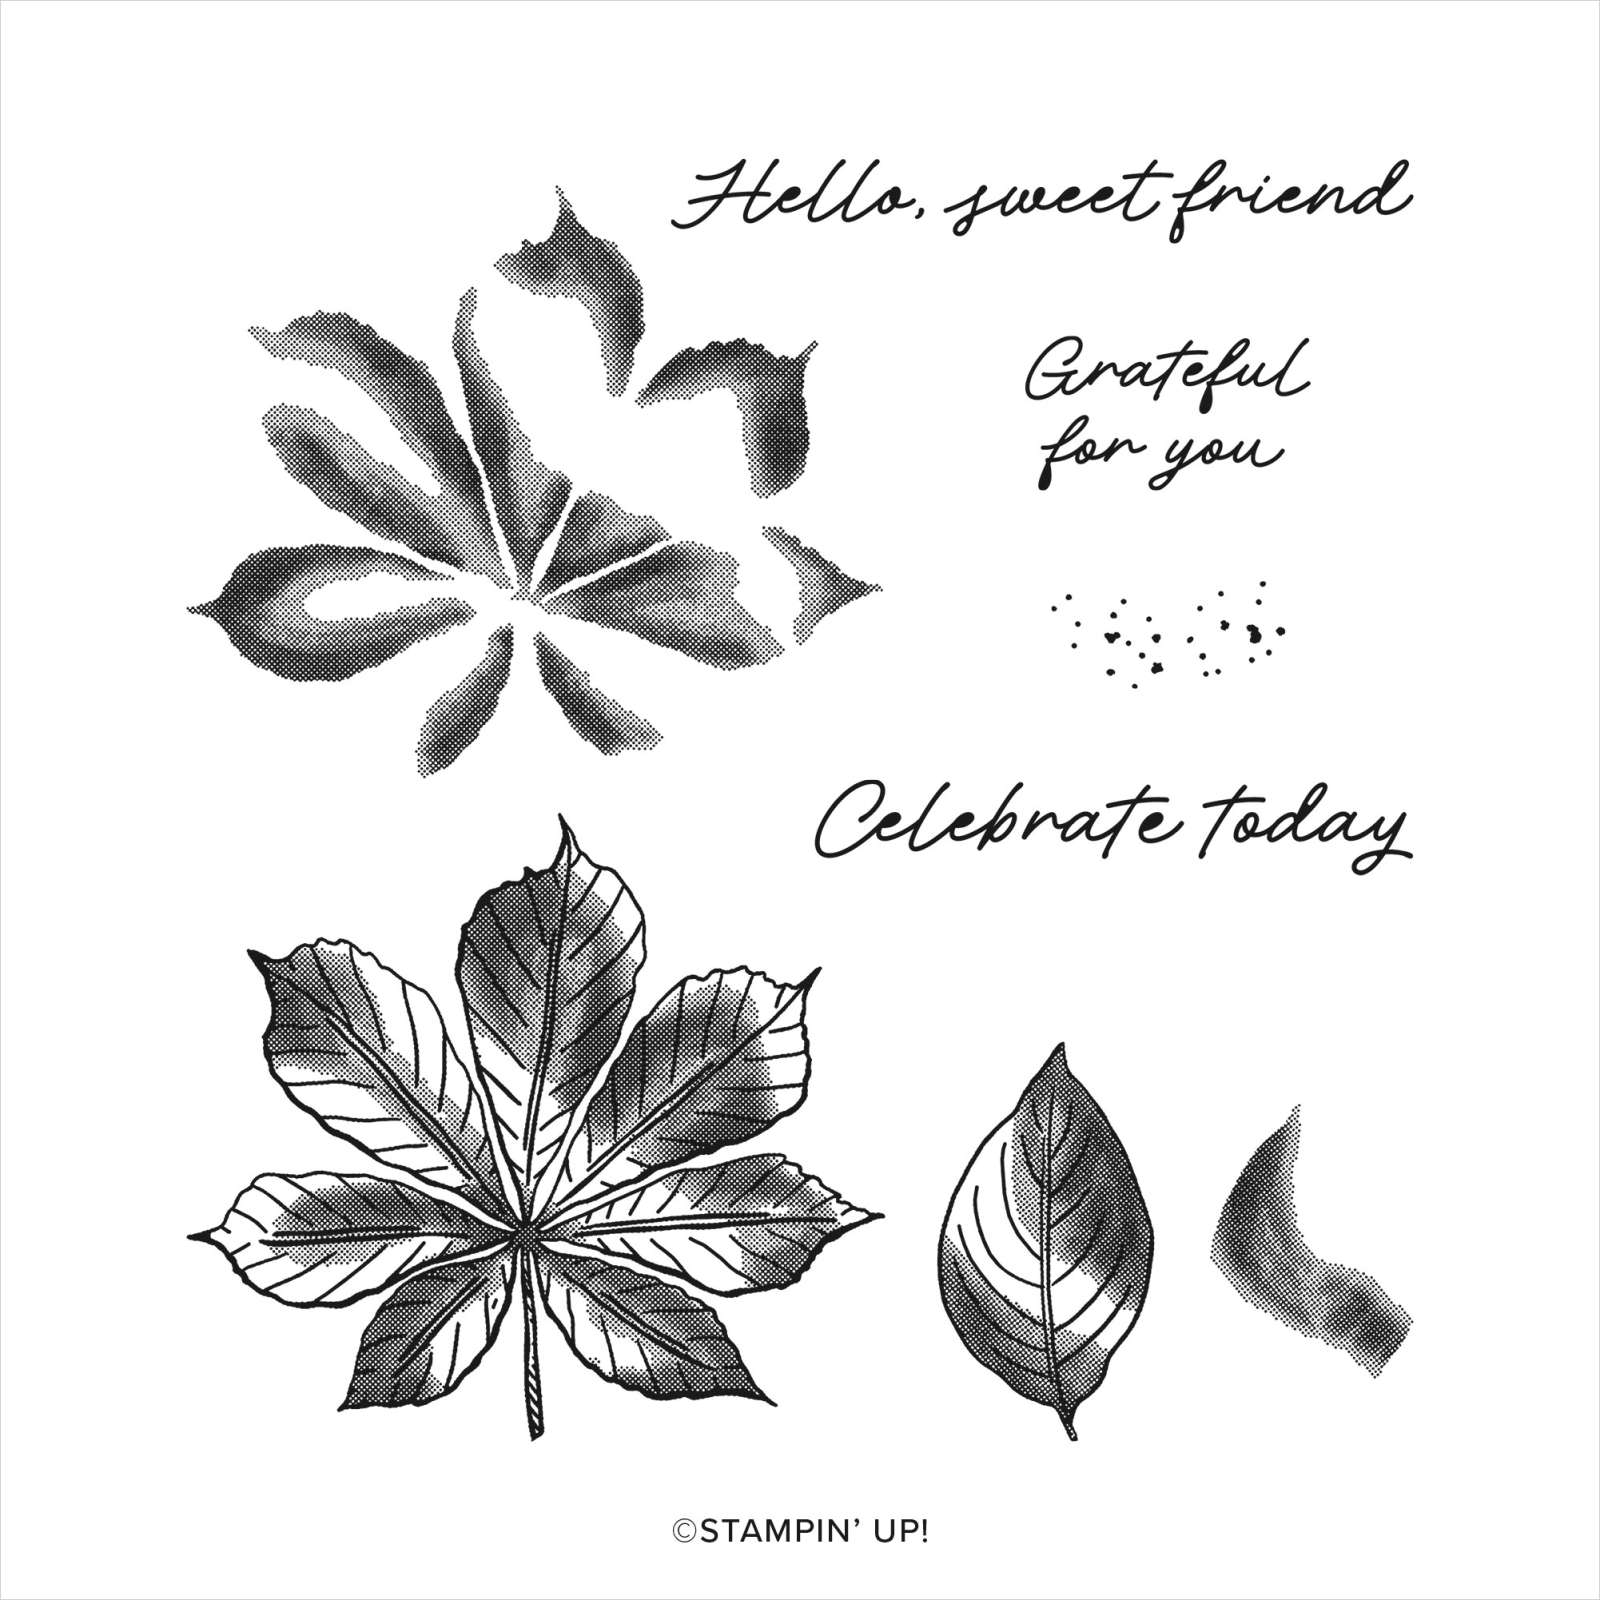
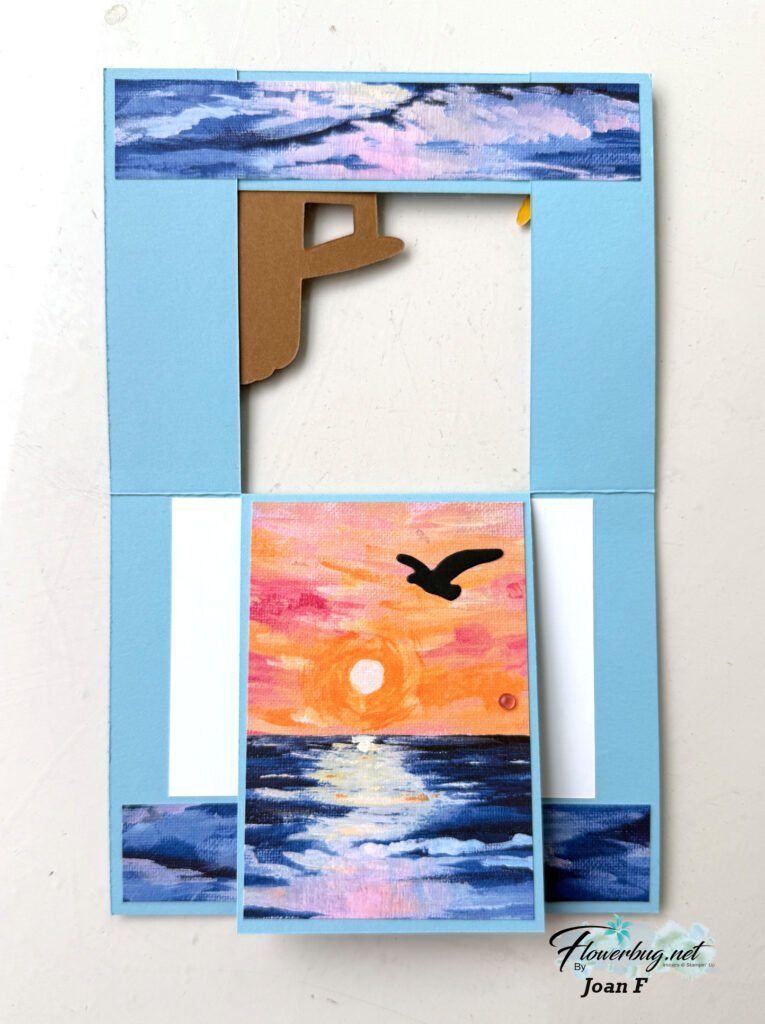
This technique involved adding color to White card stock and then heat embossing images in Clear powder over the colors.  Next rub a dark ink pad (Memento Black here).  The embossed images resist the black ink – it must be water-based ink!  

Watch the video below to see how it’s done.  It’s super fun and such a cool effect.  

I stamped the inside leaf with color by inking it in Timid Tiger ink and adding Secret Sea to the outer edges.  Then I stamped the coordinating stamp in Darling Duckling.  

Here’s the free project sheet for this card. Just click on the following link to print or download it.  Download Artistic Leaves Joseph’s Coat

The video tutorial for this card and two more versions is below.  Be sure to follow me on YouTube here so you don’t miss any of my tutorials. 

~~~

August Specials

Lots of In Color products are discounted in August!!

Go here to see them all. 

Get a free card class with any online order over $55 during August!

Order online here

The last chance list has new products! See them here. 

All Posts

  • Beautiful Berry Botanical Vellum; it’s our Product of the Month and just $5!


    May is ending in a few days. Have you seen the beautiful Berry Botanical Vellum yet? It’s the May POM – Product of the Month.

    You can redeem this pretty vellum paper once your order hits the $75 mark. And when you order it from me you’ll receive a nice big PDF tutorial filled with a bunch of special cards featuring this vellum paper. *see the sneak peek below

    See this specialty paper here.

    Here’s a pretty card I made with it:

    I chose to feature the Fresh Freesia vellum from the pack with the Phrases & Frames bundle seen here. It’s one of our newest set of Impression dies. They give a super deep impression when used with our new Impression plate seen here.

    ~~~

    Don’t forget to consider the Starter Kit Deal in May; time is almost up!

    You’ll get either all 5 new Magnetic ink pads or an extra $35 in product of your choice; all for $99!

    Leave a Reply

    Your email address will not be published. Required fields are marked *

  • Cool technique for a background made with our new shimmer brushes


    Take your new Shimmer Brushes for a test drive with this darling DIY background idea. Stampin’ Up! posted this card idea; what a super neat plaid background!

    Here’s how you do it:

    Step 1: Draw diagonal lines on Basic White Cardstock using the Barely Blush Shimmer Brush. (Use the Clear Block F as a guide.) Apply light pressure to create fine lines; increase pressure for thicker lines.

     Step 2: Rotate your cardstock and (using the Clear Block F) draw additional lines to create a plaid pattern.

     Step 3: Decorate your sparkling background with images, sentiments, and embellishments, then adhere the finished piece to the card base.

    We now have 5 colors of these Shimmer Brushes in each of our new In Colors. See them all here.

    I hope this technique inspires you to try it. I think you could also do it with our Wink of Stella on any color CS.

    I have one Mystery Box left!
    Place an order over $100 to grab it before it’s gone.
    Message me before you order to be sure it’s still available.

    Don’t forget to consider the Starter Kit Deal in May; time is almost up!

    You’ll get either all 5 new Magnetic ink pads or an extra $35 in product of your choice; all for $99!

    Leave a Reply

    Your email address will not be published. Required fields are marked *

  • More Team swaps!


    Here are a few more of the Team swaps featuring brand new catalog products.

    Jacki created this striking card with the Scalloped Blooms bundle seen here.

    Her colors include Melon Mambo, Black & White. Those scalloped circle dies are so fun aren’t they? The leaf die-cuts are from the Delicate Whispers dies seen here.

    Next is a striking card made by Joan: She chose to highlight the Scenic Coast DSP.

    She also used the Relaxing Waterside bundle seen here. Love that chair! As you might guess, it’s a fun fold ‘bridge card’.

    Super cool! To make this card you’ll start with a 5 1/2″ X 8 1/2″ card base, scored at 4 1/4″. Now use the paper trimmer to cut up to the score line on each side at 1 1/4″.
    The DSP is 2 3/4″ X 4″ and on the sides it’s 1″ X 4″. There’s also a lower and an upper strip that is 5 1/4″ X 1″.

    Great cards ladies! I’ll share more later this week.

    May Specials:

    I have one Mystery Box left! The first person to place an online order from me over $100 will receive it.
    It has over $200 in Stampin’ Up! products in it and I’ll ship it to you FREE! Order here.

    Don’t forget to consider the Starter Kit Deal in May; time is almost up!

    You’ll get either all 5 new Magnetic ink pads or an extra $35 in product of your choice; all for $99!

    Leave a Reply

    Your email address will not be published. Required fields are marked *


Notice: LeeAnn Greff, Independent Stampin’ Up! Demonstrator, Manager. The content of this website is my sole responsibility as an independent Stampin’ Up! demonstrator and the use of, and content of, the classes, services, or products offered on this website is not endorsed by Stampin’ Up! Copyright 2025