Peaceful Place card kit to go; beautiful ‘winter’ cards for any occasion!
The Peaceful Place specialty designer paper is gorgeous in it's silver, black, gray & white color theme. This paper does the work for you in creating simple yet elegant cards.
I have a limited supply of these; opt in by December 14th.
This kit to go includes 10 pre-cut cards (2 each of 5 designs). The PDF tutorial includes directions to make 10 beautiful cards; & $20 in Stampin' Up! product. Product includes 1/2 pkg. of the Peaceful Place specialty designer paper, a share of Wonderful snowflakes, silver cord & clear rhinestones.
*this is the card kit my subscribers will receive. If you'd like to automatically receive my kits each month opt in here.
You'll receive the PDF tutorial immediately after payment in an email. The pre-cut kit will be mailed out before Christmas, barring back orders.
The PDF tutorial includes photos, measurements, step by step directions and a supplies list. You'll use the measurements listed to cut your new Designer paper to complete your cards.
You will need the following to complete the cards like mine:
Shaded Spruce, Blackberry Bliss, Black or Rich Razzleberry inks.
I used the Peaceful Cabin & Peaceful Moments stamp sets but you can easily substitute other greetings. Or add either set or bundle on at an extra 10% discount! Contact me for payment.
You will also need a tree image for two cards.
adhesives, a paper trimmer, scissors
Below are the links to order; remember I have a limited supply of these; opt in soon!
Click here to purchase the pre-cut kit to go for $28 plus shipping
Merriest Moments ‘5 at a time’ cards with free templates
Here's another set of my '5 at a time' cards I shared yesterday here. I used the Merriest Moments stamp set. This stamp set is carrying over to next year's Holiday catalog along with the dies & Hybrid embossing folder but they will not longer be in a bundle at 10% off.
See the carry over list here.And the retiring or Last Chance list here
My colors include Cherry Cobbler, Shaded Spruce, Sahara Sand & White. I love the unusual addition of the Sahara Sand. I chose it to blend in softly instead of another attention grabber.
See the texture? After I stamped I used the Timeworn Type 3D embossing folder before layering the pieces and finishing the cards. I used the Double Oval punch here.
If you missed yesterday's post I shared these '5 at a time' cards on a recent FB Live video seen here. I created two templates that layer each other for quick set of 5 A2 sized finished cards. And they sized perfectly for very little waste.
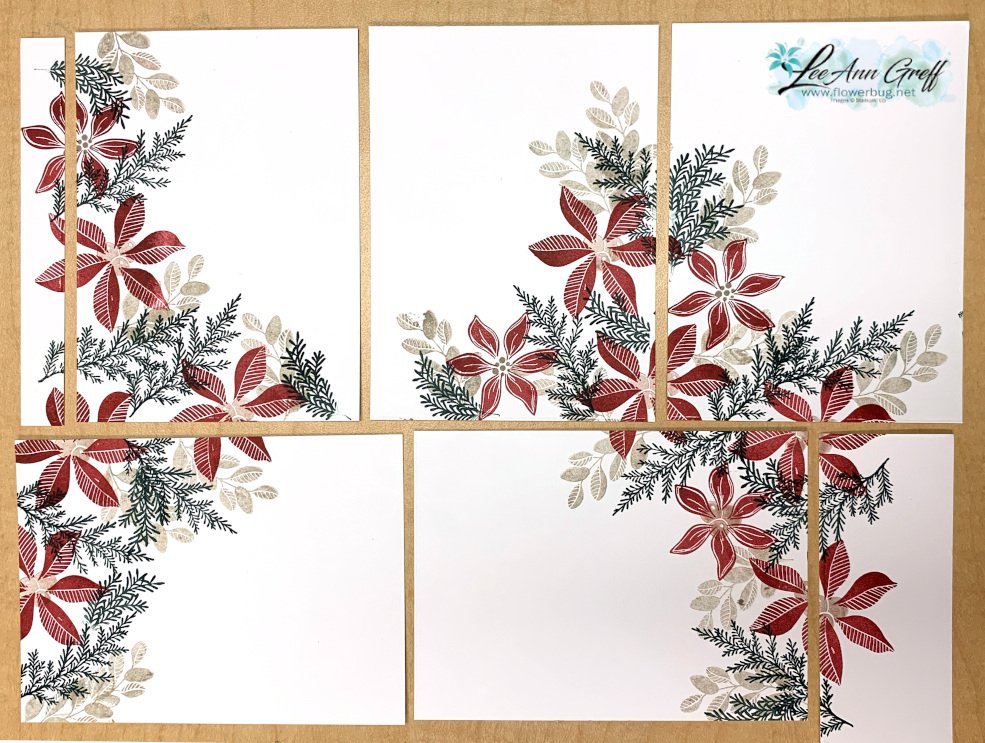
Below is how the White card stock is stamped. Can you see that the images concentrate on two sides of each piece leaving one corner free & clear? This keeps the cards from being too busy.
Before I stamped I scored on the 4 3/4" and 3 1/2" lines (using the measurements on the template) leaving the piece intact. You could also draw a light pencil mark so you know where to stamp. Then after stamping I can cut on the scored lines.
I'm so excite to share this fun & unique idea! I created two templates that help you make 5 cards at a time. It's addicting & you'll be looking at your stamps in a whole new way!
I shared this on last week's Facebook Live and it was a hit! It's so fun to do.
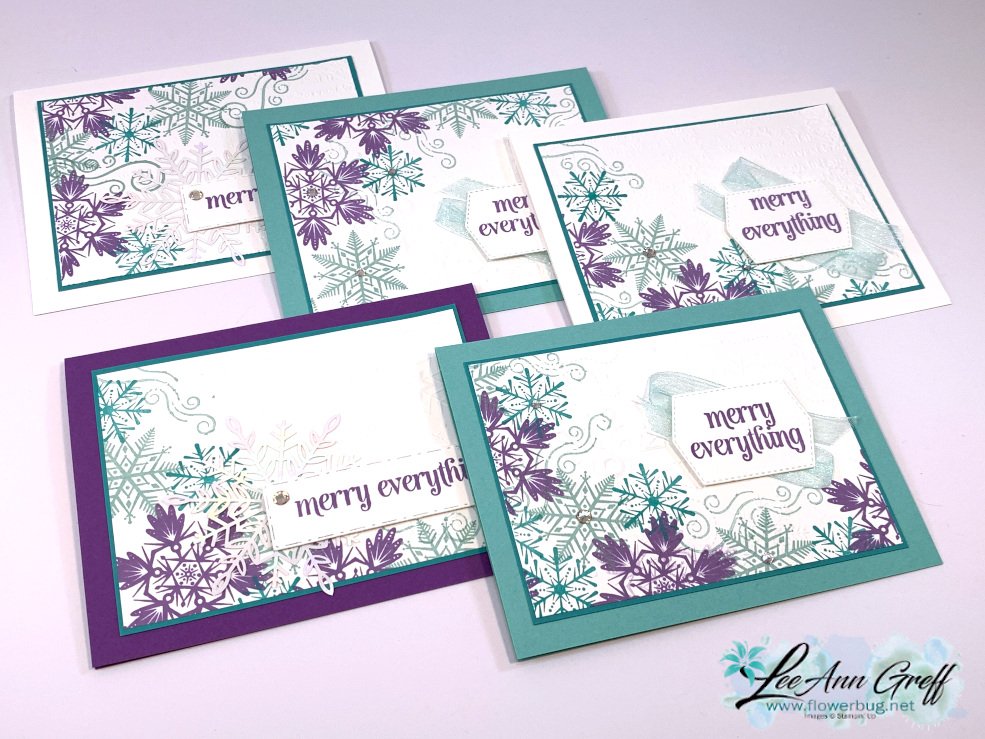
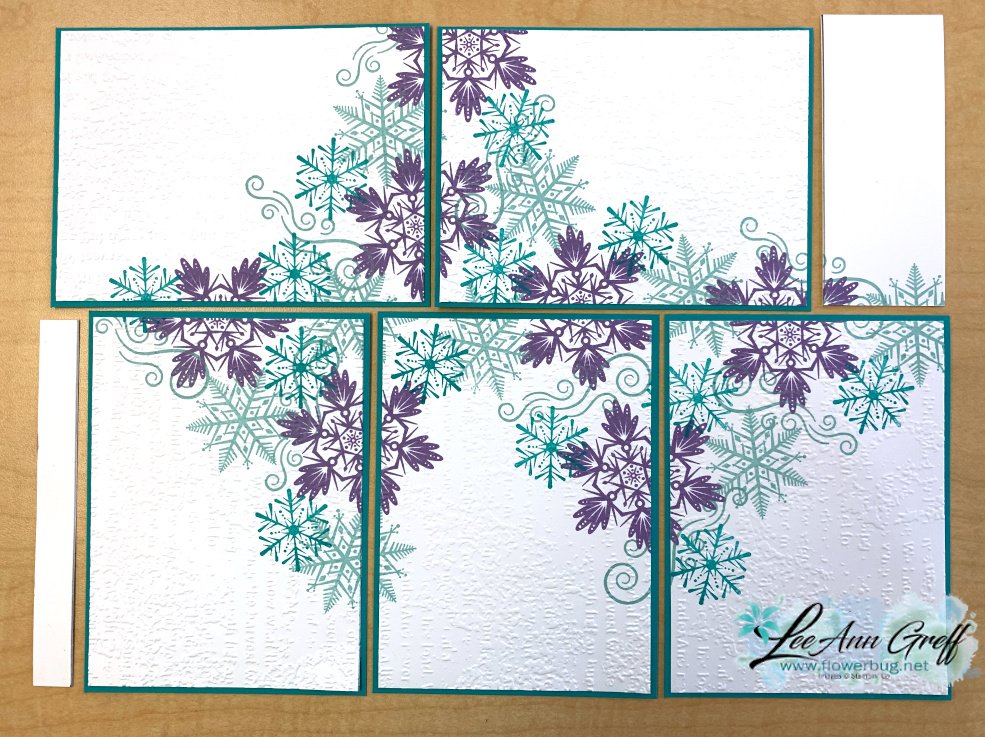
For these cards I used the Merry Snowflakes stamp set (seen here) & Pool Party, Bermuda Bay & Highland Heather inks. The card stock is White, Gorgeous Grape, Bermuda Bay & Coastal Cabana. If you follow me you know these are some of my favorite colors! They're perfect for snowflakes.
Below are the templates. Remember these are 8 1/2" X 11" to start with. For these cards I stamped before I cut but you can certainly cut your pieces first if you'd like to.
As you can see these templates have very little waste.
Before I stamped I scored on the 4 3/4" and 3 1/2" lines leaving the piece intact. You could also draw a light pencil mark so you know where to stamp.
And here is how the White card stock is stamped. (I forgot to take a photo before I cut and layered them.)
Can you see that the images concentrate on two sides of each piece leaving one corner free & clear? Basically you're stamping down the middle and on each of the lines. This keeps the cards from being too busy.
I added a few iridescent Wonderful snowflakes (seen here) to some of them; I cannot get enough of these! They're such a great size & value – you get 24 for $6.
I hope you watch the video below to see the tips & tricks on using these templates.
Notice: LeeAnn Greff, Independent Stampin’ Up! Demonstrator, Manager. The content of this website is my sole responsibility as an independent Stampin’ Up! demonstrator and the use of, and content of, the classes, services, or products offered on this website is not endorsed by Stampin’ Up! Copyright 2025


Leave a Reply