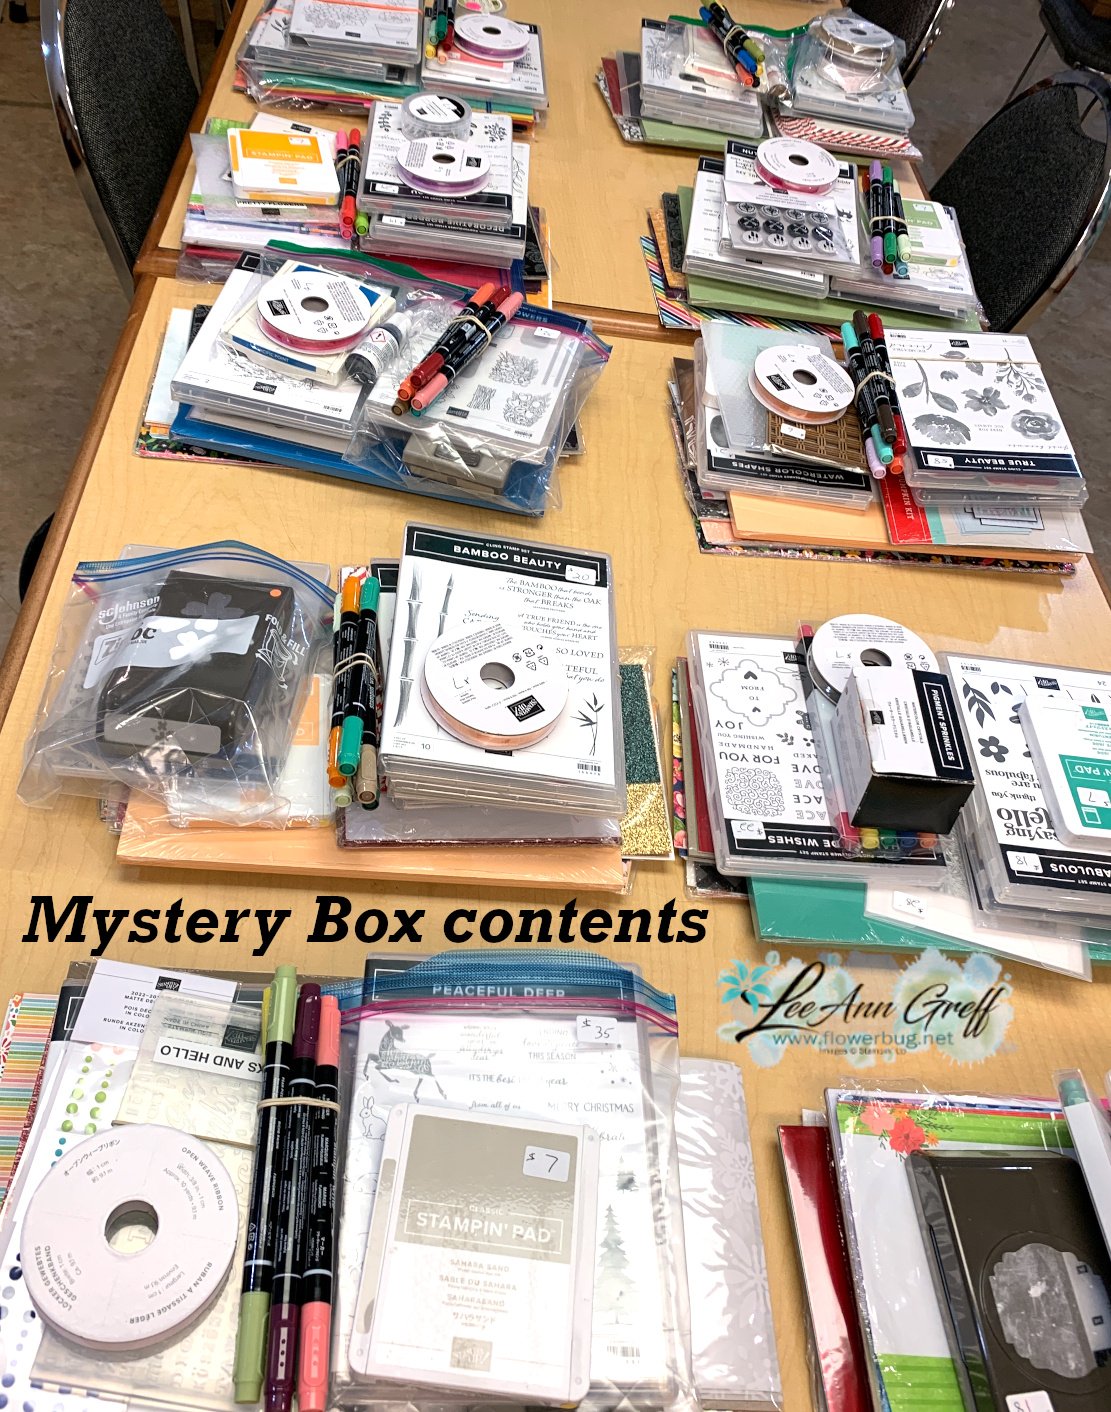
Place an online Stampin' Up! order over $100 (before tax & shipping) using one of my current host codes to reserve a Mystery Box. *Host code links – WXX6RCHA or VEH4FKBV
Send me the $14 shipping fee (PayPal or Venmo).
I'll send you your Mystery box via Priority Shipping!
I've listed most of the contents of each box below; but I forgot to add card stock. Remember all of these items are Stampin' Up! but retired. *stamp sets & dies are lightly used.
There is a limited supply of these; so don't wait long to claim yours!
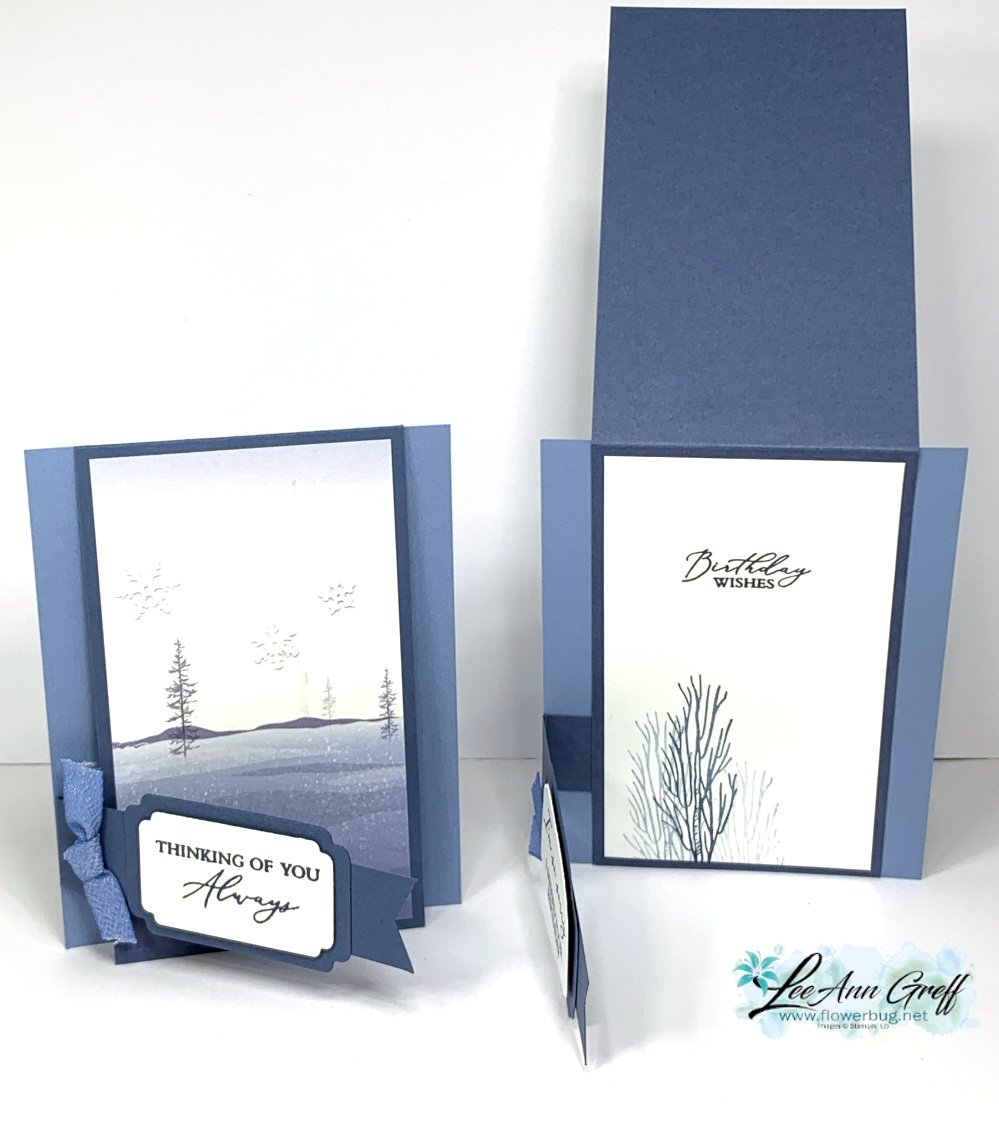
Here are the other two cards I shared in last week's Live video. If you're not following me on Facebook to catch the live videos click here to join my FB page!
My colors are Gray Granite with Early Espresso ink. The die-cut trees are from the Horse & Sleigh dies seen here. I added some color to the base of the trees with brown & Gray Granite Blends. My greetings are from the Lasting Joyand Layering Leavessets.
Here's the view once the upper panel is lifted. I stamped a tree from the Horse & Sleigh bundle on the inside.
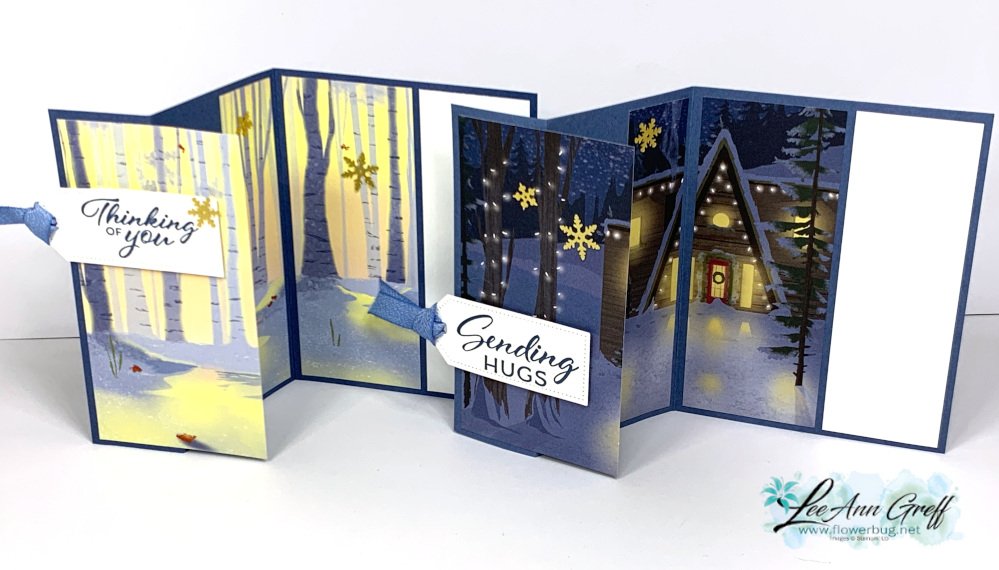
This card is a wonderful fun fold layout for 6" papers. You can make two cards with one piece. Or make 8 cards with a 12" designer paper! The stamps are from One Horse Open Sleigh and Lasting Joy.
The side flap is scored and the score line is placed right at the left card edge. I cover that up with the inside white panel.
Measurements:
DSP – 1 piece per card 3” X 5 ¼”
Card base 5 ½” X 4 ¼”
Center flap 3 ¼” X 11” score at 5 ½”, Side flap 5” X 1” score at ¾”
White inside 3” X 5 ¼”
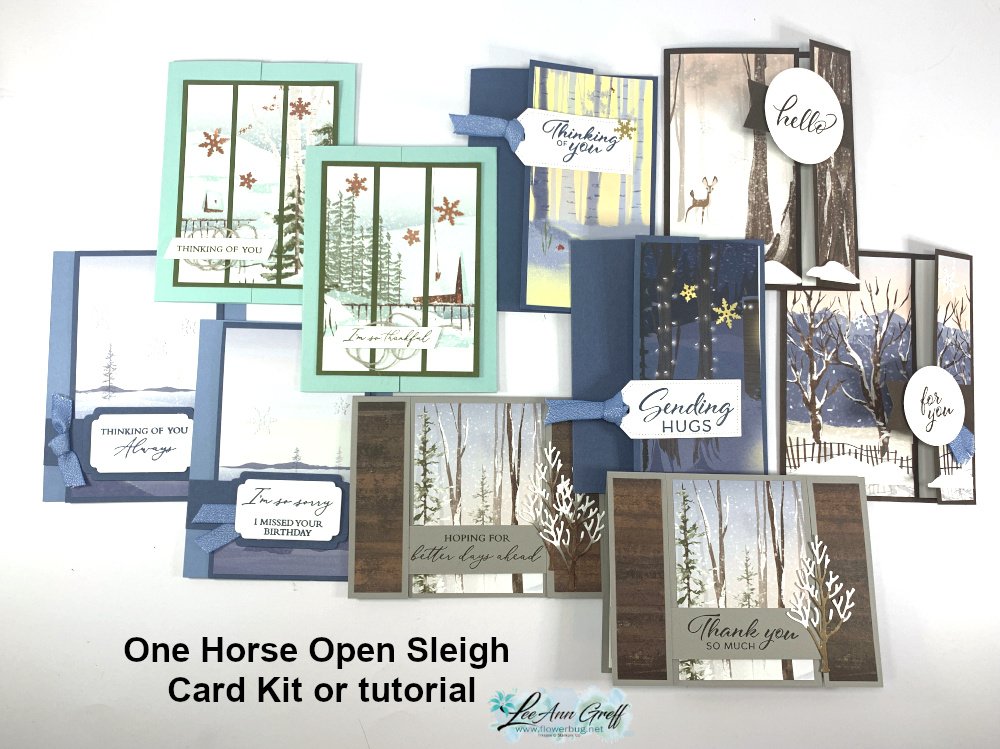
Both of these cards are included in my One Horse Open Sleigh fun fold cards PDF tutorial seen here. My tutorials can be used for more than this designer paper!
One Horse Open Sleigh Fun Fold cards with video & measurements!
On last week's Live video I shared three fantastic fun fold cards featuring the One Horse Open Sleigh designer paper – it's an Online Exclusive you can see here.
These cards were featured in last month's card kit to go; each card is a fancy fold! The kit is no longer available but the PDF tutorial is here. You can see all of the cards in the tutorial below:
I love this card because it shows off the full beauty of this scenic paper. Whenever I have a pretty scenic paper I want to showoff this is the layout I use.
Just trim off 3/4" of the upper or lower edge of the designer paper and cut using the following measurements:
Measurements:
DSP – start with 1 piece 5 ¼” tall X 6” wide. Make your first cut 2 ¾” from the left edge vertically. From that cut edge cut another piece at 1 1/8"
Notice: LeeAnn Greff, Independent Stampin’ Up! Demonstrator, Manager. The content of this website is my sole responsibility as an independent Stampin’ Up! demonstrator and the use of, and content of, the classes, services, or products offered on this website is not endorsed by Stampin’ Up! Copyright 2025


Leave a Reply