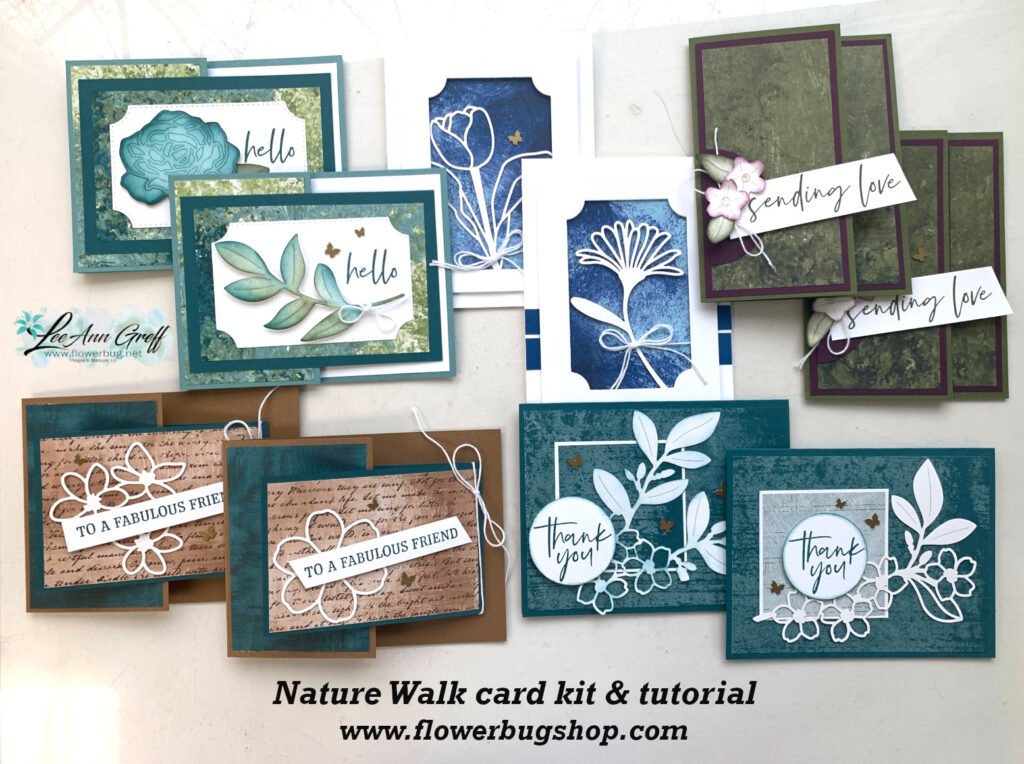
I chose the pretty Misty Moonlight & Seaside Spray combination for these cards. I love the two toned look of these In Colors together. When you add White for a pop of brightness they really shine!
Join me here tomorrow night. Prep the pieces, gather some supplies and we'll stamp together!
I used the Queen Anne's Lace stamp set seen here in Misty Moonlight, White & Seaside Spray.
I paired it with the new Covered in Flowers Accents from the Spring catalog, the retiring butterflies and White Baker’s Twine. See those pretty floral & botanical die-cuts on the cards? That’s the Flower Accents! They come in a large single sheet of thick pre-cut pieces. They’re white but can be colored or textured. They were so fun to use on these cards!
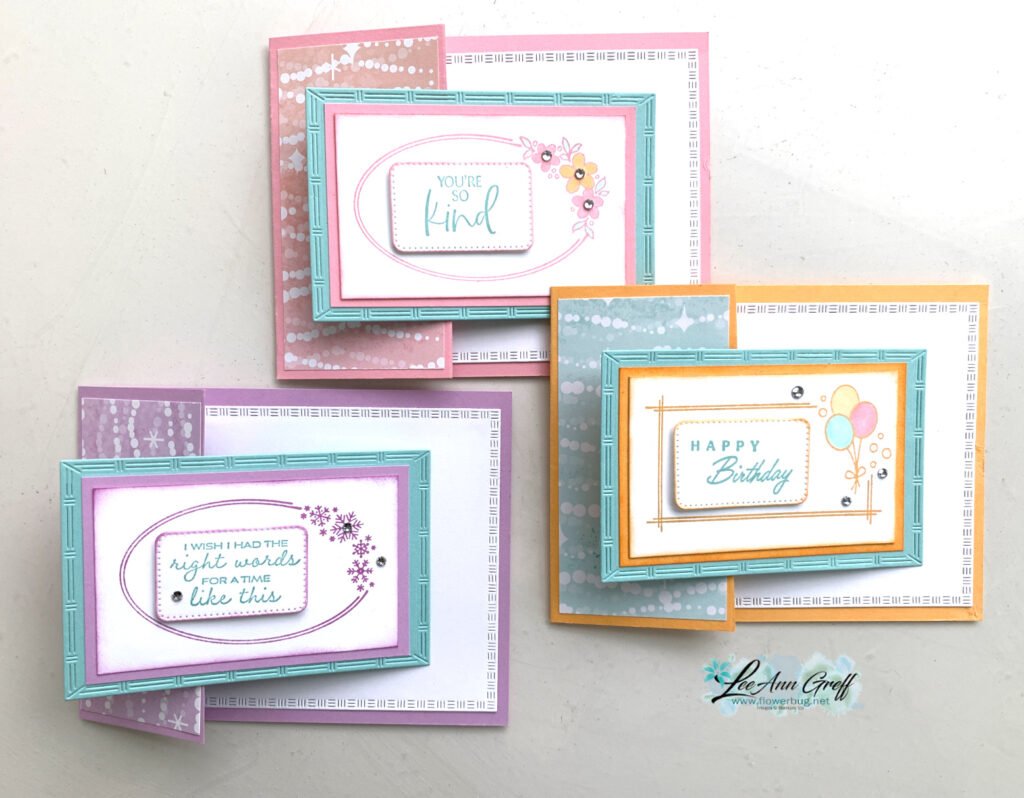
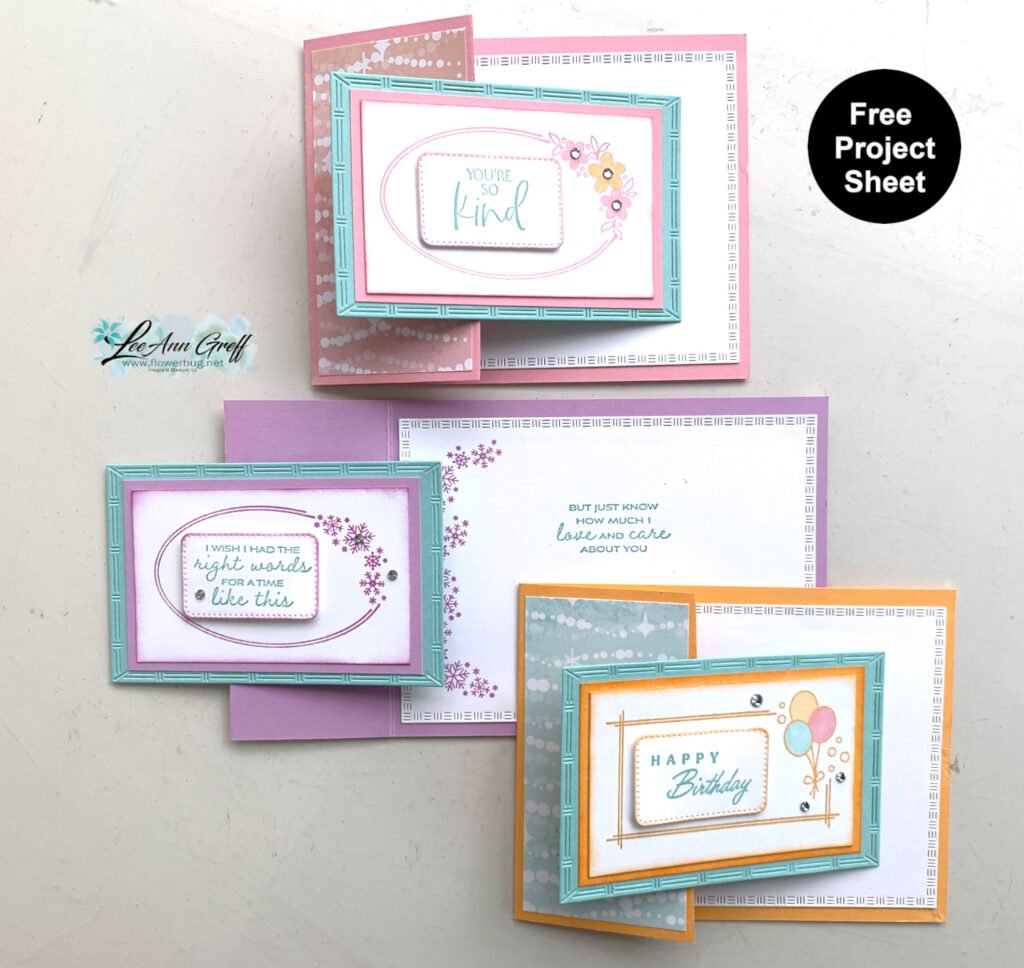
3 of the 5 designs are fun fold layouts. The kit & tutorial include 2 of each. You can choose from the PDF tutorial for $16 or the pre-cut card kit which includes up to $20 in Stampin’ Up! product for just $31.
Everything is cut for you in this kit except for your new 1/2 package of the designer paper. You will need your own greeting images, inks, adhesives and paper trimmer.
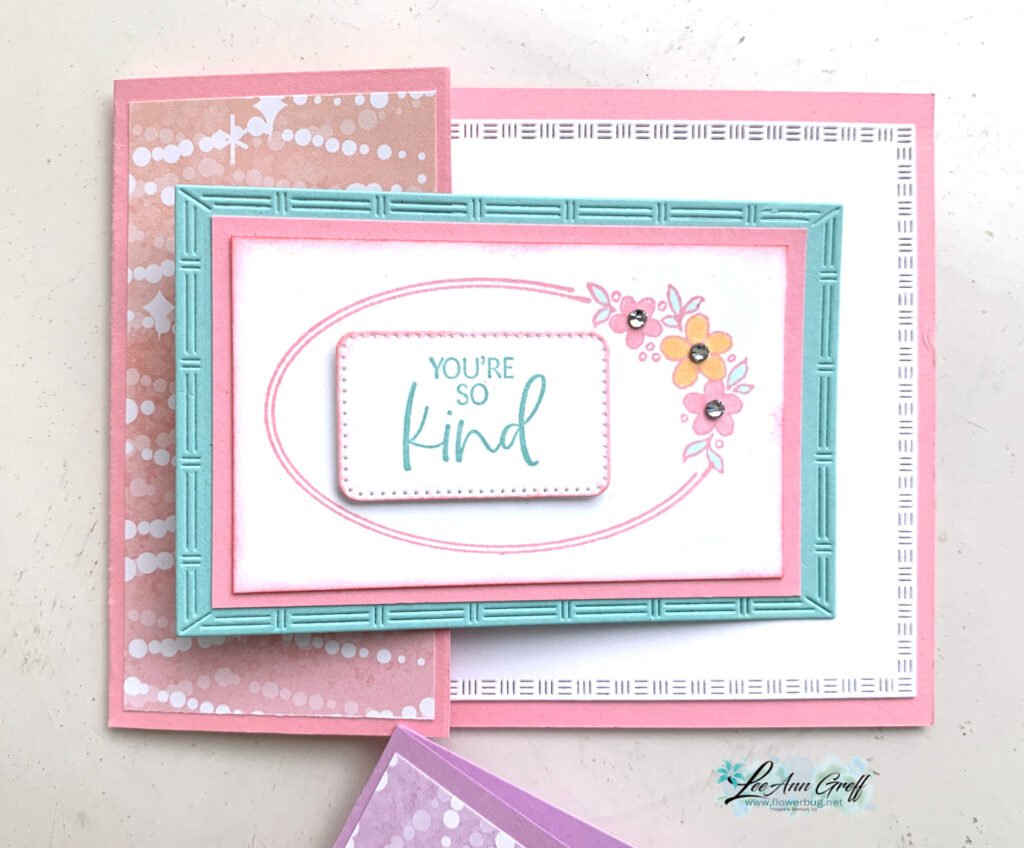
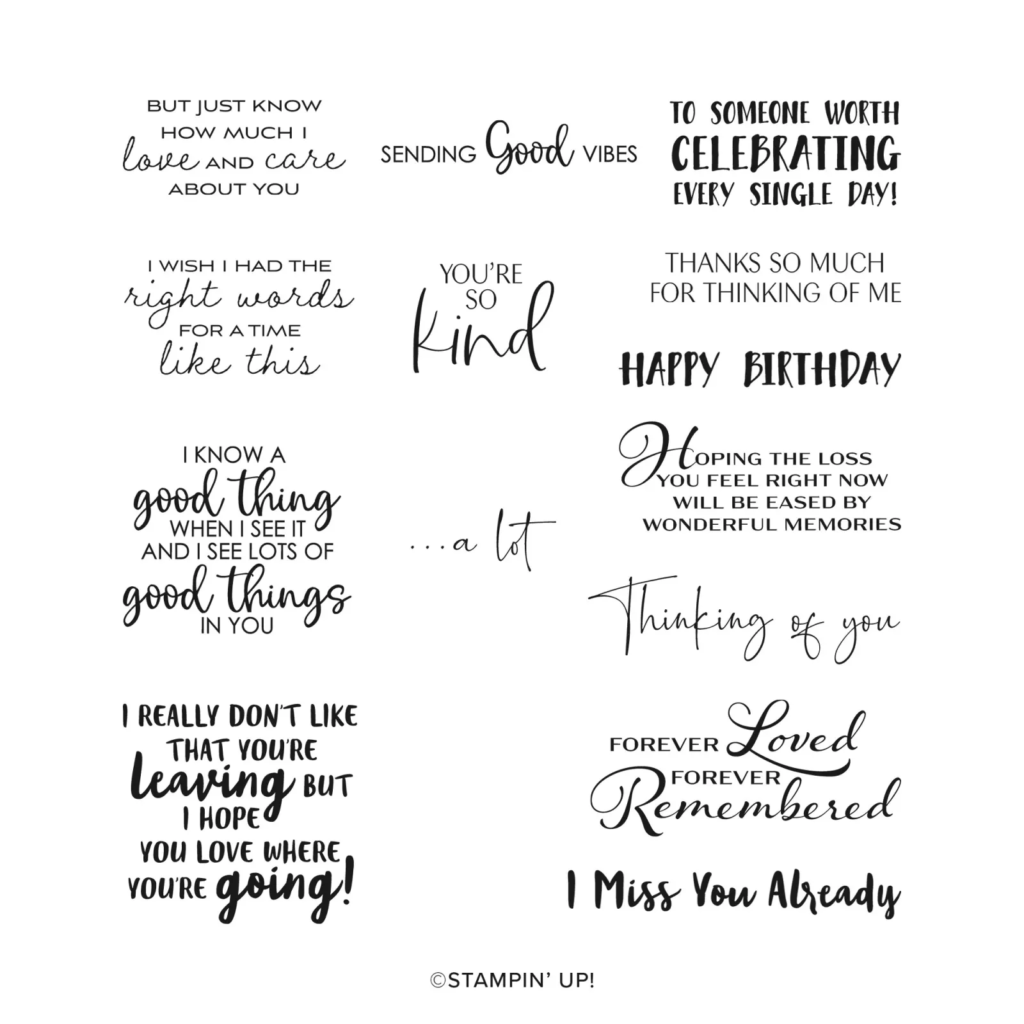
I featured the Addressed to You stamp set for all three cards. See the cute ovals & rectangle with the ‘filled in’ images on the right? Those are all part of this unique stamp set! See it here.
I used the retiring Textured Notes dies seen here. They’re the stitched edge rectangle dies used twice on this card. They are on the last chance list right now and reduced in price too!
This card opens with a type of flip/flap feel. Here’s how we cut off the tabs on the card base. Once you score your card you’ll make a pencil mark from the top and bottom at 1″. Then trim off the corners.
I was in the middle of the video tutorial for this card but the video failed right before I started the project. And I made my last packet. So I do not have a video for it. But hopefully the project sheet above helps you out.
~~~
February Specials
Product of the Month is the new Painted Illusions 12 X 12″ designer paper
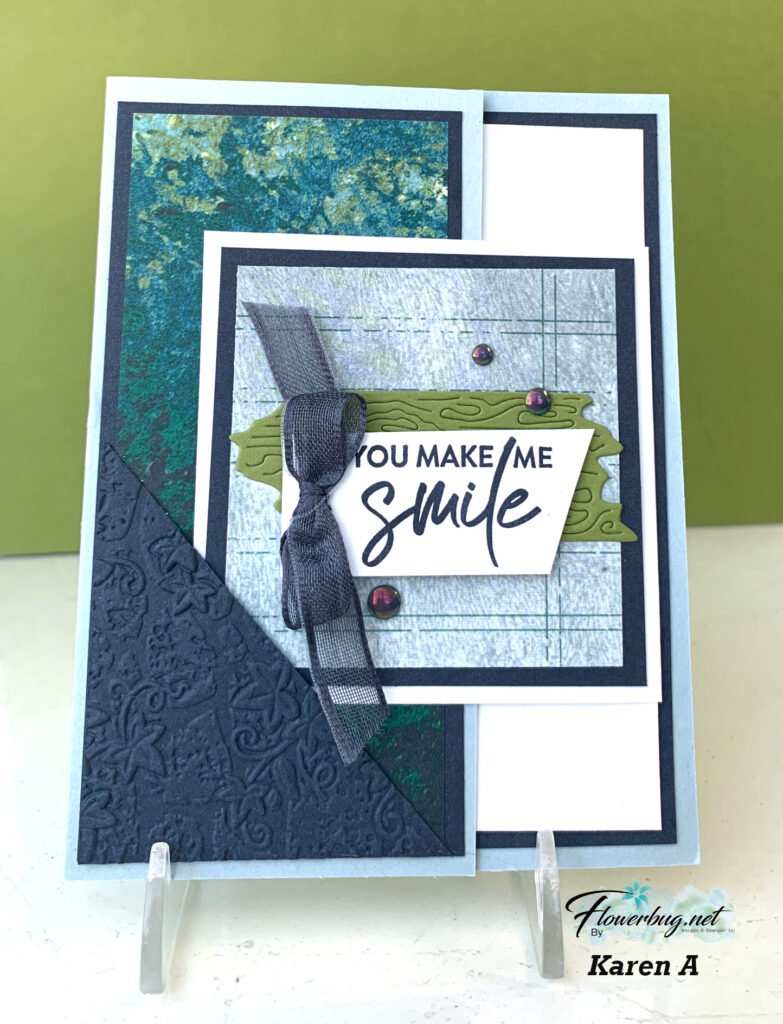
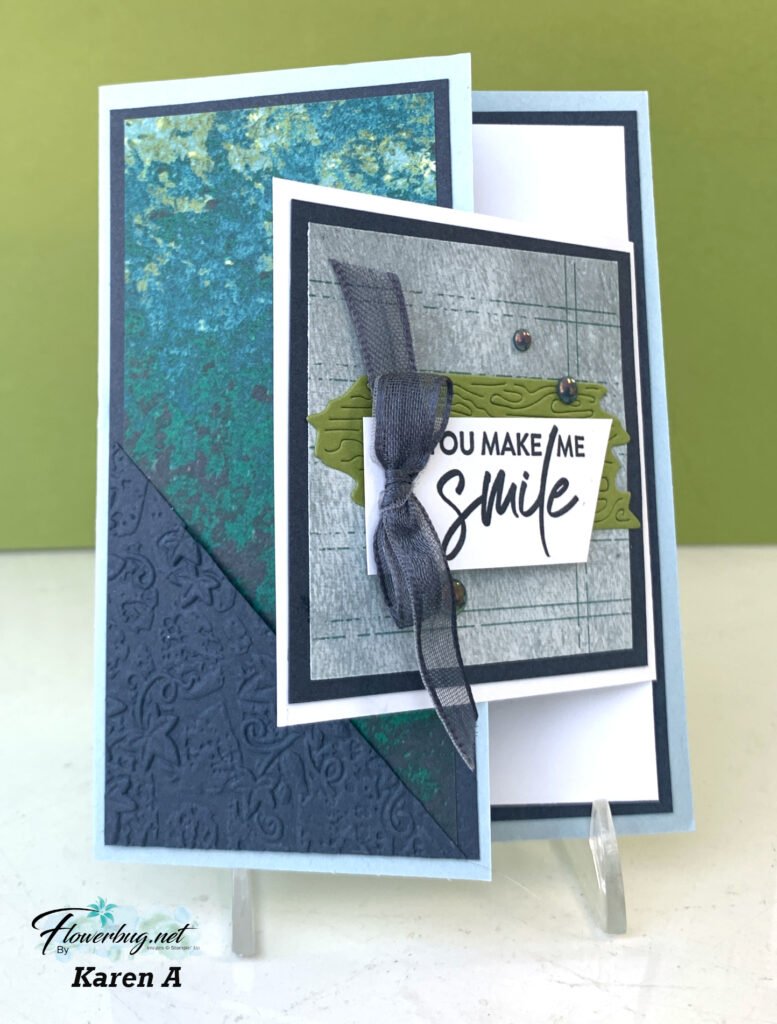
Isn’t it beautiful?! Can you tell that the front, main layers are ‘caught’ on the diagonal textured layer on the lower left? That’s what is keeping the flap tucked in. This is how it opens:
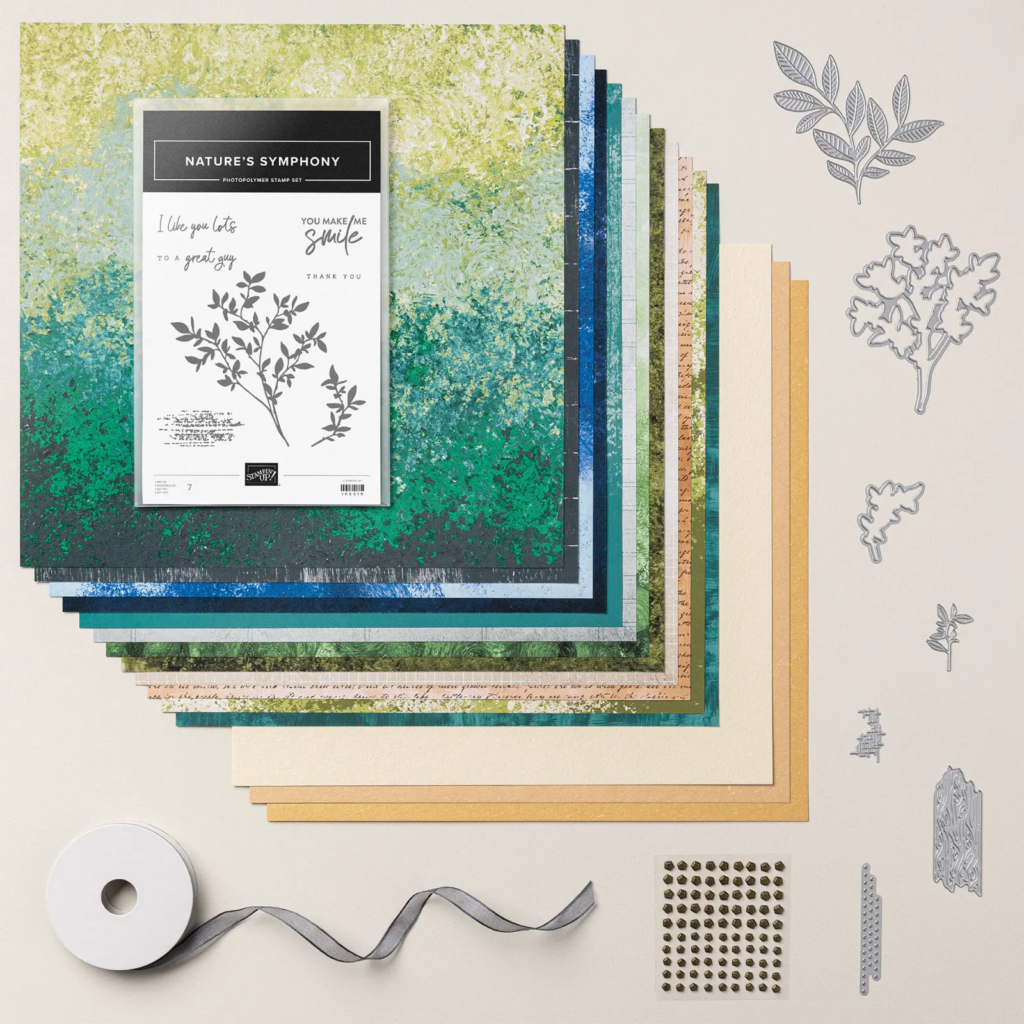
Her colors include Cloud Cover, Secret Sea, Old Olive & Basic White. I’ll share measurements below. Did you catch the pretty textured layer? That’s the new Stone & Vine 3D embossing folder. And did you notice the ‘wood look’ die-cut in Olive near the greeting? That and the greeting are included the Nature’s Symphony bundle seen here.
She used the Nature Walk suite for her card which includes gorgeous nature focused products. See it all here.
-card base 7″ X 5 1/2″ scored at 4 1/4″ -White 7″ X 5″ scored at 3 3/4″. Make a mark on the shorter end at 1″ from the top and the bottom. Trim off the rectangle to the score line for the front flap -Secret Sea front is 3″ square, side is 2 1/2″ X 5 1/4″, the diagonal piece is 2 1/2″ X 2 3/4″ cut in half and inside is 4″ X 5 1/4″ -DSP front is 2 3/4″ square, side is 2 1/4″ X 5″
Notice: LeeAnn Greff, Independent Stampin’ Up! Demonstrator, Manager. The content of this website is my sole responsibility as an independent Stampin’ Up! demonstrator and the use of, and content of, the classes, services, or products offered on this website is not endorsed by Stampin’ Up! Copyright 2025
")


")


Leave a Reply