/


Latest Post

Double Flap fun fold with free project sheet & video tutorial


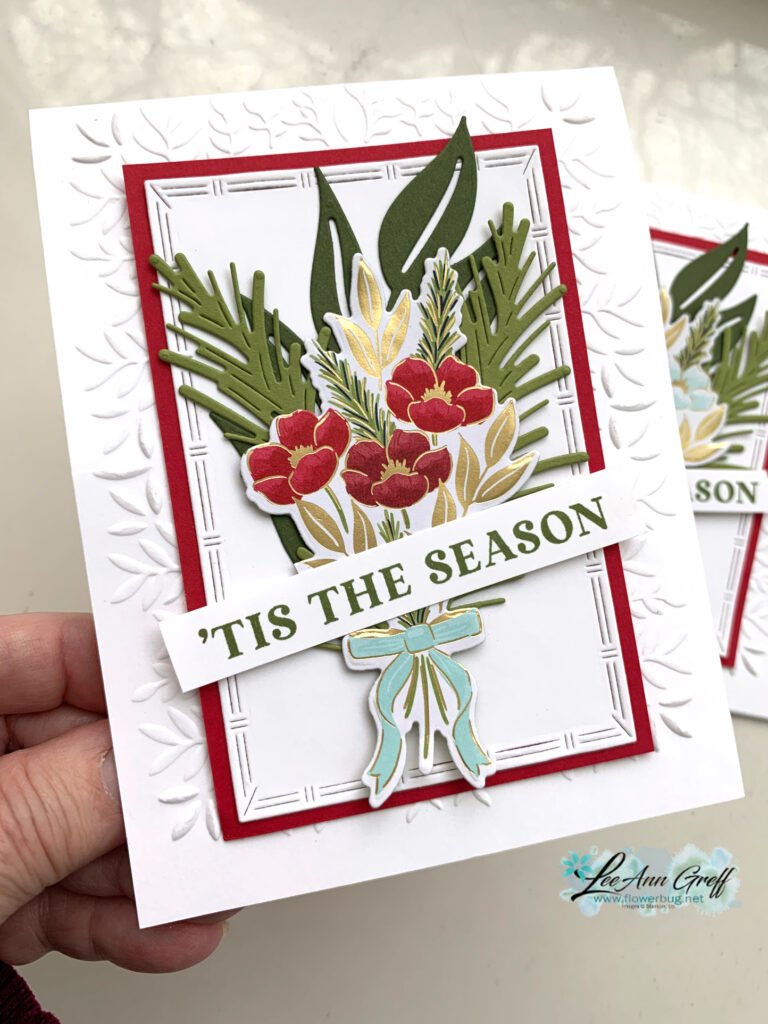
Today I'm sharing the second card I made on last week's video.  It's a double flap fold card featuring the Sunrise Sailing bundle.

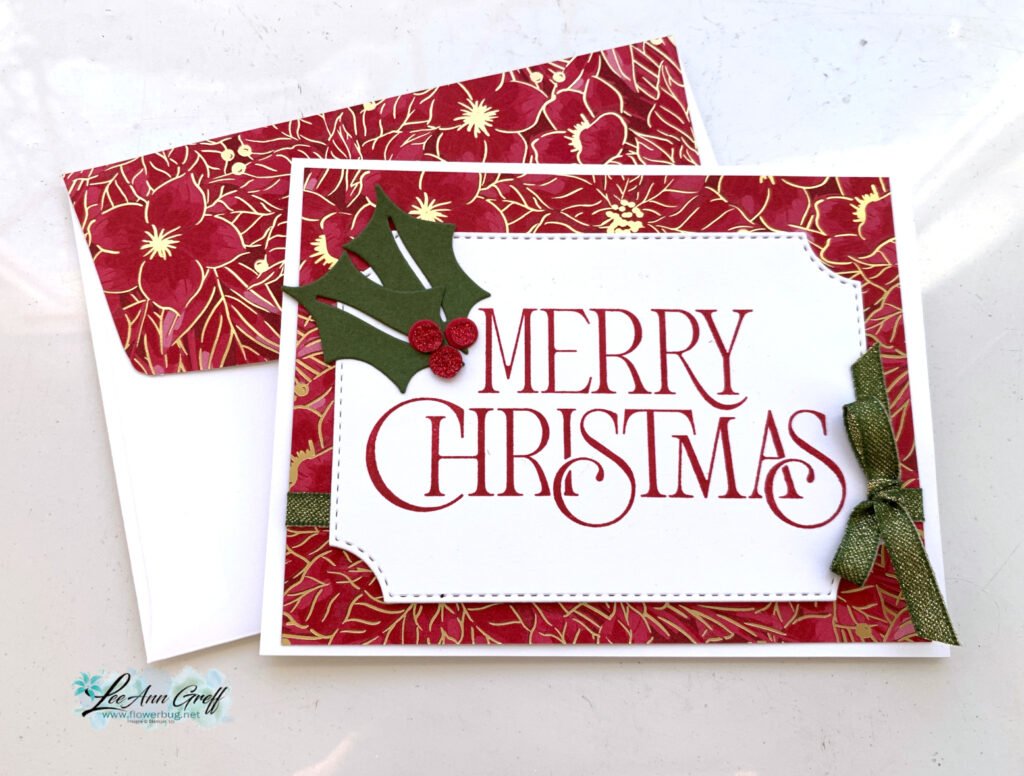
The colors include Cloud Cover, Secret Sea, Strawberry Slush and Daffodil Delight.  

I created a mask for the sun with a 1 7/8" circle punched from a post-it note. I used blending brushes & Strawberry Slush and Daffodil Delight inks. I also added just a hint of Strawberry Slush ink on the bottom of the cloud die-cuts. 

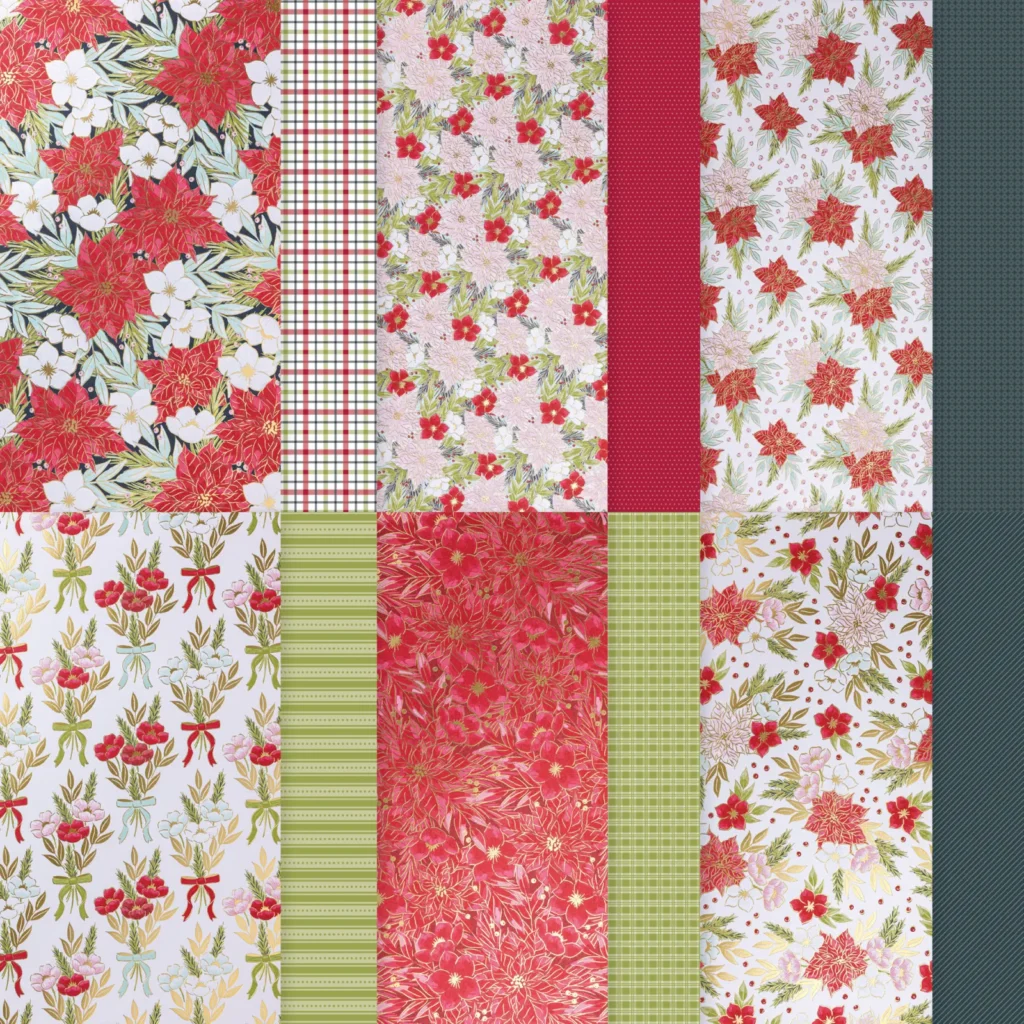
The Designer Paper is our new 6 X 6" In Color designer paper seen here.  

I showcased the Sunrise Sailing bundle seen here.  I love the stamp images AND the dies in this bundle.  They're wonderful and really spark creativity. There are THREE different size sailboats in the dies!  

As you can see in the sample in the photo below you can make a card with just the embossing folder! 

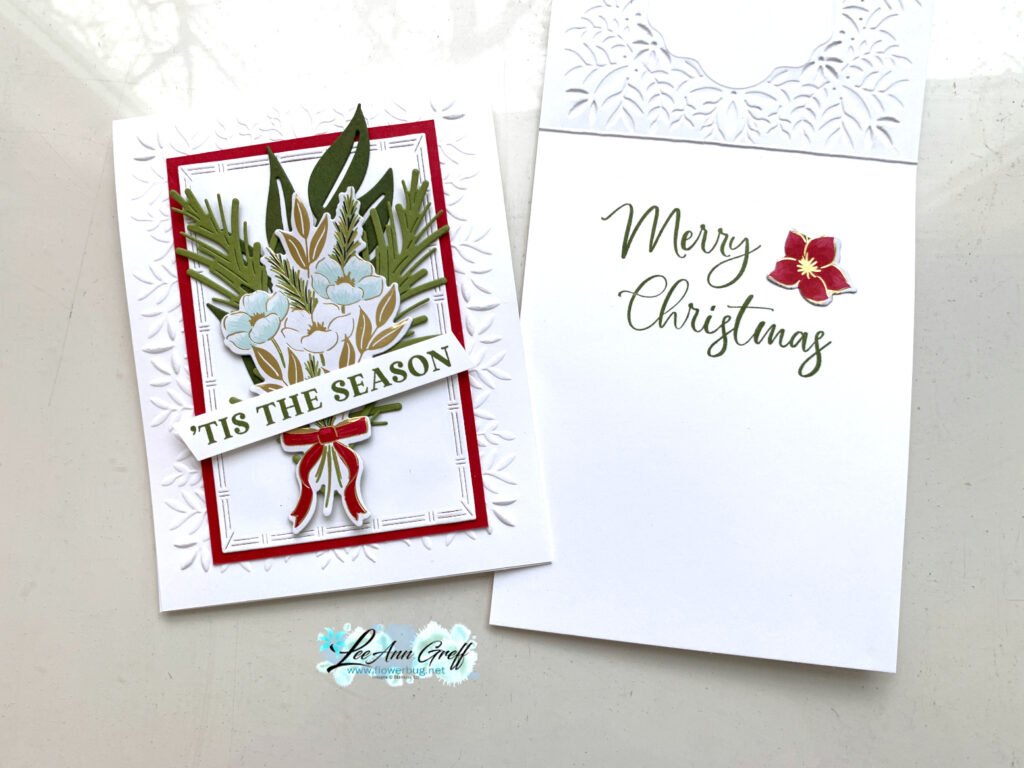
You can see in the photo below how the front square flap lifts to the right to reveal a peek at the inside. I added the cloud to the back of this square and placed it so it could 'latch' on the larger cloud to hold the card closed.   

I create a free project sheet for this card. I also share it on the same day as my video on my Flowerbug's Stamp & Share FB group here .       Download Sunrise Sailing Latch card

You can see the card fully opened below.  I love this easy but fun card fold.


You'll find the video tutorial for this card and another Sailing card below. Don't forget to subscribe to my YouTube channel while you're watching!  

I'll share another card with this bundle on Wednesday. 

~~~

July Specials:

New Online Exclusives are here!  

~~~

Last Chance List has been updated!  see it all here. Don't miss out on the deals!

~~~

Get my Turtle-y Cute PDF tutorial free with any online order in July!


All Posts

  • Autumn Garland Kit


    I love this autumn garland kit!  I made it for my open house display and am in love! 

    I’ll show my own photos soon but wanted to share the video for it here.  It took me about 1 hour and 15 minutes to make and it’s huge & gorgeous!  I had many extra leaves left. The copper leaves and acorns add beautiful accents.  

    It comes with everything you need but hot glue. 

    You can see it online here.  

    ~~~

    ~~~

      To see all of the new Online items click here.  Or download & save the Download Online Exclusives flyer 

    Get a free project tutorial with any online order in September! 

    ~~~

      To see all of the new Online items click here.  Or download & save the Download Online Exclusives flyer 

    Leave a Reply

    Your email address will not be published. Required fields are marked *

  • Holiday Catalog Open House displays!


    Saturday I held my new catalog launch party & open house.  I had a wonderful turnout!  Best thing was how much they loved the new products I displayed.  Here are some photos of my projects and swap cards:

    These first few photos show the autumn themed products including the Gathering Together suite and the Autumn Toile sweet. 

    Next is the beautiful Lights of Aurora, the Fluffy Squirrel and Amber Autumn projects: 

    This next photo shows the display in my studio wall.  I always have multiple packs of designer papers hanging on the wall or on my magnet boards.  

    Next up are a few displays with Holiday themed products: 

    I loved playing with the new Joyful Days Memory & More cards. Such pretty pine themed cards!  

    I hope you enjoyed seeing some of my new Holiday displays.  I love holding these open houses because I get to see customers & friends I don’t see regularly.  And I get to cook for them too, which I totally enjoy! 

    ~~~

    ~~~

    ~~~

      To see all of the new Online items click here.  Or download & save the Download Online Exclusives flyer 

    Get a free project tutorial with any online order in September! 

    Leave a Reply

    Your email address will not be published. Required fields are marked *

  • Colorful Autumn Trees card with a baby wipe technique


    Fall is in the air here in North Dakota.  Look at this gorgeous & colorful autumn tree!  

    It’s made with the new Autumn Trees bundle seen here.  Here’s how I did the tree:

    1. I stamped the tree onto Crumb Cake card stock using Crumb Cake ink.
    2. Then die-cut it with the tree die from the bundle. 
    3. Next I inked up a baby wipe with fall colors of Garden Green, Crushed Curry, Pumpkin Pie and Cajun Craze.  I rolled it up and pressed it onto the tree die-cut repeatedly. 
    4. Lastly I used a Crumb Cake Blends marker to add more detail to the trunk.  

    I used the Birch Wood embossing folder on the Vanilla background and lightly blended Cajun Craze ink over it.  The greeting is from the More Messages bundle. 

    Thanks for stopping in today!  

    ~~~

    ~~~

      To see all of the new Online items click here.  Or download & save the Download Online Exclusives flyer 

    Get a free project tutorial with any online order in September! 

    ~~~

    Leave a Reply

    Your email address will not be published. Required fields are marked *


Notice: LeeAnn Greff, Independent Stampin’ Up! Demonstrator, Manager. The content of this website is my sole responsibility as an independent Stampin’ Up! demonstrator and the use of, and content of, the classes, services, or products offered on this website is not endorsed by Stampin’ Up! Copyright 2025