/


Latest Post

Diagonal Fun Fold with new products! Free project sheet & video too.


Today I'm sharing a neat fun fold I hadn't made for awhile.  It's a diagonal fold that is fun and easy. 


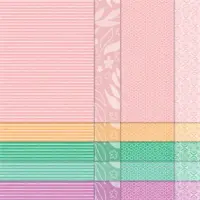
I used a few new, upcoming products from both the 2025 Spring and the 2025 Sale-a-Bration catalogs.  The greeting & punch are made with the Bright Borders set and coordinating To the Point punch.  The designer paper is the Toadstool Gardens 6" DSP from the SAB catalog.  It's free with any $60 purchase from January 7th – February 28th, 2025.  

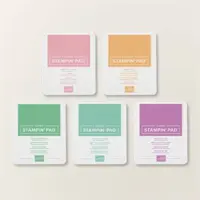
I made over 20 of them for a mail out swap I joined.  The colors include Melon Mambo & Granny Apple Green. 


I share how to make it in the video here and seen below.  Basically it involves trimming off half of one side of the card base, flipping it and adhering it back to the card front.  The only confusing this can be adding your designer paper.  I suggest using a non-directional paper when trying this out. 

Here's the free project sheet you can print or download. Click on the following link: Download Bright Borders Diagonal fun fold


Below is the video if you'd like to see how to assemble this card. I also share a pretty Sophisticated Sled project too.

~~~

December Specials:

*current host code link:  

P243X6VH

3 new designer papers!

~~~

Available December 3rd; while supplies last!

~~~

~~~

All Posts

  • A Little Latte cards – all made from leftovers on my desk!


    I decided to have a staycation this last weekend. I rarely take a day off at home; it seems like the only time I take an entire day off is if I leave town.  I tried my hardest to stay out of my studio on Saturday.  I lasted until 5 pm; then I couldn't resist playing a bit. 

    I had a bunch of fussy cut coffee cups in a baggie and thought they'd make great thank you cards. So I pulled out my A Little Latte designer paper pack and some extra greeting tags and made these cards. 

    The designer paper pieces were either strips or squares so I arranged the fussy cut coffee cups over the largest pieces.  I think they turned out great for cards made without a plan!


    The only thing I purposefully prepped were the card bases and White textured layers (So Swirly embossing folder seen here). The rest are all scraps! 

    Do you ever play with what's on your desk and get creative? 

    ~~~

    May Specials: 

    *current host code link:  9AWSF9T9 or FERX3EKC

    ~~~

    Get over $200 in products for just $99 in May & free shipping too! 

    You'll get tons of new In Color products plus choose $125 in products of your choice! 

    ~~~

    All online orders in May will receive a free project tutorial and if your order is over $50 I'll also send you a pre-cut card kit!

    Leave a Reply

    Your email address will not be published. Required fields are marked *

  • Just a few days left to get over $200 in Stampin’ Up! products for just $99


    Friday is the last day to get the Starter Kit deal of over $200 in products for just $99!  Crazy & amazing special offer! I'd love to have you join my Flowerbug's Team! 

    Here's how it works:

    Start your list of $125 in products of your choice.  Then click on this link.  You'll add your products to the order and you'll also receive the following items absolutely free!

    • 5 new Classic In Color ink pads
    • 1 pkg of 8 1/2" X 11" In Color assorted card stock (20 sheets)
    • 1 pkg. of 6 X 6" In Color designer paper (40 sheets)
    • 1 set of 5 In Color Stampin' Write markers
     More information:

    ****Remember that most Demonstrators are 'happy shoppers' – in it mostly for the discount and fun!  

    Benefits of the Starter Kit: 

    • New demonstrators can select any Stampin’ Up! products up to the $125 in value for just $99.
    • New team members who join Stampin’ Up! get to be a part of our amazing community of Stampin' Up! crafters with exclusive FB groups including my Flowerbug's Team! Plus, they get to enjoy sharing simple and fun crafting experiences with others, early access to products, and exclusive access to training events.
    • The Starter Kit includes business resources like catalogues, brochures and postcards.
    • My Flowerbug's Team is incredible, generous, talented and kind. 
    • My Team members get all of my current and past tutorials FREE!   
    • We have optional swaps, monthly challenges, lots of sharing and Prize Patrol too!
    • You can be any kind of Demo you want; there's no need to run a business.  You're in charge and can simply enjoy the discount or hold events and earn an income. I'm happy to support you either way! 
    • Email me here with any questions you have.  

    Click here to get your Starter Kit deal and join my Team! 

    ~~~

    May Specials: 

    *current host code link:  9AWSF9T9 or FERX3EKC

    ~~~

    Get over $200 in products for just $99 in May & free shipping too! 

    You'll get tons of new In Color products plus choose $125 in products of your choice! 

    ~~~

    All online orders in May will receive a free project tutorial and if your order is over $50 I'll also send you a pre-cut card kit!

    Leave a Reply

    Your email address will not be published. Required fields are marked *

  • Simple fun fold card with Wildflower Designs with video & free project sheet


    I shared two cards featuring the Wildflower Designs bundle in last week's video. Here's one of them: 

    Can you see the simple but different card layout here? The back of the card is a full 4 1/4" X 5 1/2" layer. The Lost Lagoon folded card is 8" X 5 1/4" scored at 4".  So easy but unique too. 

    Click here to download or print the free project sheet: Download Wildflower Designs easy fold

    I wanted to use Pretty in Pink with a current color and chose Lost Lagoon to pair with it.  I think they work beautifully together. 

    What do you think of the new Dashing Designs embossing folder? I love it! 

    The Wildflower Designs bundle can be seen here.  I love the stamp set a lot but the dies won me over. There's so many possibilities with them! 

    I made the card on the right below first.  Then tried it again for the left card.  Can you spot the difference?  

    When I made this card for our Team swap my first one did not include the frame.  Otherwise they're the same. Which do you prefer? 

    Watch the video below; it's the first project I share. 

    Don't forget to subscribe to my YouTube channel while you're there. 

    ~~~

    May Specials: 

    *current host code link:  9AWSF9T9 or FERX3EKC

    ~~~

    Get over $200 in products for just $99 in May! 

    You'll get tons of new In Color products plus choose $125 in products of your choice! 

    Click on the pictures above or below to get to my new catalog shares – choose from designer papers or a ribbon share. 

    ~~~

    All online orders in May will receive a free project tutorial and if your order is over $50 I'll also send you a pre-cut card kit!

    Leave a Reply

    Your email address will not be published. Required fields are marked *


Notice: LeeAnn Greff, Independent Stampin’ Up! Demonstrator, Manager. The content of this website is my sole responsibility as an independent Stampin’ Up! demonstrator and the use of, and content of, the classes, services, or products offered on this website is not endorsed by Stampin’ Up! Copyright 2025