/


Latest Post

Great card ideas from my Flowerbug’s Team swaps!


Here are a few more swap cards made by my Flowerbug's Team in August.  I hope you get some inspiration from them.  

First is a sweet card made by Candy using the Caroling Mice stamp set. It's a hostess stamp set that's free with host rewards. See it and the details on page 86 of the Holiday catalog.  Or click here.  

Her colors are Cherry Cobbler, Crumb Cake, White & Shaded Spruce.  She colored the images in with Blends markers.  I love how she paired the Merry Melody embossing folder with this!  

The circles are from the Layering Circles dies and the designer paper is the Lights Aglow specialty DSP.  It is currently out of stock but will return in September.  

~~~

Next is another fun card using the same Caroling Mice set, made by Sharon.  

She used a totally different color combo here – Orchid Oasis with White & Garden Green.  

We colored the mouse in with watercolor pencils and smoothed them out with a Blender pen.  She used the Deckle dies for her rectangles, the Christmas Banner dies for the greeting and the trees are from the same set but fussy cut.

That dotted silver background paper is from the Silver & Gold DSP – currently available free with a $50 during Sale-a-Bration in August.  Sale-a-Bration ends on the 31st!  

We used the Pearlized Enamel Effects on the tree ornaments, the music notes and for his hat pompom! So fun! 

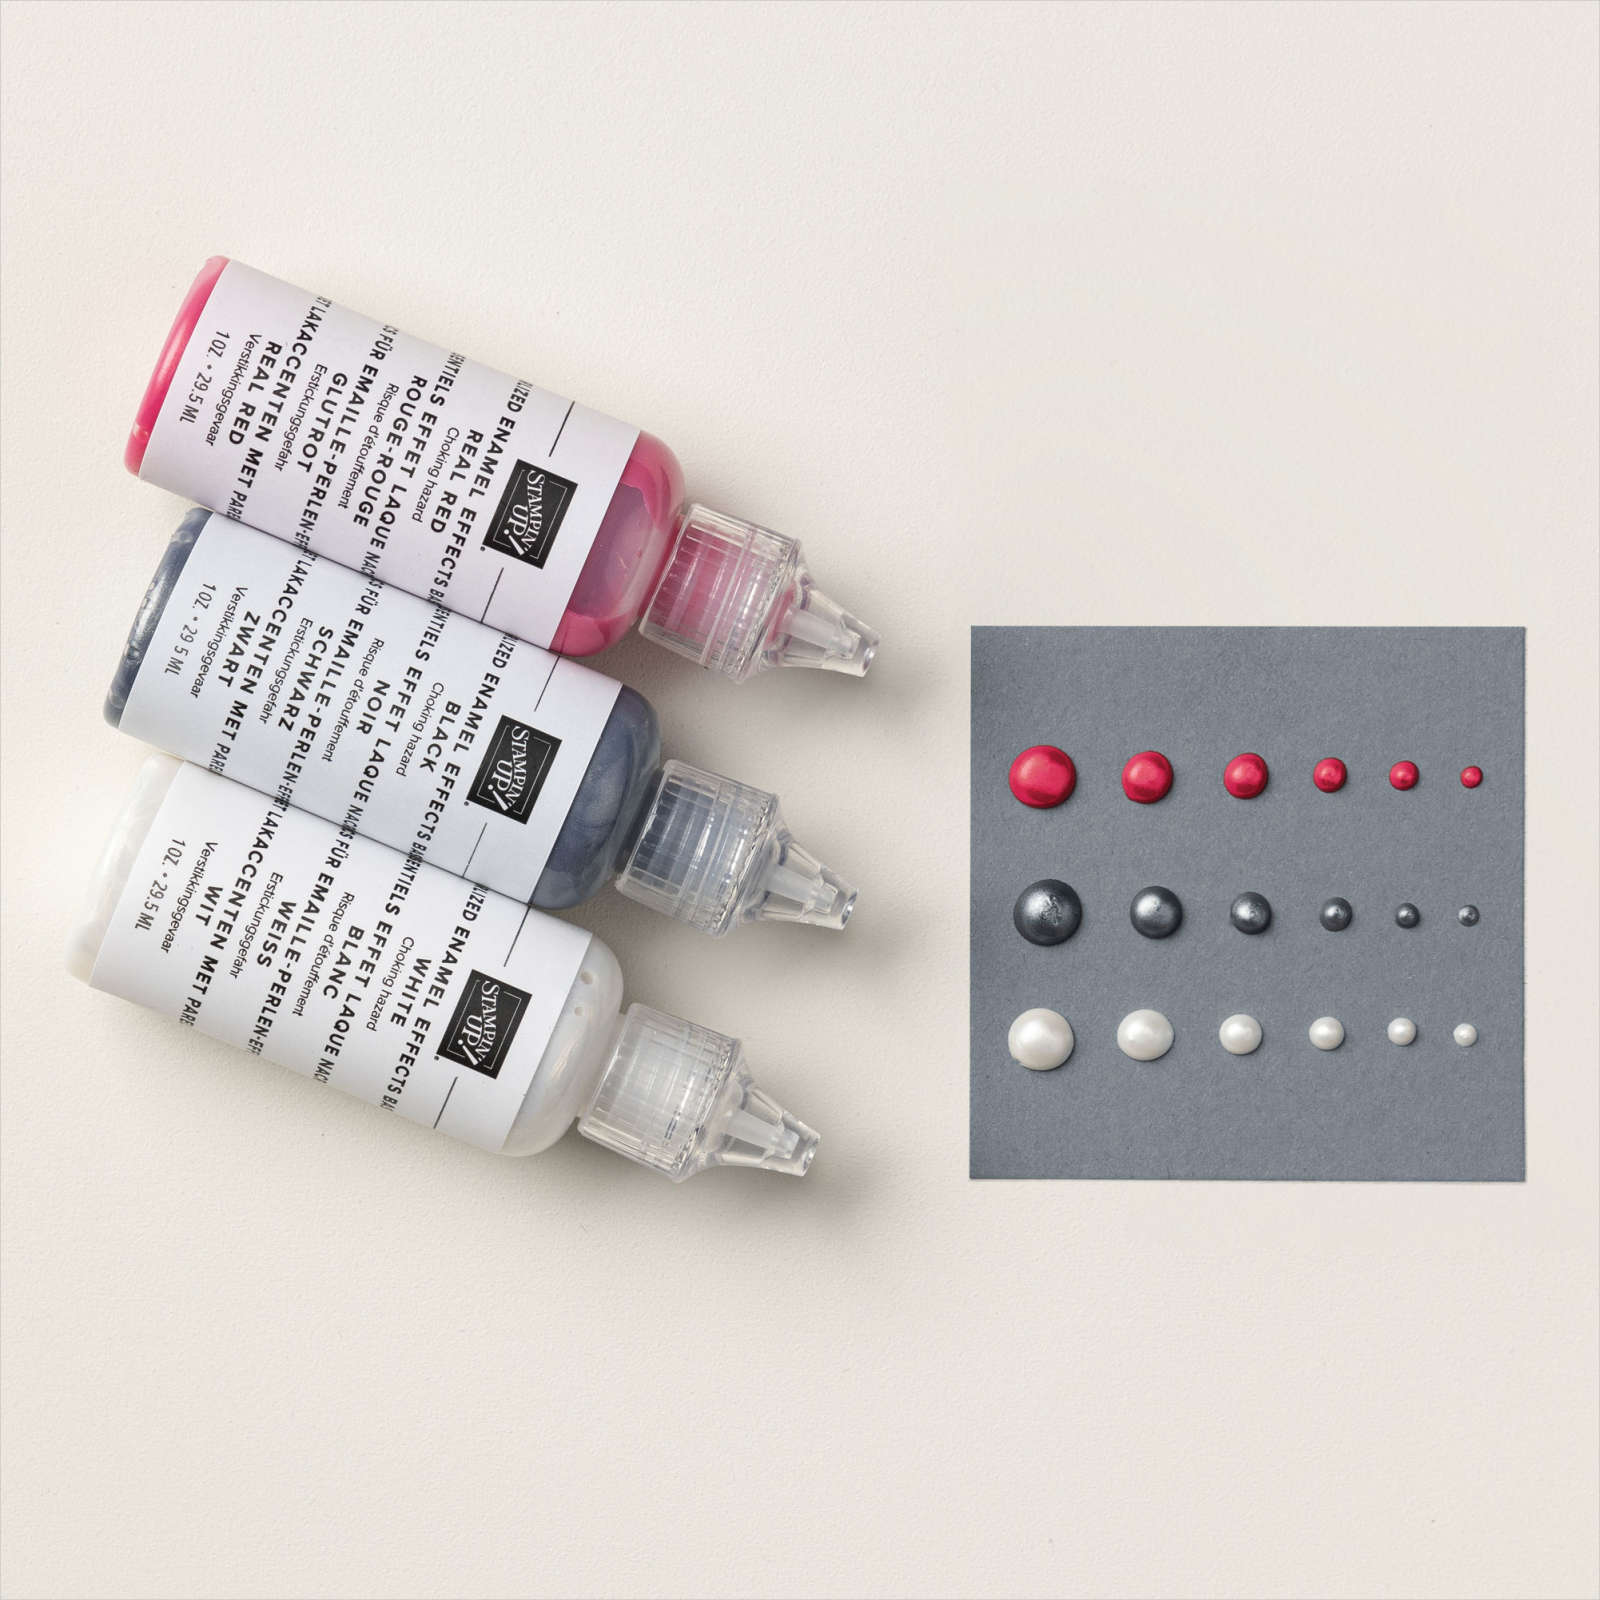
It comes in 3 colors – Black, White & Real Red. See this product here. 

~~~

Lastly for today is Becky's card – she loves to combine multiple stamp sets & dies for a super creative card! 

I'll list them here:

  • Ornament, stars, bow & pine bough – Decorated Pine dies
  • Plaid background in Red glimmer & Shaded Spruce – Candy Cane dies
  • The ornament is made from Silver Foil paper & paper pieced with In Color glitter paper!  


~~~

August Specials

Get free items here in August during Sale-a-Bration! 


Host code: E22FXSSB


Get these pretty gems free! *click here to order 

Earn free products with my loyalty rewards! 

Click here to download yours and earn a $50 shopping spree!

All Posts

  • Floral Charm fun-fold card kit to go or choose the PDF tutorial option


    This is my second card kit to go I've created for July.  It features the new Floral Charm designer paper released in our newest Online Exclusives.  It's absolutely gorgeous designer paper!  

    My favorite thing about this pack of paper is that the reverse side of the pretty floral patterns have a coordinating solid print. So I created a batch of fancy fold cards to show them off!  

    The directions for these fun fold cards are included in the PDF tutorial plus there's a private video you'll get access to when you purchase either the kit or the PDF tutorial.  

    This kit to go includes the following products:

    • 1/2 pkg Floral Charm DSP (6" X 12")
    • a share of Peacock/Gold ribbon
    • a share of Shimmer dots
    • pre-cut or die-cut pieces for each of 10 cards
    • the PDF tutorial & video link 

    The kit to go is $31 and can be reserved here.  It is shipped out at the end of July. The PDF tutorial is $16 and can be seen here.  The tutorial is emailed to you immediately after purchase. 

    *You will need stamp greetings, inks, a paper trimmer (to cut your new designer paper) and adhesives to finish the cards. 

    See all of my available kits to go and tutorials here.  Opt in for more than one to save on shipping costs! 

    *If you'd like to subscribe to receive a kit automatically each month please use the button below.  My subscribers get a free surprise every few months along with the guarantee of a beautiful kit full of products too! 

    ~~~

    July Specials:

    New Online Exclusives are here!  

    ~~~

    Last Chance List has been updated!  see it all here. Don't miss out on the deals!

    ~~~

    Get my Turtle-y Cute PDF tutorial free with any online order in July!

    Leave a Reply

    Your email address will not be published. Required fields are marked *

  • Kintsugi Inspirations fun fold card kit to go or tutorial. Reserve yours now!


    I'm thrilled with the cards in the Kintsugi Inspiration kit this month!  I am featuring this unique, gold foil accented designer paper for one of my kits to go in July. (I add 2 new kits to my shop each month!)

     The gorgeous designer paper is definitely the star of these stunning cards. Each of the 10 cards are unique fun fold designs and the video will help you assemble each one.

    The directions for the cards are included in the PDF tutorial plus there's a private video you'll get access to when you purchase either the kit or the PDF tutorial.  

    This kit to go includes the following products:

    • 1/2 pkg Kintsugi Inspirations specialty DSP (6" X 12")
    • a share of Misty Moonlight 1/4" ribbon
    • a share of gold Flower Accent gems
    • pre-cut or die-cut pieces for each of 10 cards
    • the PDF tutorial & video link 

    The kit to go is $31 and can be reserved here.  It is shipped out at the end of July. The PDF tutorial is $16 and can be seen here.  The tutorial is emailed to you immediately after purchase. 

    *You will need stamp greetings, a paper trimmer (to cut your new designer paper), adhesives and inks to finish the cards. 

    See all of my available kits to go and tutorials here.  Opt in for more than one to save on shipping costs! 

    *If you'd like to subscribe to receive a kit automatically each month please use the button below.  My subscribers get a free surprise every few months along with the guarantee of a beautiful kit full of products too! 

    ~~~

    July Specials:

    New Online Exclusives are here!  

    ~~~

    Last Chance List has been updated!  see it all here. Don't miss out on the deals!

    ~~~

    Get my Turtle-y Cute PDF tutorial free with any online order in July!

    Leave a Reply

    Your email address will not be published. Required fields are marked *

  • How to add color to the Peaceful View stamp – video tutorial too!


    Today I'm sharing the second card I made during last week's live video.  Both featured the amazing and beautiful Peaceful View stamp set seen here.  

    I used Balmy Blue, Pecan Pie and White card stock.  Inks include Balmy blue, Old Olive, Granny Apple Green and Pecan Pie. I used a Blending Brush with Balmy Blue ink to lightly color the sky before stamping. 

    Notice the fence. If you look closely you'll see the woodgrain in the fence. This was done by using an Early Espresso Stampin' Write marker to add to the stamped fence directly on the cardstock. It was mostly Pecan Pie colored before.  

    How did I color the image?  I inked the trees with Old Olive ink first using the direct to stamp method. The I used Pecan Pie on the grass and fence.  I used a sponge dauber to remove ink from the plants on the bottom so I could add Green ink to them with a sponge dauber.  I used Pecan Pie ink and a sponge dauber to add color to the trunk as well.  I hope you'll watch the video below to watch this in action. 

    For the greetings I stamped the More Messages stamp a few times and used the coordinating die to cut them all out.  I had lots to choose from this way and can save them to use whenever I need it. Here I added Balmy Blue ink lightly to color the greeting.

    What I love about this new messages bundle is that the greetings and die-cuts are such a nice size; larger than ever before. See the bundle here. 

    Here's the free project sheet with measurements and supplies for you: Download Multi-colored Peaceful View

    Below is the video for this card and another where I show you how to use this stamp on pretty designer paper for a stunning background. I shared that yesterday here. 

    ~~~

    July Specials:

    New Online Exclusives are here!  

    ~~~

    Last Chance List has been updated!  see it all here. Don't miss out on the deals!

    ~~~

    Get my Turtle-y Cute PDF tutorial free with any online order in July!

    Leave a Reply

    Your email address will not be published. Required fields are marked *


Notice: LeeAnn Greff, Independent Stampin’ Up! Demonstrator, Manager. The content of this website is my sole responsibility as an independent Stampin’ Up! demonstrator and the use of, and content of, the classes, services, or products offered on this website is not endorsed by Stampin’ Up! Copyright 2025