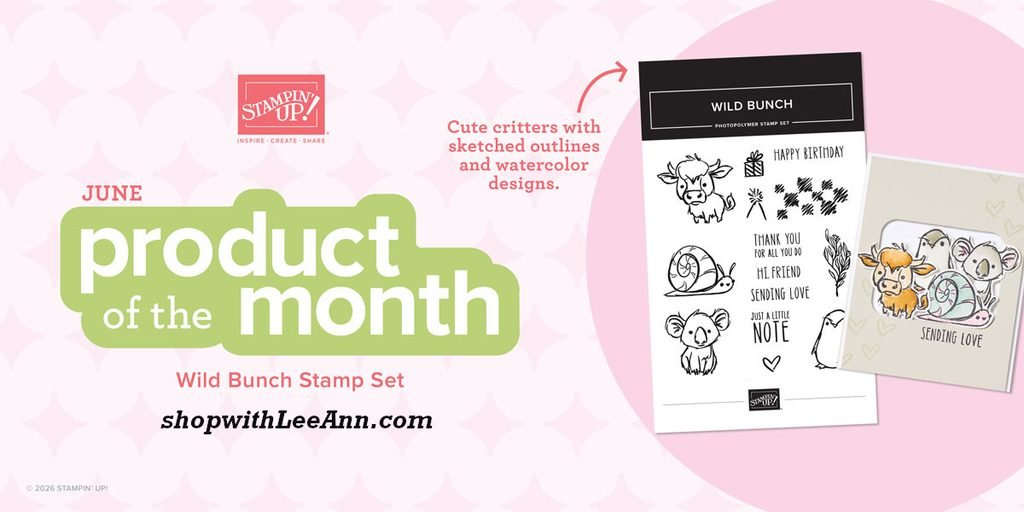
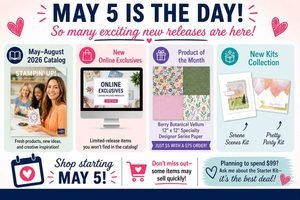
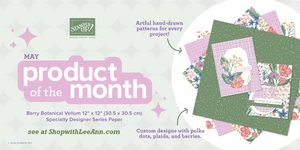
Here’s the latest product of the month – Wild Bunch stamp set – just $5 with a $75 online order. Click here
All Posts
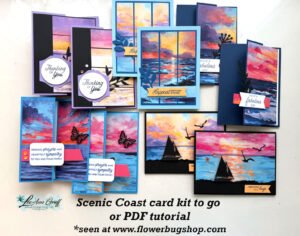
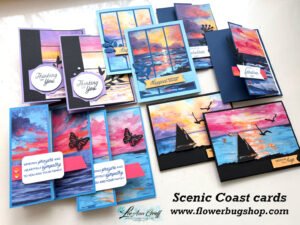
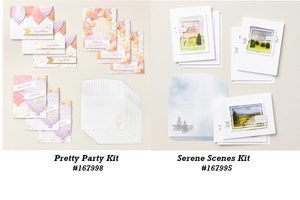
Gorgeous Scenic Coast card kit to go or tutorial
I knew from the first time I saw the Scenic Coast specialty paper that it would be my top choice for kits in May. It’s just plain stunning!
These cards are big WOW’s that you’ll enjoy making and gifting. They feature brand new products plus they’re so easy to make too!
My kit to go includes 1/2 pkg. of the Scenic Coast 6″ DSP, a share of Sunset sequins and the new Floral Flight black accent die-cuts. You’ll also receive the 10 pre-cut cards including die-cuts and punched pieces. It’s a great deal for almost $20 in product plus the card kit and PDF tutorial for just $32. Go hereto reserve the pre-cut kit.
Or, if you prefer to receive the PDF tutorial only click here. Both options include exclusive access to the video tutorial!
The kit to go will be sent out at the end of May. The PDF tutorial is emailed to you immediately.
I recently held a BOGO event for my local customers, and I wanted to extend a similar offer to you.
Here’s how it works: If you place an order over $100, I will send you a mystery box filled with Stampin’ Up! products for free. I’ll even pay the shipping to you! It’s an amazing deal!!
Don’t wait to grab yours! I have a limited supply.
Each box includes at least $200 in product value and includes these items:
2 stamp bundles with either dies or punches
1-2 stamp sets in photopolymer or red rubber
1 thick bunch of 6 X 6″ designer paper
an embossing folder or set of dies
2 ribbons or twines
8 handmade cards
2-3 hand-cut acrylic clear blocks
many will include the following – a Paper Pumpkin card kit, gems, ink, ephemera, cards & envelope pack or stencils
This is a sample photo of what your box might include:
Notice: LeeAnn Greff, Independent Stampin’ Up! Demonstrator, Manager. The content of this website is my sole responsibility as an independent Stampin’ Up! demonstrator and the use of, and content of, the classes, services, or products offered on this website is not endorsed by Stampin’ Up! Copyright 2025


Leave a Reply