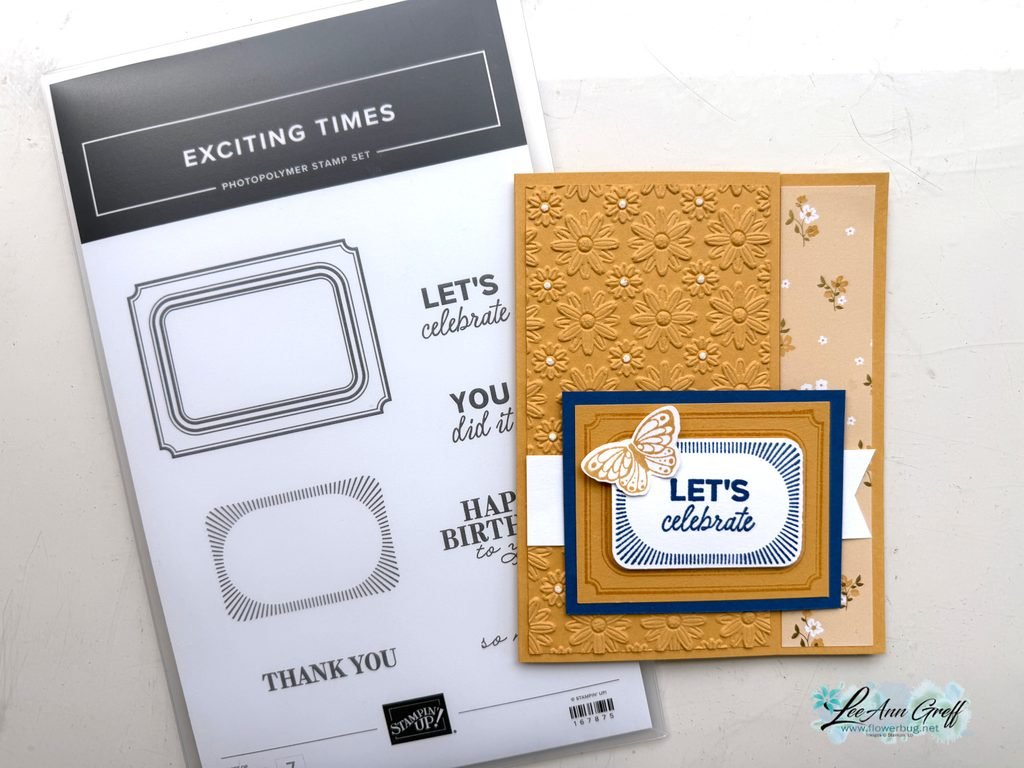
Here’s a neat card that showcases a bunch of new products from the 2026 Summer catalog by Stampin’ Up!.
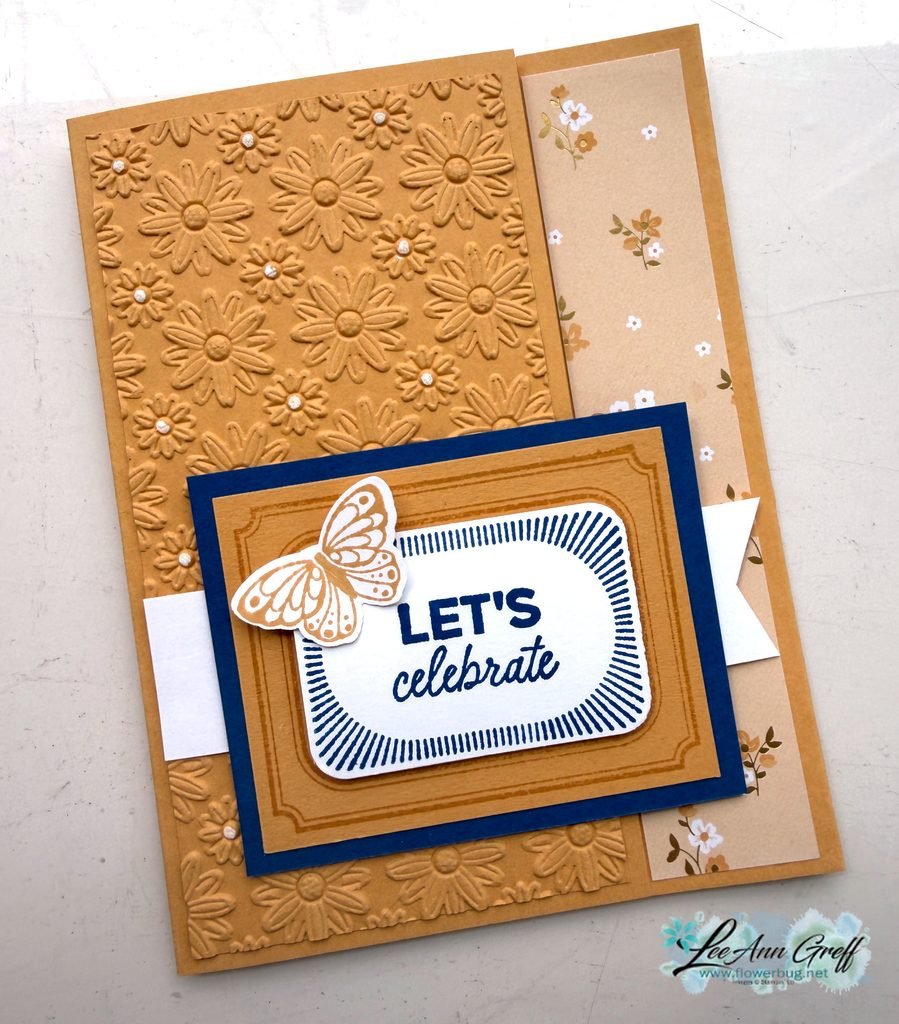
This is our new ‘Golden Glow’ in color with Blueberry Bushel and White. I added white centers to the small embossed daisies with our new White Gel Pen.
It features a ton of new products which I’ll list here:
- Exciting Times bundle seen here
- Lazy Daisy embossing folder seen here
- Bloom Boutique DSP seen here
- All Afflutter bundle seen here
- our new fantastic White Gel pens seen here
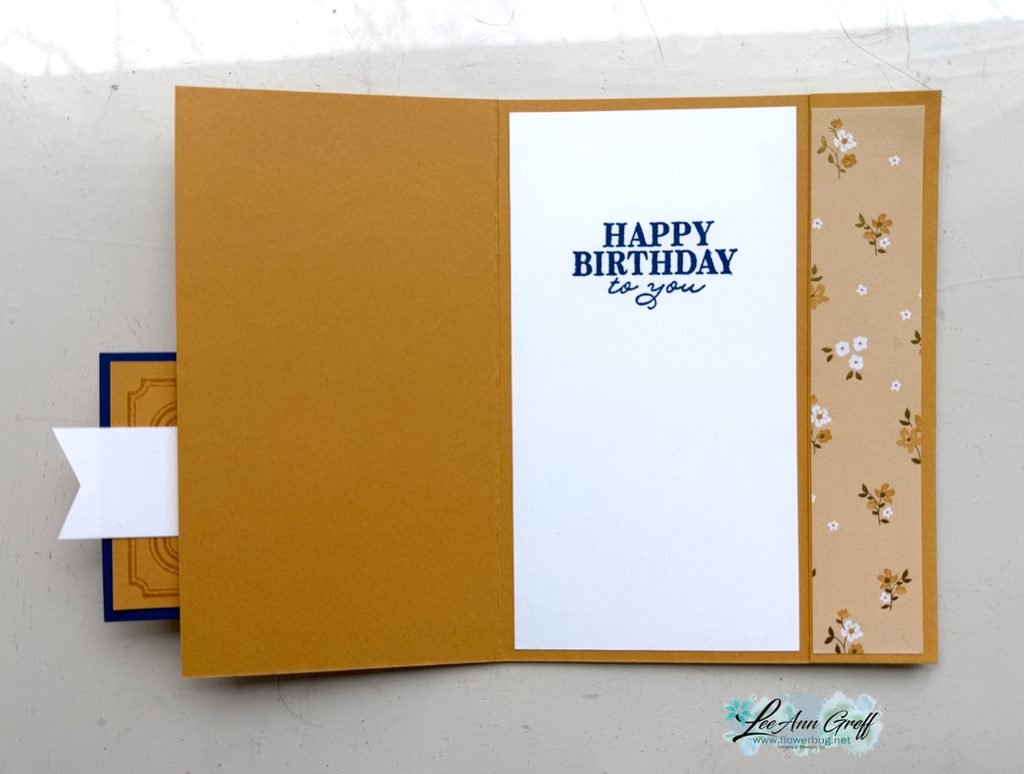
I trimmed off one inch from the card front to reveal the pretty DSP on the inside edge. I originally created this for a possible swap card; but it didn’t make the cut. Do you see the blooper/mistake here?
Thanks for stopping in today; I appreciate it!

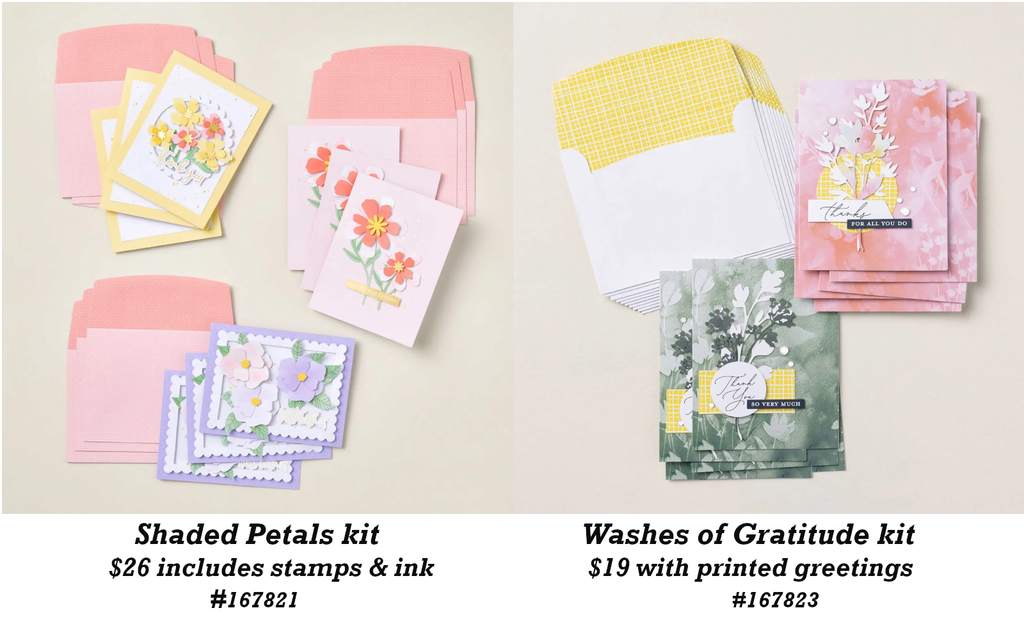
Below are the two new kits in June!


Leave a Reply