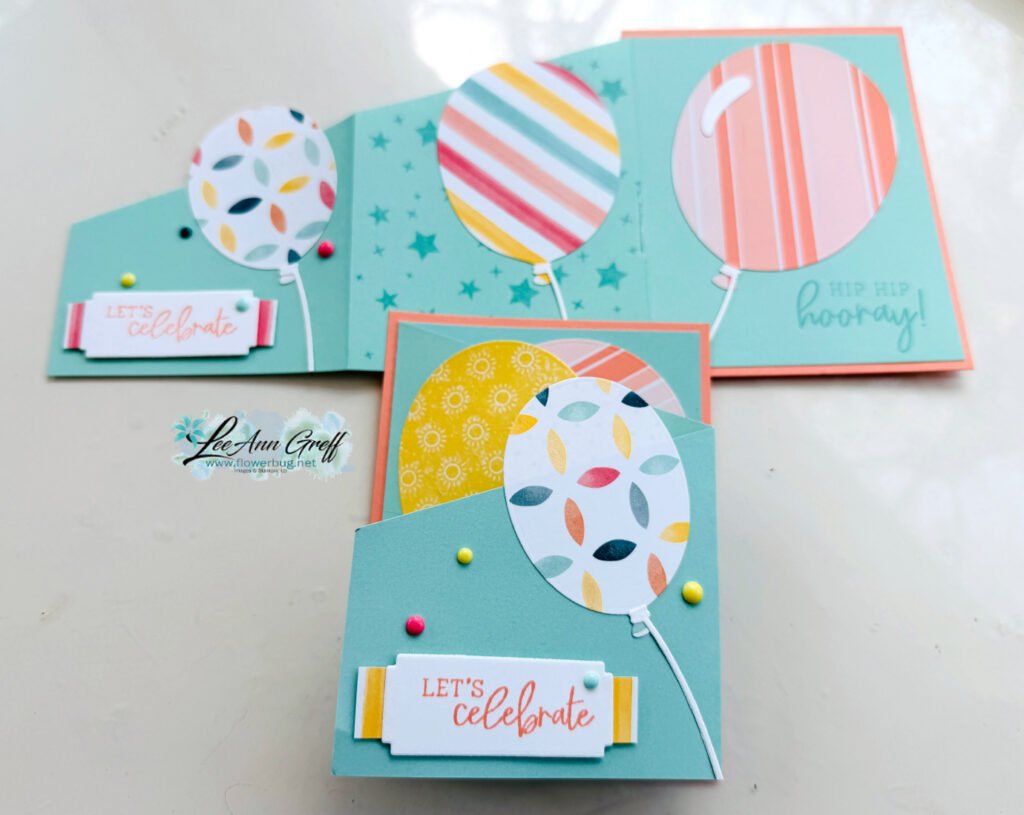
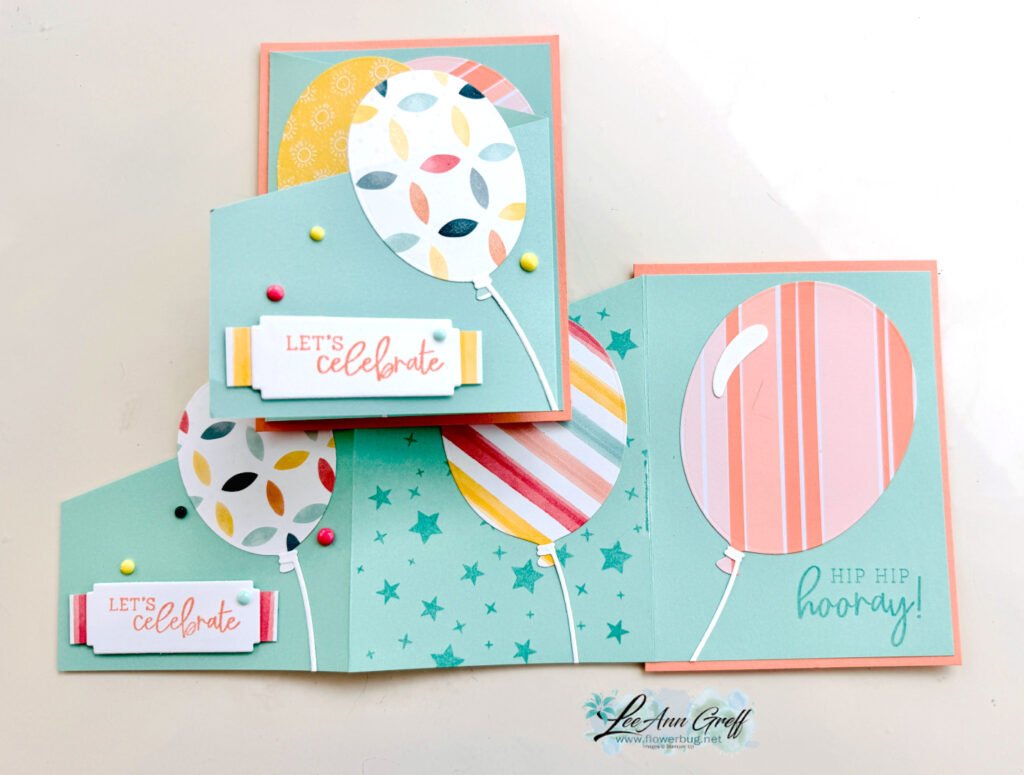
Neat Diagonal Z-fold with Balloon Festoon; free project sheet too!
I created this card for my May Team swap; the theme was to use new Summer catalog products.
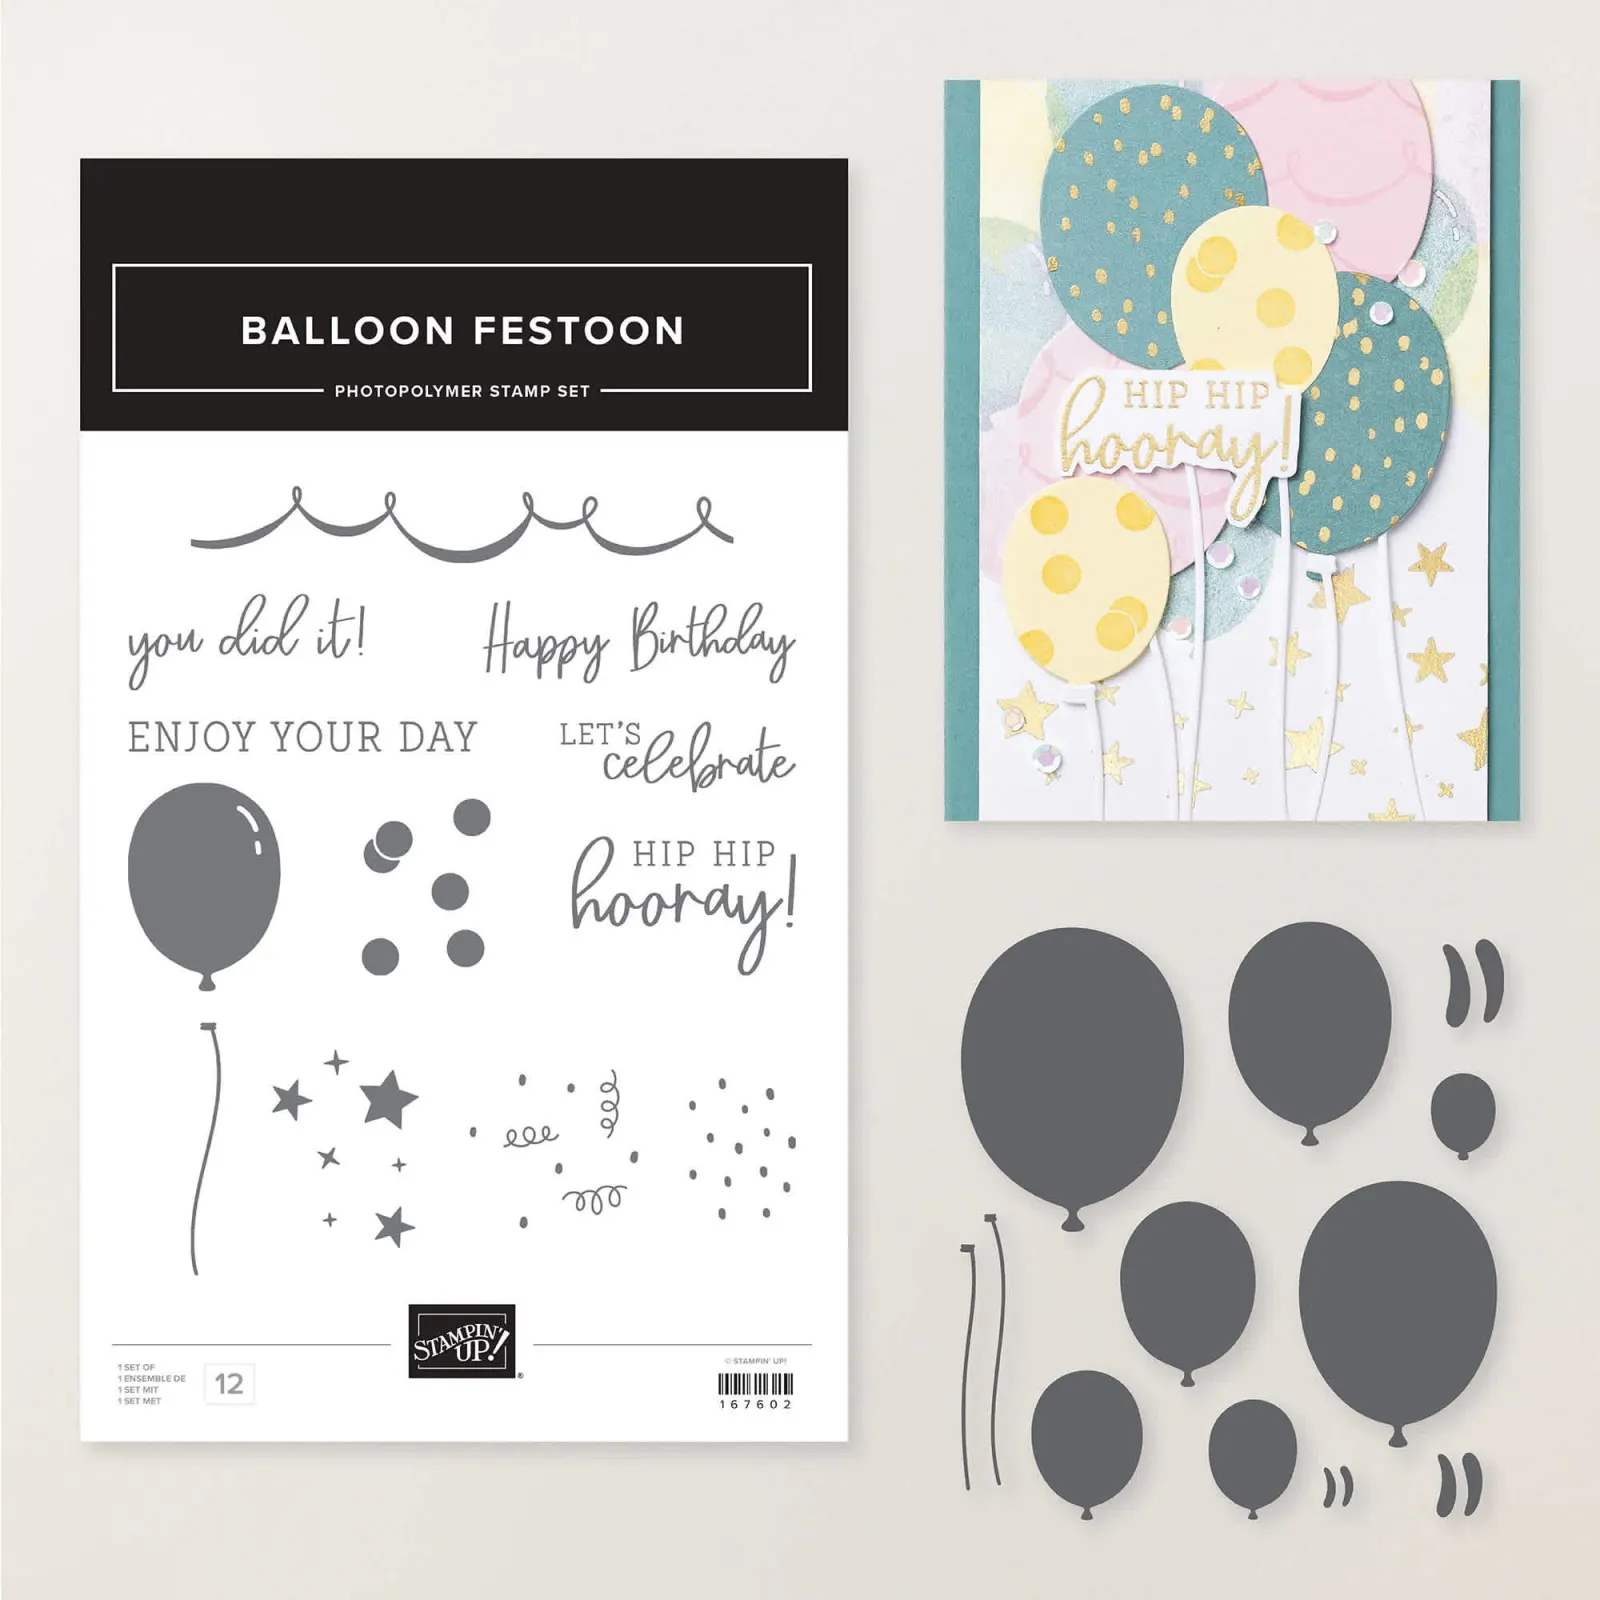
The Balloon Festoon bundle is a new favorite of mine. The multiple sizes of balloon dies are just wonderful and perfect for any celebratory event. See it here.
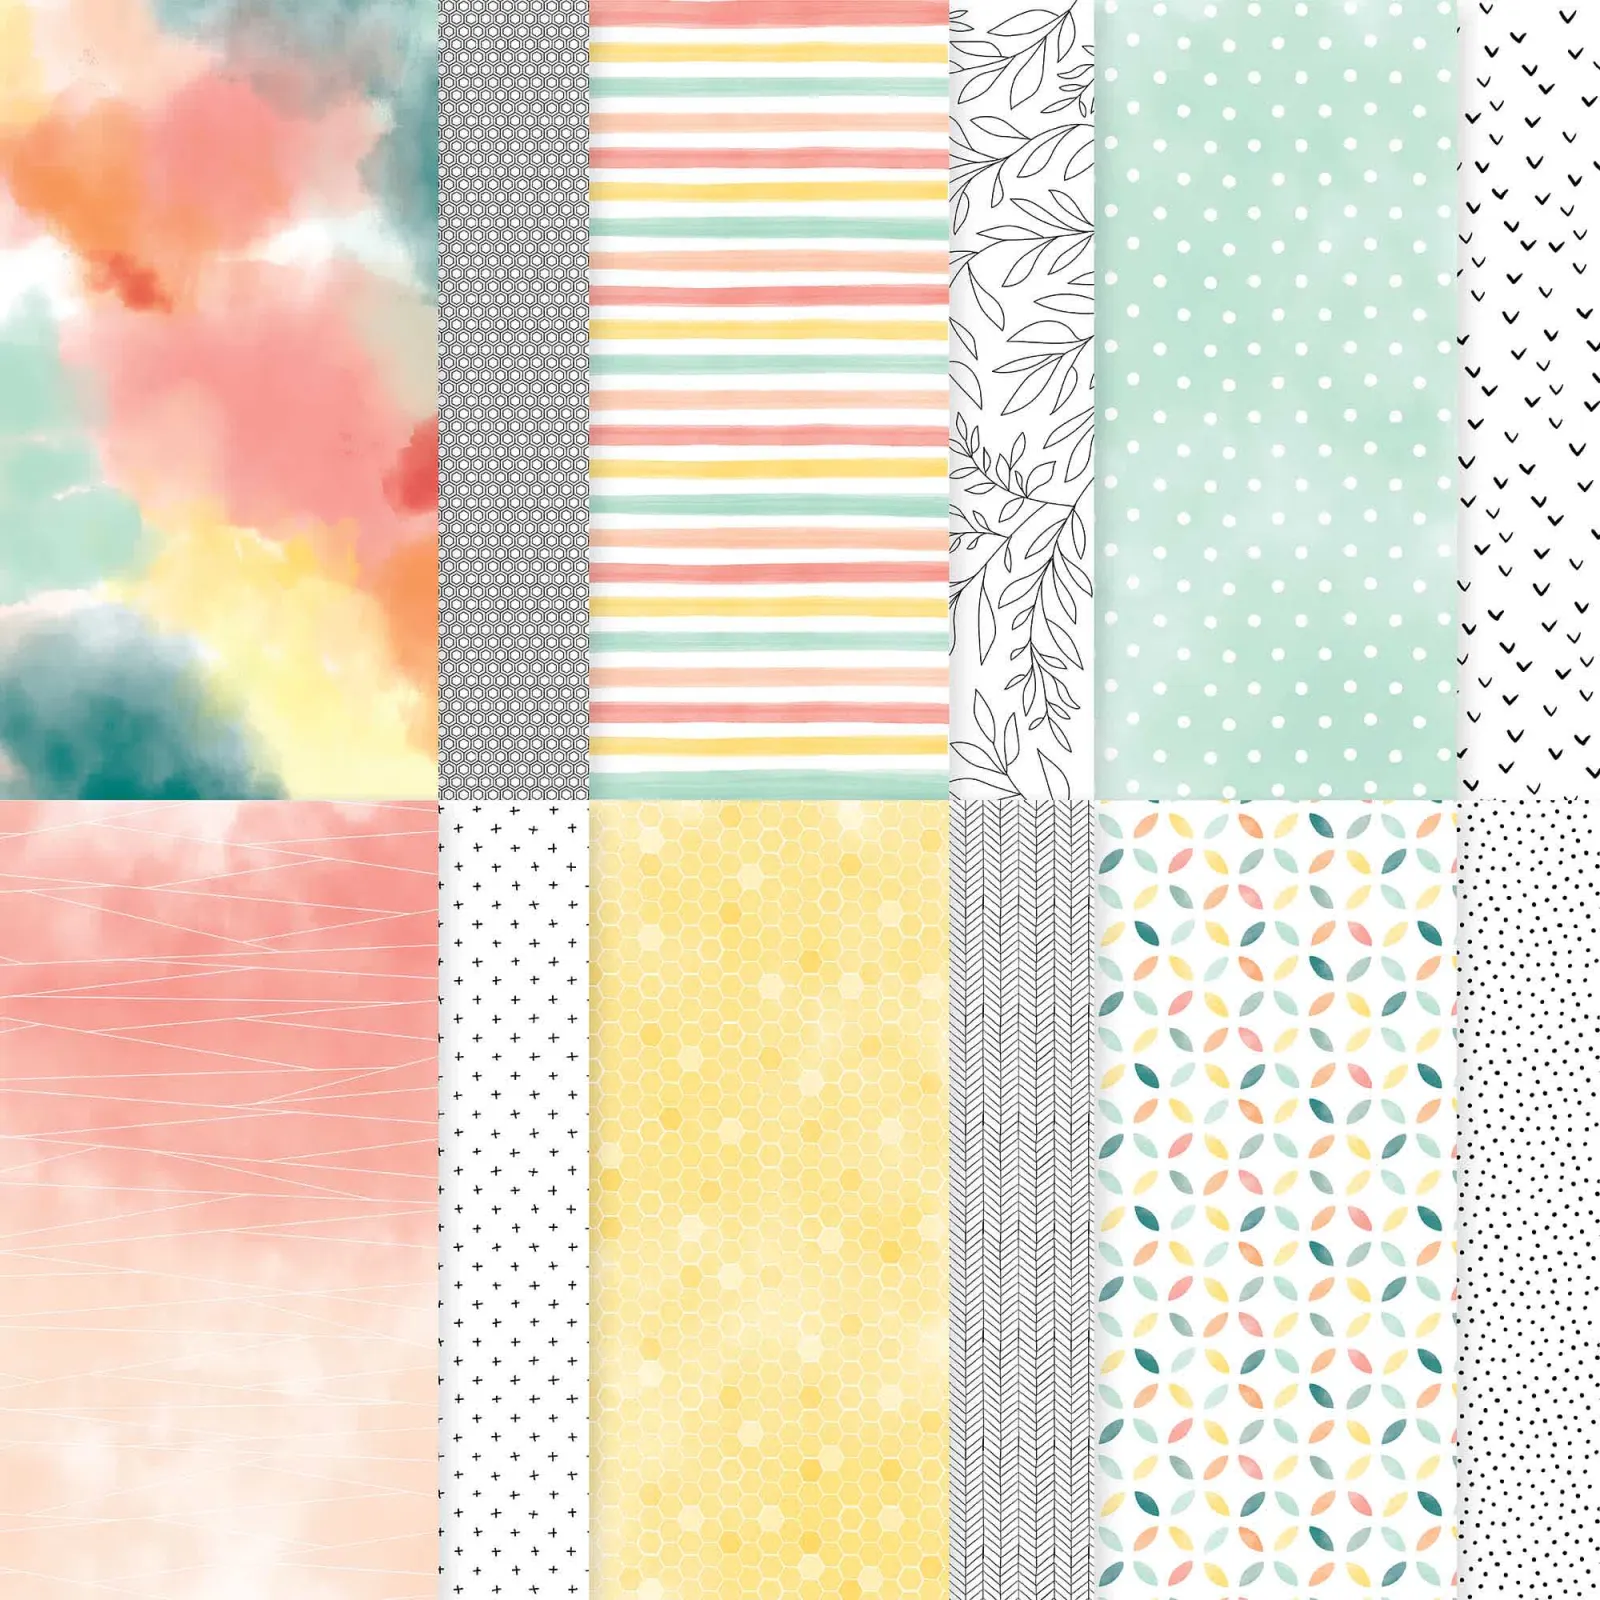
I used the 12 X 12 Pool Party 2-tones card stock for the diagonal layer. It’s 12″ X 5 1/4″ scored every 4″. Then simply cut at an angle from the lower left to the upper second score line.
I created a free project sheet for you; click here to print or download it.
Below is the video where I shared this card and another featuring the same products.
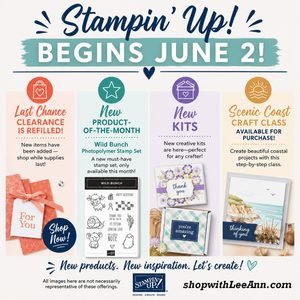
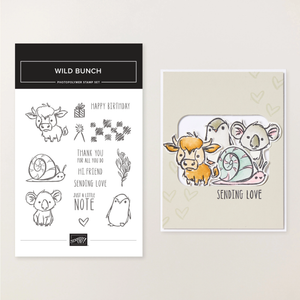
June Specials:
June’s Product of the Month is this adorable stamp set! Redeem it for just $5 once your order is over the $75 mark.
All Posts
More ideas with the Oh So Ombre DSP & A Touch of Ink stamp set; both FREE for just 5 more days!
The end of Sale-a-Bration is nearing and I had to get one more play in with these two amazing products. A Touch of Ink stamp set & Oh So Ombre Designer Paper. Both of these are free with a qualifying order through February 28th.
This sliding latch card is quite unique and fun too. My friend Karen shared it with us at a recent Team meeting and I had to learn how to make it. She found the idea from Chris Slogar. It's so cool!
You need the Classic Label punch, Designer paper and a few punched or die-cut images for the front and inside.
I chose to use the flower and hummingbird images in this set. I stamped the flower using both the outline and solid images. For the hummingbird I stamped the outline image on a scrap of White CS and colored it in with Blends markers. Then I fussy cut it out and added to the circles.
This card is so neat! But you'll definitely want to watch the video below to catch the important 'how to' tips.
~~~
Next is a fun card with a neat masking tip using the leaves in this set. I stamped them in a 'round' to create a loose wreath.
I chose to use the Granny Apple Green and Bermuda Bay papers and inks here. Watch the video below to catch my matching tip to connect the four stamped leaf images perfectly.
Click on the video below to see how I made these and one more Fun Fold card!
A Touch of Ink Fun Fold card with Oh So Ombre; quick & easy!
We made these pretty fun fold cards at my February card clubs! I think the A Touch of Ink stamp set is incredibly versatile! There was an option for everyone's needs.
I shared this card on my FB Live yesterday plus two others with this paper & stamp set. You can see it here.
Aren't they pretty?! I feel like these two Sale-a-Bration choices go together perfectly. The Ombre DSP lets the stamp shine though. You can get either or both free with an order through February 28th. Sale-a-Bration ends then and there won't be anymore 'free' with purchase options.
Go here to see the A Touch of Ink stamp set and here to see the Oh So Ombre DSP.
I added some of our new Black Matte gems and the pretty Black Glittered ribbon too. That neat stitched die-cut is from the Stitched Nested Label dies seen here.
Measurements:
Black 5 ½” X 8 ½” score at 1 ½” and 4 ¼”
Designer Paper – 5 1/2" X 6". Cut in order from left to right so the pattern matches making sure the 6" side is along the top. 2 ¾” X 5 ¼”, 1 1/8” X 5 ¼”, 2 1/8” X 5 ¼”. Plus the last piece on the right is 1 3/4" X 5 1/4"
White inside 2 3/4" X 3 1/2", die-cut is 2" X 3 3/4"
Black strip 1" X 2 3/4"
~~~
February Specials:
There's just 5 days left of Sale-a-Bration and the Starter Kit promotion!
Get over $200 in product for just $99 and free shipping. The current bonus is 5 packs of NEW 6" Designer Paper FREE.
Last weekend we held our monthly card swap with my Flowerbug's Team. The theme was to use Specialty paper on their card.
The cards I'm sharing today all feature the Love You Always Specialty Foil papers. Did you know we have two kinds? A smooth foil seen here and printed foil seen here.
This first card was created by Karen G. She used both specialty papers with the Always in My Heart bundle. The Floral Heart dies are gorgeous! I love the heart and that banner!!!
This next beauty was created by Candace. She also used both of these pretty specialty papers along with the 'Love You More Than' dies. The embossing folder is the Parisian Flourish 3D seen here.
And lastly, this striking card was made by Mary. She combined the Love You Always paper with the True Love DSP.
She fussy cut the flowers from the True Love DSP and colored them with Blends markers. The Best Wishes is from the Art Gallery bundle.
Aren't my gals talented though!
*Remember that if you have a nice wish list February is a great time to whittle it down! You can choose to order as a customer and earn free Sale-a-Bration items or get the Starter Kit option and get 25% off a $125 order. And then get 20% off all further purchases! Details in this postor click here.
~~~
February Specials:
Get the best deal during Sale-a-Bration with purchase of the Starter Kit! Get $125 in products of your choice for just $99 and FREE shipping too!
Plus you get 5 packs of NEW 6" Designer Paper FREE.
Notice: LeeAnn Greff, Independent Stampin’ Up! Demonstrator, Manager. The content of this website is my sole responsibility as an independent Stampin’ Up! demonstrator and the use of, and content of, the classes, services, or products offered on this website is not endorsed by Stampin’ Up! Copyright 2025


Leave a Reply