/


Latest Post

Boughs of Holly Suite projects; with a special fun fold you’ll be amazed at!


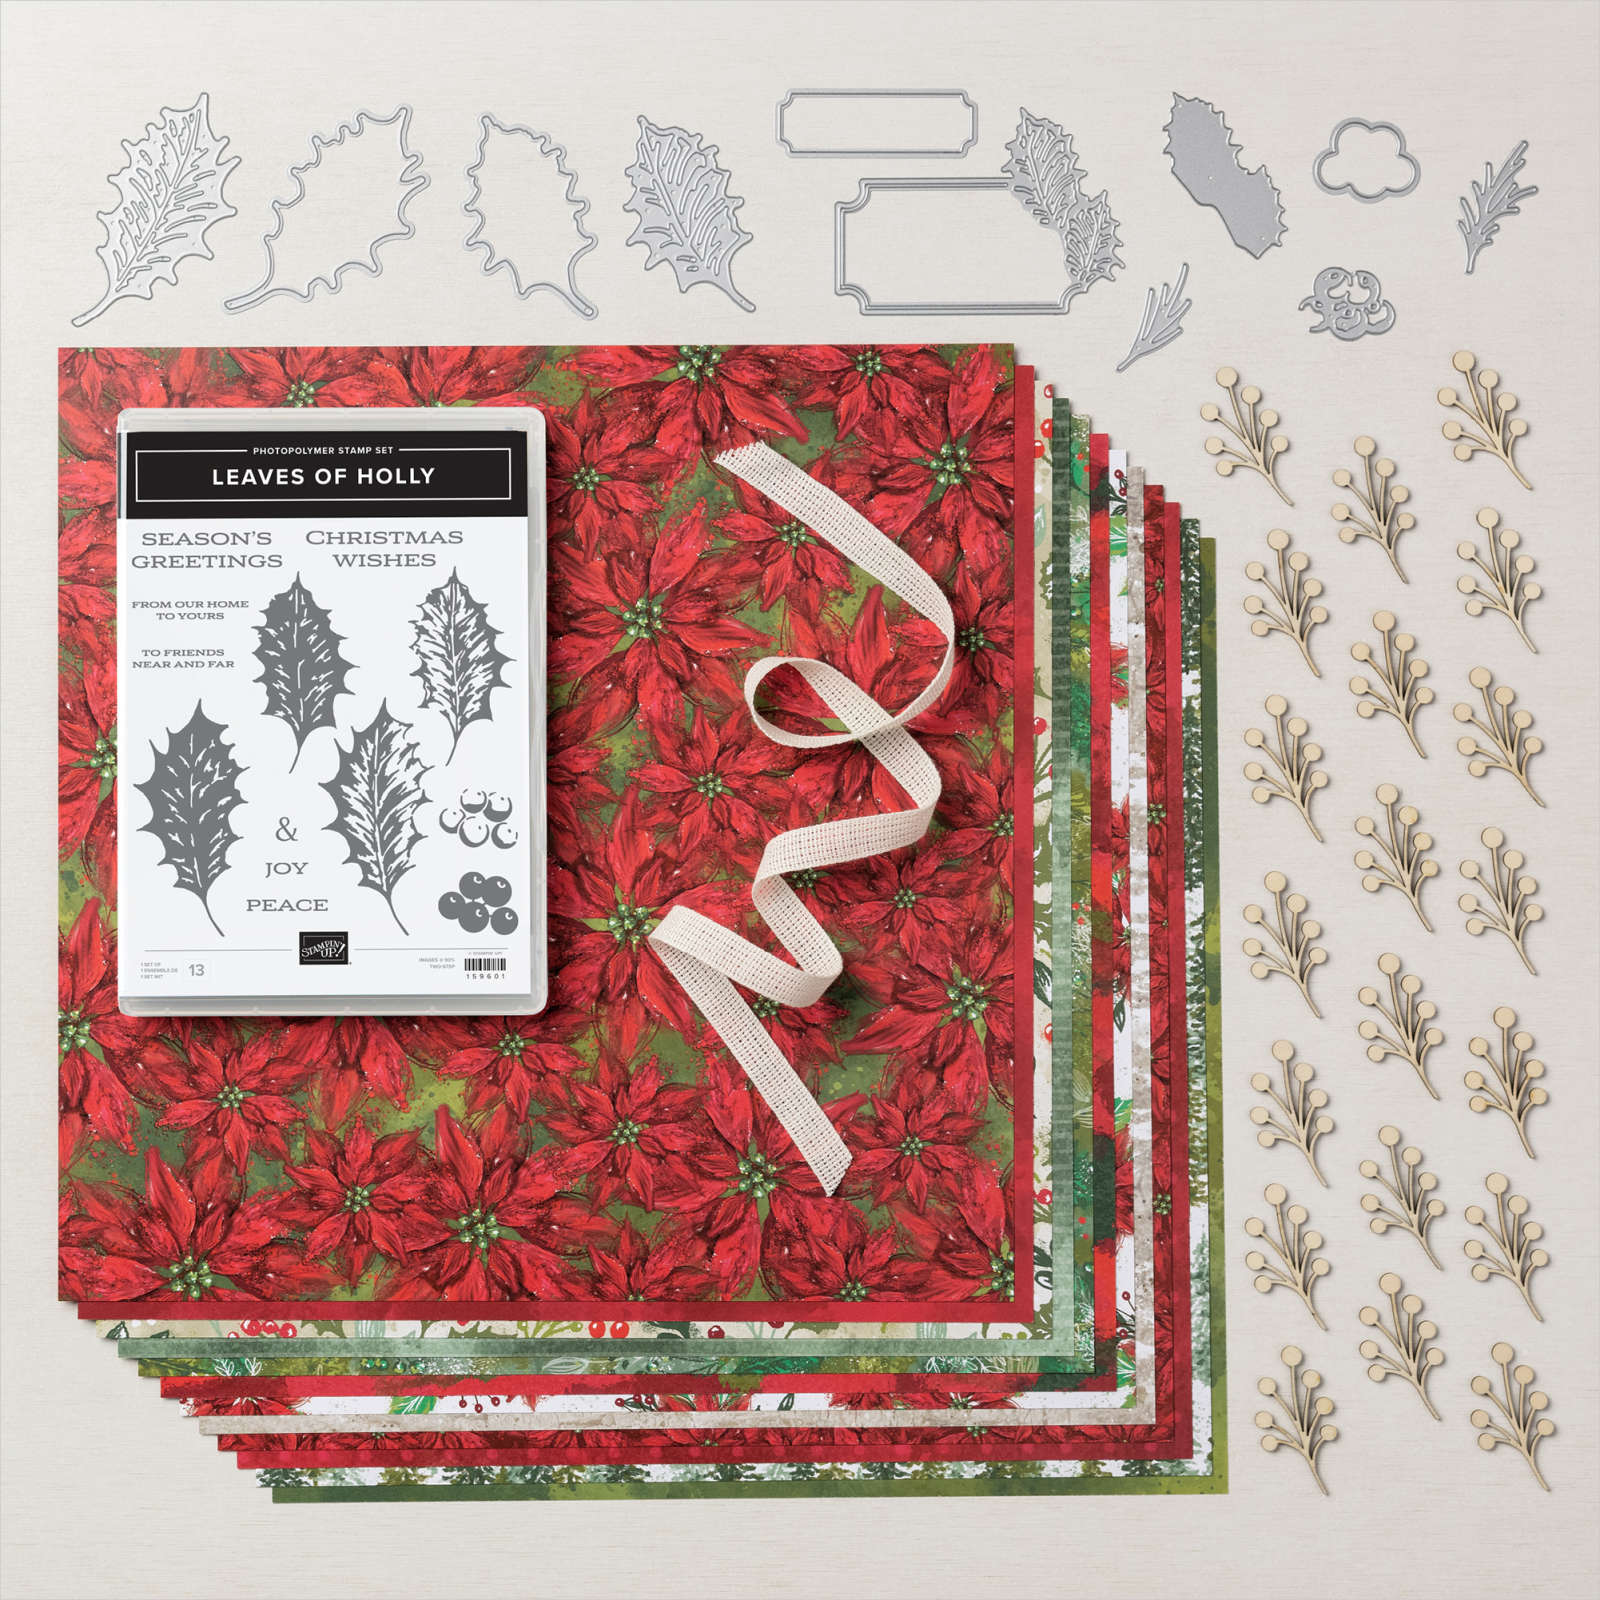
I think everyone is loving the Boughs of Holly suite seen here; the paper is stunning and the Leaves of Holly bundle is incredible as well!  

These are the last swap cards from our Christmas swap with my Flowerbug's Team.  I hope you've enjoyed their amazing & creative projects. *Scroll back to see them all. 

Marilyn made this pretty card:

Her colors include Mossy Meadow & Cherry Cobbler with White.  She stamped a few spatters on the designer paper before texturing it with the Gingham embossing folder before adding the die-cut greeting and leaves.  This greeting die-cut with the attached holly leaves is so pretty & unique. 

Measurements: Card base 5 1/2" X 8 1/2", DSP is 4 1/2" X 3 1/4", the Cherry Cobbler layer is 4 3/4" X 3 1/2" 

Here's a photo of the entire Boughs of Holly suite:

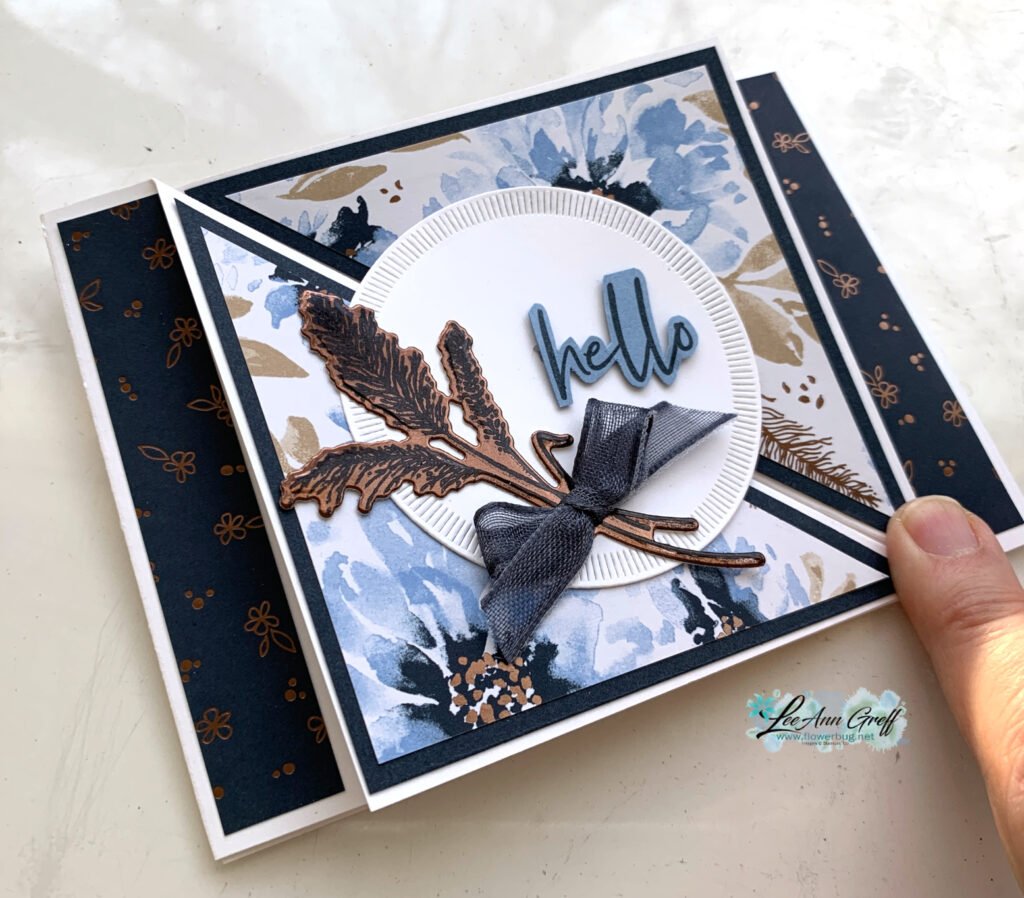
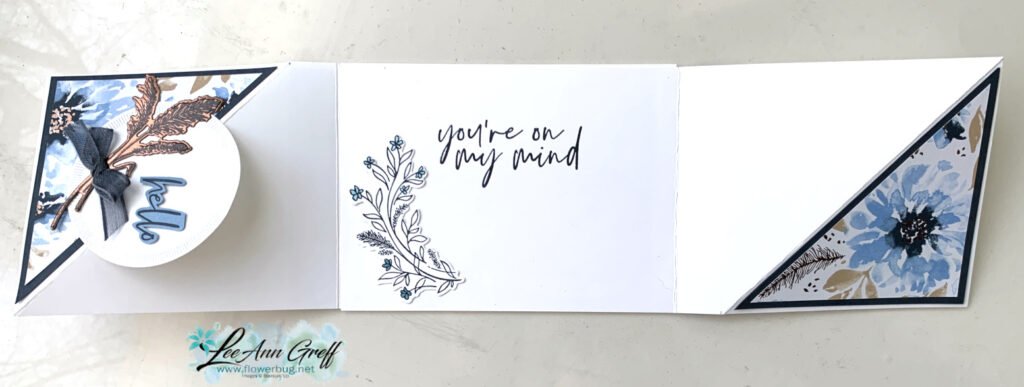
Next up is an amazing card by Paula.  She made a vertical Pillar card.  I've never seen one before.  

The way she attached the mini envelope across the front 'bridge' is so neat.  Here are the directions she shared with me:

The dimensions are:
  • 8-1/2 x 5-1/2 cardstock in Evening Evergreen
  • On 8-1/2 side score down 1/4, 1, 1-3/4, 2-1/2  6, 6-3/4, 7-1/2 and 8-1/4.
  • Banish all score lines toward the center
  • DSP strips are 5/8" X 5 1/4" and the center DSP is 1 3/4" X 5 1/4", the bridge piece across is 5/8" X 3 3/8"  

It folds flat to fit in a A2 size envelope.  

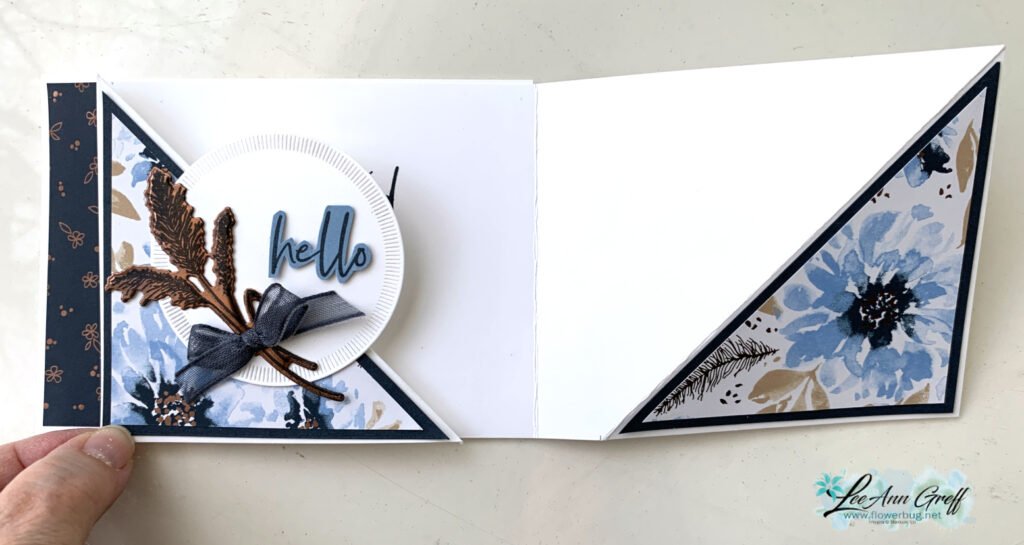
Products used include the Mini Pocket Envelope die, the tag was Tailor Made tags and the Rectangular Postage Stamp punch for the greeting. She also added the Flat Jingle Bells on page 27 of the Holiday catalog and the Wintry 3D embossing folder for the texture on the pocket. 

The tag pulls out of the pocket for even more interest. 

So creative and unique!  

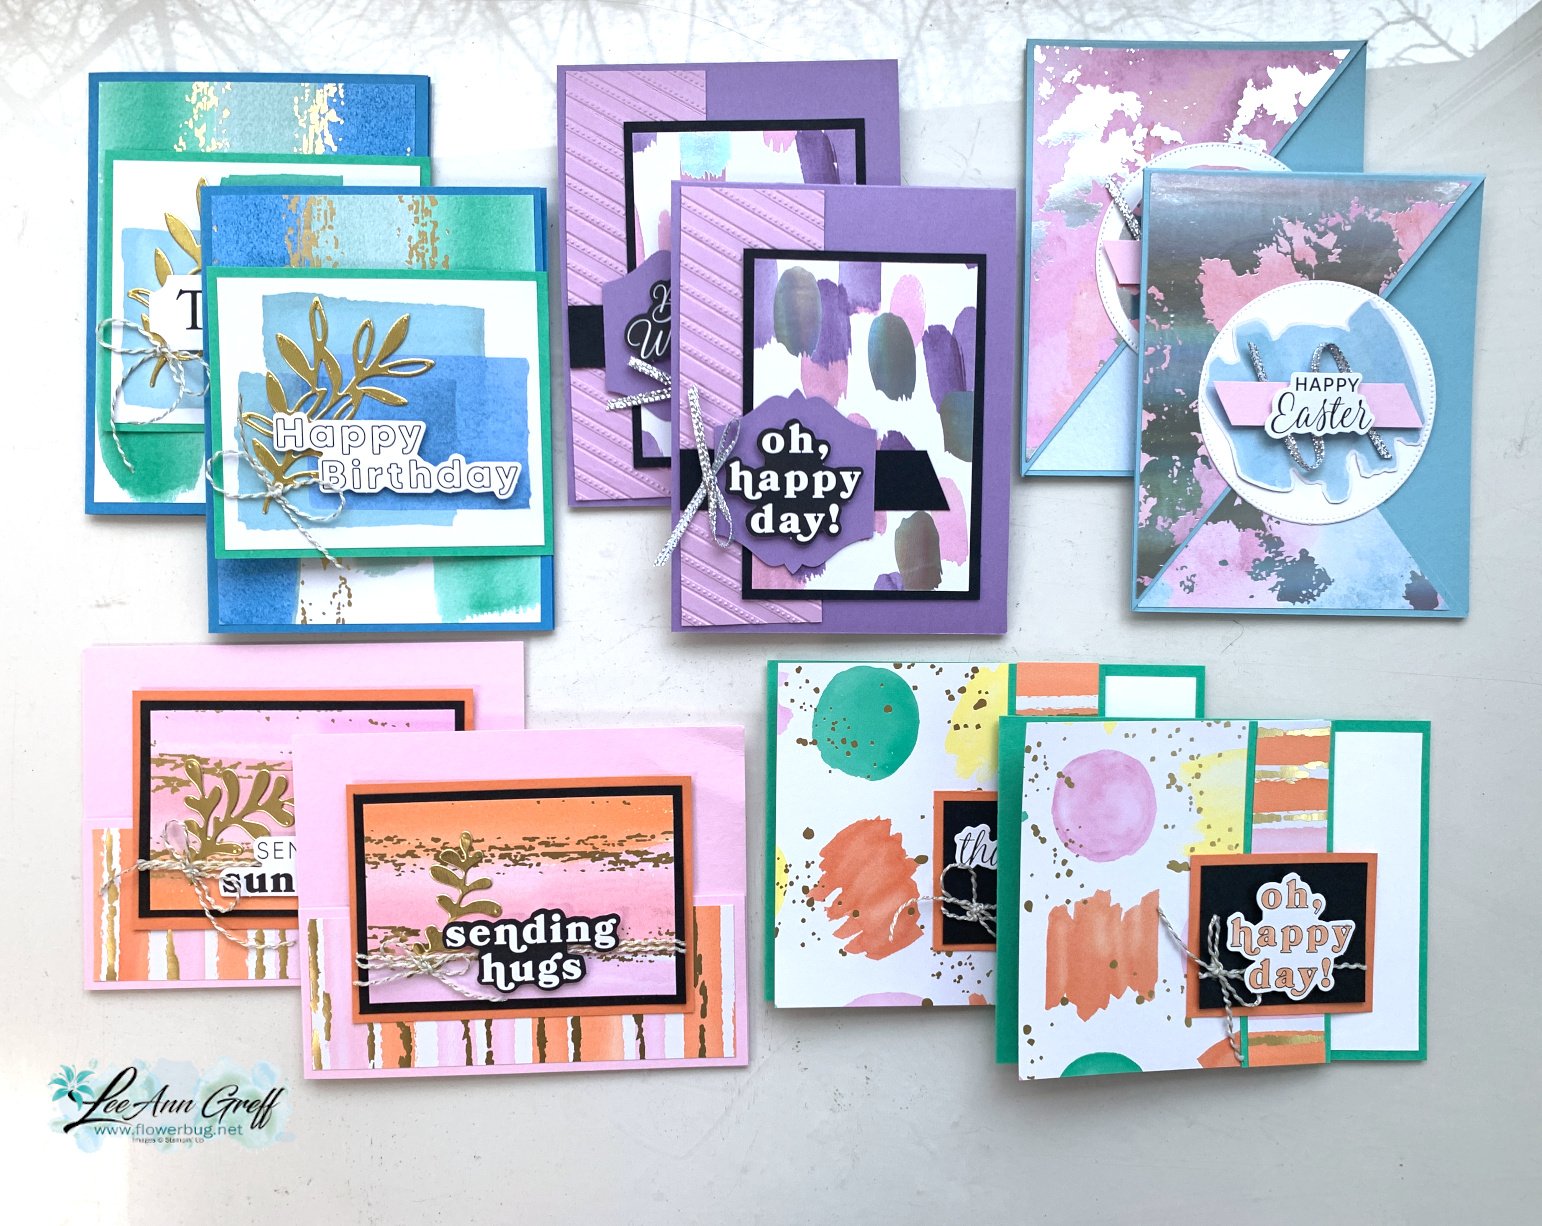
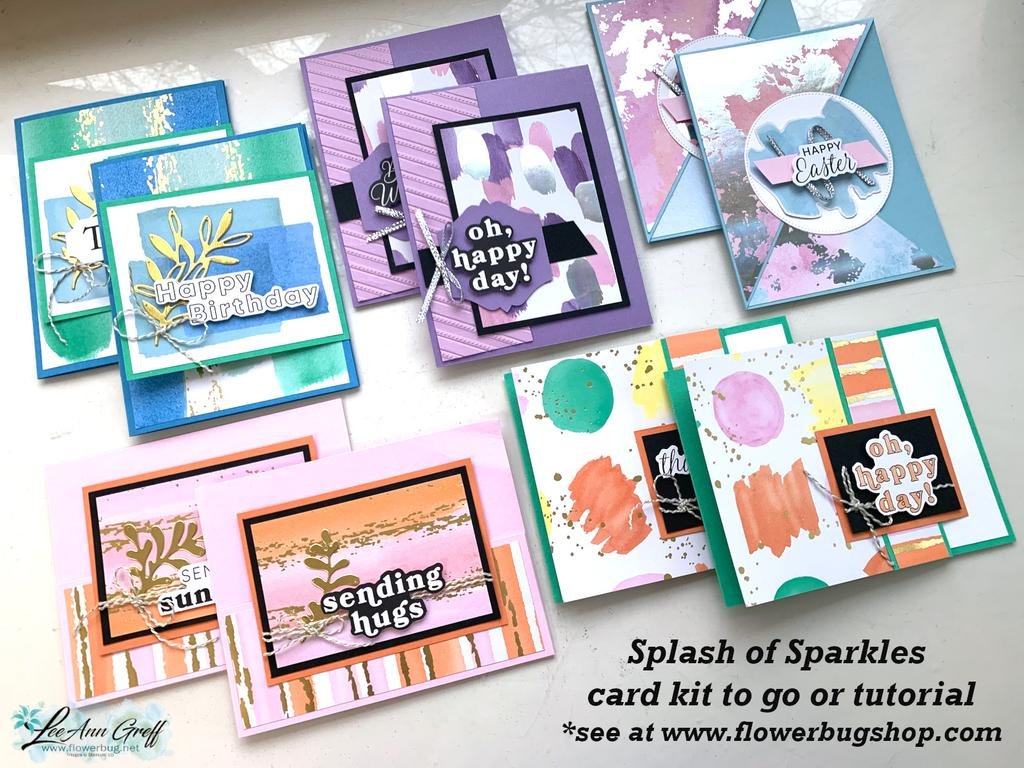
Here is a photo of all of the incredible swap cards by my Team in October. I hope you've enjoyed this weeks posts featuring their cards.  


*Love swapping?  Or maybe you like discounted products?  Consider joining my Flowerbug's Team! 

The Starter Kit has bonus free dollars this month!  Check it out below:   

~~~

October Specials

Starter Kit special! Get $155 in product for just $99

click here

~~~

Order online here

Host code link: SVBHWRCY

Get a free embellishment from me with online orders over $50!


Earn free products with my loyalty rewards! 

Click here to download yours and earn a $50 shopping spree!

All Posts

  • A gorgeous card with the Joyful Tidings set


    This beautiful card has tons of Gold accents plus there are lots of neat tips you’ll appreciate. I made it during last week’s video.

    It was originally created for our November Team swap. The theme was to use foil or metallic heat embossing. I did both!

    Notice the background stamping on the right side; I used the Amber Autumn set with Versamark ink. The greeting is from the Ornamental Christmas set. The gold foil ‘wheat’ die-cuts are from the Amber Autumn dies
    The wreath stamp set is Joyful Tidings and can be seen here. I’ve always loved wreaths and used to collect them.

    Here I simply heat embossed the partial wreath in Gold embossing powder. It’s stamped on a die-cut from the Spotlight on Nature dies. See the pretty gold hoop? Those are available here and are applied with either mini glue dots or thin lines of Multipurpose Liquid Glue (which I did).

    My colors include Basic Beige, Mossy Meadow and Gold foil. I textured the Mossy Meadow layer with the Wreath 3D embossing folder. I also used the Labeled with Love punch to achieve the ‘ticket’ shaped corners.
    *look at your punches to see if you can use them in new ways!

    This card is a slightly different fold because the second layer is what opens. I created a free project sheet for this card for you. Click here to download or print it.

    I also have a video tutorial seen below for this beautiful card and one more beautiful card featuring the Joyful Tidings stamp set that I’ll share Wednesday.

    ~~~

    November Specials

    New Online products are available on November 4th.
    See them here.

    Get the Peaceful Garden suite tutorial FREE with any online order in November!

    Leave a Reply

    Your email address will not be published. Required fields are marked *

  • Beautiful Gold foil cards made with the Season of Elegance DSP


    Today I’m sharing two more beautiful swap cards by my Team. Out November theme was to feature either foil designer paper or metallic heat embossing.

    First up is Tracey’s stunning easel card:

    She featured the ‘A Child is Born’ stamp set and heat embossed it on a Gold foil die-cut from the Spotlight on Nature dies. There are tons of details on her gorgeous card; I’ll highlight a few:

    I think my favorite thing about her card is what she heat embossed the greeting with. Gold embossing powder wouldn’t show up very well so she mixed Copper and Black embossing powders and used that. Genius!

    Measurements:
    – Mossy Meadow card base 5 1/2″ X 8 1/2″ scored at 4 1/4″. Cut from the center score line down one side at 1″ and again at the other side at 1″. Now score that center piece at 2 1/8″
    – DSP strips are 1″ X 4 1/4″
    – Gold circle die-cut is approximately 3 7/8″
    – inside vanilla is 3 1/4″ X 4″
    – Greeting die-cuts are 2 1/2″ long X 7/8″ tall

    A stunning Christmas card Tracey!

    ~~~

    Next is a pretty card made by Lori who used a few of the same products on her card.

    She added lots of texture to her card with four different embossing folders. Those include the Sunflower 3D, Birchwood, Gathering Leaves & Soft Waves folders. These are in 1 1/4″ squares.

    Her colors include Mossy Meadow, Old Olive, Gold foil and Very Vanilla. The greeting is from the Prairie Grass stamp set.

    It’s quite a striking card Lori. Thank you!

    ~~~

    The kits below will ship out this week so you have plenty of time to finish them by December. And they’re quick & easy too!

    The Christmas Tags & More cards are easy because there isn’t any stamping. The greetings are from the gold foil ephemera pack included in the kit.

    This kit to go includes a share of the festive designer paper, the ribbon, the peppermint gems, the ephemera greetings, the PDF tutorial and video too. Plus the pre-cut 10 cards that are all fun folds. All for $30 plus shipping. It’s a fabulous deal!

    Don’t wait long; I have just a few left. Go here to get yours. *You will need to cut your new designer paper for the cards but my directions make that simple.

    ~~~

    The other kit I created this month is also easy but does require stamped greetings. But there is very little prep & just a little trimming of the card bases to create these beautiful wintery cards:

    These cards could be winter or holiday; it’s your choice when you stamp the greetings.

    This kit originated from a former Paper Pumpkin kit but I jazzed up the cards and added more to create 12 gorgeous cards. This kit includes 12 envelopes and a share of Peppermint gems plus the PDF tutorial.
    I have a few left so grab yours soon. This kit is $29 and you can see it here.

    **Remember to check out all of my kits to go and tutorials here at my shop; choosing more than one will save on shipping.

    ~~~

    ~~~

    November Specials

    New Online products are available on November 4th.
    See them here.

    Get the Peaceful Garden suite tutorial FREE with any online order in November!

    Leave a Reply

    Your email address will not be published. Required fields are marked *

  • Beautiful Embossed card swaps with foil accents


    Our Team swap theme was to use foil or heat embossing on our cards. This was a fun theme that is especially easy around the holidays.

    Today I’m sharing Jonna’s stunning card in Black, Silver & White:

    It’s a ‘Wow’ card for sure! She textured the Basic Gray card layer with the Sunflower 3D embossing folder seen here first and then rubbed it with Versamark ink. Then she heat embossed it with Silver embossing powder. Just gorgeous!

    Her measurements are as follows:
    – Embossed layer 3 1/2″ square
    – Black layer 3 3/4″ square, Black greeting layer 3 3/4″ X 1 1/4″
    – White is 4″ X 5 1/4″, White greeting layer is 3 1/2″ X 1″

    The greeting is from the Branching Out stamp set.

    It’s a beautiful card Jonna!

    ~~~

    The kits below will ship out this week so you have plenty of time to finish them by December. And they’re quick & easy too!

    The Christmas Tags & More cards are easy because there isn’t any stamping. The greetings are from the gold foil ephemera pack included in the kit.

    This kit to go includes a share of the festive designer paper, the ribbon, the peppermint gems, the ephemera greetings, the PDF tutorial and video too. Plus the pre-cut 10 cards that are all fun folds. All for $30 plus shipping. It’s a fabulous deal!

    Don’t wait long; I have just a few left. Go here to get yours. *You will need to cut your new designer paper for the cards but my directions make that simple.

    ~~~

    The other kit I created this month is also easy but does require stamped greetings. But there is very little prep & just a little trimming of the card bases to create these beautiful wintery cards:

    These cards could be winter or holiday; it’s your choice when you stamp the greetings.

    This kit originated from a former Paper Pumpkin kit but I jazzed up the cards and added more to create 12 gorgeous cards. This kit includes 12 envelopes and a share of Peppermint gems plus the PDF tutorial.
    I have a few left so grab yours soon. This kit is $29 and you can see it here.

    **Remember to check out all of my kits to go and tutorials here at my shop; choosing more than one will save on shipping.

    ~~~

    ~~~

    November Specials

    New Online products are available on November 4th.
    See them here.

    Get the Peaceful Garden suite tutorial FREE with any online order in November!

    Leave a Reply

    Your email address will not be published. Required fields are marked *


Notice: LeeAnn Greff, Independent Stampin’ Up! Demonstrator, Manager. The content of this website is my sole responsibility as an independent Stampin’ Up! demonstrator and the use of, and content of, the classes, services, or products offered on this website is not endorsed by Stampin’ Up! Copyright 2025