/


Latest Post

Bonus Days are here! Plus lots of exciting new products seen online!!


First, I want to wish you a wonderful & happy 4th of July!  I hope you get to spend it with family or friends.

~~~

Bonus Days start today!  That means that for each $50 you spend (before tax and shipping) you earn a free $5 coupon to redeem in August. 

Tips on earning & using these coupons:

  • Spend in July & redeem in August – if you tend to order monthly or every other month it makes sense to assure your order is over $50 in July so you can redeem it in August
  • Need some of the new colors – In Colors or the new Basic Beige? Grab them in July!
  • Wanting to try Paper Pumpkin kits? Or if you already love Paper Pumpkin grab a 3 or 6 month pre-paid subscription here and earn free coupons!

Below is a sneak peak of the upcoming 3 months of Paper Pumpkin kits. There is an optional add on that coordinates with each of these kits! See that here. 

Remember that Paper Pumpkin subscribers get perks!  They are eligible to purchase any of the available past kits, refills or add ons.  I love the refill options; they're a fabulous deal!  See those here. 

Subscribe here to receive a kit sent to you each month. *Remember you are in charge of the kits you receive.  You can opt out or skip a month.  If you want to receive the Painted Petals kit be sure to opt in or subscribe by July 10th!

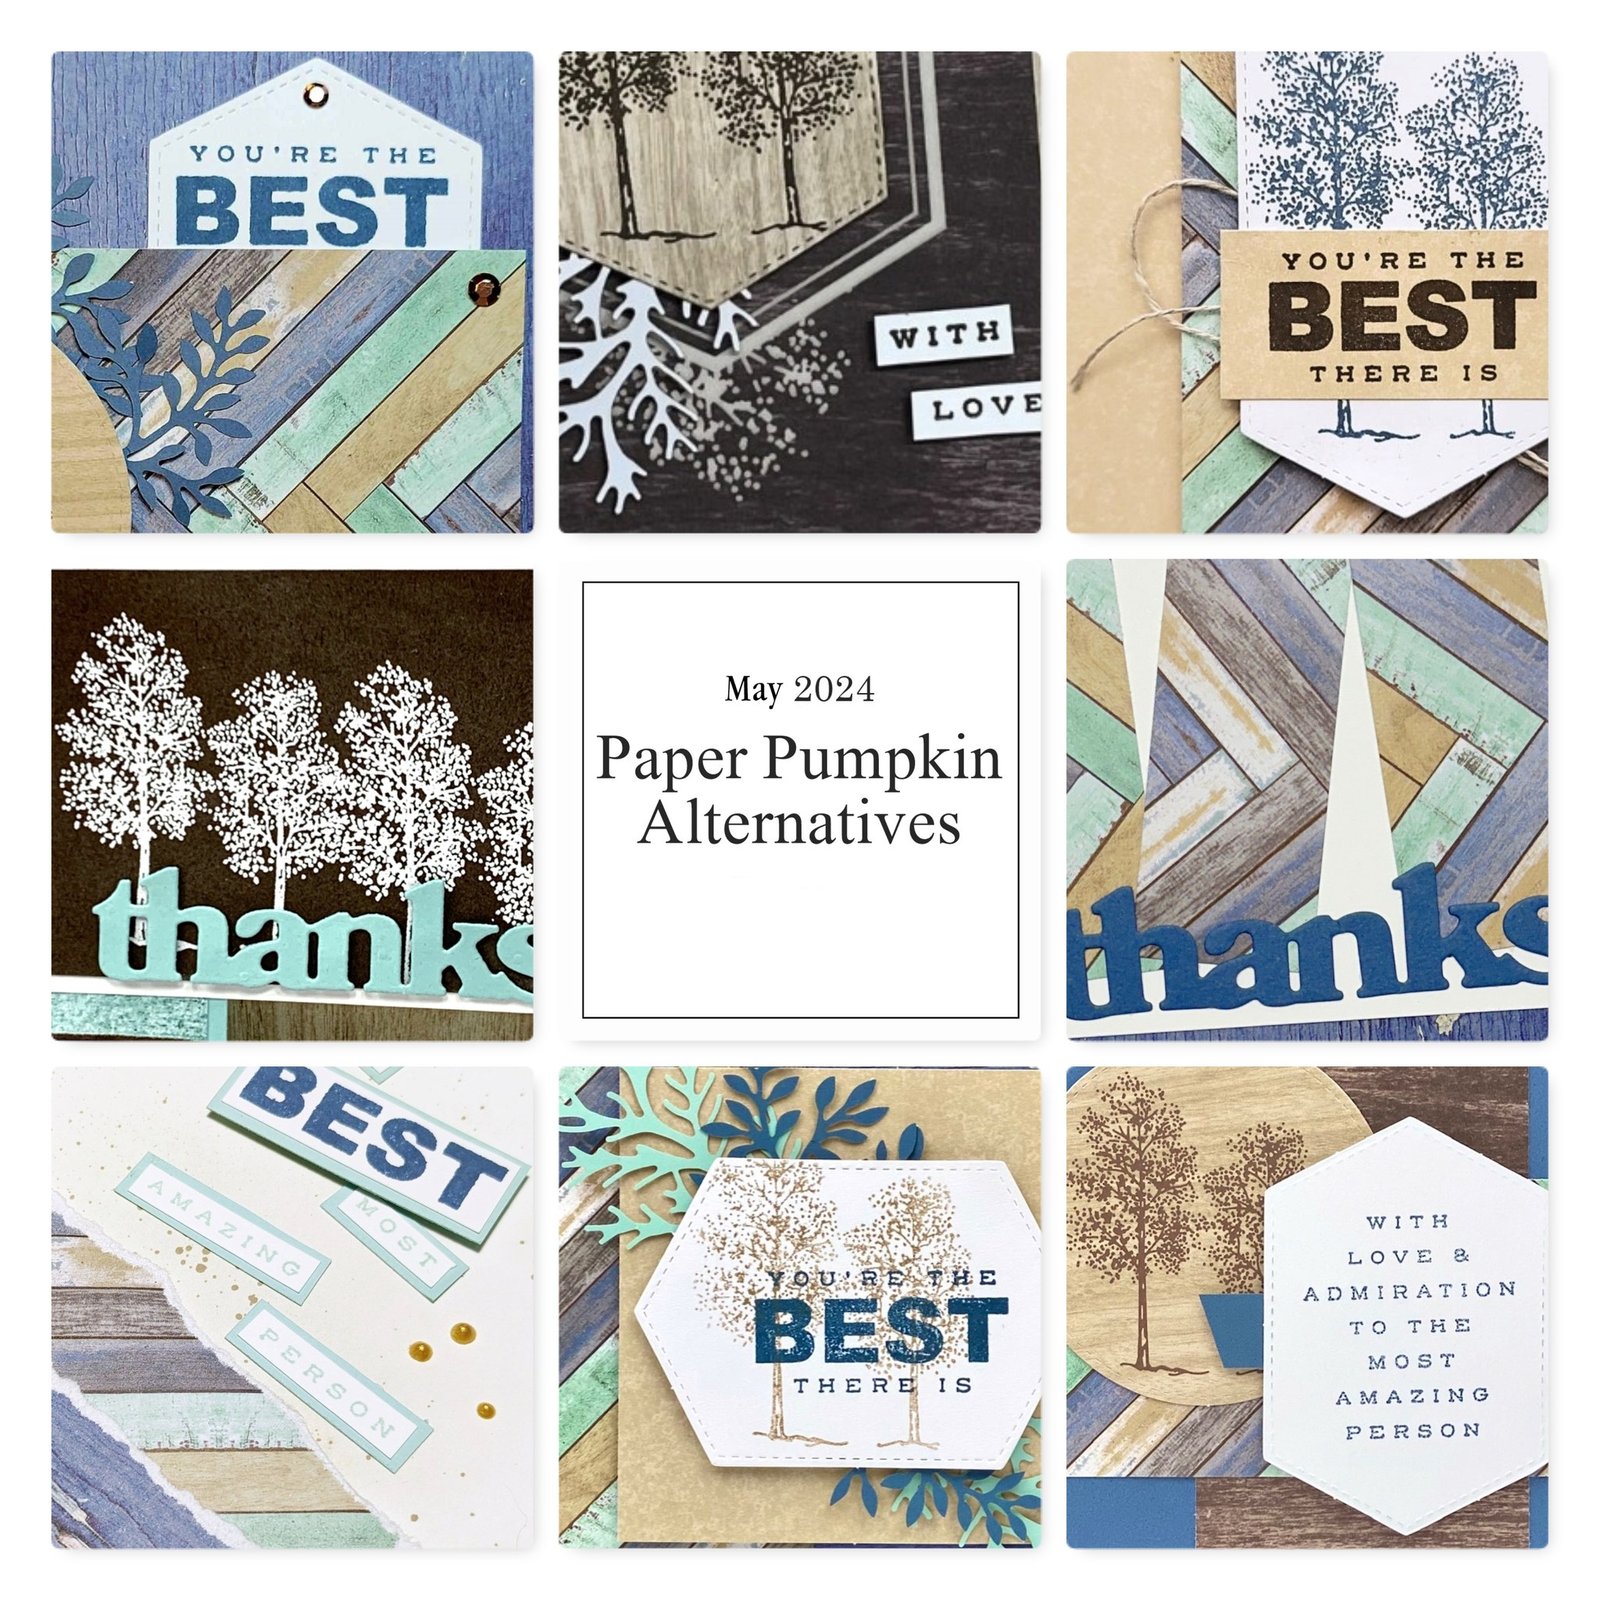
My subscribers get a free project tutorial that includes multiple bonus projects each and every month!  Here is a peak at May's tutorial projects: 
~~~

Click here to see the many new Online Exclusive products released yesterday; you can print it out too.  Fall, Halloween and Christmas as well as everyday greetings.  Here's a flyer made by Terri Gaines that you can print so see them all. Download July 24-OnlineExclusivesRelease

~~~

*current host code links: GF24T6XG or 3A73HXYB


Starting July 3rd, earn $5 coupon for every $50 you spend in July; redeem in August. 

~~~

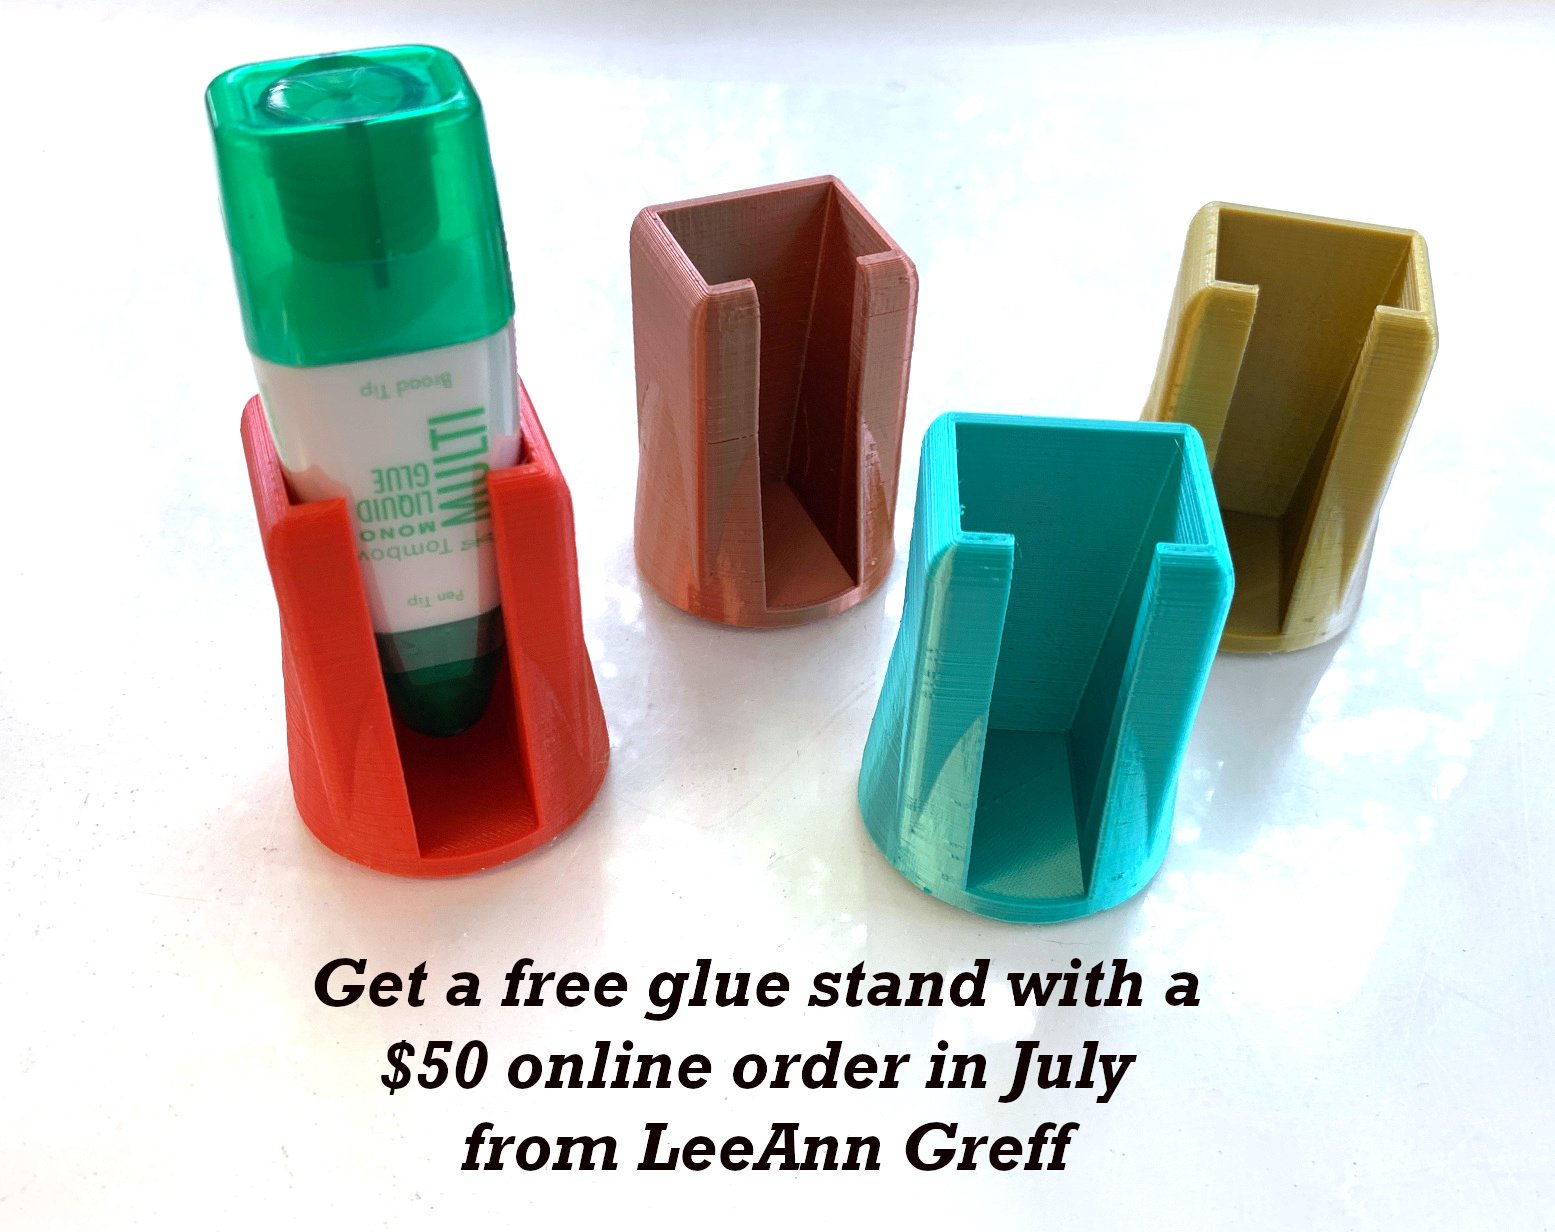
Get a free glue stand from me in July with your online order!
All online orders will receive my PDF tutorial featuring the Full of Life suite

All Posts

  • Sweet Country Bouquet cards & treat box


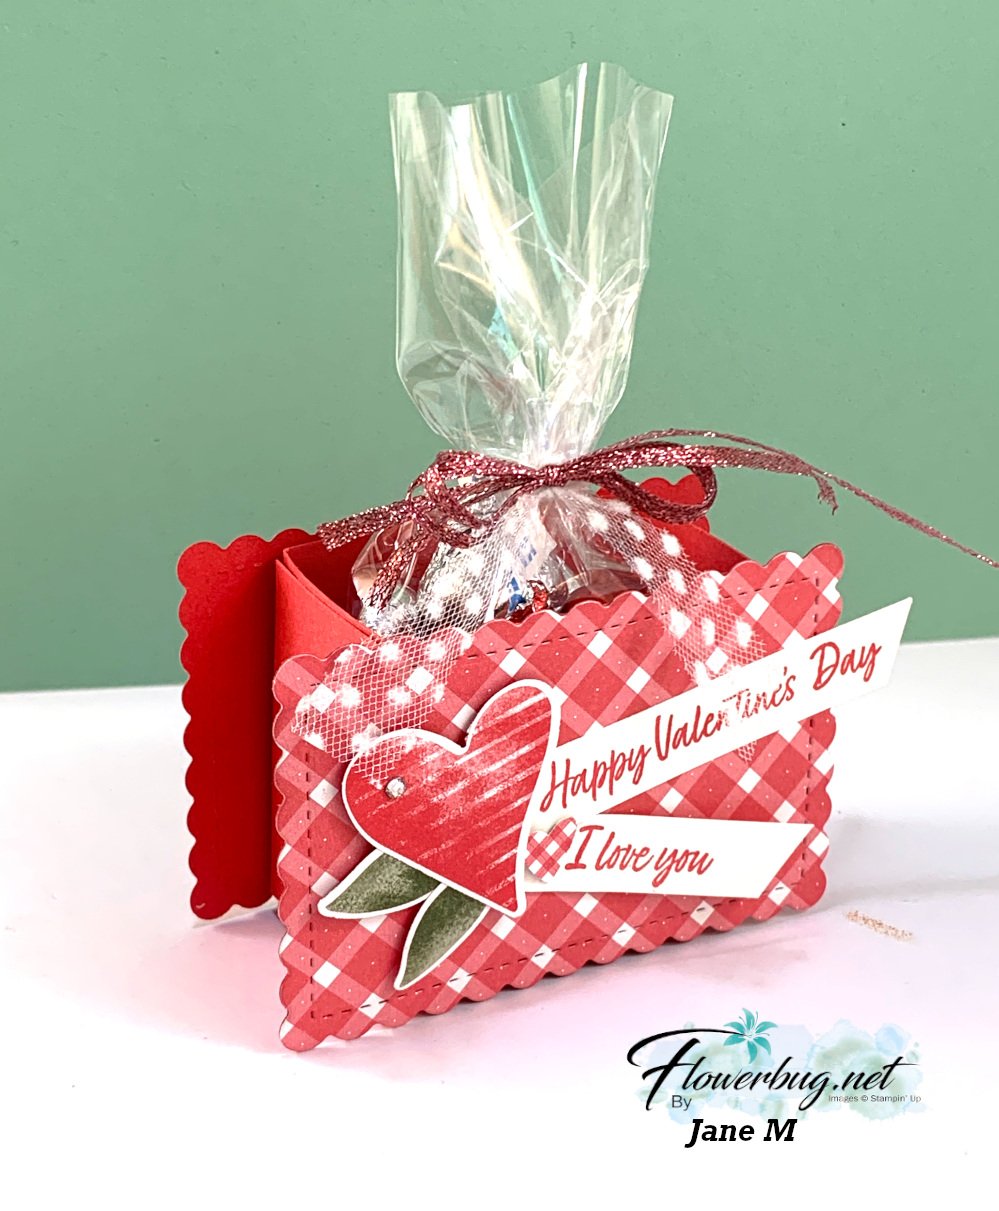
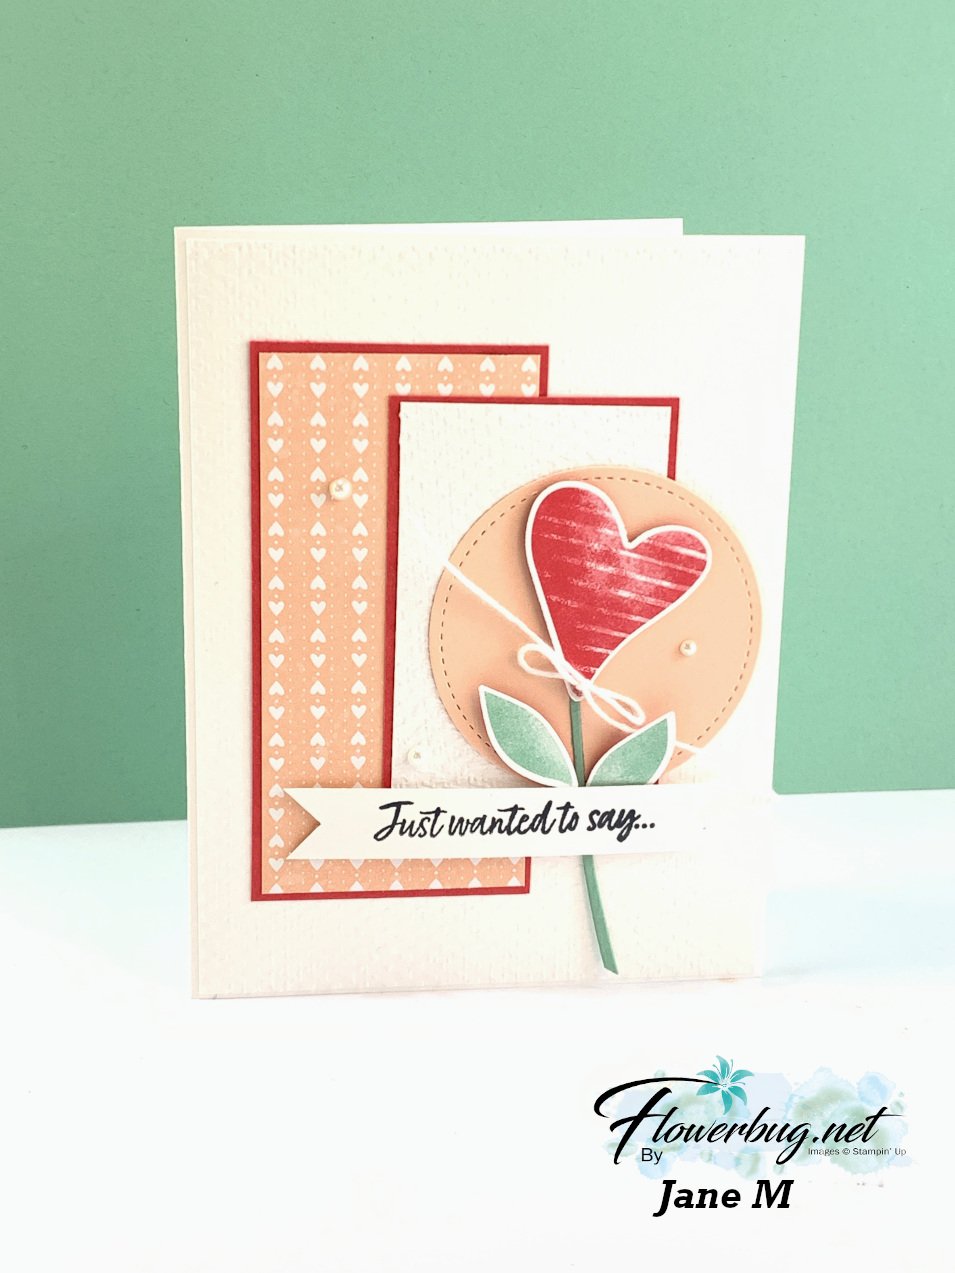
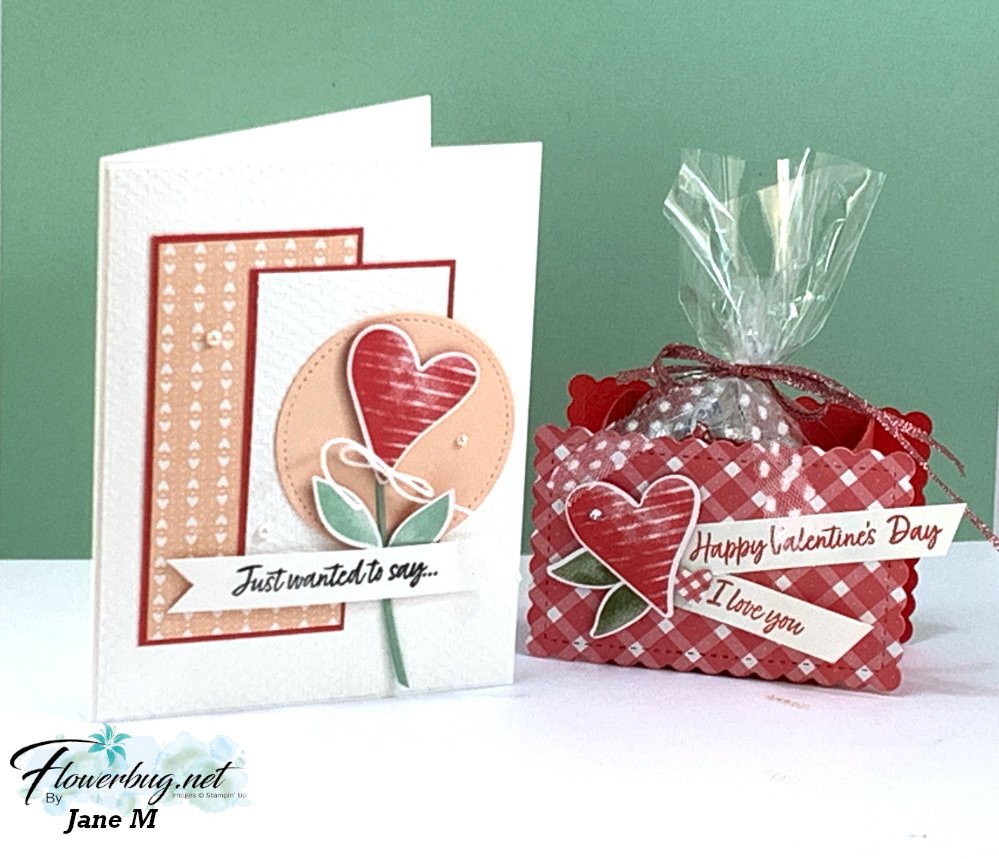
    Jane shared this 'sweet' card and treat box she made at our Flowerbug's team meeting yesterday.  They were for her monthly Club gathering. 

    I think they're super cute and had to share them with you.  

    She featured the Country Floral Lane suite; especially the Country Bouquet Bundle seen here.  Unfortunately the Country Bouquet punch is unavailable right now; it's out of stock until possibly April. The heart and leaves would be easy to fussy cut though.   

    She used the Scalloped Contour dies were used on the front and back of her box using the Country Gingham DSP seen here; a simple hand made box is between them to add your treats to.  I might have to make one to share with you!

    I love the greetings added with banners on the front!  She gave me the following measurements for the box: 

    Start with 6" X 5 1/2".  Score on the 5 1/2" side at 1 1/2" and 4". Score on the 6" side at 2 1/4" & 3 3/4".  Cut up to the score lines on the 6" side.  Form your box. 

    For her card she used the Country Floral Lane DSP seen here along with Petal Pink, Sweet Sorbet and a bit of Mint Macaron.  Love the layout! 

    Mary made this pretty card for our Team swap also featuring the Country Floral Lane DSP.  She also used the Love for You Bundle seen here. 


    That 'Love' die-cut from the White layer placed on the angle adds a fun playfulness to the card.  Her hearts and leaves are punched directly from the Country Floral Lane DSP with the Country Bouquet punch. She cased the card from Mary Fish. 

    Measurements:  DSP 3 1/2" X 3 3/4", Sweet Sorbet is 3 3/4" X 4", Petal Pink 2" X 2 1/2", White is 2 1/2" X 1 1/2" 

    Thanks for stopping in today; more to come every day of the week; Monday – Friday! 

    ~~~

    Sale-a-Bration & the Spring Catalog!


    Order online using the links below:

    January Host code links: FYRQ94HR or 69GXSA3B

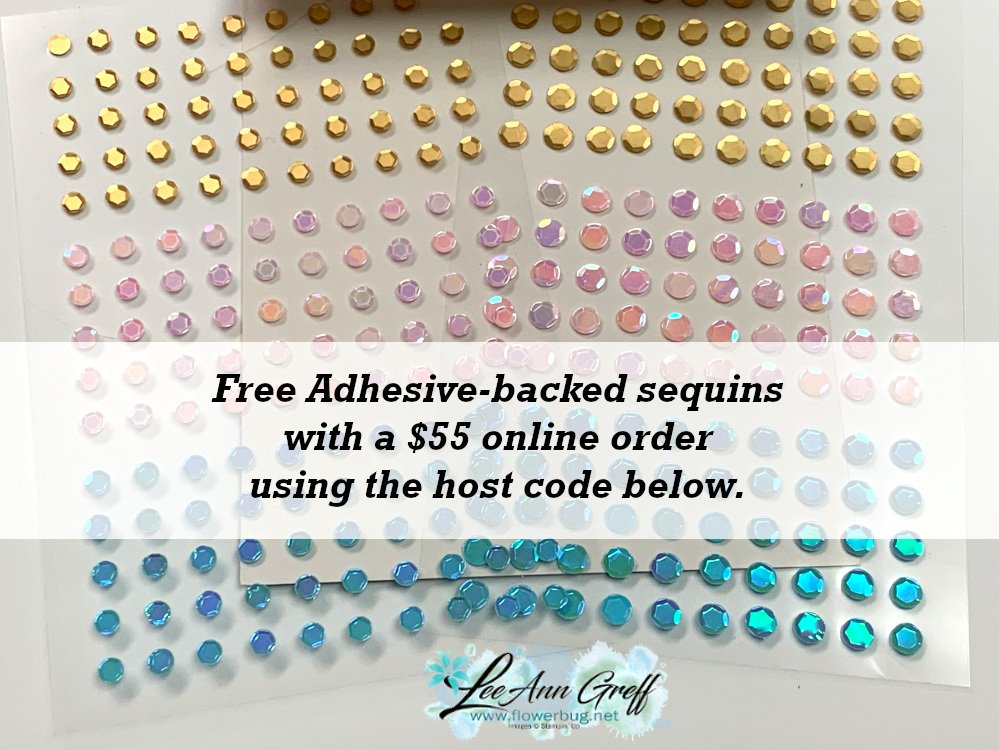
    Get free Pastel Sequins with online orders over $55 when using the host code above! 

     Earn free products with my loyalty rewards! 

    Click here to download yours and earn a $50 shopping spree!

    ~~~

    Best Deal Ever on the Starter kit here!

    Choose $175 in products for just $129 plus the new mini machine!

    Or choose $175 for $99 without a new Mini.  AMAZING!

    Leave a Reply

    Your email address will not be published. Required fields are marked *

  • Double Pillar Window card technique with video; it’s so cool you’ll want to try it!


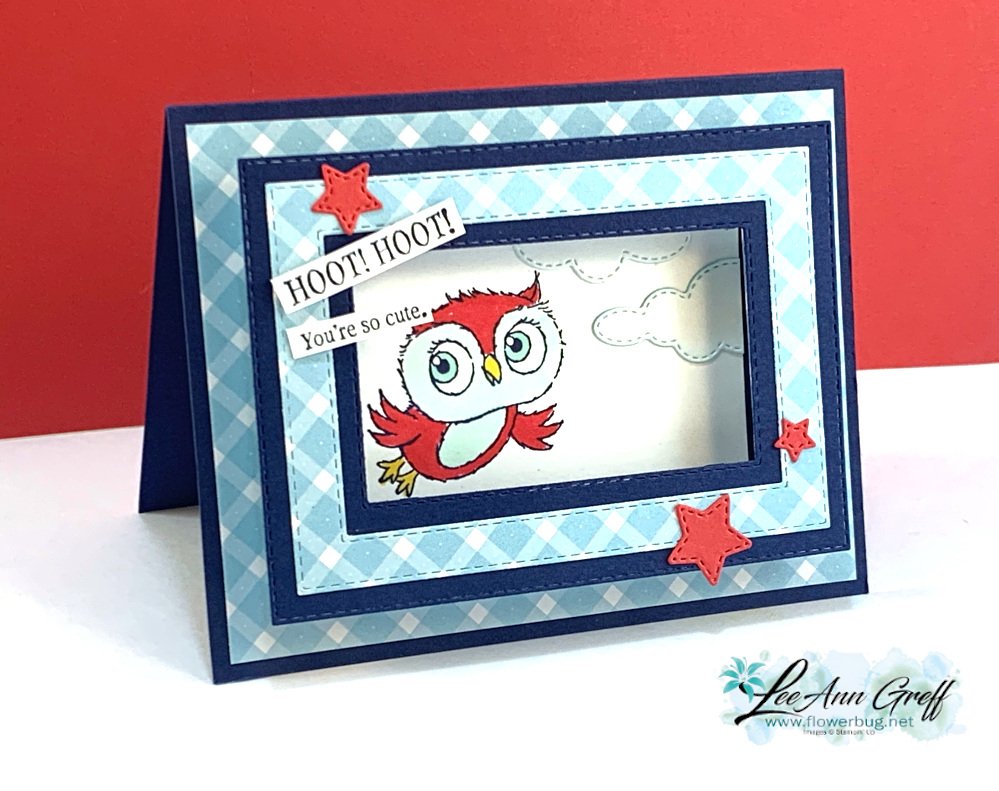
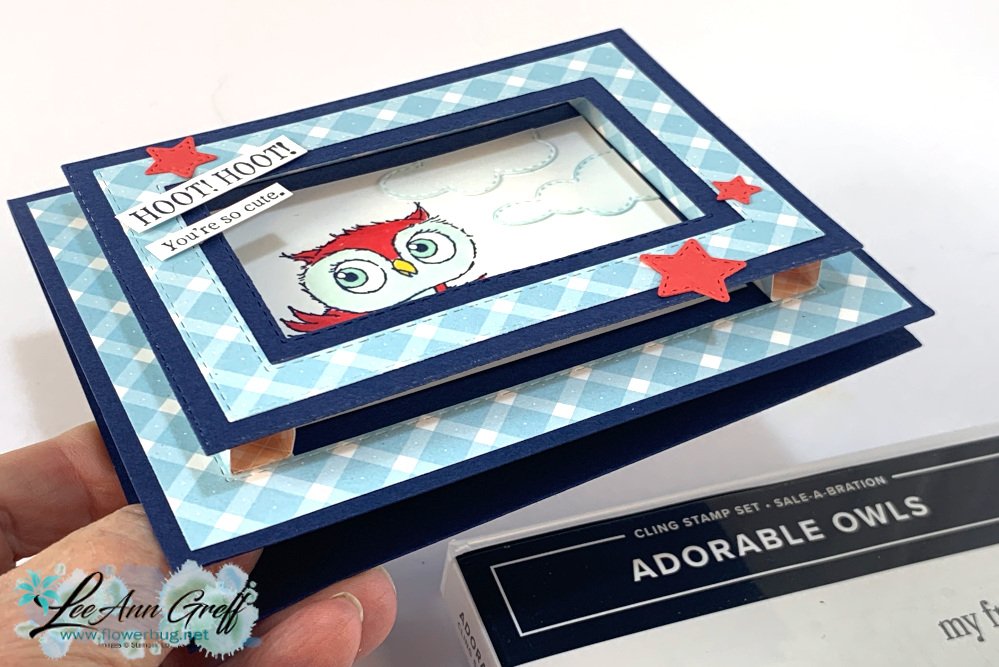
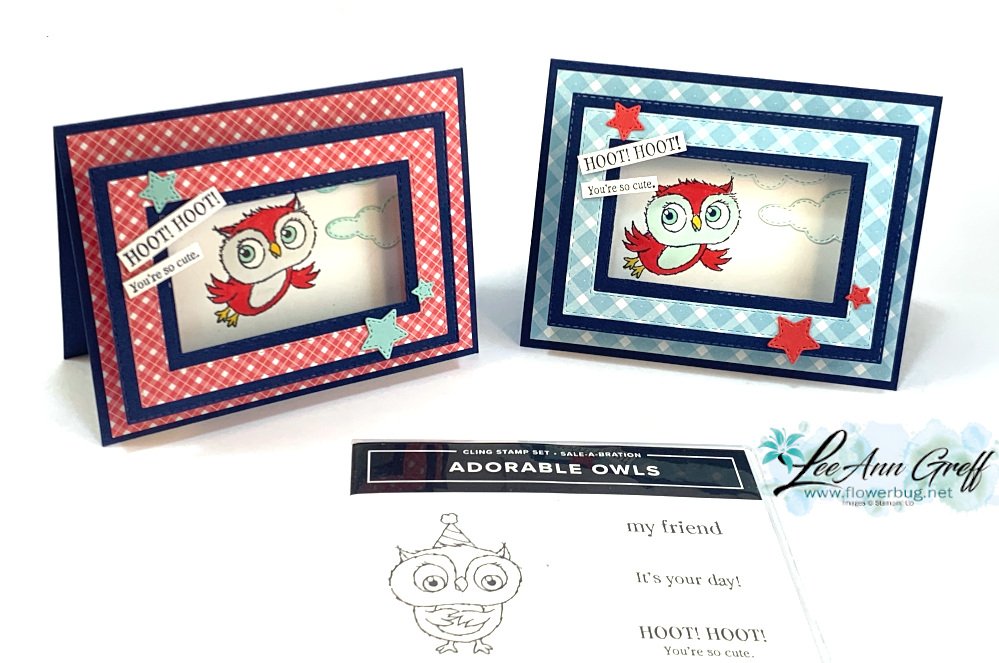
    I made this card on Tuesday's Live video; it's a Double Pillar Window card!  It has so much dimension and is also fun to play with. 

    I used the Stitched Rectangle dies – 4 different sizes – on this card. Two for the Country Gingham designer paper frame and two for the Navy frame/layer that's popped up.  *These are a must have! 

    *If you do have these dies I used the 5th & 3rd from the largest for the designer paper frame. For the card stock I used 6th and 2nd from the largest.

    As you can see, I used the Adorable Owls stamp set.  It's available with our Sale-a-Bration promotion in January & February 2023; while supplies last.  It's actually free with any $50 purchase.  See it here.  

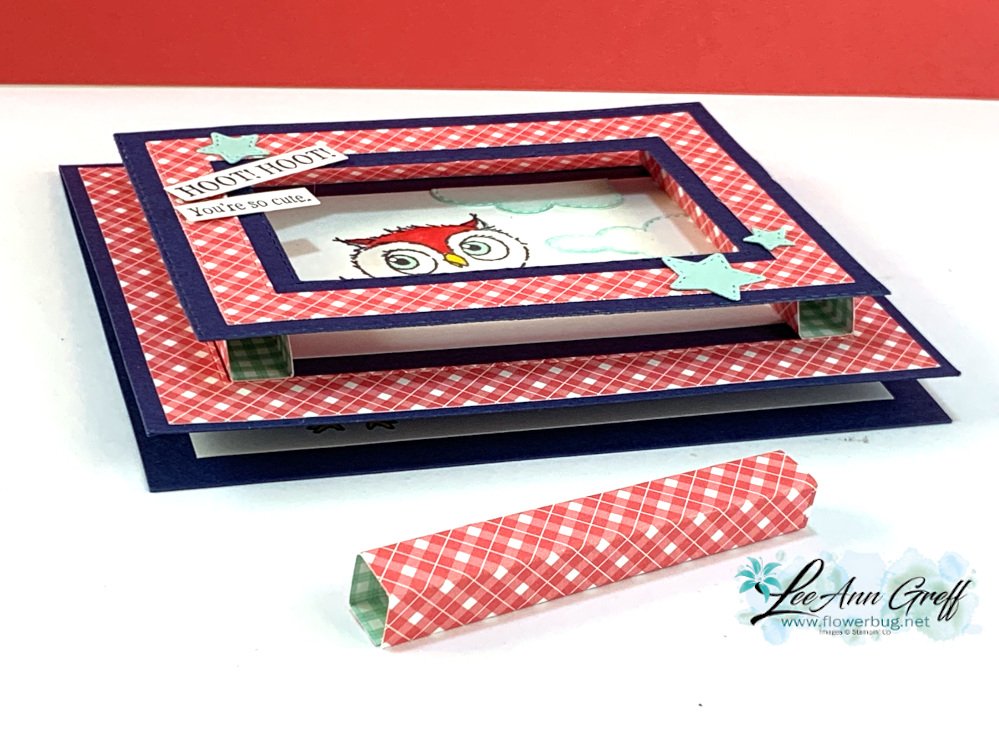
    See the pillars under the top layer?  They are about 3/8" X 3" and fit right inside the DSP window under the upper layer.  They fold down flat for mailing.  

    Measurements: 

    • Navy CS 5 ½” X 8 ½” and stitched die-cut 4 ¾” X 3 3/8” outside size
    • 4” X 5 ¼” DSP, cut with Stitched Rectangles. Pillars – 2 pieces 3” X 1 7/8” DSP; scored every 3/8”
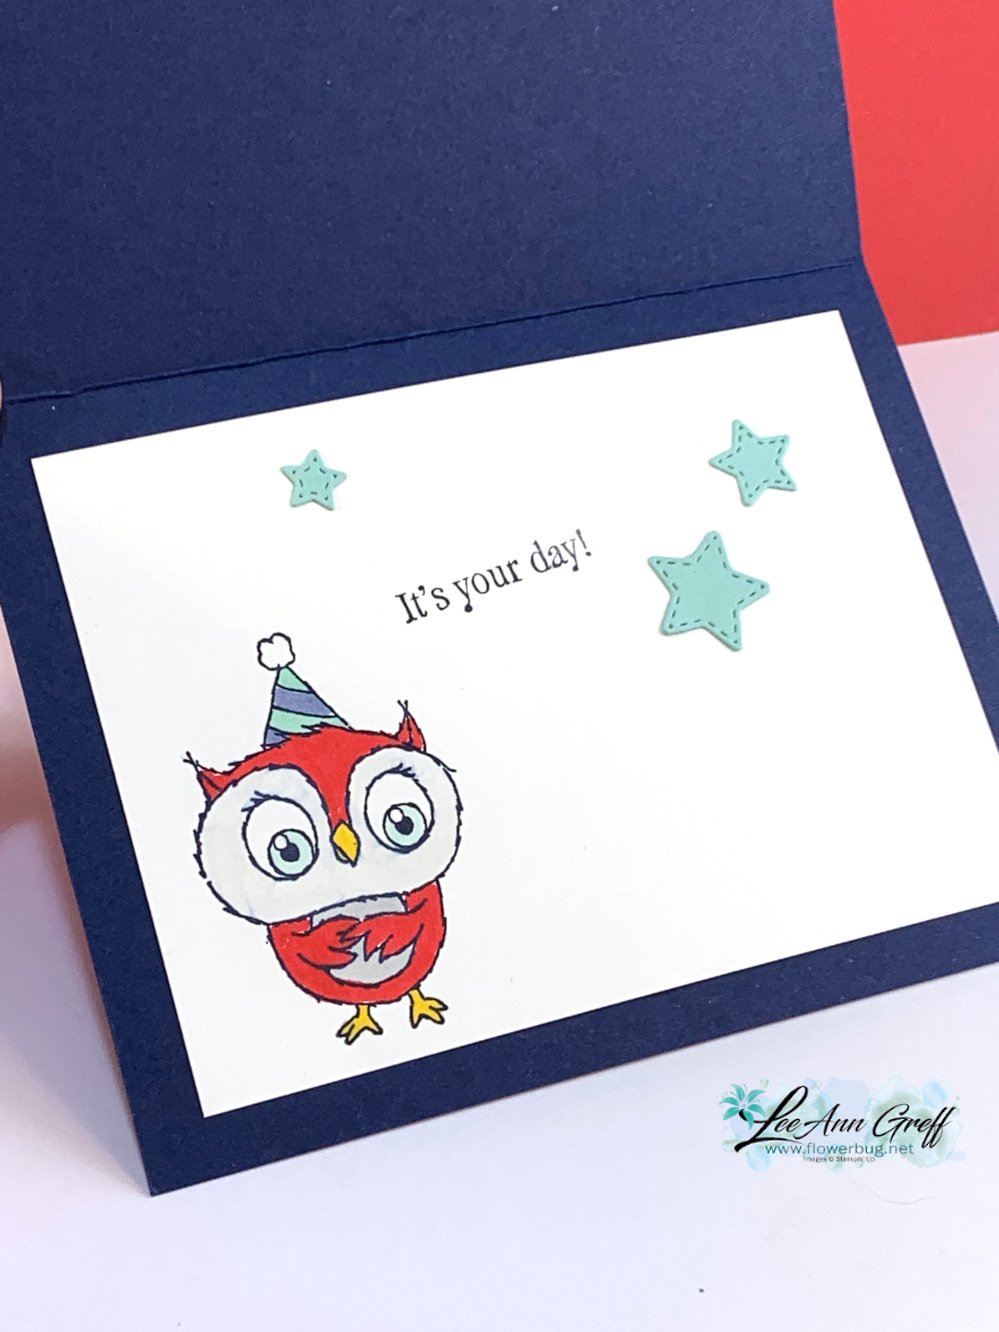
    • White 3 ½” X 2 ½” inside frame, Inside layer is 4 ¾” X 3 ½”

    Here's the inside view.  I colored the owls with Blends markers.  The stitched stars and clouds are from the Give it a Whirl dies seen here.  

    Click here to watch the video or click on the photo below.  I share this card and another special fun fold card.  

    Be sure to subscribe to my NEW YouTube Channel while you're there.  Unfortunately my former YouTube channel was hijacked and is no longer available.  

    ~~~

    Sale-a-Bration & the Spring Catalog!


    Order online using the links below:

    January Host code links: FYRQ94HR or 69GXSA3B

    Get free Pastel Sequins with online orders over $55 when using the host code above! 

     Earn free products with my loyalty rewards! 

    Click here to download yours and earn a $50 shopping spree!

    ~~~

    Best Deal Ever on the Starter kit here!

    Choose $175 in products for just $129 plus the new mini machine!

    Or choose $175 for $99 without a new Mini.  AMAZING!

    Leave a Reply

    Your email address will not be published. Required fields are marked *

  • See lots of Fancy fold cards with the Control Freaks Blog Hop!


    It's been awhile since I joined the Control Freaks Blog Hop!  The fun theme of Fancy Folds is right up my alley. 

    You may have joined us from Melissa's blog; make sure to click on the icon at the end of each post to see every fancy fold card. 

    I'm excited to share this fabulous 'Pop-Up Window Frame' card; it has so much dimension! 

    It featuring the Adorable Owls stamp set from our Sale-a-Bration promotion.  It's free with any $50 Stampin' Up! purchase in January & February of 2023.  

    The designer paper is the Country Gingham 6 X 6" from the Spring catalog.  The card colors include Night of Navy, Sweet Sorbet & Balmy Blue.  The layered frame is raised about 1/2" from the card base and is supported by two long boxes made of Designer Paper.  

    Isn't that cool?  These boxes can lay down so the entire upper panel folds flat for mailing.  Love that!!  

    Of course to create the neat window frame you will need the Stitched Rectangle dies I used 4 of the dies to make this card!  The stitched stars and clouds are die-cuts from the Give it a Whirl diesThe sweet owls are colored in with our Blends markers. 

    Measurements: 

    • Navy CS 5 ½” X 8 ½” and stitched die-cut 4 ¾” X 3 3/8” outside size
    • 4” X 5 ¼” DSP, cut with Stitched Rectangles. 3” X 1 7/8” DSP; scored every 3/8”
    • White 3 ½” X 2 ½” inside frame, Inside card is 4 ¾” X 3 ½”

    ~~~

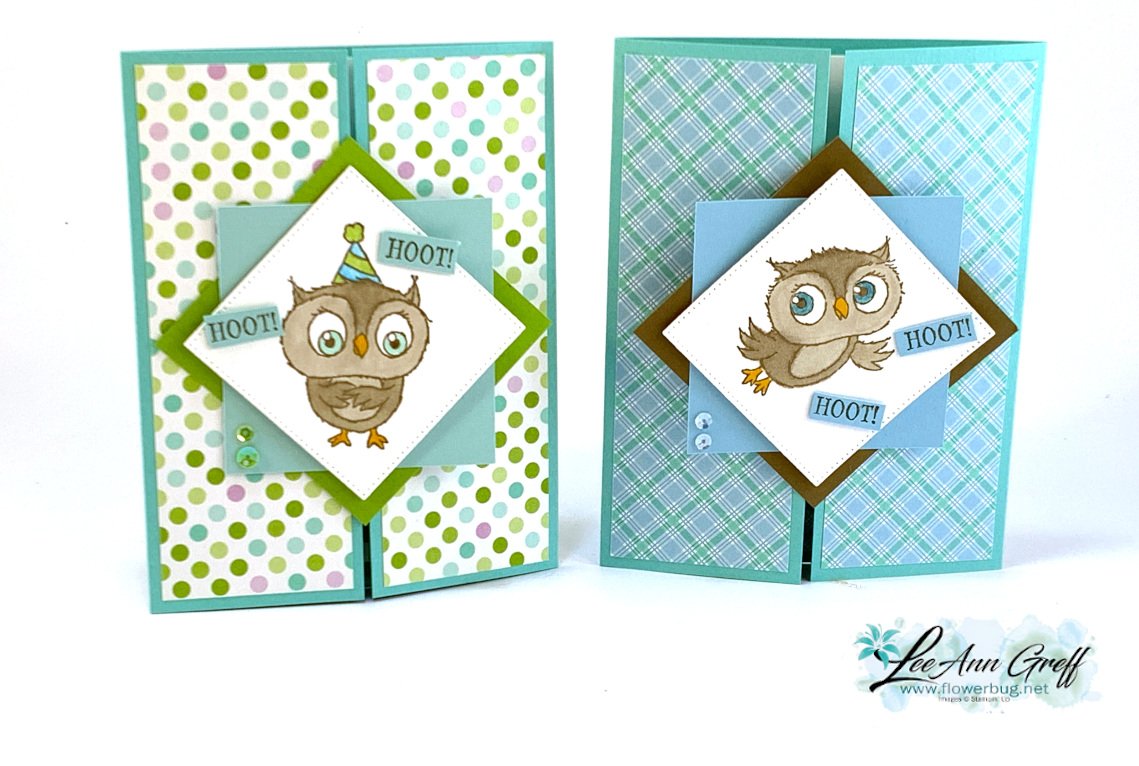
    Next is a neat card I call a 'Vertical Slider'.  It's basically a gatefold card with an element in the center that is either fixed or removeable.  

    It features the Adorable Owls stamp set again along with the Dandy Designs designer series paper.  Both are free during oru Sale-a-Bration promotion in January & February 2023.  

    I colored the owls with our Blends markers.  Adding the 'Hoot Hoot' by fussy cutting it and adding it around the owl brings a bit of playfulness to the card. 

    Measurements:

    • Card base 5 1/2" X 8 1/2" scored at 2 1/8" from each end
    • DSP 1 7/8" X 5 1/4" – 2 pieces plus a strip 3/4" X 4" for inside
    • White stitched square 2 3/8"; inside is 4" X 5 1/4" & three 2" circles
    • largest square 2 3/4", middle square 2 5/8"

    Here's the inside view: 

    There are three 2" circles adhered together to create this sliding element.  Fold two in half and adhere them to the last flat circle.  Be sure to adhere the folded circles to the back of your main element with the flat circle on top; it holds the card closed best this way.  You can see how this is done in the video. 

    If you prefer to adhere this center element to your card permanently, just adhere it to the left side of your card front and allow the right flap to 'catch or latch' it closed.  

    I'll share the video tomorrow or click here to see it on my YouTube Channel. 

    Be sure to keep hopping on to see Debbie's projects and the rest of the Freaks! 

    ~~~

    Sale-a-Bration & the Spring Catalog!


    Order online using the links below:

    January Host code links: FYRQ94HR or 69GXSA3B

     Earn free products with my loyalty rewards! 

    Click here to download yours and earn a $50 shopping spree!

    ~~~

    Best Deal Ever on the Starter kit here!

    Choose $175 in products for just $129 plus the new mini machine!

    Or choose $175 for $99 without a new Mini.  AMAZING!

    Leave a Reply

    Your email address will not be published. Required fields are marked *


Notice: LeeAnn Greff, Independent Stampin’ Up! Demonstrator, Manager. The content of this website is my sole responsibility as an independent Stampin’ Up! demonstrator and the use of, and content of, the classes, services, or products offered on this website is not endorsed by Stampin’ Up! Copyright 2025