/


Latest Post

Beautiful Wisteria Wishes card with video


Hot News!!!

Tomorrow, June 21st is a FREE SHIPPING day!!


For 24 hours you can get free shipping on any order over $75. 

This means that the Last Chance List and the Kit Collection BOGO are even better deals! 

Or get those 'wish list' items from the new Annual Catalog!  

Order here and use either host code below and you still get my free embellishments too!  WIN WIN!!!

Host codes: Y23VZ9UC or 9F9AJHYG

~~~

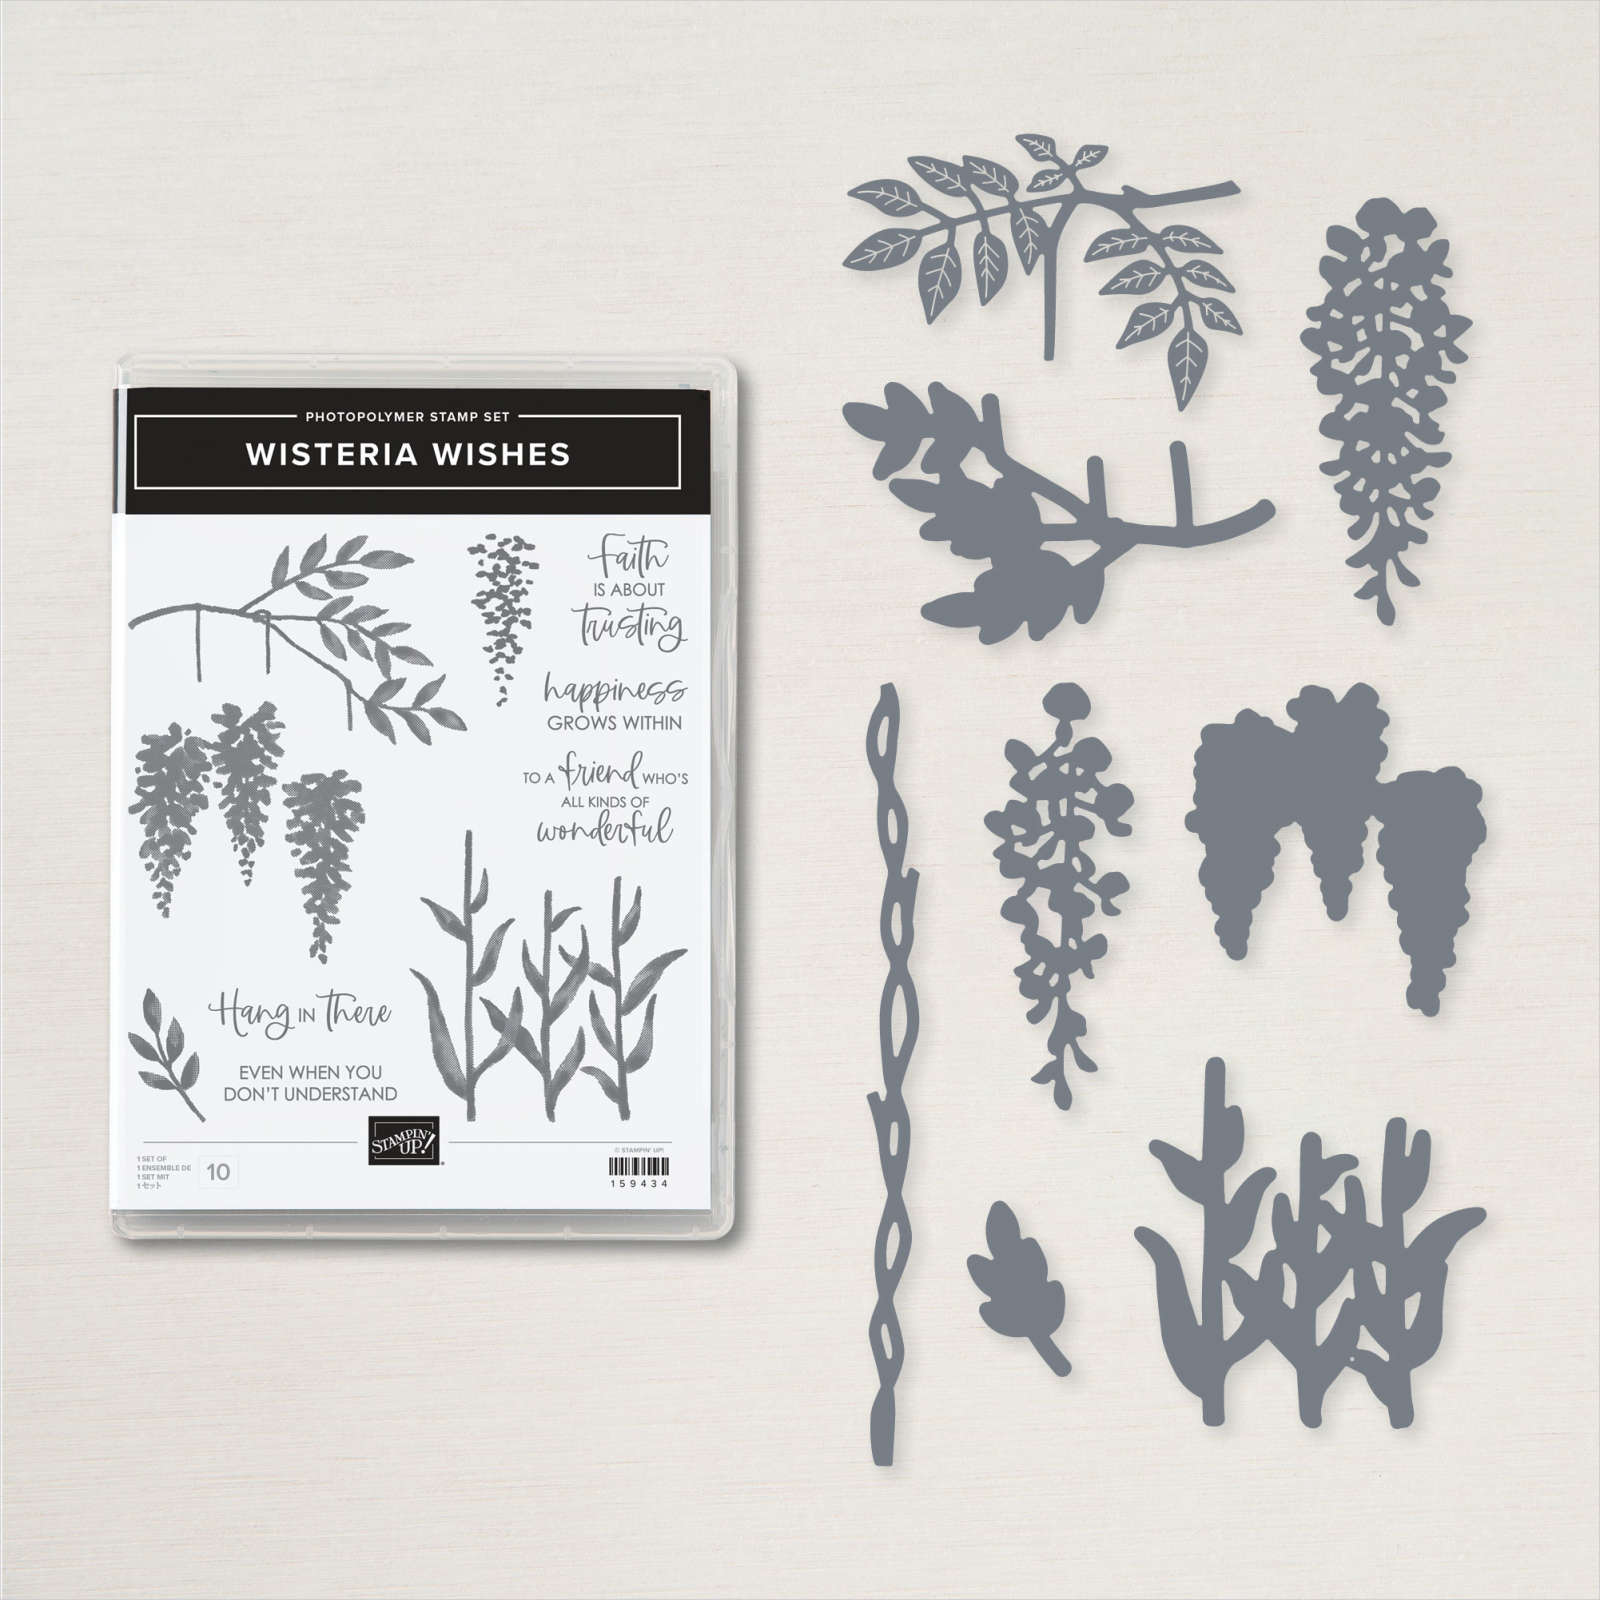
This week I'll be sharing the cards I made on last week's FB Live video.  I chose to feature the pretty Wisteria Wishes bundle seen here. 

Join me here for tomorrow's video. 

My colors include Orchid Oasis, Parakeet Party and a little Old Olive with White.  This card was pretty instinctive; hanging wisteria is the first thing that comes to mind.  There are a few tricks I used to alter the leaves die-cuts though.  I trimmed off a few extra pieces to fit the stamped images better.  You can see what I did in the video below.  

This bundle is super versatile!  I made two more cards in the video plus shared a bunch of swap card ideas as well.  You might be inspired to purchase it once you see them all!  

Products used:

  • Wisteria Wonder bundle
  • Orchid Oasis and Parakeet Party card stock & ink, Old Olive ink
  • Stitched Rectangle dies
  • Blending Brushes
  • In Color twine combo pack 


Click on the photo below to watch the video.  

~~~

Last Chance items are selling out!  


Kits Collection BOGO – buy 1 get 1 50% off!  

Host codes: Y23VZ9UC or 9F9AJHYG

If your order is over $50 you'll receive a set of Solid Faceted Gems from me. *click here to order 

Earn free products with my loyalty rewards! 

Click here to download yours and earn a $50 shopping spree!  

All Posts

  • Curvy Christmas & the Postage Punch


    Check out this easy card using the new Curvy Christmas stamp set and the Postage Punch!  

    It's super simple! Here's how I made it:

    1. Stamp the curvy trees image on the White CS using Shaded Spruce ink.  Color the trees with a Light Shaded Spruce Blends marker.  Add a tiny star using Cherry Cobbler ink on one tree. Adhere it to the Cherry Cobbler layer and to the main card.
    2. Punch out three pieces of Classic Christmas designer paper with the Postage Punch seen here.  Adhere to the White CS. 
    3. Stamp the greeting in Cherry Cobbler ink on a 1/2" strip of White CS.  Punch the ends with the Banners Pick a Punch. Add it to the card with mini dimensionals. 
    4. Finish with a few Holiday rhinestones. 

    You can see this stamp set here; it's only available through January 4th.  And the Classic Christmas Designer Paper is here while supplies last. 

    Remember that everyone who orders any of these products or places an online order with me in November will receive a free 22 project PDF tutorial featuring the Curvy Celebration products! 


    ~~~

    November Specials!

    Current Host code is GRC9VVUU


    All online orders receive my FREE Curvy Celebrations 22 project PDF Tutorial! 

    Leave a Reply

    Your email address will not be published. Required fields are marked *

  • Gift Wrapped Box Fold Card with video


    Check out this cute Christmas card we made at my October Card Clubs!  It's a box fold card; a super cute but easy fun fold. 

    The colors are Real Red with Granny Apple Green & White. The dies on the front are the Stitched Shapes and Hippos & Friends.

    It even folds flat for mailing!  As you can see the back is similar to the front; leaving some space to write or sign the card.  

    I used the Gift Wrapped punch bundle from the Holiday catalog.  You can see it here. 

    Check out the video and measurements below. 

    Here's the video: 


    Measurements:

    Real Red 4 1/4" X 11" scored at 5 1/2", 7", 9" and 10 1/2"
    Granny Apple Green 3 5/8" X 4 7/8" (2 pieces) plus scrap for die-cut
    Whisper White 3 1/2" X 4 3/4" (2 pieces) plus scrap for circle die-cut and bow

    ~~~

    November Specials!

    Current Host code is GRC9VVUU


    All online orders receive my FREE Curvy Celebrations 22 project PDF Tutorial! 

    Leave a Reply

    Your email address will not be published. Required fields are marked *

  • Peaceful Nativity WOW card


    Look what happens when you combine a beautiful background with the Nativity Dies?!  

    Candace created this gorgeous card for our October Christmas cards swap with my Flowerbug's Team.  She is a master at sponging backgrounds.  I believe she used Pacific Point here.  She simply added a greeting (from For Unto Us set) embossed in Silver and the pretty scenic die-cuts in Black.  

    Click here to see the For Unto Us stamp set and here for the Peaceful Nativity bundle. 

    More Team swaps tomorrow! 

    ~~~

    November Specials!

    Current Host code is GRC9VVUU


    All online orders receive my FREE Curvy Celebrations 22 project PDF Tutorial! 


    Leave a Reply

    Your email address will not be published. Required fields are marked *


Notice: LeeAnn Greff, Independent Stampin’ Up! Demonstrator, Manager. The content of this website is my sole responsibility as an independent Stampin’ Up! demonstrator and the use of, and content of, the classes, services, or products offered on this website is not endorsed by Stampin’ Up! Copyright 2025