/


Latest Post

Add color to the Sunflower 3D embossing folder. Wow!


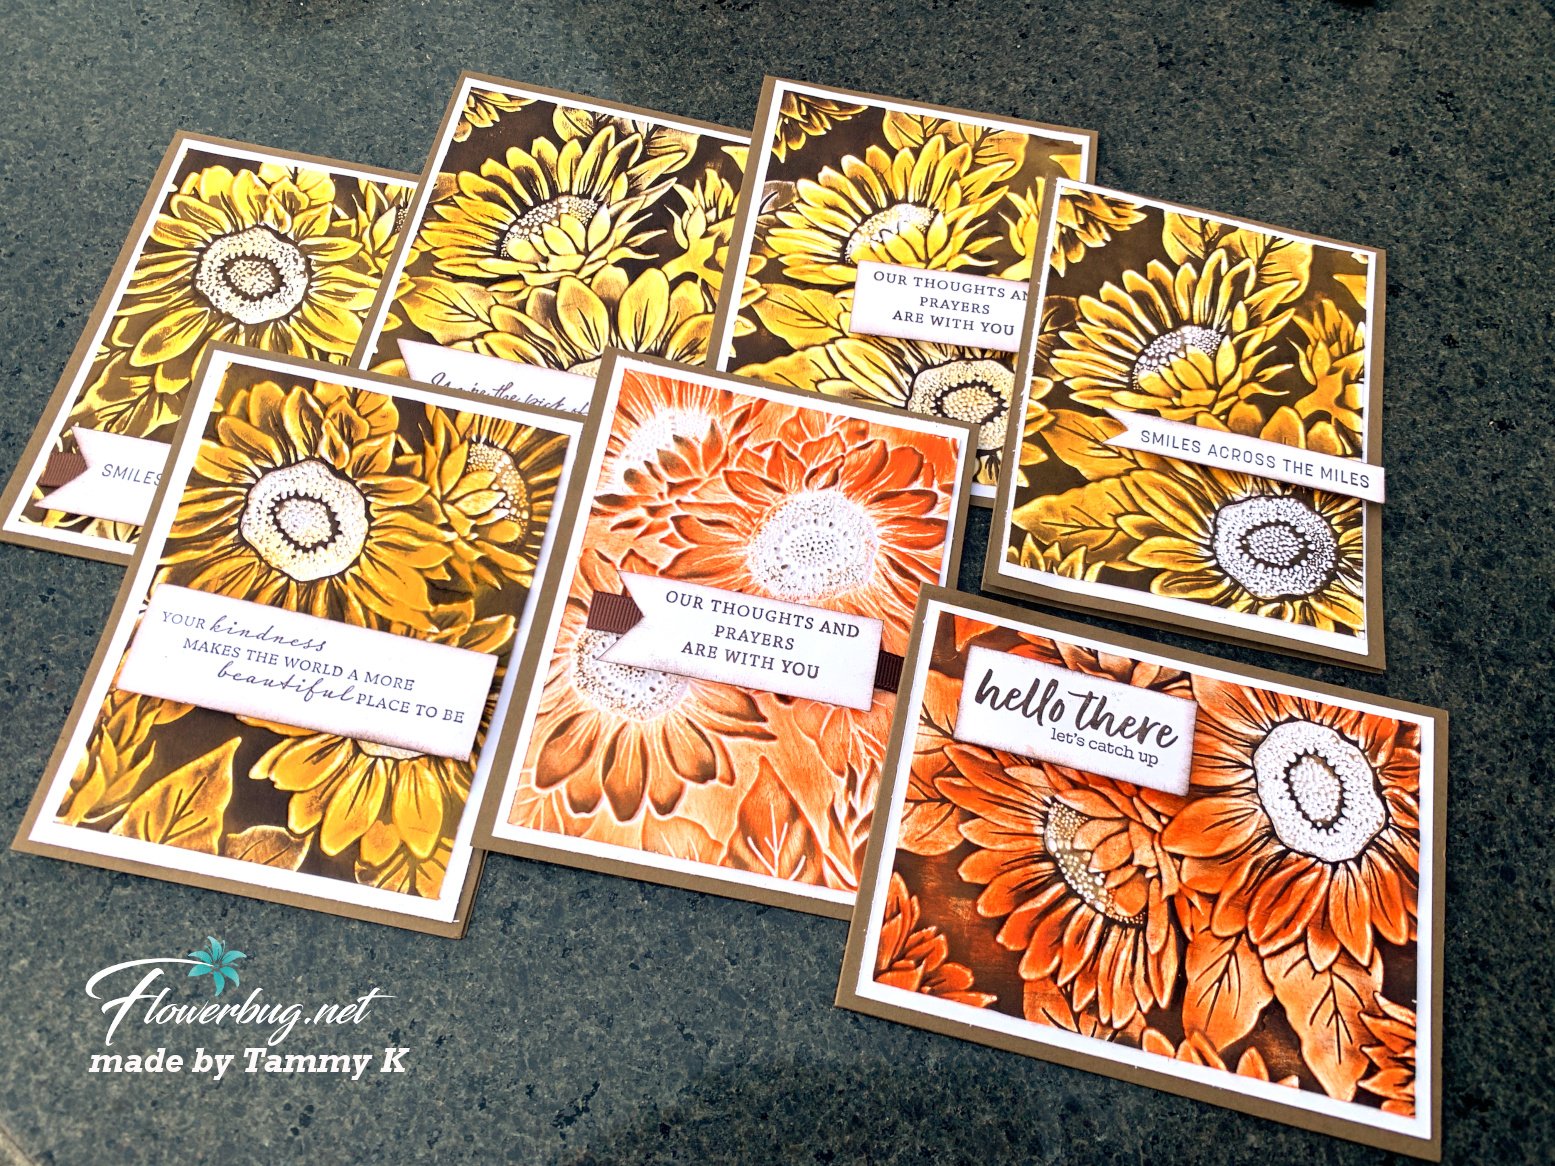
You’ve likely seen lots of cards made with the new Sunflower 3D embossing folder but have you seen any like this?!  

We made this card at my August card clubs and it was a big hit!  Turquoise might not be a traditional color but it sure is pretty!  This technique will work beautifully with yellows & oranges too.

We started by embossing a white layer of card stock with the embossing folder. Then using the debossed side, added Coastal Cabana ink to the petals with a sponge dauber.  

Next we did the ‘direct to paper’ technique – rubbing our ink pad directly onto the embossed card stock – with Pecan Pie ink.  After that we did the same with Early Espresso ink.  This picked up the fine details in the embossing.  Gorgeous!!

This Sunflower 3D embossing folder has been out of stock twice already and it’s in low inventory again!  You can see it here. Get it while it’s available!  Online Exclusive products are while supplies last….. 

Get the free project sheet for this pretty card here.  Click on the following link to print or download it.  Download Multicolored Sunflower card

Below is the video I made showing this technique.  I hope you watch it.  Don’t forget to follow me on YouTube here or Facebook here.  

~~~

September Specials

~~~

  To see all of the new Online items click here.  Or download & save the Download Online Exclusives flyer 

Get a free project tutorial with any online order in September! 


All Posts

  • Mini Coffee Carriers; a special gift with treats & glue stands!


    Have you noticed the mini coffee carriers on page 9 of the Holiday catalog? They're actually quite large and should not be called mini!  You can see the entire suite here. 

    My friend Marilyn made this one for me; casing the catalog project on page 10.  It's so cool! 

    She used the Heartwarming Hugs and Wrapped in Christmas stamp set.  She wrapped her coffee cups with Real Red CS. Tip; use strong adhesive like Tear & Tape for this. 

    Here's another version. I made these for my Flowerbug's Team that attended OnStage@Home a few weeks ago.  It was filled with treats, apple cider packet and a liquid glue stand that we make *see photo below

    I actually sprayed my coffee cups with a mixture of rubbing alcohol and Real Red ink refill.  

    Here are the Multipurpose Glue stands included in the gift above. We have them available in my Shop here.  They are $6 each. 


    We can fit three in a box for almost the same shipping cost.  They make great gifts for your stamping friends!  

    ~~~

    November Specials!

    Current Host code is A2MTFYEB


    All online orders receive my FREE Curvy Celebrations 22 project PDF Tutorial! 

    Leave a Reply

    Your email address will not be published. Required fields are marked *

  • Three easy cards with Curvy Christmas set


    I mentioned I'd made quite a few cards with the Curvy Christmas stamp set.  I wanted to share a few of them.  

    To clarify these products, the Curvy Christmas & Classic Christmas 6" Designer Paper will be available through January 4th or while supplies last.  You can see it all here: 

    I used the pine bow to create a garland and added a fussy cut bow. Super quick card! 

    Here I used the Pine Tree punch and Perfectly Plaid stamp set with the Classic Christmas DSP.  The White card base measures 5 1/2" X 7", scored at 4 1/4".  Add a 1" strip of DSP on the inside right edge.  

    Above I used the Curvy Dies on my White layer.  Look how perfectly the dies match the stamp!  I added a few greenery die-cuts and one from the Poinsettia dies on the top. I may have gotten a little carried away with my Red rhinestones!  

    Remember that all online orders in November get my 22 project PDF for the Curvy Celebrations bundle.  Order online here. 

    FREE 22 project PDF Tutorials for Curvy Celebrations! 

    ~~~

    November Specials!

    Current Host code is A2MTFYEB


    All online orders receive my FREE Curvy Celebrations 22 project PDF Tutorial! 

    Leave a Reply

    Your email address will not be published. Required fields are marked *

  • 3 Unique Snowflake Splendor Fun Fold cards with video!


    Look at these awesome fancy fold cards featuring the Snowflake Splendor designer paper!  They're so pretty but also very easy too. 

    I made them on a recent Facebook Live video and think you might like to see how they're made.  Here's a link to this gorgeous Snowflake Splendor designer paper; it will be retiring soon so get it now! 

    The greetings and images and dies are all from the Snowflake Wishes bundle seen here; I just love this one!

    The two dies I used are the Painted Poppy and Ornate Border dies. 

    I used the Itty Bitty Christmas and Snowflake Wishes stamp sets and So Many Snowflake dies on the card above. 

    Below is the video so you can catch the tips on make them.  

    ~~~

    November Specials!

    Current Host code is JRZFR4QU


    All online orders receive my FREE Curvy Celebrations 22 project PDF Tutorial! 

    Leave a Reply

    Your email address will not be published. Required fields are marked *


Notice: LeeAnn Greff, Independent Stampin’ Up! Demonstrator, Manager. The content of this website is my sole responsibility as an independent Stampin’ Up! demonstrator and the use of, and content of, the classes, services, or products offered on this website is not endorsed by Stampin’ Up! Copyright 2025