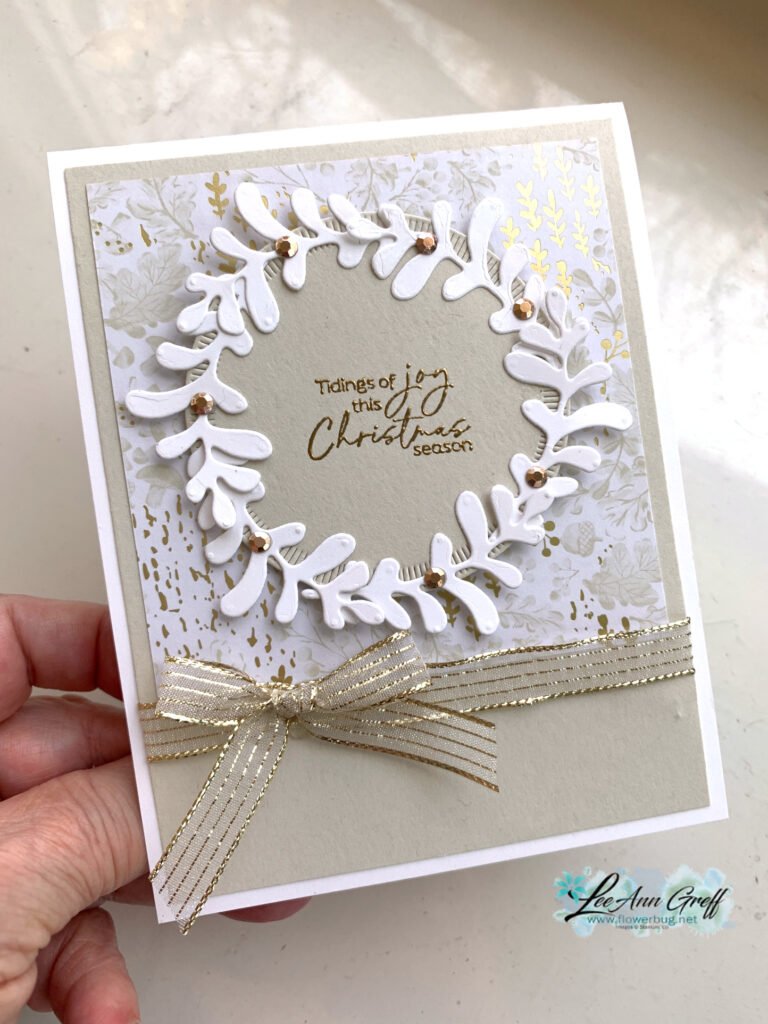
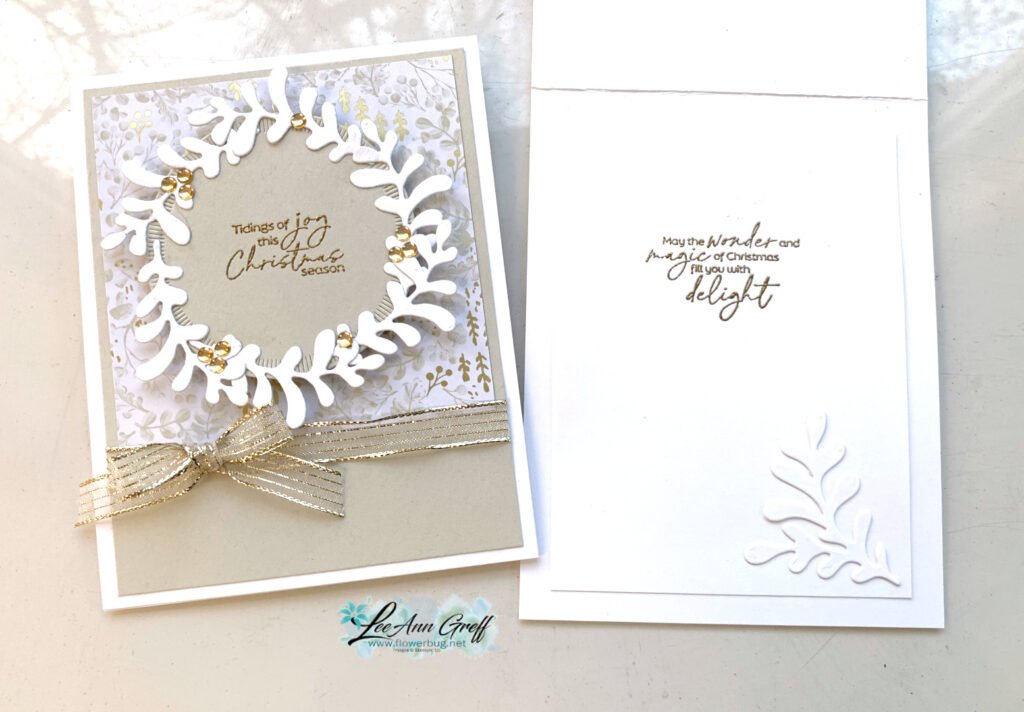
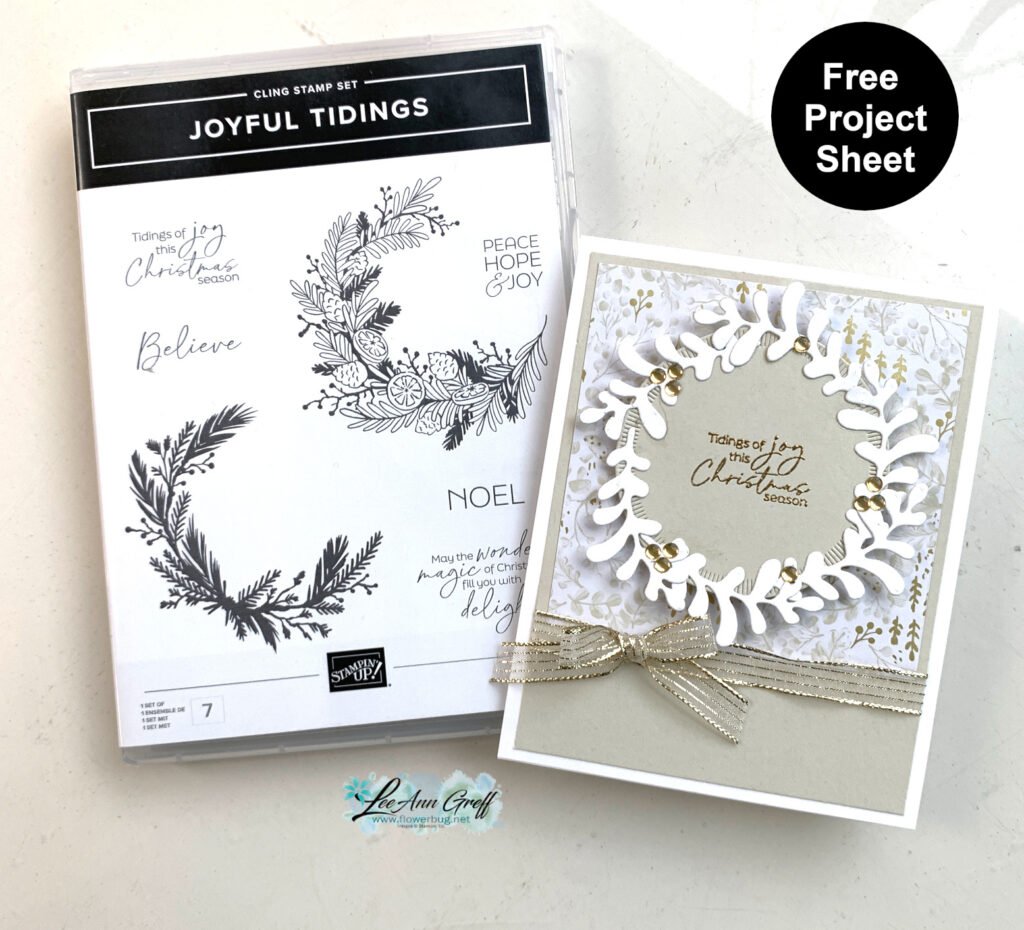
My colors include White, Basic Beige & Gold. Soft, pretty & classy.
Here are the products I used:
– Gathering Together designer series paper – Gold Striped ribbon – Low-profile dots (now retired) – Gold heat embossing powder – Creative Haven dies seen here for the leaf die-cuts
You can also watch the video tutorial below. I shared a neat trick to place the leaf die-cuts on the greeting circle element. Press & Seal wrap saves a ton of time!
~~~
November Specials
New Online products are available on November 4th. See them here.
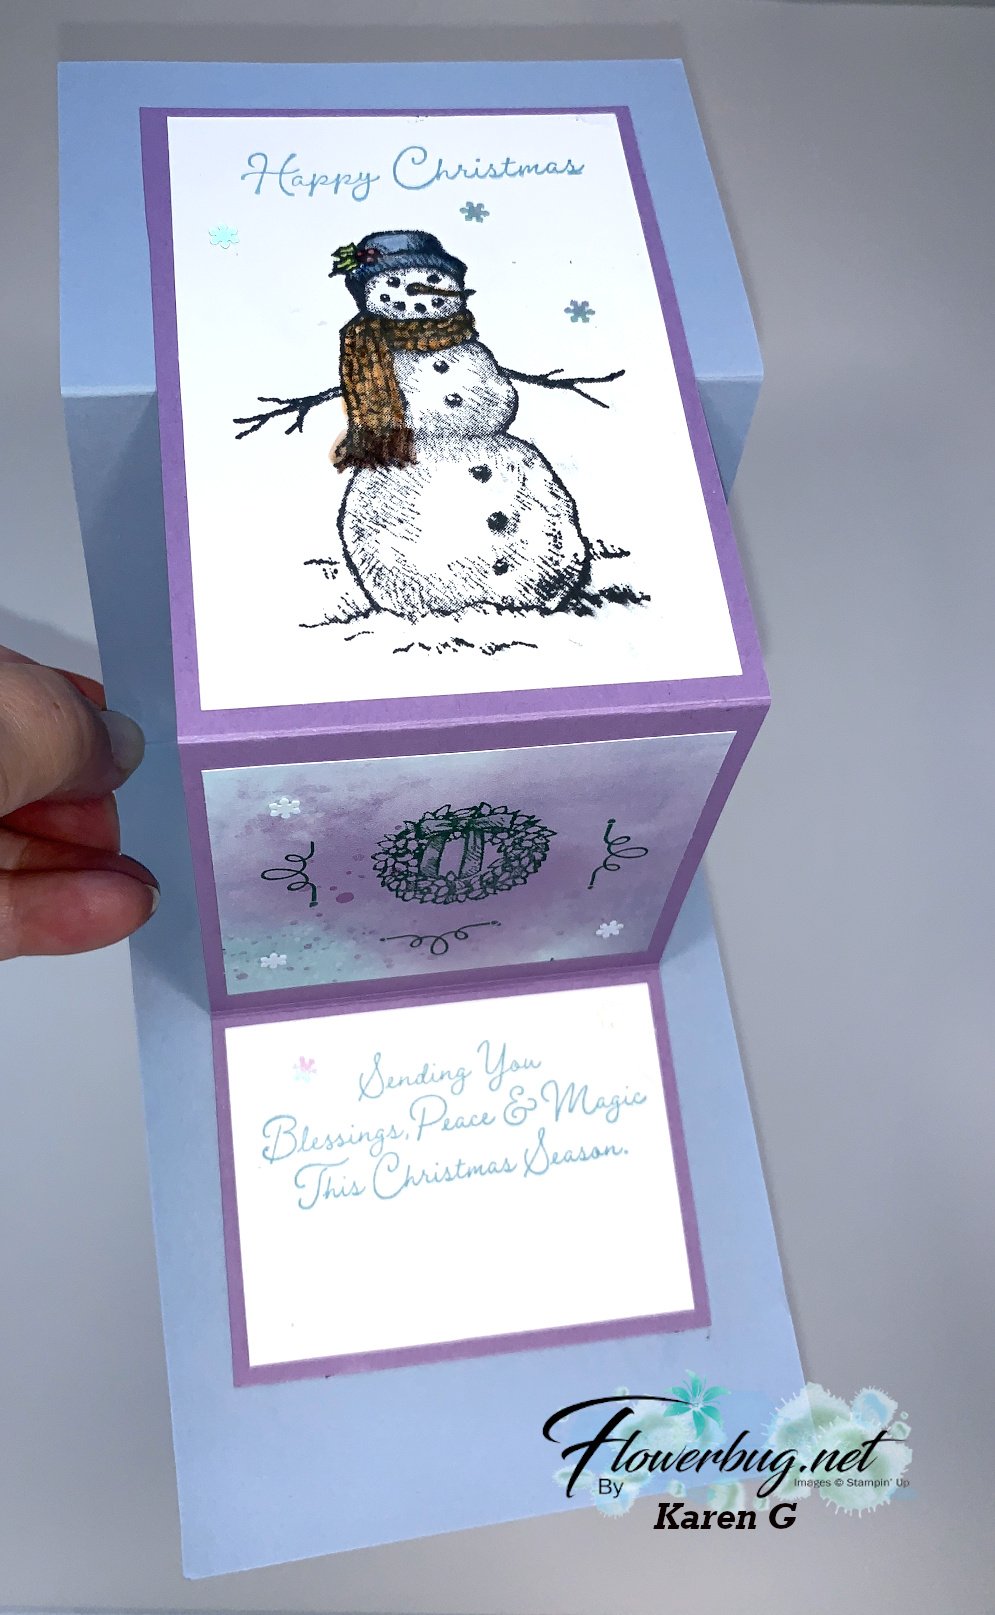
Here are two more fun fold cards made by my Flowerbug's Team for a recent swap. They're both Z-fold cards but totally different!
First is Mary's card featuring the Heartwarming Hugs designer paper and the Warm Hugs bundle; both in the 2020 Holiday catalog now. This Designer paper is on sale right now. Click here to see all 15 papers!
I LOVE the bright, eye-catching colors she choose; Granny Apple Green & Poppy Parade. Can you see that she used both the Light & Dark colors in these Blends markers?
She also used the Wink of Stella on the punched bow and 'ribbon' on the front. See that cute baby tag? That's part of the punch too!
Can you see how the front flap catches on the greeting on the left? Love this!
Clear Block Stamping; a fun & easy background for quick cards!
Have you ever tried Block Stamping? If you have a clear block and ink pads you can do this!
I shared these cards on Facebook Live last week Tuesday. You can watch the replay below. Remember every Tuesday morning at 11 am CT I'm Live on FB here.
I chose a few different stamp sets and inks for the cards I made. I also have a few tips for you when doing this technique.
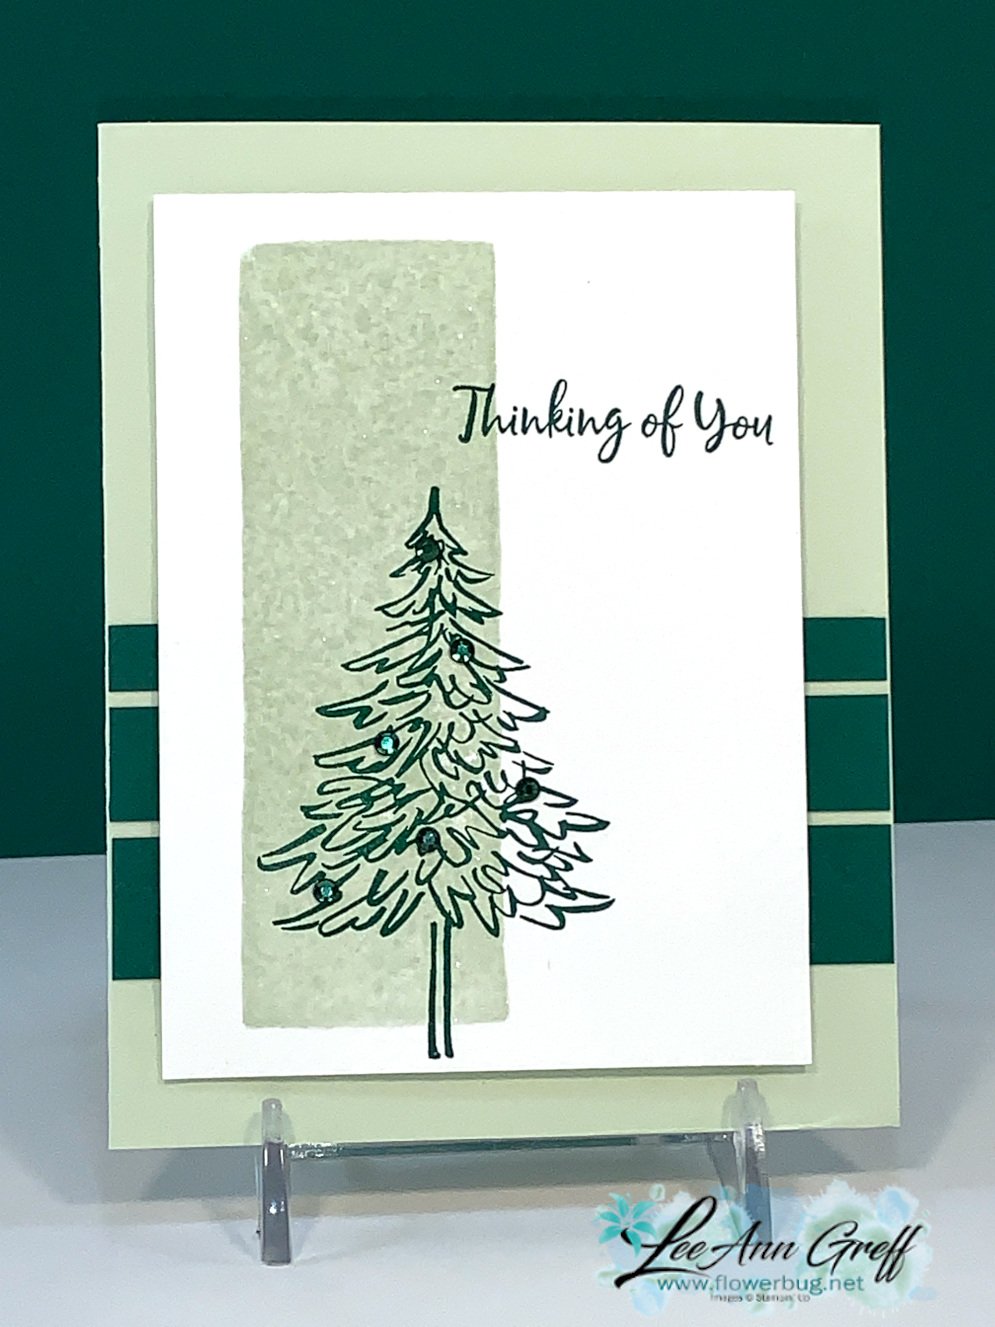
The above card features Soft Seafoam and In The Pines stamp set. The White layer is 4 3/4" X 3 1/2". I inked the 'H' block in Soft Seafoam ink and spritzed it with a mixture of rubbing alcohol and Champagne Shimmer Paint.
You can use water but that takes longer to dry and I wanted a bit of shimmer. Shimmer Paint mixes well with rubbing alcohol. I added random strips of Shaded Spruce CS across the card. Quick & easy!
This card features Calypso Coral (2" X 5 1/2"), Petal Pink and the Queen Anne's Lace stamp set. The textured layer is from the set of Wrapped in Texture embossing folders.
Can you see the marbling effect here? I inked the block in Seaside Spray ink and then added a few swirls of Misty Moonlight with a Stampin' Write marker. *Watch the video below.
I used the Snowflake Wishes set on this card and the Flowers for Every Season ribbon/twine combo pack. The colors are Seaside Spray & Misty Moonlight. The White layer is 3 1/2" X 4 3/4" and the Misty Moonlight is 3 3/4" square – a scrap I had.
Tips on the Clear Block Technique:
Use a light color of ink
Choose a block that fits on your card stock
Ink it and spritz with either water or rubbing alcohol until it almost starts to puddle.
Add a swirl of darker color with a marker after inking the block and before spritzing.
Alcohol dries faster than water
Add a bit of Shimmer Paint to your alcohol for additionals glitz!
Whisper White card stock works just fine; no need for thicker papers
Notice: LeeAnn Greff, Independent Stampin’ Up! Demonstrator, Manager. The content of this website is my sole responsibility as an independent Stampin’ Up! demonstrator and the use of, and content of, the classes, services, or products offered on this website is not endorsed by Stampin’ Up! Copyright 2025


Leave a Reply