/


Latest Post

A-Mazing Starter Kit deals start today! 2 choices; one is almost half price!


It starts today!

I hope you consider taking advantage of this incredible deal!  

New demonstrators can choose one of the following options for their Starter Kit in October:

Option 1: Get 35% OFF the normal cost of a Stampin’ Up! Starter Kit. Those who select this option will receive $125 USD  worth of product for only $64.35 USD!

Option 2: Get 35% MORE product with their Starter Kit. Those who select this option will receive $168.75 USD worth of product by spending $99 USD!

No matter which option new demonstrators choose for their Starter Kit, both provide them with free business supplies and free shipping on their Starter Kit—not to mention all the fun that comes with being part of Stampin’ Up!

Plus more!  Get a FREE OnStage@Home Registration

*Those who sign up for a Starter Kit during this offer will also be automatically registered for FREE* to our virtual OnStage event on 11 November—a $77 value! 

~~~

*Did you know your starter kit is entirely up to you?  Choose whatever products suits you! 

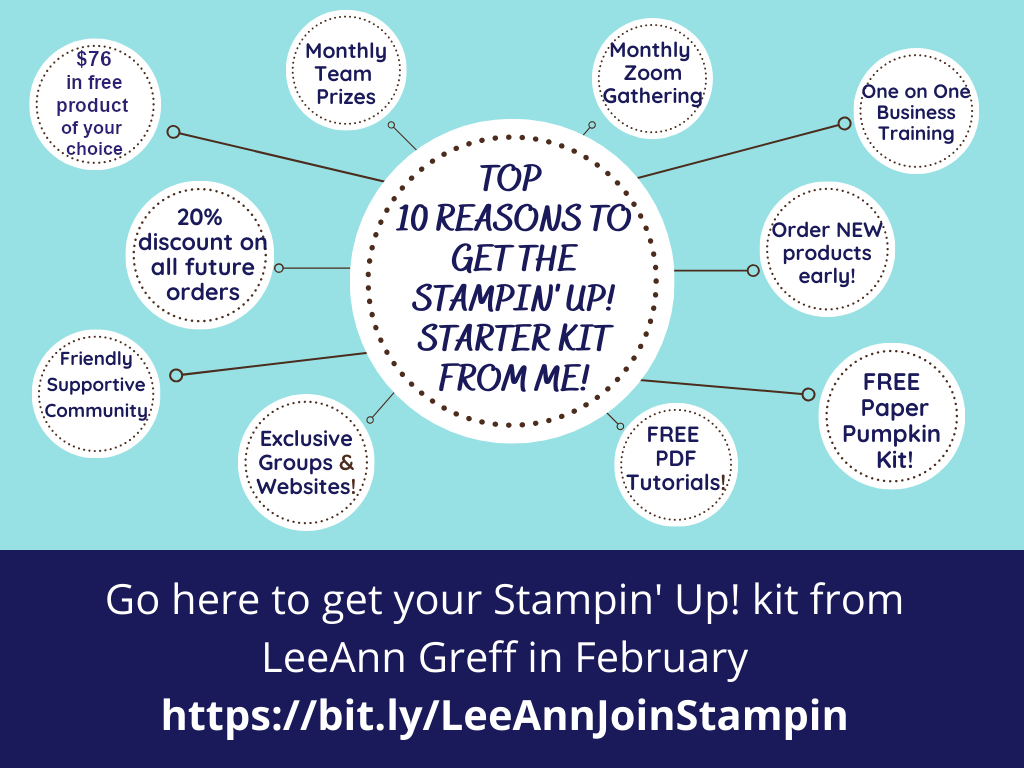
I'd love to welcome you to my Stampin' Up! Team this month.  There are so many reasons to choose the Flowerbug's as your stamping group. Here are just a few:

  1. Friendly, supportive and active group of stampers
  2. 3-4 optional creative and business challenges each month!
  3. FREE PDF 10+ project tutorials – at least 3 every month!
  4. Optional team card swaps
  5. Multiple prizes sent out each month
  6. Monthly virtual team gathering
  7. One on one optional business training 

  Plus the many perks of being a Stampin' Up! Demonstrator like:

  • 20% off all future orders 
  • we get all the perks a customer receives like host rewards; but at a discount! 
  • See & pre-order from new catalogs early
  • your first quarterly minimum is waived – order $300 by the end of March to stay active.
  • All orders from now through March count towards your first $300 minimum
  • Be in the know with what's happening in Stampin' Up!
  • Exclusive groups and websites just for Demonstrators!

I hope you'll consider getting the Starter kit and join the incredible Stampin' Up! community.

~~~

October Specials: 

*current host code: W99E4KPB or VEH4FKBV

*Get free glitter gems with online orders over $55 (Please use a host code)

~~~

Get a Mystery Box full of Stampin' Up! supplies while they last!

Each box contains from $180-200 in retired products (new or lightly used)

    1. Place an online Stampin' Up! order over $75 (before tax & shipping) using one of my current host codes to reserve a Mystery Box. *Host code links – W99E4KPB or VEH4FKBV
    2. Send me the $14 shipping fee (PayPal or Venmo). 
    3. I'll send you your Mystery box via Priority Shipping! 

All Posts

  • Retro style circles layout; super easy! Catch the Live video tonight!


    Tonight at 7:30 pm Central Time I'm sharing how to make these retro style circle cards on Facebook Live.  Click here to join me.   You can also see this video below!

    Basically you need three sizes of circle dies or punches for the start of this layout.  Cut them in half and layer together with the edges meeting on one side. Adhere and add a long greeting between the two. 

    Watch how on my FB Live replay!

    Measurements:

    • 5 1/2" X 8 1/2" card base
    • 3 1/2" X 4 3/4" Whisper White; the greeting strip is about 5" long and either 1/2" or 3/4" wide depending on your greeting image.
    • 1" X 5 1/2" horizontal strip
    • Circles from the Stitched Shapes dies are the largest three circles. 

    You'll want ink, stamps and embellishments that coordinate with your Designer Paper.  Remember you could use card stock instead of DSP. 


    Products used:

    • Designer papers – Heartwarming Hugs, new Classic Christmas & Snowflake Splendor
    • Stamps – Tree Angle, Snowflake Wishes & Curvy Christmas
    • Colors – Real Red & Olive, Seaside Spray & Night of Navy, Sahara Sand & Cherry Cobbler  
    • Other: Stitched Shapes dies, Curvy Dies & Pick a Banner punch

    ~~~

    November Specials!

    Current Host code is GRC9VVUU


    All online orders receive my FREE Curvy Celebrations 22 project PDF Tutorial! 

    Leave a Reply

    Your email address will not be published. Required fields are marked *

  • Curvy Christmas & the Postage Punch


    Check out this easy card using the new Curvy Christmas stamp set and the Postage Punch!  

    It's super simple! Here's how I made it:

    1. Stamp the curvy trees image on the White CS using Shaded Spruce ink.  Color the trees with a Light Shaded Spruce Blends marker.  Add a tiny star using Cherry Cobbler ink on one tree. Adhere it to the Cherry Cobbler layer and to the main card.
    2. Punch out three pieces of Classic Christmas designer paper with the Postage Punch seen here.  Adhere to the White CS. 
    3. Stamp the greeting in Cherry Cobbler ink on a 1/2" strip of White CS.  Punch the ends with the Banners Pick a Punch. Add it to the card with mini dimensionals. 
    4. Finish with a few Holiday rhinestones. 

    You can see this stamp set here; it's only available through January 4th.  And the Classic Christmas Designer Paper is here while supplies last. 

    Remember that everyone who orders any of these products or places an online order with me in November will receive a free 22 project PDF tutorial featuring the Curvy Celebration products! 


    ~~~

    November Specials!

    Current Host code is GRC9VVUU


    All online orders receive my FREE Curvy Celebrations 22 project PDF Tutorial! 

    Leave a Reply

    Your email address will not be published. Required fields are marked *

  • Gift Wrapped Box Fold Card with video


    Check out this cute Christmas card we made at my October Card Clubs!  It's a box fold card; a super cute but easy fun fold. 

    The colors are Real Red with Granny Apple Green & White. The dies on the front are the Stitched Shapes and Hippos & Friends.

    It even folds flat for mailing!  As you can see the back is similar to the front; leaving some space to write or sign the card.  

    I used the Gift Wrapped punch bundle from the Holiday catalog.  You can see it here. 

    Check out the video and measurements below. 

    Here's the video: 


    Measurements:

    Real Red 4 1/4" X 11" scored at 5 1/2", 7", 9" and 10 1/2"
    Granny Apple Green 3 5/8" X 4 7/8" (2 pieces) plus scrap for die-cut
    Whisper White 3 1/2" X 4 3/4" (2 pieces) plus scrap for circle die-cut and bow

    ~~~

    November Specials!

    Current Host code is GRC9VVUU


    All online orders receive my FREE Curvy Celebrations 22 project PDF Tutorial! 

    Leave a Reply

    Your email address will not be published. Required fields are marked *


Notice: LeeAnn Greff, Independent Stampin’ Up! Demonstrator, Manager. The content of this website is my sole responsibility as an independent Stampin’ Up! demonstrator and the use of, and content of, the classes, services, or products offered on this website is not endorsed by Stampin’ Up! Copyright 2025