/


Latest Post

A great way to add multiple pieces with the Press & Seal technique


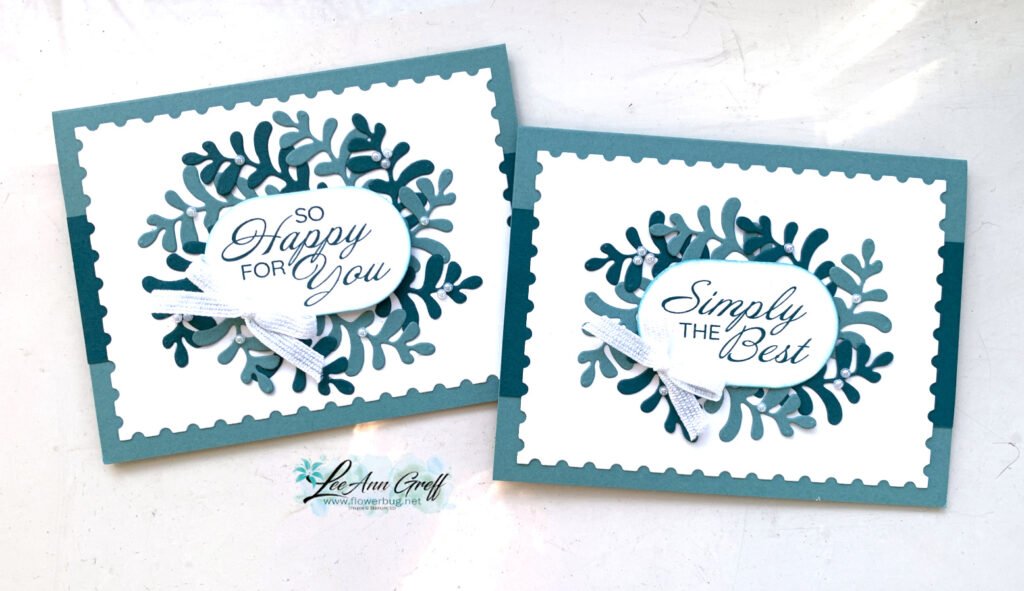
I shared this pretty card on last week’s video featuring new products and a neat and easy technique. If you’ve ever struggled to add multiple pieces perfectly, as you’ve laid them out, this will help you so much!

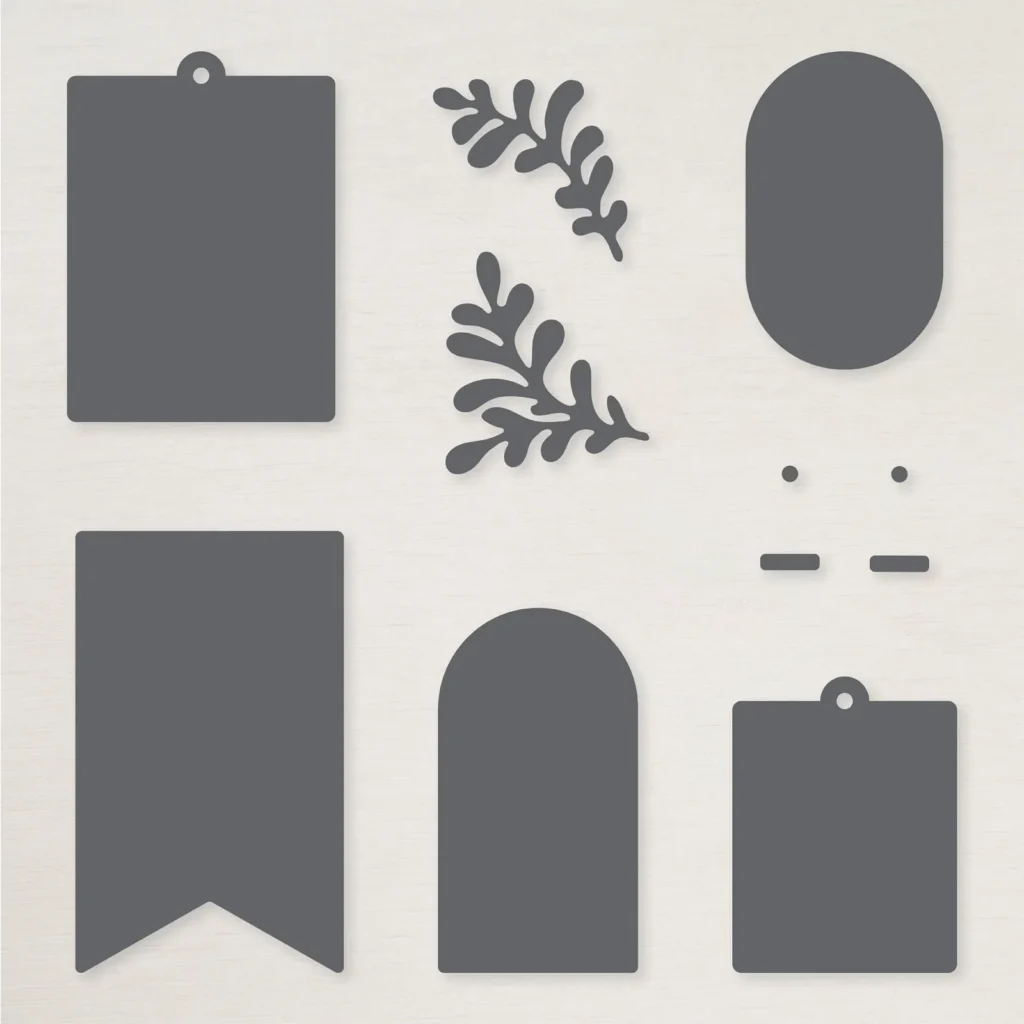
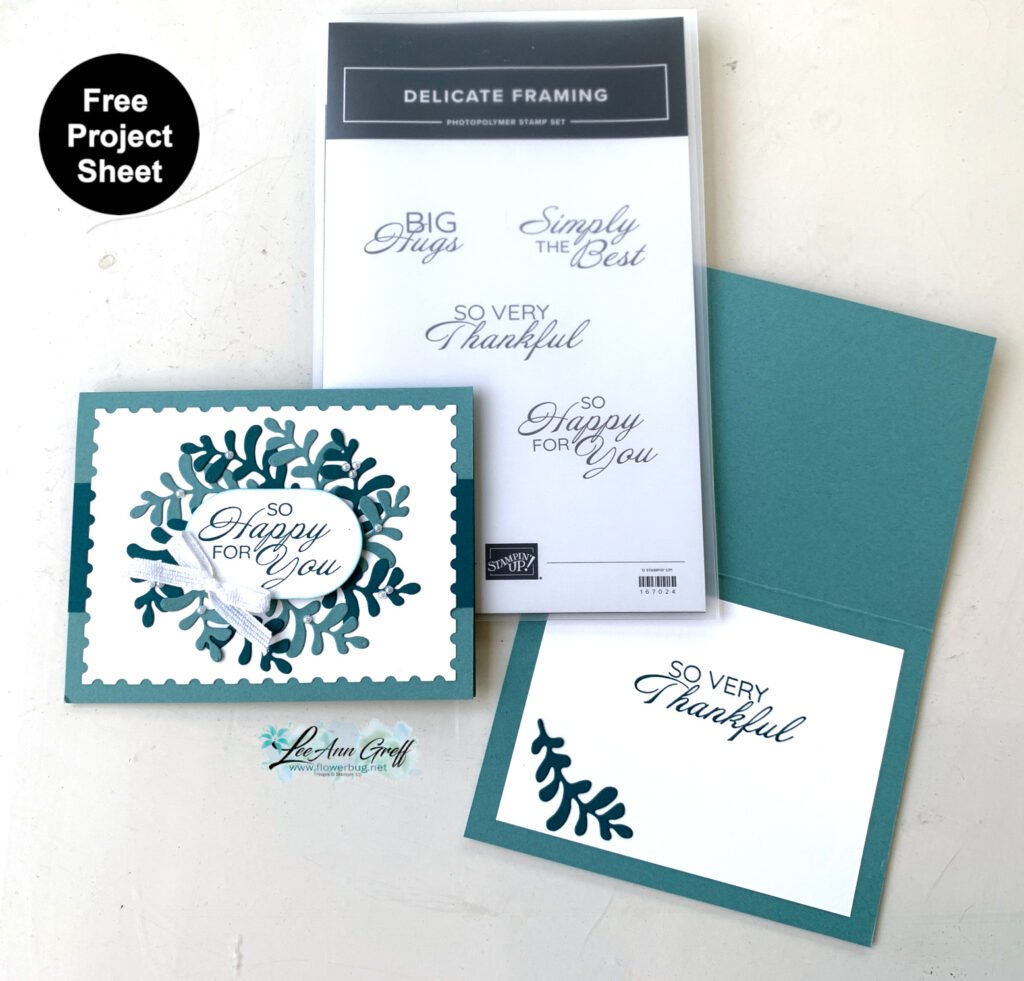
My colors include Pretty Peacock, Lost Lagoon and White. The large die-cut is from the Perennial Postage dies and the greeting & leaves dies are from the Creative Haven dies seen here.

Tips on using Press & Seal to adhere die-cuts perfectly in place:
I placed the center greeting piece in the center of the Postage die-cut. Then I tucked each die-cut leaf under and around it placing them just where I wanted them. Next I lifted the greeting piece off and pressed a piece of my Press & Seal kitchen wrap onto the die-cut leaves. Once they were all stuck on the wrap I turned them over and added adhesive to the back. I then turned it over and adhered it to my White layer. Let it dry or set a bit and then carefully peel off the Press & Seal wrap.

I love this technique!!

I created a free project sheet for this card with measurements, directions and a product list. You can see or download it here.

Below is the video tutorial for this card and one more pretty Easel card too.

The kits below will ship out this week so you have plenty of time to finish them by December. And they’re quick & easy too!

The Christmas Tags & More cards are easy because there isn’t any stamping. The greetings are from the gold foil ephemera pack included in the kit.

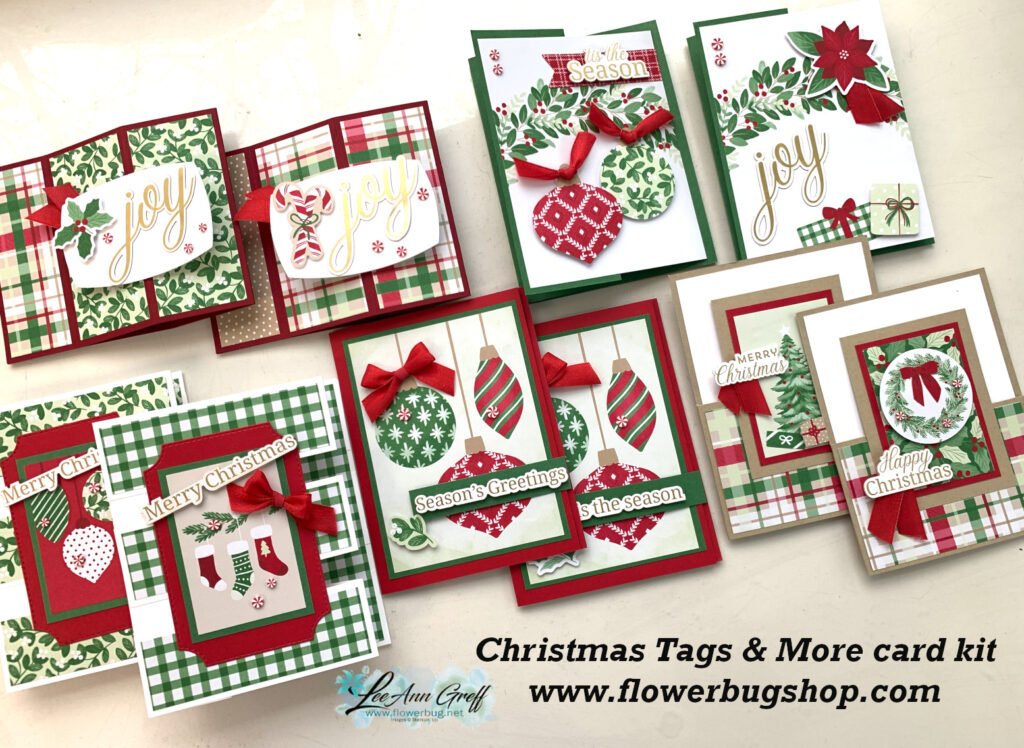
This kit to go includes a share of the festive designer paper, the ribbon, the peppermint gems, the ephemera greetings, the PDF tutorial and video too. Plus the pre-cut 10 cards that are all fun folds. All for $30 plus shipping. It’s a fabulous deal!

Don’t wait long; I have just a few left. Go here to get yours. *You will need to cut your new designer paper for the cards but my directions make that simple.

~~~

The other kit I created this month is also easy but does require stamped greetings. But there is very little prep & just a little trimming of the card bases to create these beautiful wintery cards:

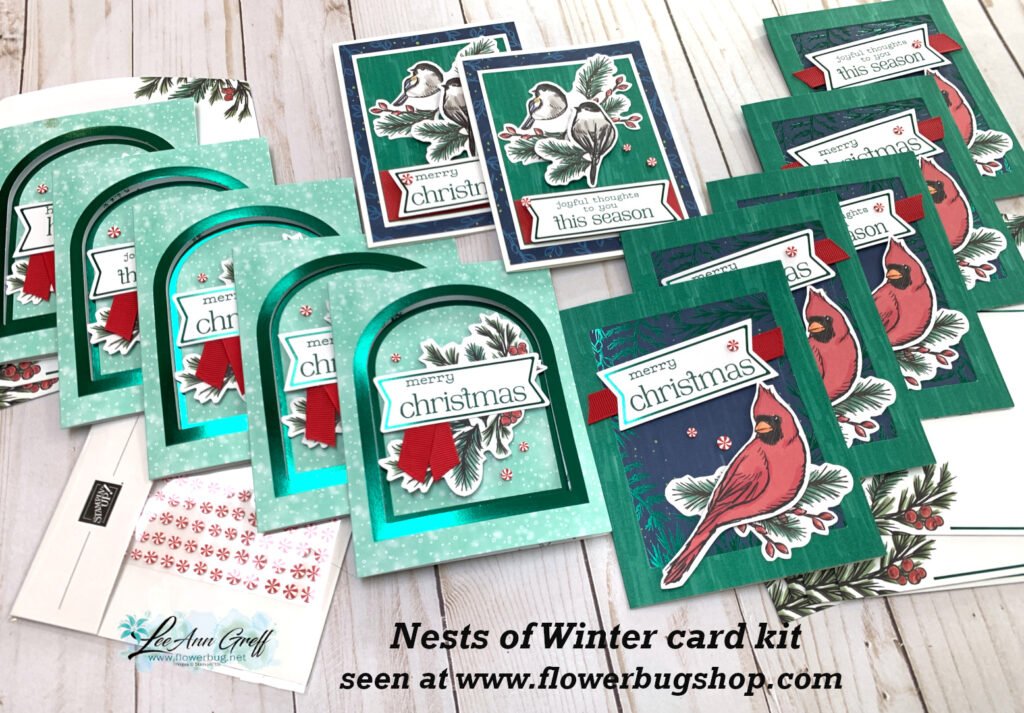
These cards could be winter or holiday; it’s your choice when you stamp the greetings.

This kit originated from a former Paper Pumpkin kit but I jazzed up the cards and added more to create 12 gorgeous cards. This kit includes 12 envelopes and a share of Peppermint gems plus the PDF tutorial.
I have a few left so grab yours soon. This kit is $29 and you can see it here.

**Remember to check out all of my kits to go and tutorials here at my shop; choosing more than one will save on shipping.

~~~

~~~

November Specials

New Online products are available on November 4th.
See them here.

Get the Peaceful Garden suite tutorial FREE with any online order in November!

All Posts

  • A colorful Joseph’s Coat technique with Layered Thoughts


    Have you ever done the Joseph’s Coat technique?  It’s one of those techniques that makes you feel like an artist.

    I shared how to do it on last week’s Live video. The card I’m featuring today uses the Layering Thoughts technique with three of our newest In Colors – Strawberry Slush, Darling Duckling and Timid Tiger.  

    These colors – card stock, ink, refills, gems, markers and card stock are all 15% off in August. See these products and so much more here.  It’s a great time to grab these items while discounted. 

    This technique involves a few steps:

    1. sponge colors over your neutral card stock – I used White. 
    2. Tap or rub the embossing buddy over the layer. 
    3. Stamp your images using Versamark ink. 
    4. Heat emboss with Clear embossing powder and your heat tool. Let dry. 
    5. Rub a dark ink (memento black here) over the entire layer.  The embossed areas will resist the water based ink. 
    6. Dab off excess ink with a tissue or paper towel.  Done!  

    Here’s how I finished the inside.  I wanted to use all of the colors I colored on the front so I used my Stampin’ Write markers on the stamp before stamping. 


    Here is the free project sheet for this card. Click on the following link to print or download it.  Download Layered Thoughts Joseph’s Coat Technique

    I’ll be sharing the other cards in the next few days. Stay tuned! 

    The video tutorial for this card and two more versions is below.  Be sure to follow me on YouTube here so you don’t miss any of my tutorials. 

    ~~~

    August Specials

    Lots of In Color products are discounted in August!!

    Go here to see them all. 

    Get a free card class with any online order over $55 during August!

    Order online here

    The last chance list has new products! See them here. 

    Leave a Reply

    Your email address will not be published. Required fields are marked *

  • Look at this pretty Notes from the Heart kit to go


    This beautiful card kit includes the Notes from the Heart Paper Pumpkin refill kit with additional product added to jazz up the cards. 

    This kit to go includes the original Paper Pumpkin refill kit plus extra card stock and layers needed to make all 12 cards including 12 envelopes.  You’ll also receive a new package of sponge daubers. 

    You will need greeting images, a few inks and embossing folders are optional. 

    Reserve your kit here. The tutorial includes step by step directions, photos, measurements & a supplies list. It is sent via email immediately after purchase. Check your spam or junk folder.  

    *The pre-cut kit is mailed to you at the end of August.  

    See all of my kits & tutorials here.  Ordering more than one kit saves on shipping! 

    ~~~

    August Specials

    Lots of In Color products are discounted in August!!

    Go here to see them all. 

    Get a free card class with any online order over $55 during August!

    Order online here

    The last chance list has new products! See them here. 

    Leave a Reply

    Your email address will not be published. Required fields are marked *

  • Beautiful Painterly Pears fun fold card kit to go; or choose the PDF tutorial option


    Oh my gosh; I just love these cards in this kit to go.  The Painterly Pears designer paper is gorgeous! 

    Each card is a unique fun fold layout.  And there’s an exclusive video tutorial for them for everyone that orders the kit or tutorial.  There are 5 different layouts with 2 of each in the kit to go and it includes over $20 in Stampin’ Up! products in addition to the pre-cut card pieces!

    This kit includes the following:

    • 1/2 pkg. Painterly Pears DSP (6″ X 12″)
    • shares of both Low-profile Sparkle Dots & Mossy Meadow/Gold ribbon
    • all pre-cut pieces to make 10 cards
    • the PDF tutorial with measurements, directions, supplies and photos
    • exclusive video tutorial

    Reserve your kit to go here for $32.  Or choose the PDF tutorial option here.  

    This kit will be mailed out at the end of August. The PDF tutorial with video link is emailed to you immediately after payment. Check your junk of spam folder. 

    *You will need your own greeting images, ink, adhesives, paper snips and trimmer to complete the cards. 

    *If you’d like to subscribe to receive a kit automatically each month please use the button below.  My subscribers get a free surprise every few months along with the guarantee of a beautiful kit full of products too! 

    ~~~

    August Specials

    Lots of In Color products are discounted in August!!

    Go here to see them all. 

    Get a free card class with any online order over $55 during August!

    Order online here

    The last chance list has new products! See them here. 

    Leave a Reply

    Your email address will not be published. Required fields are marked *


Notice: LeeAnn Greff, Independent Stampin’ Up! Demonstrator, Manager. The content of this website is my sole responsibility as an independent Stampin’ Up! demonstrator and the use of, and content of, the classes, services, or products offered on this website is not endorsed by Stampin’ Up! Copyright 2025