/


Latest Post

3 more pretty fun fold cards for you with measurements; one is a sneak peek of upcoming product!


I hope you're enjoying the awesome fun fold cards I've been sharing this week.  My Flowerbugs Team swaps were incredible this month!  Our theme was to make fun fold cards featuring a new In Color. 

First up today is Candy's card which features Secret Sea with Cloud Cover & Vanilla. 

She used the Textured Notes bundle seen here.  It's one of my favorites!  She created her own background using the stamps in the set and Secret Sea ink – stamping off first for some. 

Measurements:

  • 7 1/4" X 5 1/2" scored at 4 1/4"
  • Vanilla panels 2 3/4" X 5 1/4"
  • Cloud Cover 1 1/8" X 5 1/4"
  • greeting die-cut 2 1/4" X 3/4", layer is 2 3/8" X 7/8" 

The textured panel is done with the Pressed Flowers embossing folder seen here.

~~~

Next is a lovely card made by Ginny featuring the Beautiful Gallery designer paper seen here.  It's part of our Suite BOGO sale too; in fact the entire suite is included!  

Her layout shows off the entire scene pictured on the DSP. This fold is perfect for scenic papers! 

Measurements:

  • Cloud Cover card base 8 1/2" X 5 1/2" scored at 2 1/8" & 4 1/4"
  • DSP – front panel is 4" X 5 1/4", inside is 2" X 5 1/4"
  • White is 2" X 5 1/4"

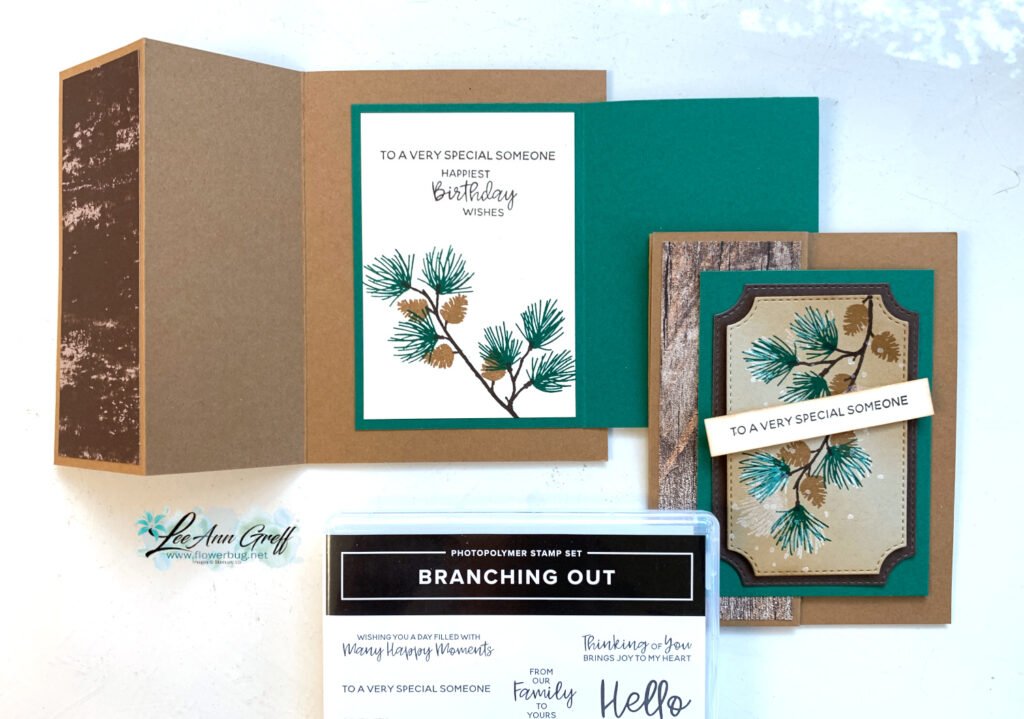
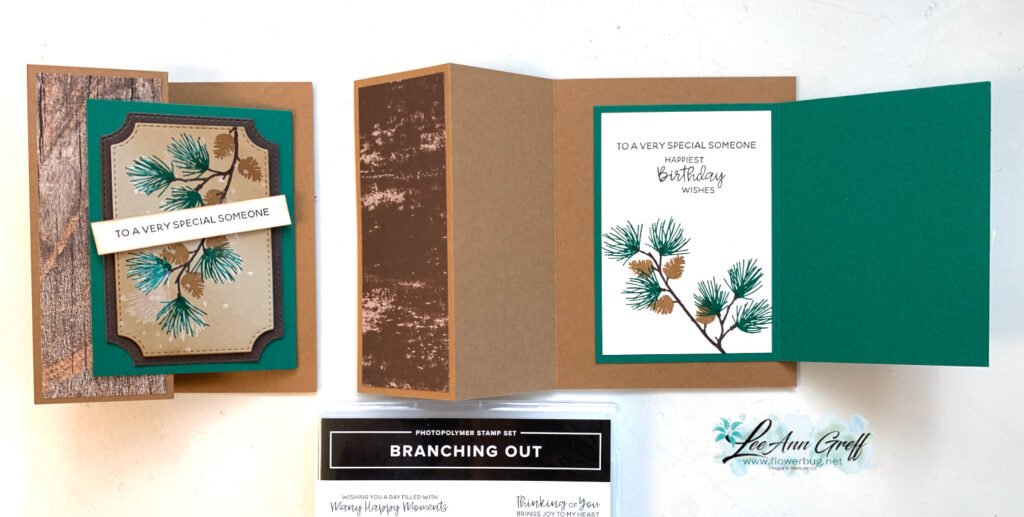
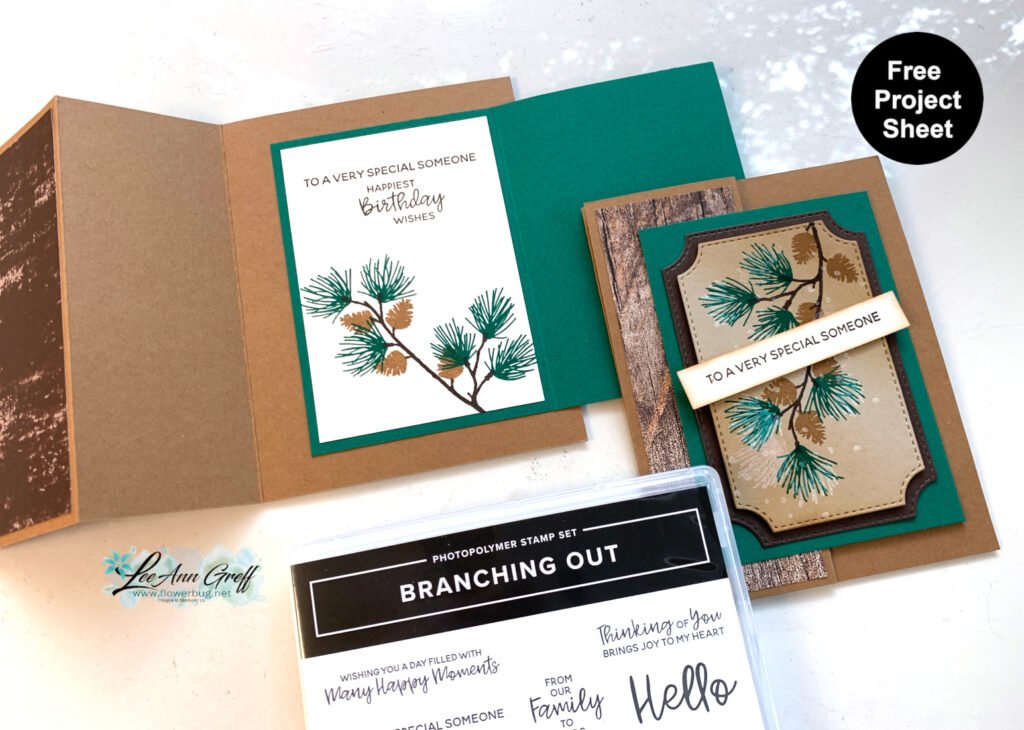
Lastly we have a sneak peek of some upcoming product from Kim. She used a suite featured in a Demo event called Creativity Now this month. She was able to pre-order the Peaceful Garden suite items that will be in the upcoming Holiday catalog in September, 2025. 

Her card is a simple Z-fold that really shows off that front White textured panel.  And look how the die-cut greeting label fits in that embossing panel! *notice those new flower gems….

She did a neat technique for her greeting panel. She used Secret Sea ink and a Blending Brush over an entire sheet of White card stock. Then she stamped and die-cut the label and the inside sprig from that. Super idea!

Measurements:

  • card base 8 1/2" X 5 1/2" score at 2 1/8" & 4 1/4"
  • White front is 4" X 5 1/4", inside is 3 1/2" X 4 3/4" 

~~~

June Specials:

The Suite Sale is on! 

Buy one get 50% the second item – on all available suite products. 

Shop here or see products below: 

~~~

Last Chance List has been updated!  see it all here. Don't miss out on the deals!

~~~

Earn free card kits in June with online orders! Get 4 kits with a $50 order and orders over $80 receive all 6 cards. All you need are greetings, gems and adhesives to assemble. 

Order here 

~~~

Get my Celebratory Sips PDF tutorial free with any online order in June!

All Posts

  • Save time on finishing the inside of your cards with this trick!


    I’m excited to share these stunning snowflake cards with you today. We made them at my card clubs in December.
    Living in North Dakota, we usually see a lot of snow in the winter so these cards are great for many occasions.

    I used the Snowflake Kisses bundle seen here. It’s filled with wonderful greeting images and lots of snowflake dies.

    My colors include Pretty Peacock with Cloud Cover and Gorgeous Grape with Fresh Freesia. I think blues & purples are perfect for snowflakes. We used a blending brush to add more color to the large snowflake die-cut.

    After creating the cards above I thought I’d try combining the colors on the large die-cut.

    Isn’t that pretty? I just love combining Gorgeous Grape with Pretty Peacock on the Fresh Freesia die-cut. Blending Brushes make this a breeze!

    Look how we finished the inside.

    I wanted to add snowflakes to the inside of the card but didn’t want to die-cut tons of them for my club gals. So I came up with creating a snowflake stencil.
    I cut multiple snowflakes from a piece of card stock and we used Blending Brushes to add pretty snowflakes to our White layer. I truly love the effect it gives.

    If you’d like the free project sheet for this card click here. You can download or print it.

    See how this card is made in the video below. I also shared a second Snowflake Kisses fun fold card.

    *You’ll receive a PDF with multiple projects featuring this product
    after the 20th of the month.
    ~~~

    The Last Chance list has been updated!
    Click here to shop.

    Get a free PDF tutorial with any online order from me in December!

    Leave a Reply

    Your email address will not be published. Required fields are marked *

  • The new Swirled Designs bundle is super fun!


    I had to point you to the new Swirled Designs bundle in our newest Online Exclusives release. It has the neatest sets of dies and stamps in it!

    See what I mean? The extra layers on the dies make them super playful and the stamps will be great for stamping backgrounds. Basic shapes like ovals and stars are something we’ll always use for multiple occasions.

    Look closer at this card made by Stampin’ Up! I love when we get new product that’s unique and we haven’t seen before.

    See what I mean? You can use the stamps to add the details to the inside of the die-cut shapes like above. I just love this card! See this bundle here.

    *You’ll receive a PDF with multiple projects featuring this product
    after the 20th of the month.
    ~~~

    The Last Chance list has been updated!
    Click here to shop.

    Get a free PDF tutorial with any online order from me in December!

    Leave a Reply

    Your email address will not be published. Required fields are marked *

  • The Branching Out bundle is retiring! Check out this fun fold card with video tutorial!


    We made this card earlier this fall and I realize I haven’t shared it with you yet. I also made a video too – scroll down….

    The colors include Pecan Pie with Crumb Cake, Early Espresso & Shaded Spruce. I used various wood-like designer series papers for the side panel. See how it has a double fold?

    Also notice the ‘white’ snow on the pine boughs plus snow in the background. You can achieve that without heat embossing. We used White Craft ink and stamped over the pine. Easy & a fun accent!

    The stamp set is retiring but the dies are not. The bundle is on the last chance list now. Click here to see it.
    It’s been one of my favorite products in our Holiday catalog this year. It’s timeless and can be used for fall, winter or Christmas!

    Besides the video tutorial here’s a free project sheet for you too. Click here to download or print it.

    I’m glad the dies are not retiring but I have to say the stamp set is among my top 5 favorites!

    Below is the video tutorial which gives you tips on stamping the branches with the pines and pine cones.

    *You’ll receive a PDF with multiple projects featuring this product
    after the 20th of the month.
    ~~~

    The Last Chance list has been updated!
    Click here to shop.

    Get a free PDF tutorial with any online order from me in December!

    Leave a Reply

    Your email address will not be published. Required fields are marked *


Notice: LeeAnn Greff, Independent Stampin’ Up! Demonstrator, Manager. The content of this website is my sole responsibility as an independent Stampin’ Up! demonstrator and the use of, and content of, the classes, services, or products offered on this website is not endorsed by Stampin’ Up! Copyright 2025