/


Latest Post

WOW – 4 new promotions starting July 6th!


4 new promotions start tomorrow, July 6th!
1. Bonus Days

BONUS DAYS are back! Starting July 6th when you shop iand spend $50 you will earn a $5 coupon! This code is sent to you via email. 

*Make sure you save all your coupons because you can redeem them (and we mean ALL of them) between 1–31 August. There’s no limit to how many coupons you can earn! 

2. PAPER PUMPKIN 48-HOUR SALE!

Surprise! On 6–7 July, all current Paper Pumpkin subscribers can save up to 50% on these Paper Pumpkin past kits, refills, and add-ons!

Customers who sign up (with a pre-paid subscription or ongoing kits) by July 10th will receive our fun July Paper Pumpkin Kit. 

Get your pre-paid kits here or monthly kits here. 

3. Next is a Clearance Rack update!

See all items available here on july 6th 

4. NEW Online Exclusives will be available

See them all here on Thursday! 

~~~

Plus my monthly special for online orders:

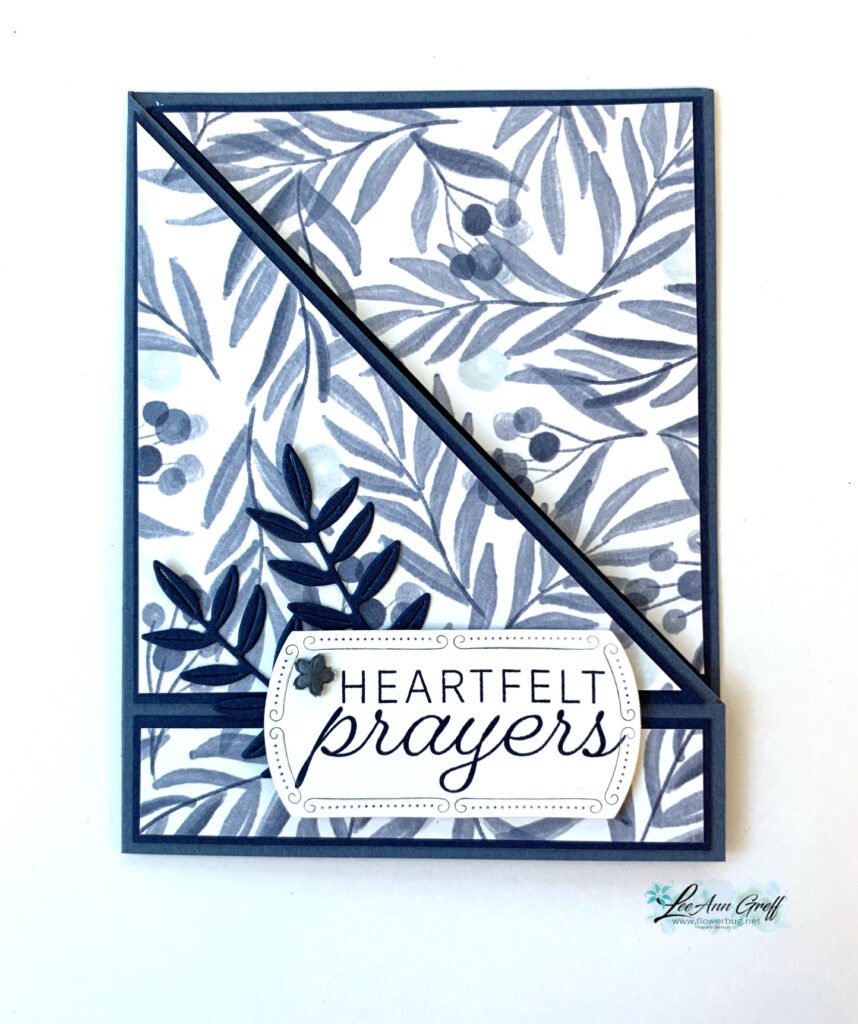
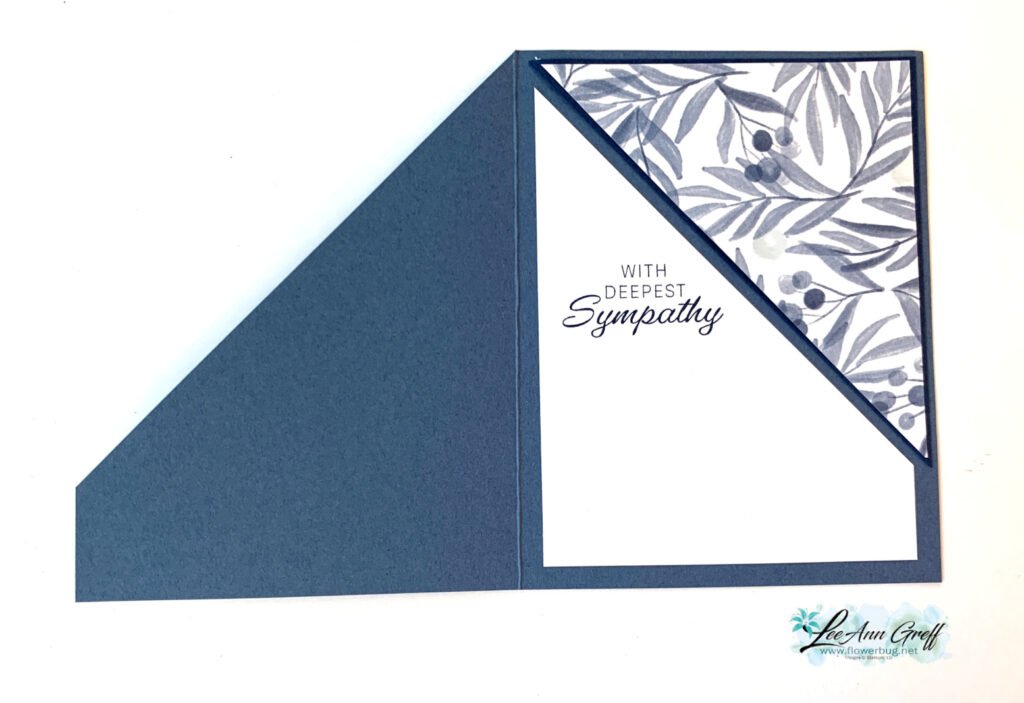
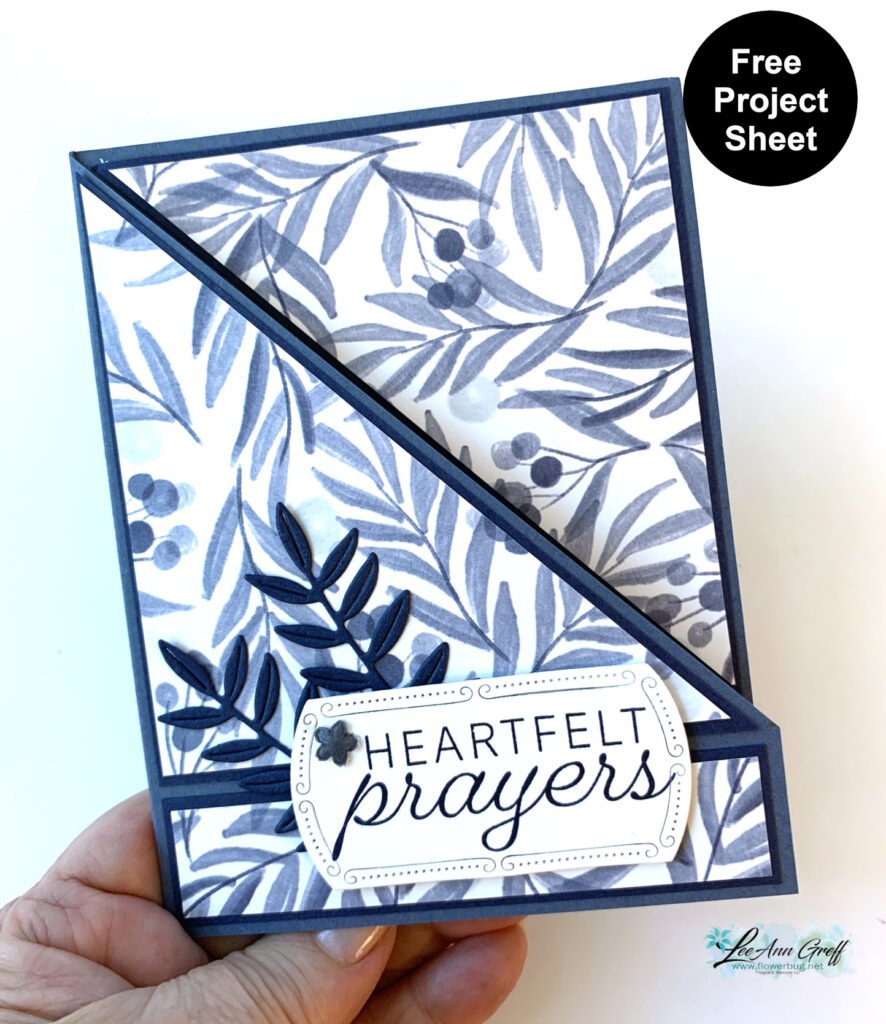
Get a free card kit & a new Beautifully Happy stamp set 

with online orders over $65; must use a host code.

*current host codes: M7SCQSVS or GGDRKFQR

All Posts

  • Stunning Prairie Grass sunset scene with a masked moon & video tutorial


    I'm thrilled to share this amazing card with you today.  We made it at my July card clubs. 

    I created a beautiful sunset with stamps, ink and a 'moon mask'.  I used Blending Brushes with Secret Sea, Darling Duckling and Timid Tiger inks.  

    It features the beautiful Prairie Grass stamp set seen here.  Since I'm from North Dakota where we have tons of 'prairie' this set was a must have!  *Unfortunately it is now out of stock but you can add your email to be informed when it's available. It should be back around August 11th. 

    After stamping the grassy image we added a post-it note mask made from a circle punch. Then we blended the inks on little by little.  It's important to use less ink and more time to get this pretty soft effect. 

    See the flap on the left side of the card above?  That flap holds down the front of the card.  So simple but a fun technique. Notice the light sponging on the greeting inside?  

    I created a free project sheet for this card.  You can print or download it by clicking on the following link: Download Prarie Grass July 2025

    And here's the video below where I share how to create this gorgeous card and two other cards featuring this amazing Prairie Grass stamp set. 

    ~~~

    July Specials:


    New Online Exclusives are here!  Click here

    ~~~

    Get my Turtle-y Cute PDF tutorial free with any online order in July!

    Leave a Reply

    Your email address will not be published. Required fields are marked *

  • Gorgeous Prairie Grass Joy Fold card with video & free project sheet


    I shared this pretty card on last week's Live video.  

    Isn't it pretty?  The colors include Fresh Freesia with Black accents. All of my projects featured the brand new Prairie Grass stamp set seen here.  

    I also used the amazing Thoughtful Journey DSP seen here.  It's absolutely perfect for scene builder stamps like this one and has some of the best and easiest backgrounds to start with.  

    This card is called a 'Joy Fold' – who knows why but it's actually one fold name I haven't forgotten. Basically it has two flaps that overlap each other. It gives you multiple opportunities to use your Designer Papers or textured layers.  

    The embossing folder here is called Glass & Gardens seen here.  It's unavailable right now but you can add yourself to the list to be notified when it's back in stock.  

    Here's the free project sheet for this card with measurements, directions and supplies.  Click on the following link to print or download it.  Download Prairie Grass JoyFold card

    And here's the video below where I share two other cards featuring this amazing Prairie Grass stamp set. 

    ~~~

    July Specials:


    New Online Exclusives are here!  Click here

    ~~~

    Get my Turtle-y Cute PDF tutorial free with any online order in July!

    Leave a Reply

    Your email address will not be published. Required fields are marked *

  • WOW! Check out this Beautiful Butterflies stained glass technique


    I was amazed by Candy's card swap this month!  Look at this beauty!!


    It's called the Stained Glass technique and she made it for our July Team swap featuring Window Sheets.  

    Her colors include Pretty Peacock with Highland Heather. The bundle is called Beautiful Butterflies and can be seen here. 

    Steps:

    • She stamped the butterfly image on a window sheet using Black Stazon ink. 
    • Turn it over and color with Blends markers. 
    • Add adhesive sheet to the Blends side. Press onto slightly crinkled aluminum foil. 
    • Adhere to a second butterfly stamped on White CS for support and to cover the foil. 
    • Fussy cut; add to card. 

    Other products used here:

    Measurements:

    • Card base 11" X 4 1/4" score at 4 1/4" & 5 1/2"
    • Highland Heather 4" square
    • DSP strip 1 1/8" X 4"
    • inside 4" square

    Thank you for creating your incredible swap card Candy!  Great job!!

    ~~~

    July Specials:


    New Online Exclusives are here!  Click here

    ~~~

    Get my Turtle-y Cute PDF tutorial free with any online order in July!

    Leave a Reply

    Your email address will not be published. Required fields are marked *


Notice: LeeAnn Greff, Independent Stampin’ Up! Demonstrator, Manager. The content of this website is my sole responsibility as an independent Stampin’ Up! demonstrator and the use of, and content of, the classes, services, or products offered on this website is not endorsed by Stampin’ Up! Copyright 2025