Each day this week I'm sharing the Fun Fold card swaps made by my incredibly talented Flowerbug's! We hold a card swap every month and many opt in to participate. See the others here and here.
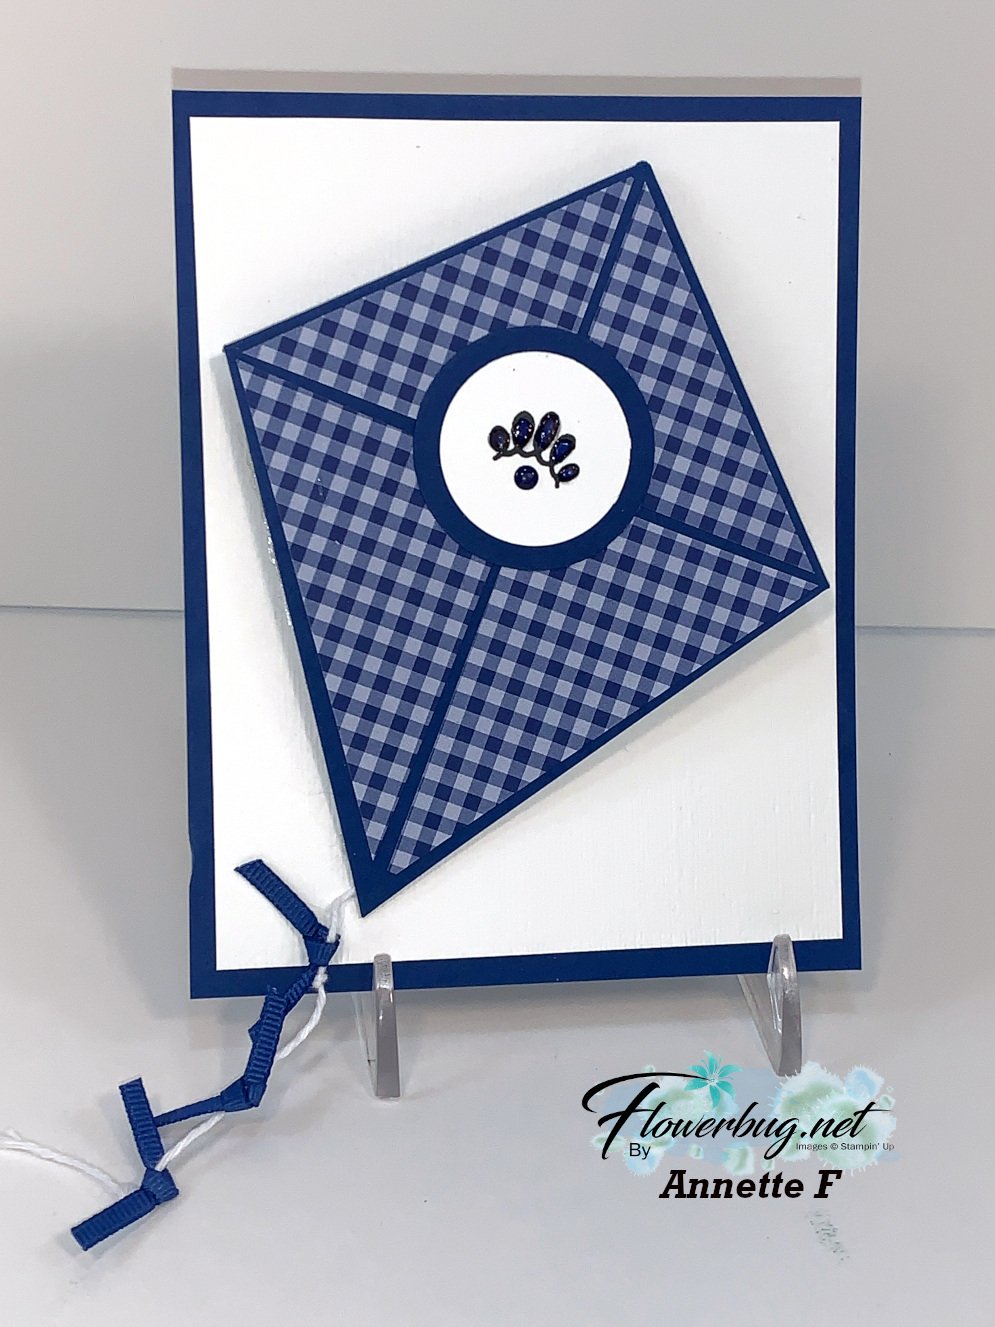
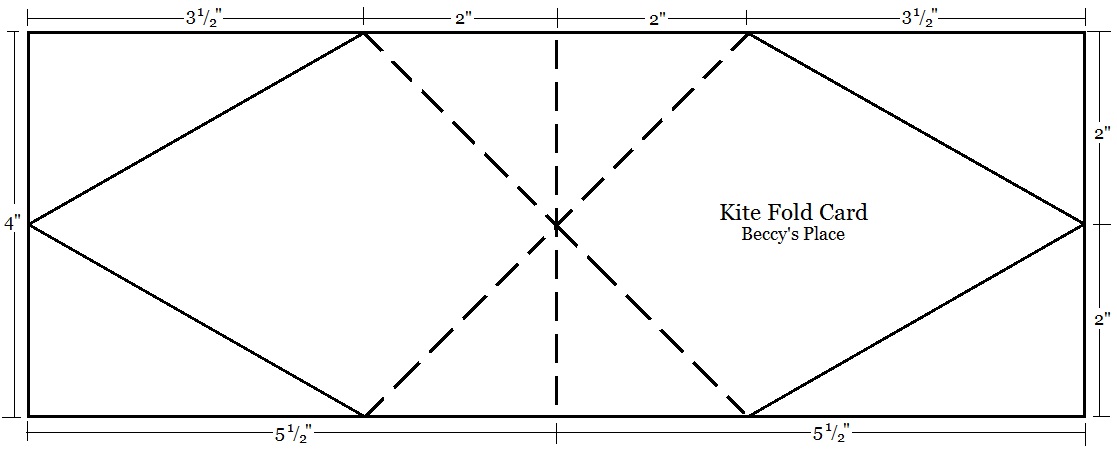
I know many of you will want to know how to make it so I searched and found this template at Beccy's Place. She has a tutorial for it here. Her card is a full sized card where Annette's was placed on a layer of her card. So the finished size may be different.
Annette adhered her kite to a base card of Blueberry Bushel at 5 1/2" X 4 1/4" and White at 5 1/4" X 4" . She also added a velcro closure to keep the card closed securely.
I think the tail of ribbon and twine finish it off like a kit perfectly!
~~~
Karen made this adorable card with the Follow Your Art suite of products seen here! I believe almost all of the products in this suite are retiring with many on sale; the stamps & dies, the designer paper (on sale for just $4.60 now!), the embellishment kit and the embossing folder too. It's such a fun group of products; great for crafters!
The Follow Your Art embellishment kit comes with lots of fun accents including these stitched felt pieces! Its on sale right now on the Last Chance list here.
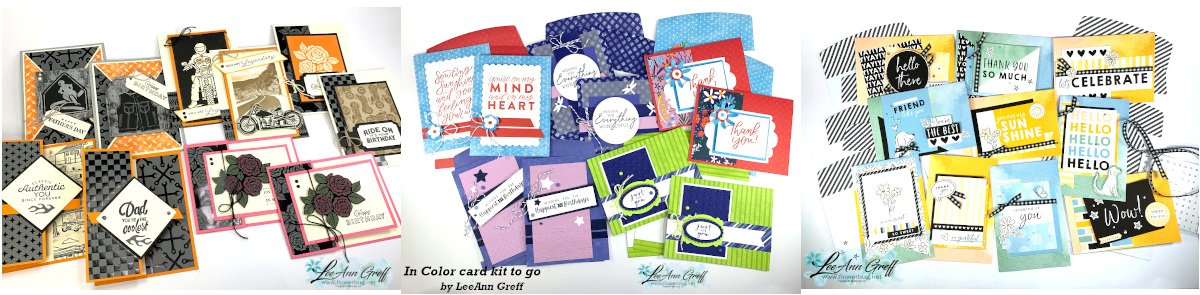
Striking Masterfully Made pre-cut card kit to go; or choose the PDF tutorial option
I chose to feature the Masterfully Made designer paper as the focus on this July card kit. There are 5 designs and you'll make 2 of each. Two are fancy folds.
*this kit is not included in my July special of buy 2 past kits and get a free stamp set.
You'll receive the following in this pre-cut kit, which is sent out at the end of July:
1/2 pkg. Masterfully Made DSP (6" X 12")
two colors of baker's twine
a share of Adhesive-backed sequins trio
All pre-cut pieces for the 10 cards including punched & die-cut pieces
the free PDF tutorial
*This kit is what my monthly subscribers will receive. If you're interested in receiving a kit each month Click here. My subscribers get a surprise product in their package every few months.
The tutorial includes photos, step by step directions, a supplies list and measurements. You'll receive the PDF tutorial in an email immediately after payment. Please check your spam or junk folder.
The pre-cut kit with tutorial is $28 plus shipping. See it here.
To complete the cards you will need the following: greeting images, Berry Burst, Pretty Peacock & Navy inks, a paper trimmer for your new DSP and adhesives.
I used the Layering Leaves & Gorgeously Made stamp sets for my greetings & other images. You can substitute other stamps.
*If you'd like to add either one to the kit (or the Gorgeously Made bundle) at an extra 10% off, please message me here and I'll send you an invoice.
*add on one or more kits and save on shipping.
*If you're interested in my July special of purchasing two 'past kits' and getting a free stamp set see them here. The July kits (Masterfully Made & One Horse Open Sleigh) are not included in this offer.
It features these products from our Annual Stampin' Up! catalog:
Kindest Expressions stamp set
Paper Florist dies
Countryside Corners dies
Blending Brushes
Artistic Mix Decorative Masks
Embossing paste Matte finish
Adhesive-Backed sequins trio
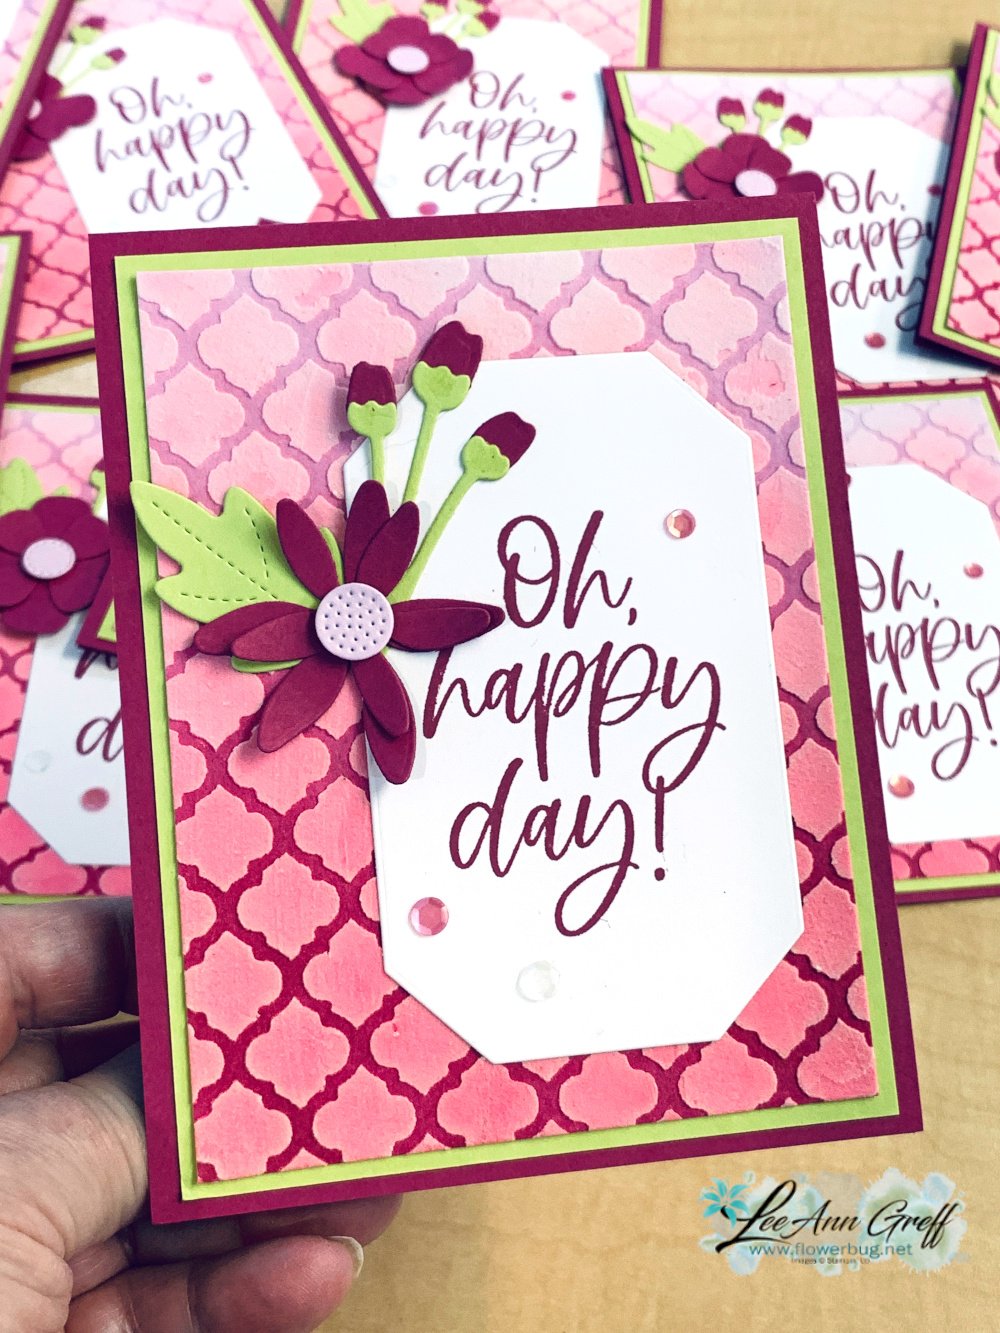
Whew! And I didn't even list the ink and paper! My colors include Berry Burst, Bubble Bath, Lemon Lime Twist and Basic White.
I used Berry Burst ink and a Blending Brush to create an ombre background on my Bubble Bath card stock. I let that dry overnight.
I then used a mask over this to spread White Embossing Paste with a Palette knife. Even though my ink was dry it picked up the color and created an ombre look on the paste too. I let that dry for a few hours.
Add the greeting and the Paper Florist dies seen here. I can tell that I'll be using these dies a lot. They're wonderful and make a huge variety of flowers.
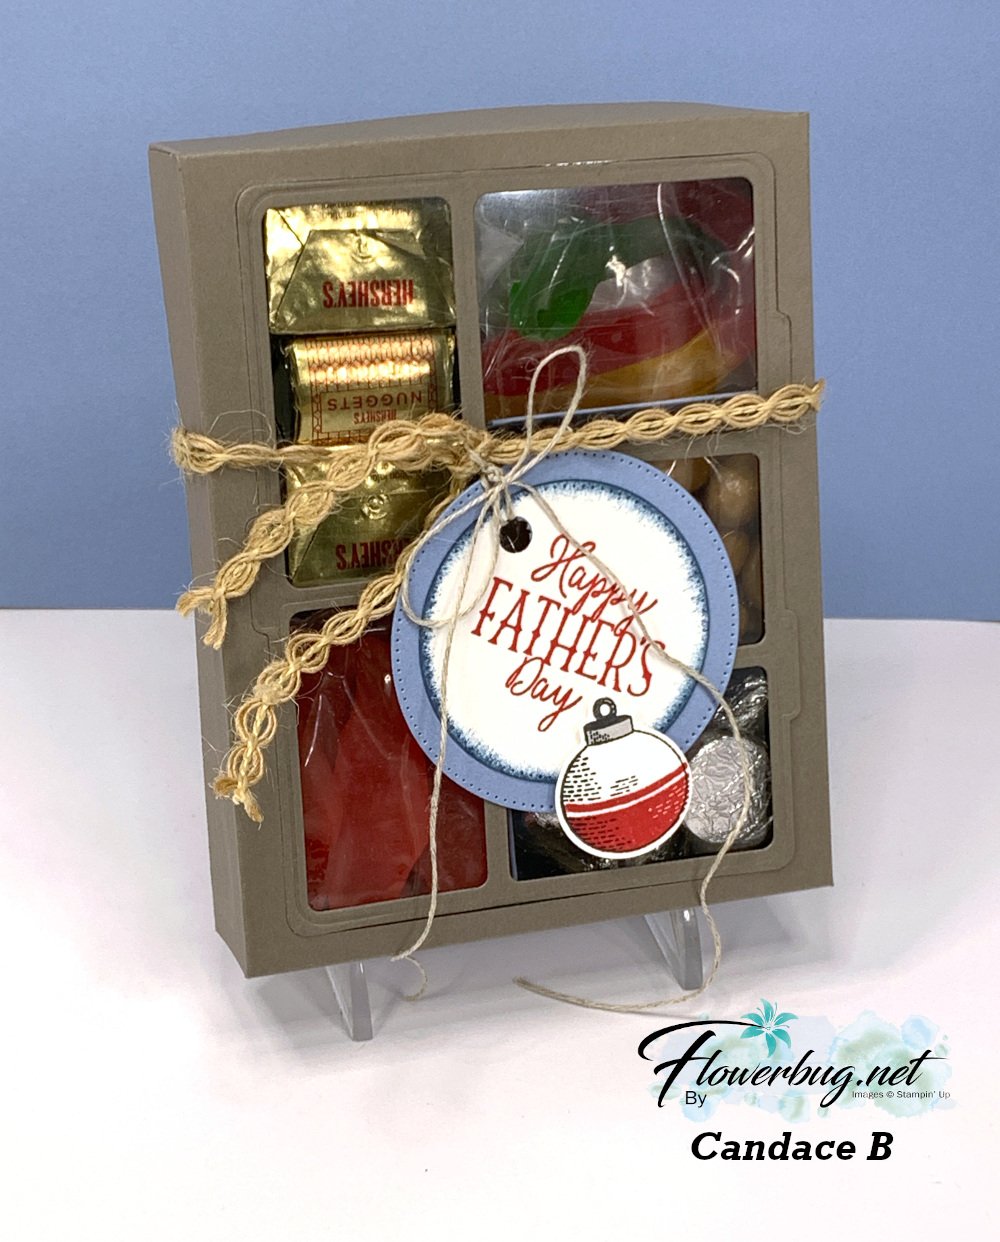
Check out this ‘Tackle box’ with the Gone Fishing bundle! Amazing!!
Today I'm sharing the last projects Candace made with the Gone Fishing and Let's Go Fishing designer paper. She was our Artist of the Month for June and created some incredible projects!
I was blown away by this 'tackle box' full of candy. She told me she made it up herself! AMAZING!!
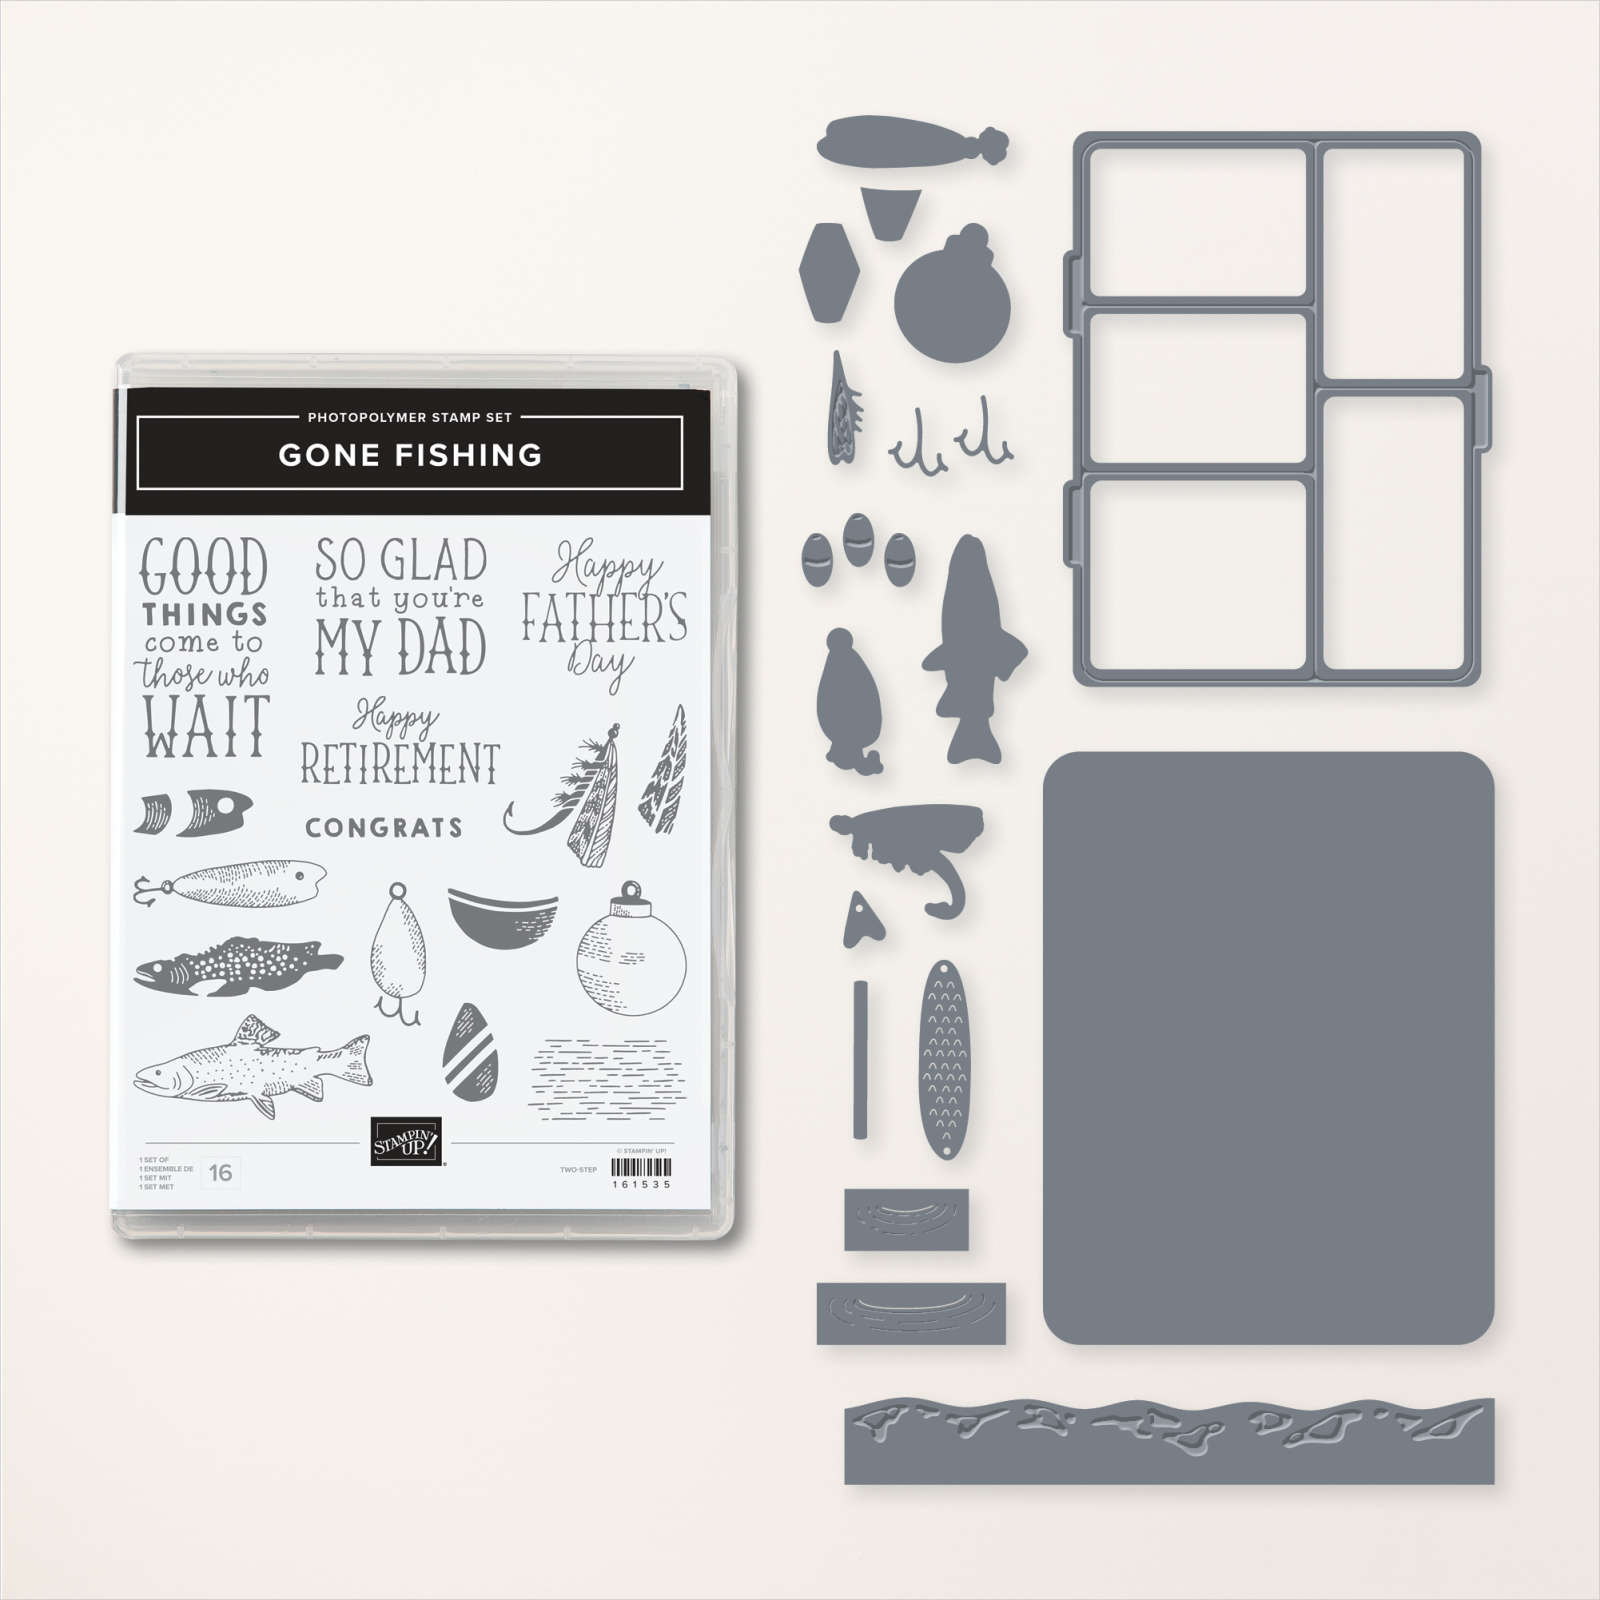
She added gummy fish & worms, kisses, candy 'rocks' and nuggets inside. I believe she first scored her box front then used the Gone Fishing large die to cut the windows for the front panel. Scoring first would help you center the die. Then she added the window sheet to the underside. The window sheet holds the die-cut frame and the box front in place.
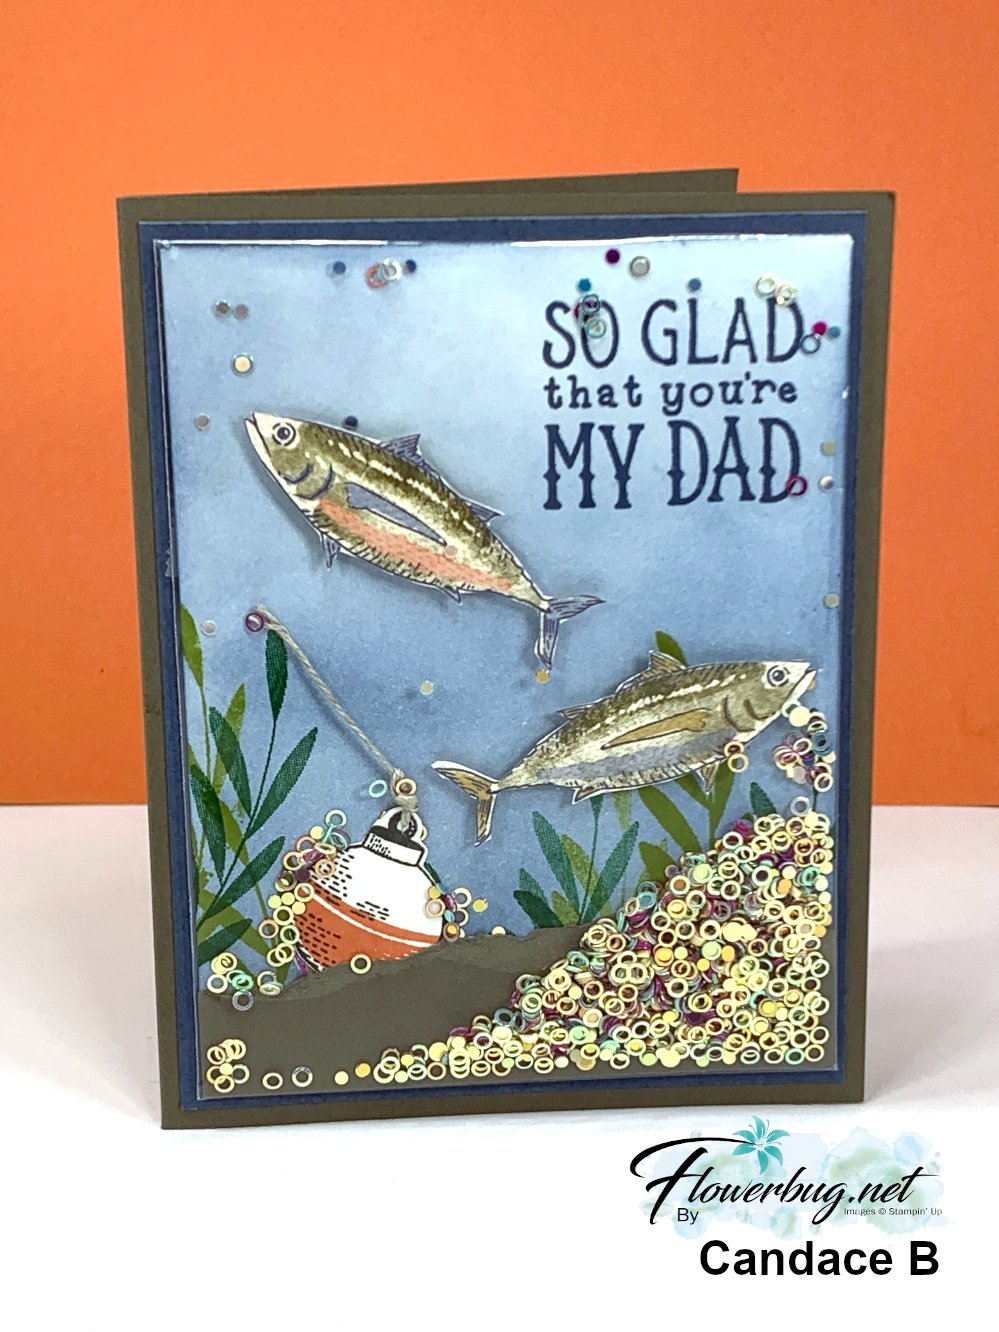
It's hard to tell but the colored and stamped panel is placed in one of our clear envelopes so she could add the new Iridescent shaker circles seen here. She added Boho Blue ink to the neutral card front using a Blending Brush, then stamped the greeting and leaves. She also fussy cut the fish from the Let's Go Fishing designer series paper and added them with Dimensionals. Then came the torn card stock layer and the bobbin and linen thread.
Now she placed the entire piece inside a clear envelope, folded over the excess and secured it with adhesive. Now she added the shaker circles from the top open edge before closing it off to seal. Add it to your card base layers and you're done!
You can see these clear envelopes here. I use them for card swaps, storing & protecting my finished cards and of course for easy shaker cards. They're $7 for 50 envelopes!
This is such a fun card to make AND receive! It's hard to stop shaking it!
~~~
July Specials:
Bonus Days!
Get a $5 coupon for each $50 order you place in July. Use the coupon in August!
Notice: LeeAnn Greff, Independent Stampin’ Up! Demonstrator, Manager. The content of this website is my sole responsibility as an independent Stampin’ Up! demonstrator and the use of, and content of, the classes, services, or products offered on this website is not endorsed by Stampin’ Up! Copyright 2025

























Leave a Reply