/


Latest Post

Wow; don’t miss these Fun Fold cards!


Each day this week I'm sharing the Fun Fold card swaps made by my incredibly talented Flowerbug's!  We hold a card swap every month and many opt in to participate.  See the others here and here. 

First up is Annette's Kite Fold card!
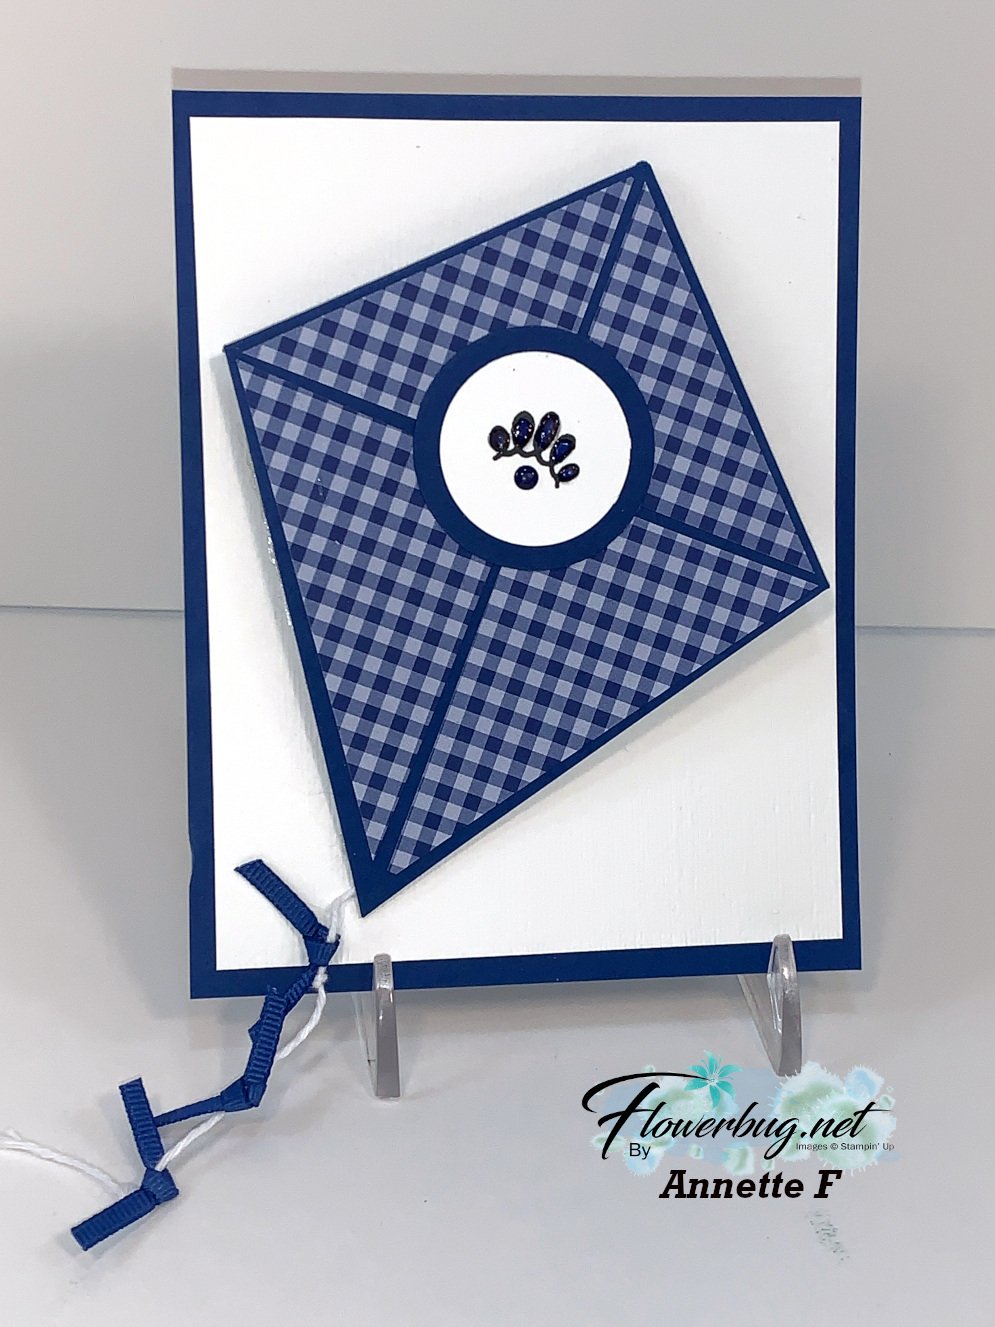
I know many of you will want to know how to make it so I searched and found this template at Beccy's Place.  She has a tutorial for it here.  Her card is a full sized card where Annette's was placed on a layer of her card.  So the finished size may be different. 
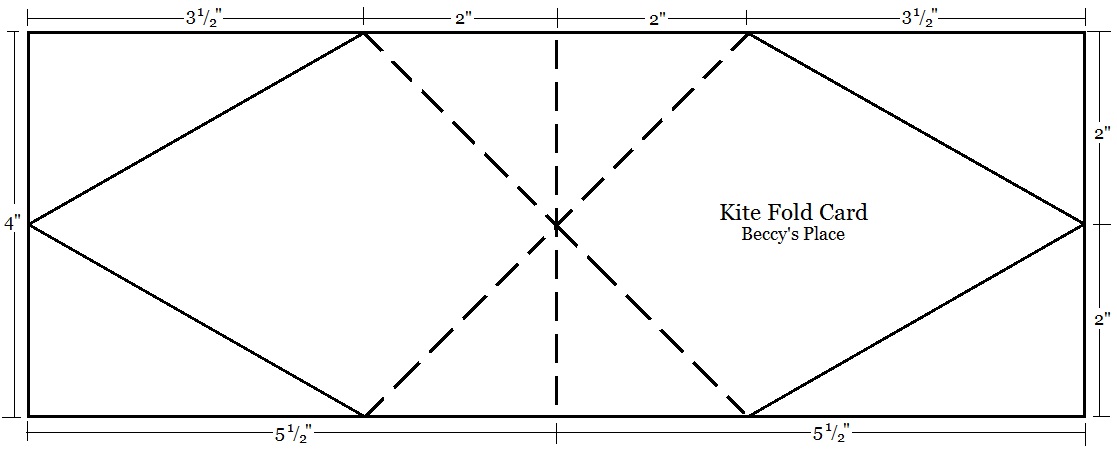
Annette adhered her kite to a base card of Blueberry Bushel at 5 1/2" X 4 1/4" and White at 5 1/4" X 4" .  She also added a velcro closure to keep the card closed securely.

I think the tail of ribbon and twine finish it off like a kit perfectly!

~~~

Karen made this adorable card with the Follow Your Art suite of products seen here!   I believe almost all of the products in this suite are retiring with many on sale; the stamps & dies, the designer paper (on sale for just $4.60 now!), the embellishment kit and the embossing folder too.  It's such a fun group of products; great for crafters! 

The Follow Your Art embellishment kit comes with lots of fun accents including these stitched felt pieces!  Its on sale right now on the Last Chance list here. 

Measurements:

  • Calypso Coral base 4 1/4" X 5 1/2"
  • Designer paper is 4" X 5 1/4"
  • White is 2 1/2" X 8 1/4" scored at 4 1/8"

~~~

May Specials


Get my 'ALL Fun Fold cards tutorial' free with any online order.

It includes directions, photos and measurements for 18 fancy card folds!


May Host code is EYDJ4MQN

Get a free pkg. of Noble Peacock rhinestones from me if your order is over $55. 

Order online here

All Posts

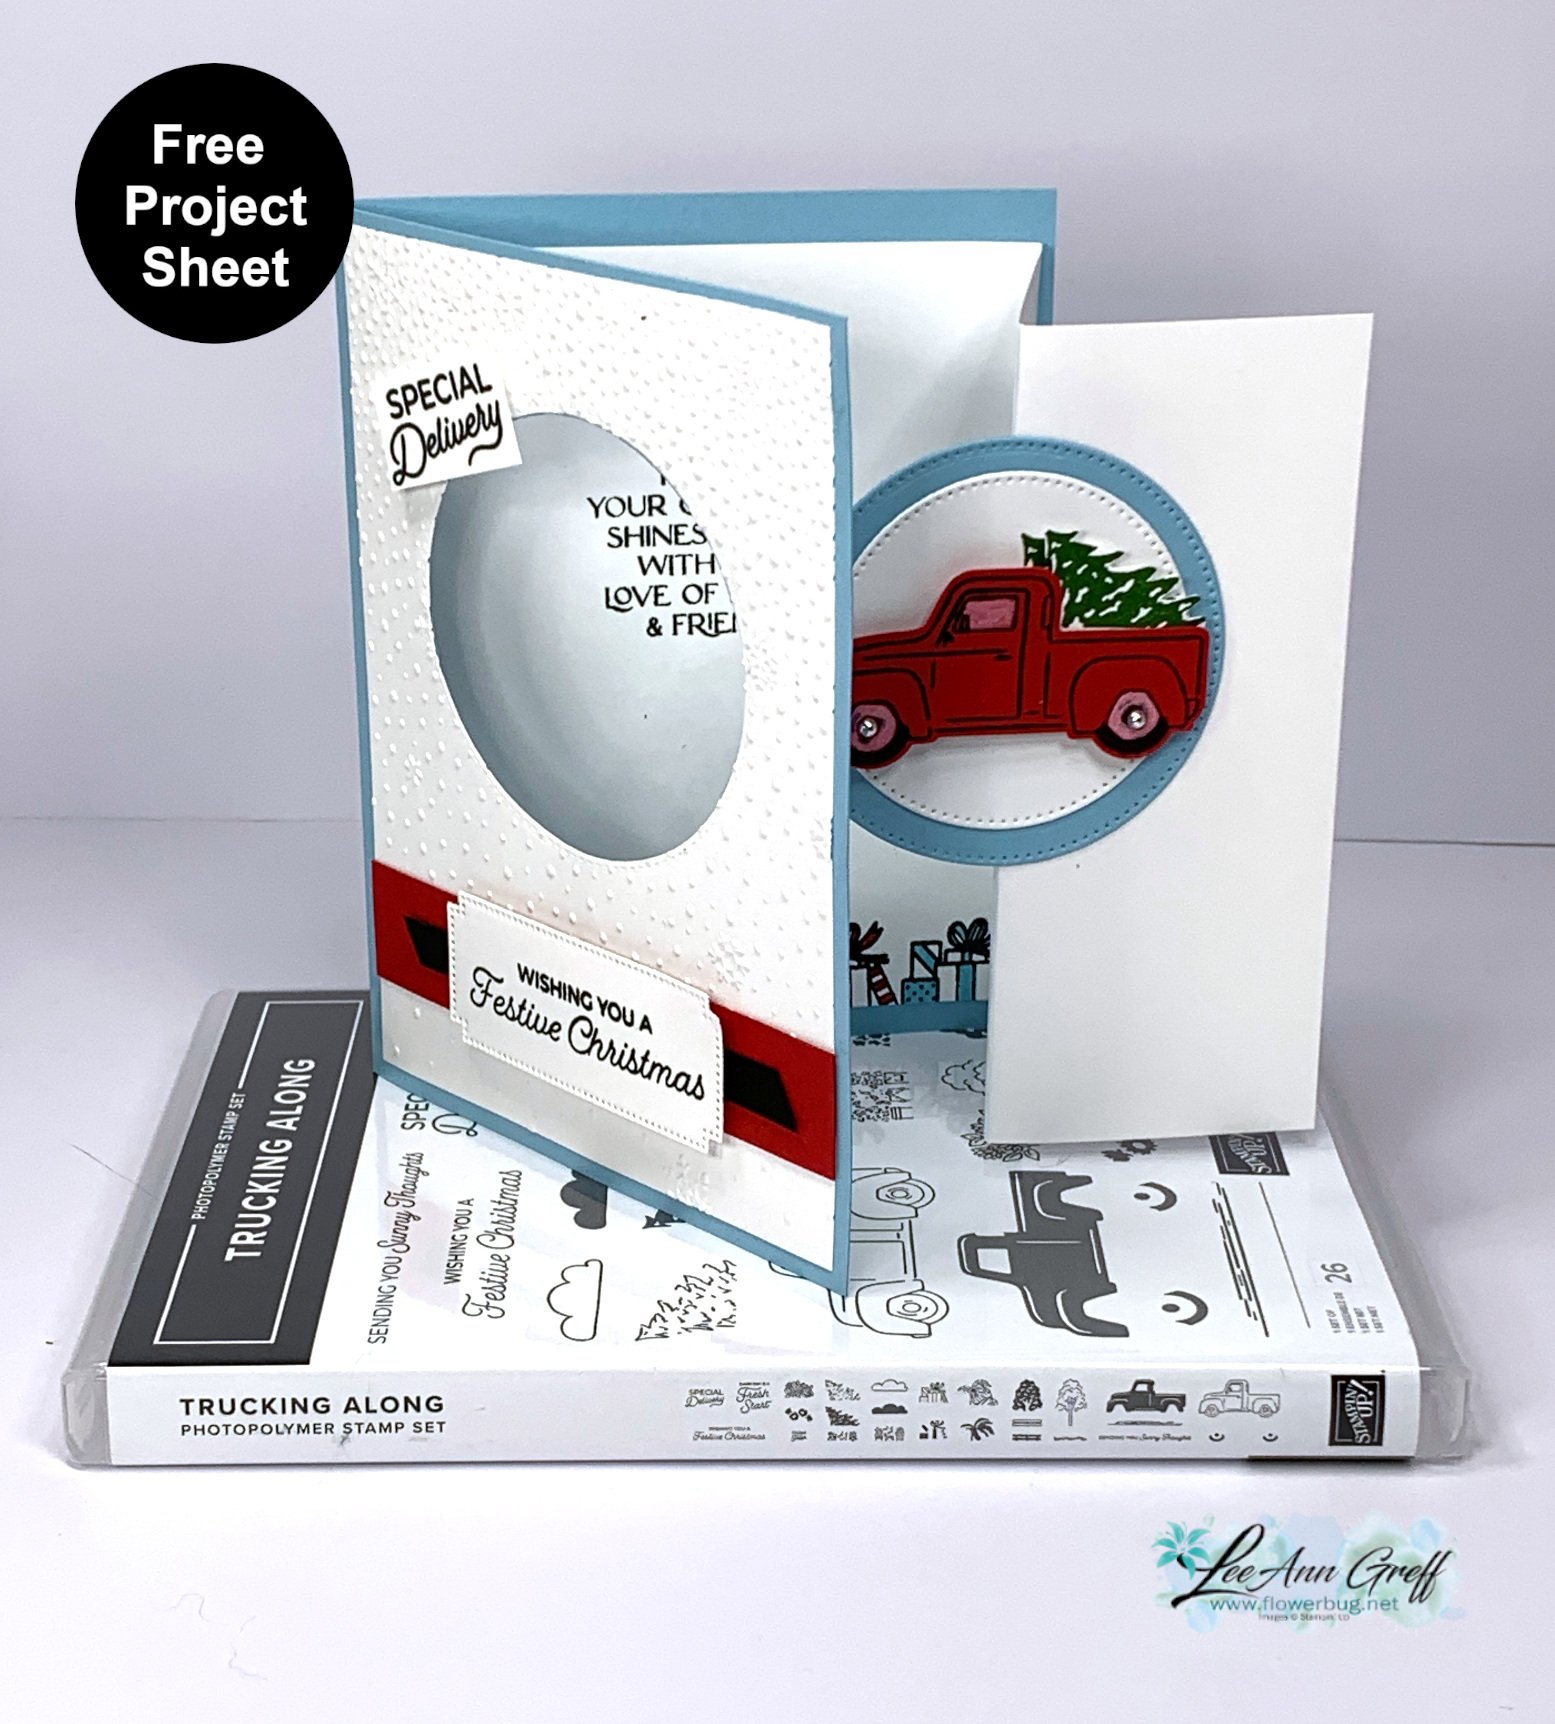
  • Trucking Along window fun fold card with video & free project sheet!


    Today I'm sharing one of my October card club projects; it features the Trucking Along punch bundle.  See it here; it's now back in stock!! 

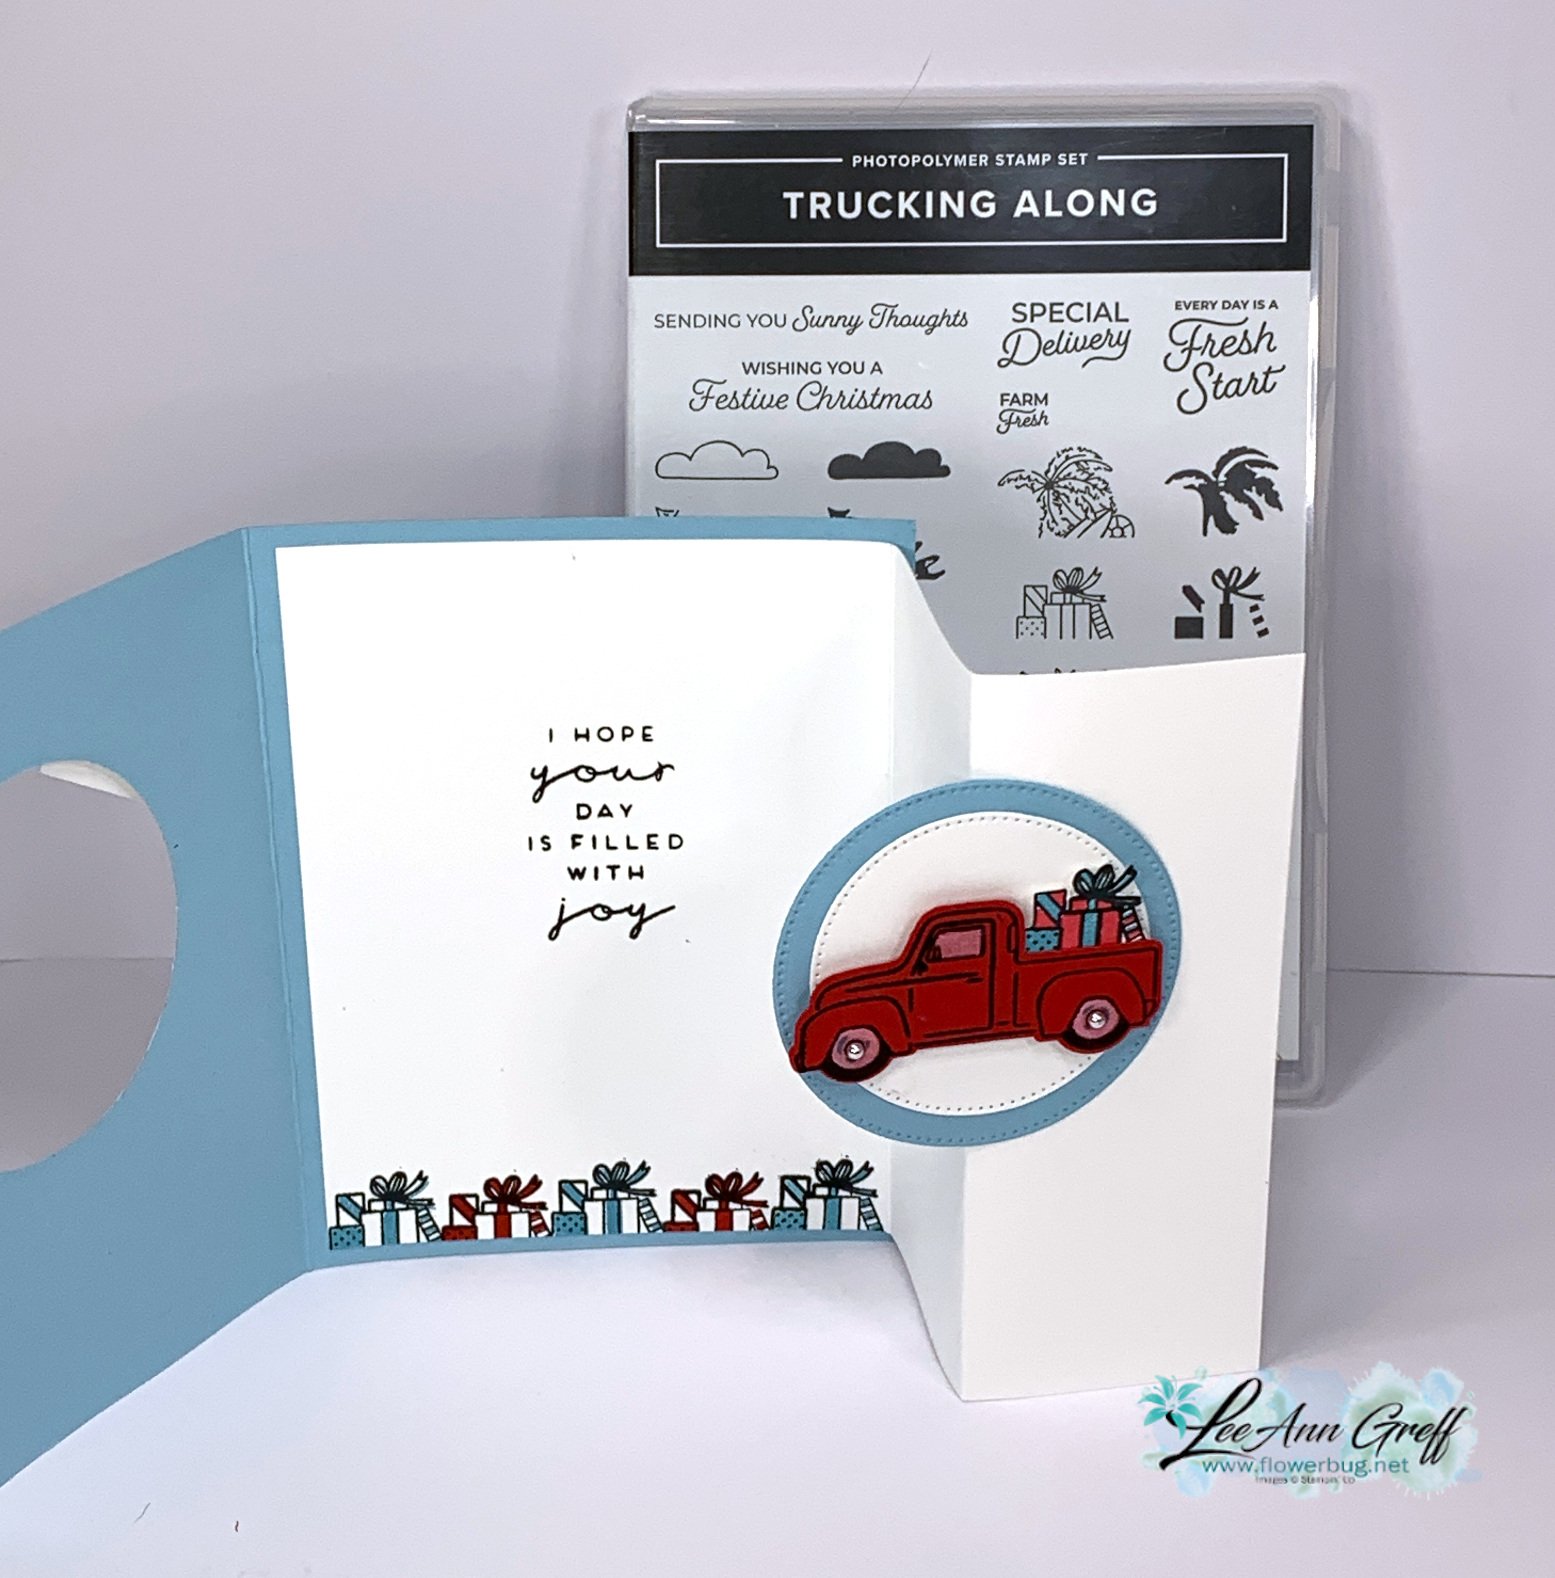
    I used an easy technique on the window and tire rims. See how they're a soft white?  Using our White Craft ink pad, I grabbed a bit of White ink with a blender pen and colored these areas. You can add more color if you'd like it whiter, but I like the almost opaque look.  

    Note one card has presents and the other a tree in the truck bed.  These are stamped on a separate piece of White paper and fussy cut before adding to the truck. 


    I created two options for my Club members; a birthday or a Christmas card. This Truck bundle has a wide variety of stamps & greetings.  I did use the Happy Birthday image from the Enjoy the Rhythm set and the inside Christmas greeting from the Brightest Glow stamp set.  

    Click on this link to download or print the free project sheet.  It includes photos, supplies, measurements and step by step directions.  Download Oct 23 Trucking Along window card

    As you can see in the card above and the one below; it's easy to switch themes with this fun card. 

    Below is the video tutorial for this card, another fun fold and an easy treat bag too!  Don't forget to subscribe to my YouTube channel too!  

    ~~~

    October Specials: 

    Amazing Starter Kit choices! 

    Choose one and enjoy the 20% discount on all future orders! Click here

    *current host code: HTHK4TQU or 4GHXYSDQ

    *Get free glitter gems with online orders over $55 (Please use a host code)

    Leave a Reply

    Your email address will not be published. Required fields are marked *

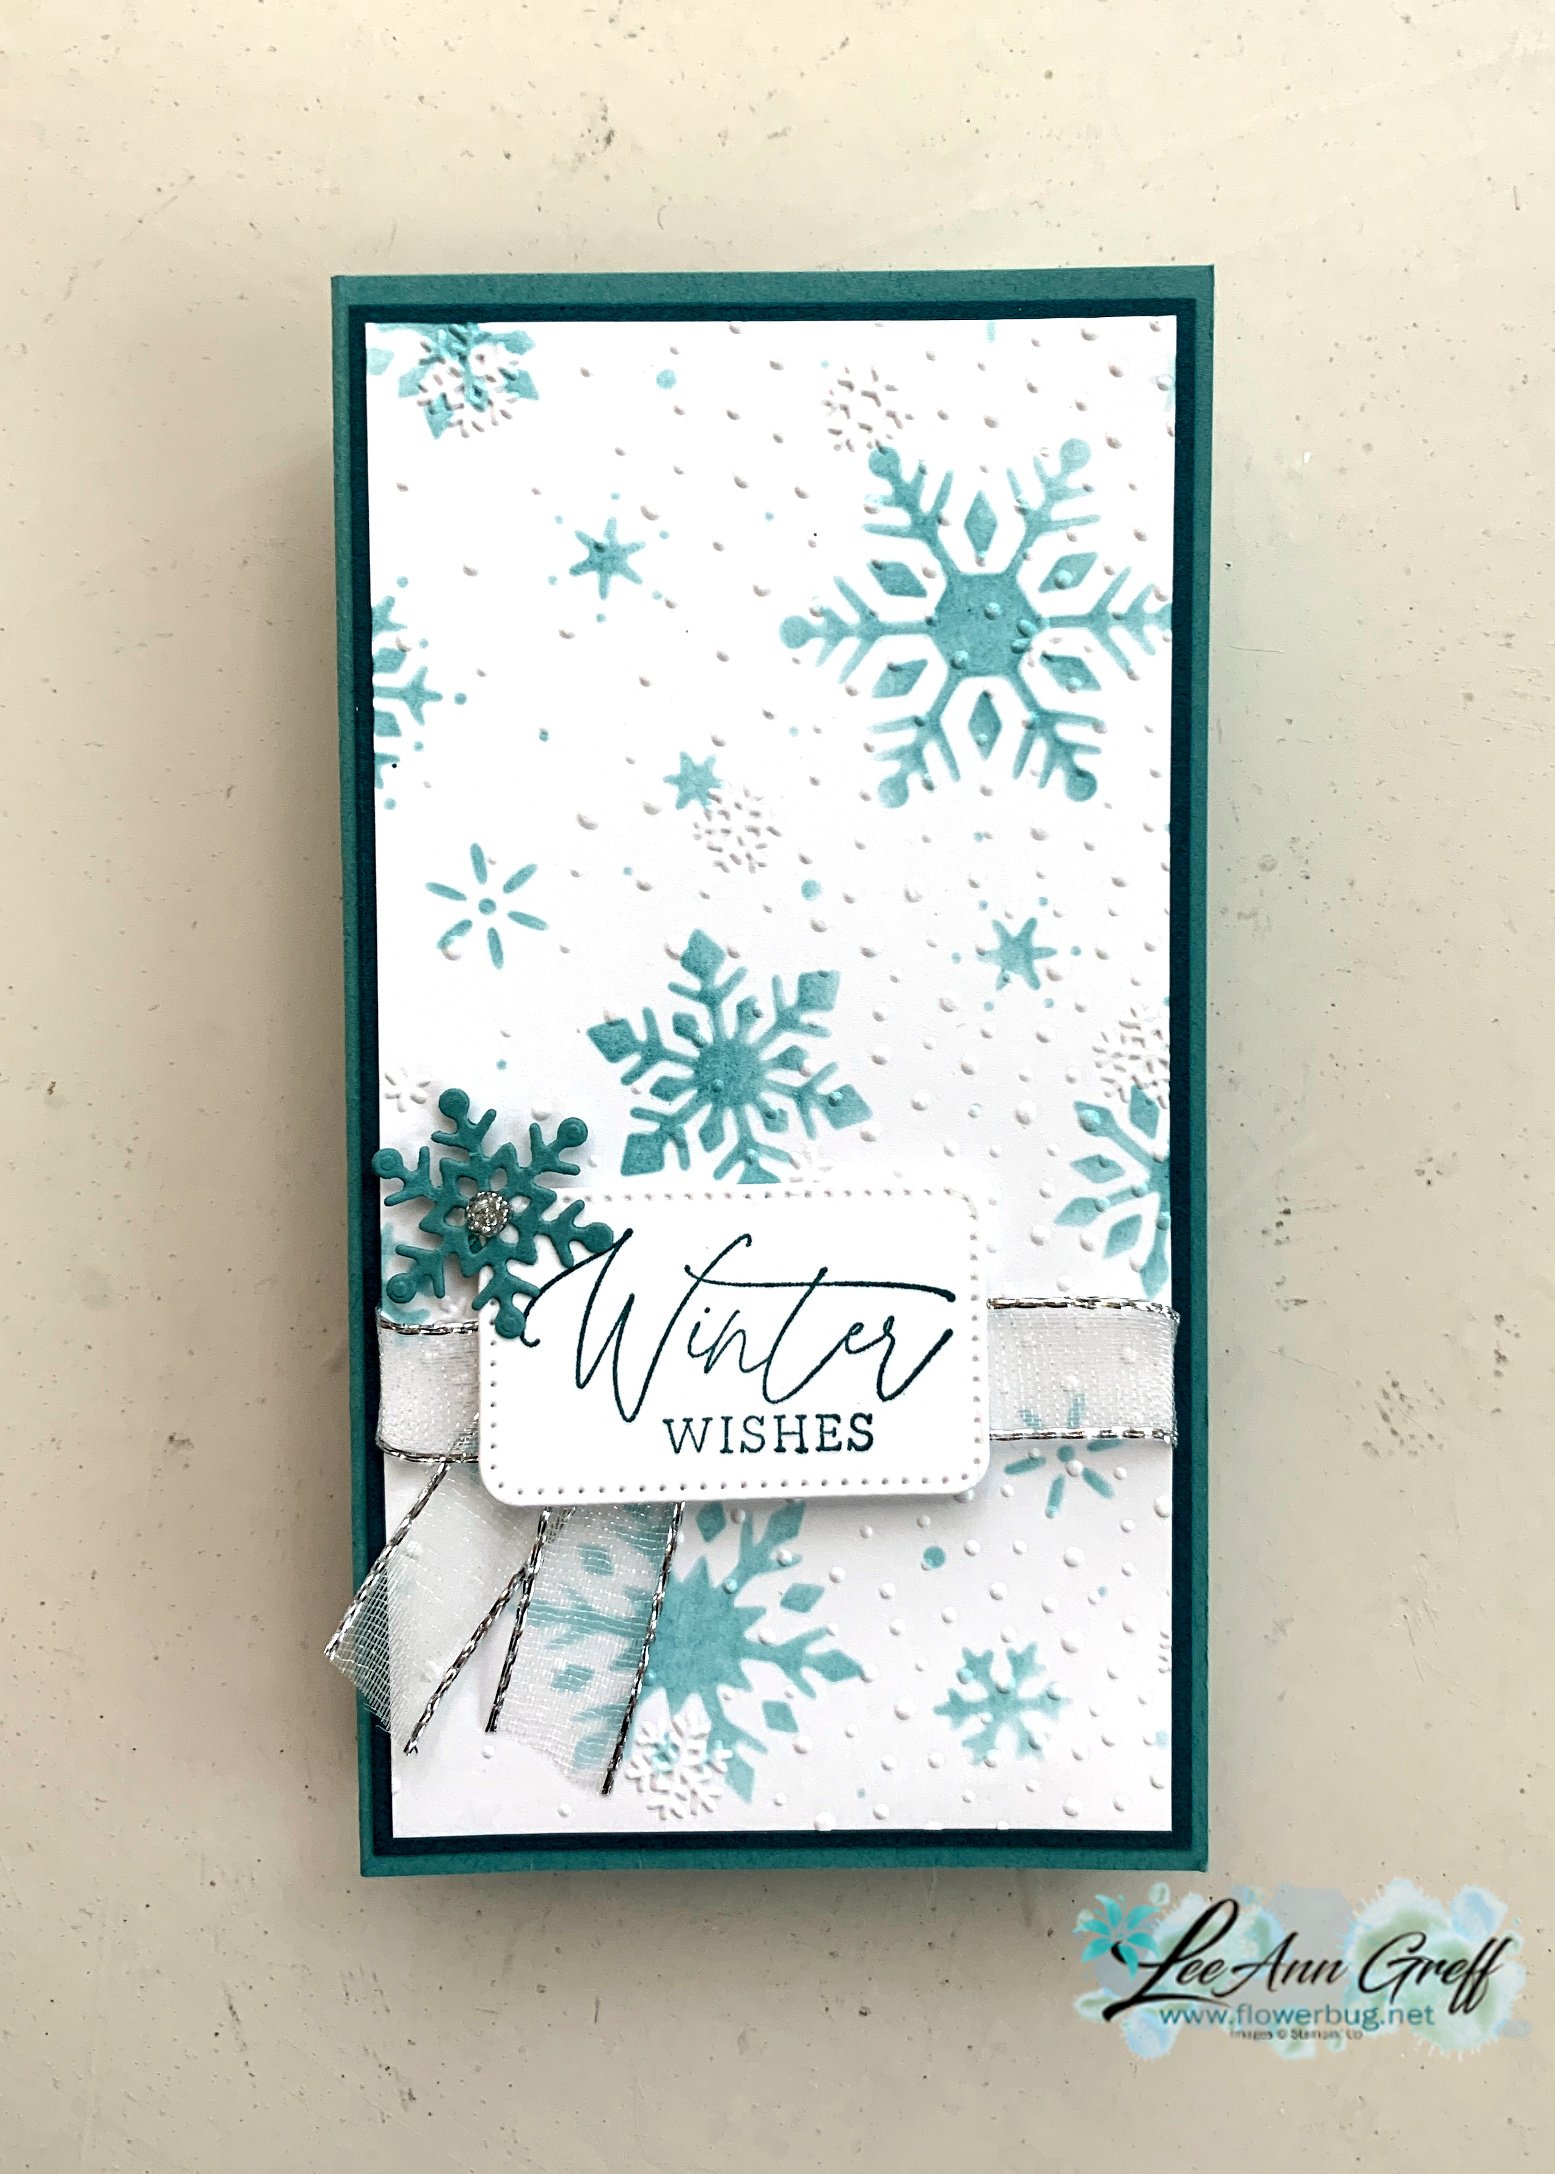
  • Winter Wishes & Abundant Beauty masks fun fold card; free tutorial & video!


    Today's project was inspired by my Team member Candace who made this cool fun fold card for a recent swap. 

    Isn't it neat! She featured the Beary Cute bundle on her card in Lost Lagoon, Smoky Slate & Pretty Peacock. 

    My favorite part of her card is that it's quite easy to make! I knew my followers would like to know how to make it so I shared it on a recent video (seen below).  

    I used similar colors but chose the Magical Meadow stamp set & the Abundant Beauty Decorative Masks seen here. 

    I used a blending brush, Lost Lagoon ink and the snowflake mask to create my card front.  After adding the pretty snowflakes I textured it with the Snowflake Sky 3D embossing folder. 

    It's a mini slim line card; the finished size is 3" X 5 1/2".  I just love the fun of the popped up panels inside!

    I created a free project sheet with measurements, directions, supplies used and photos. Click on this link to download or print it. Download Snowflakes fun fold card; abundant beauty masks

    There's something special about a monochromatic card! I used Lost Lagoon & Pretty Peacock inks, and Lost Lagoon and Basic White card stock.  

    Below is the video for this card and another as well. Don't forget to subscribe to my YouTube channel here! Enjoy!  

    ~~~

    October Specials: 

    Amazing Starter Kit choices! 

    Choose one and enjoy the 20% discount on all future orders! Click here

    *current host code: HTHK4TQU or 4GHXYSDQ

    *Get free glitter gems with online orders over $55 (Please use a host code)

    Leave a Reply

    Your email address will not be published. Required fields are marked *

  • Get 2 cards at a time with this special card layout & a 6 X 6″ piece of designer paper!


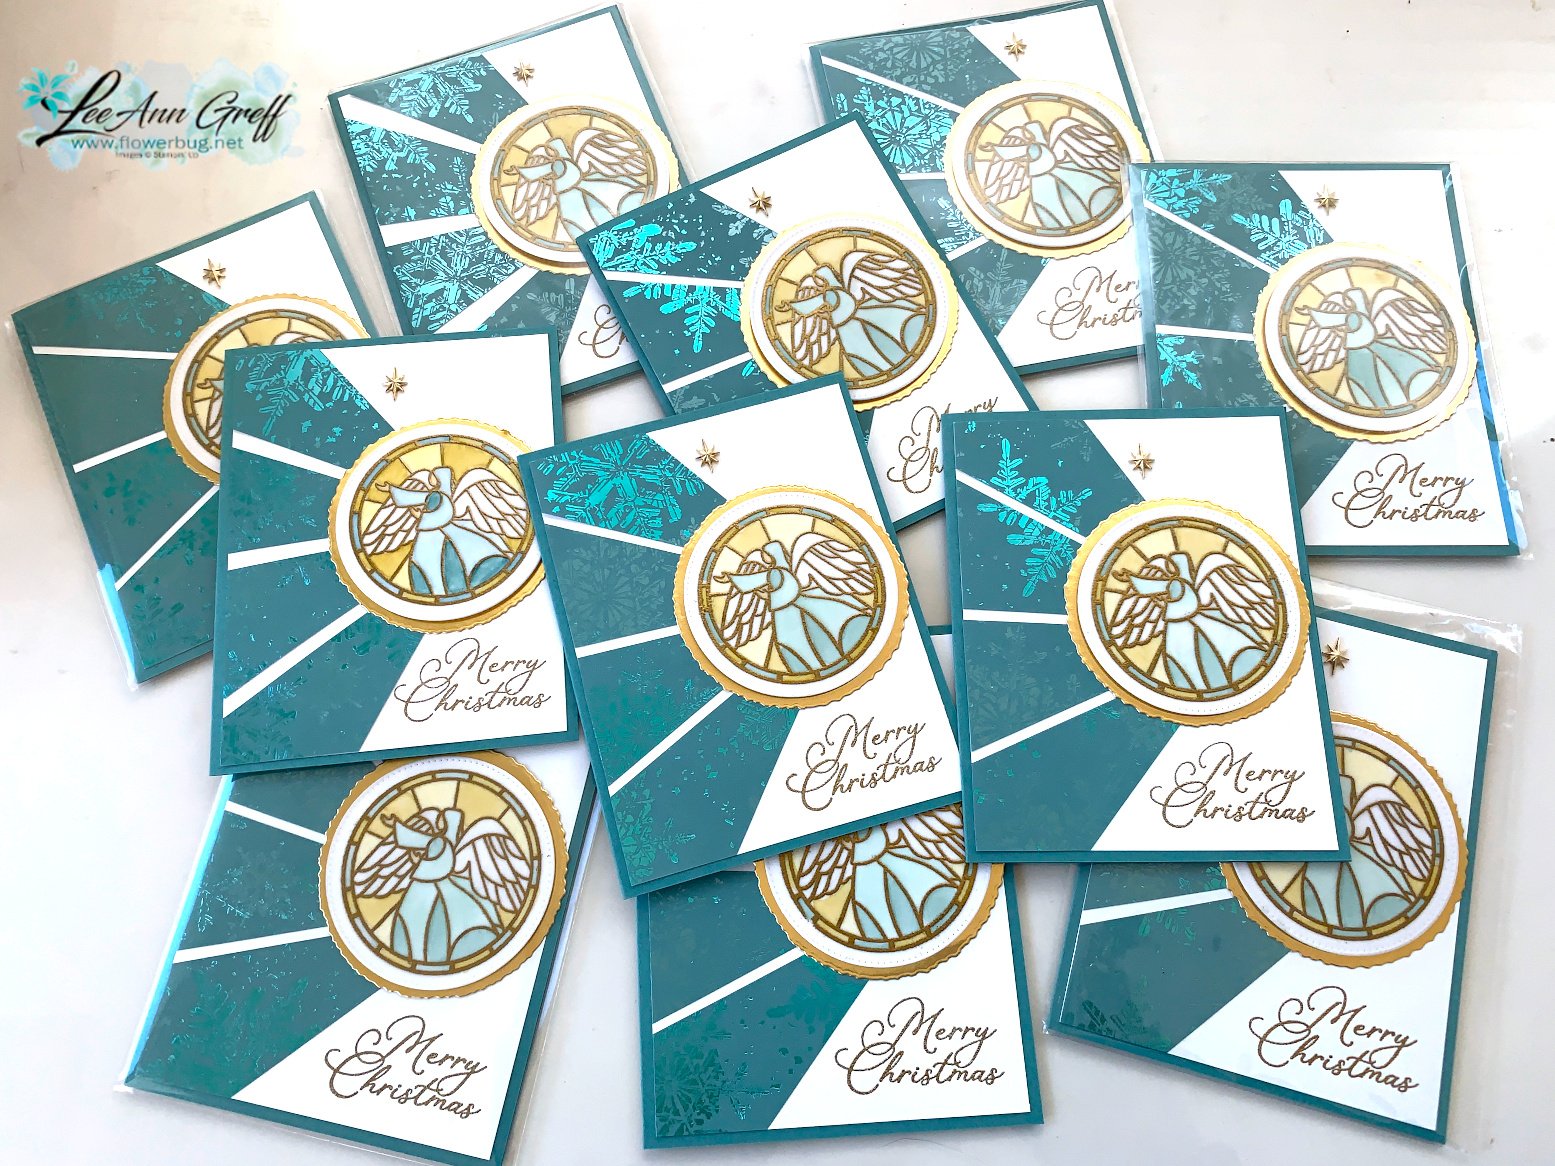
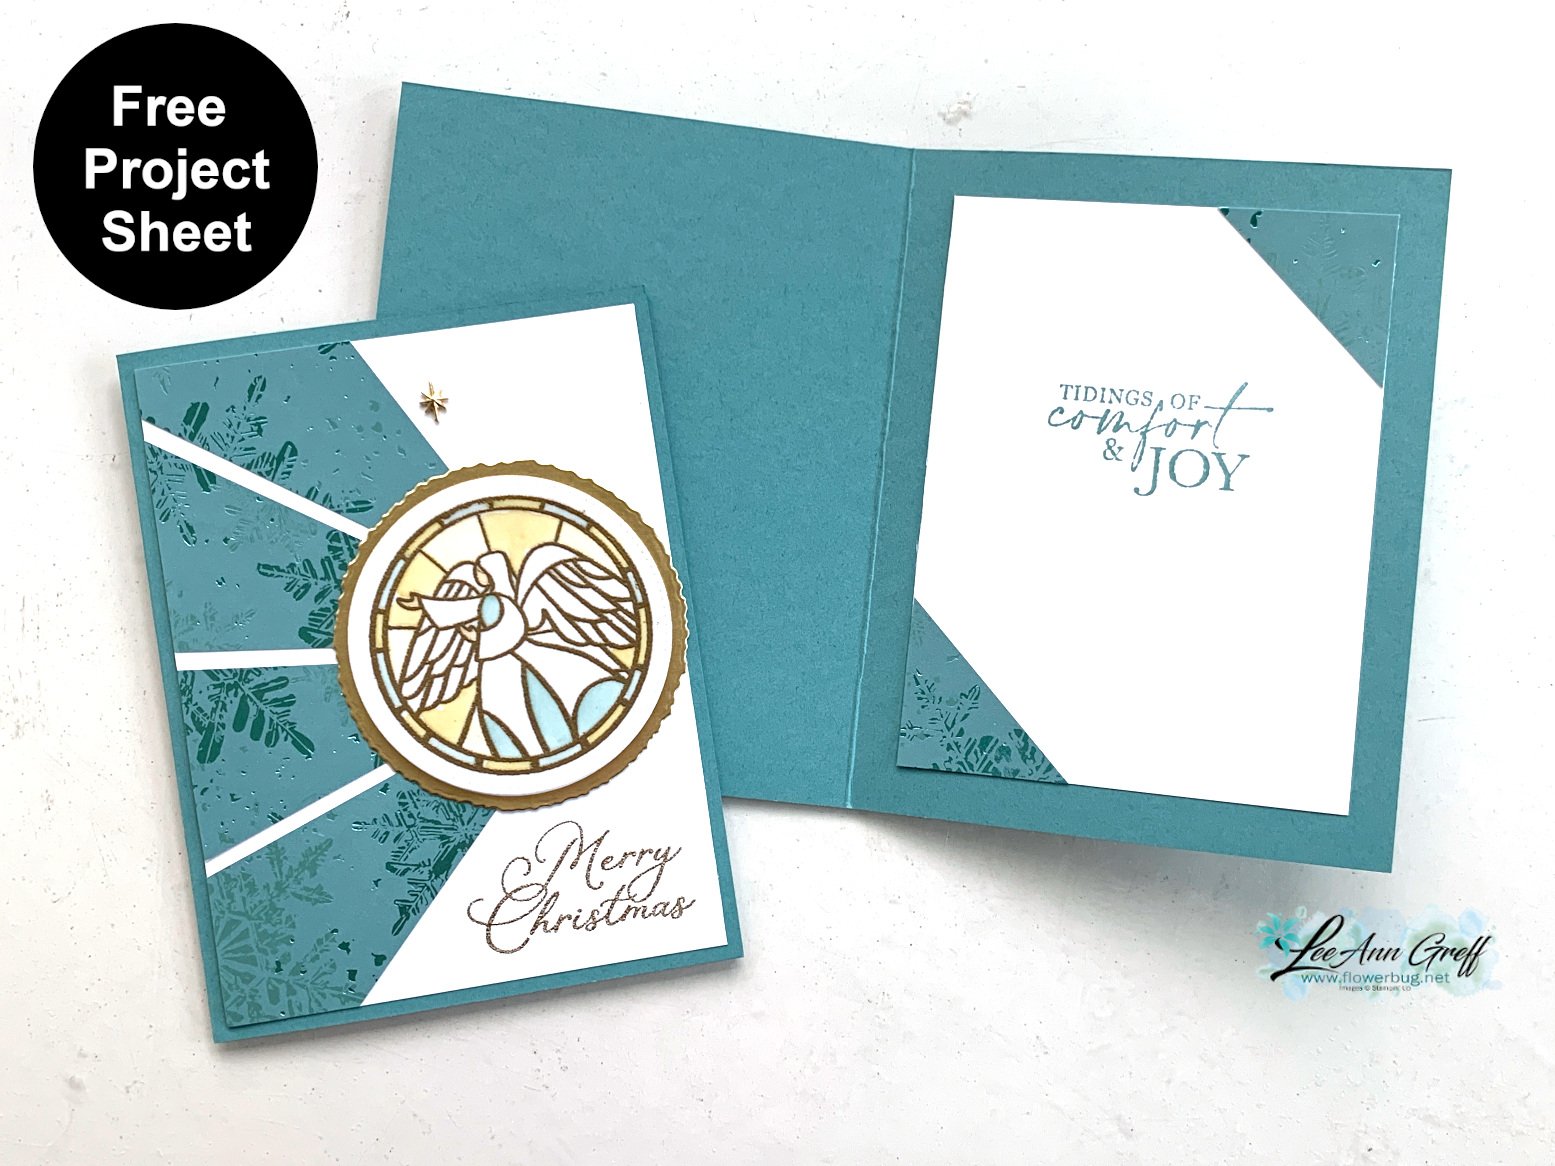
    I shared this card on last week's Live video.  It features the So Very Merry stamp set and the Snowflake Magic designer paper.

    I made a bunch of these cards for our Flowerbug's October Christmas card swap.  You might wonder how I achieved the starburst effect with the Snowflake Magic designer paper.  Keep reading plus watch the video seen here or below!

    Other products used:

    Vellum card stock, Gold Foil paper, Deckled circle dies, Stylish Shapes dies, Blends markers for coloring & Gold heat embossing.

    Here's what the inside looks like. Make note of the little designer paper triangles inside; remember this when you see the cutting templates below.  


    My friend Lyssa Zwolenek inspired these cards and created the template too.  She is super creative and so great about sharing ideas!

    Below are a few cutting templates for you.  


    Watch the video here or below to see how this is done. 

    Directions:

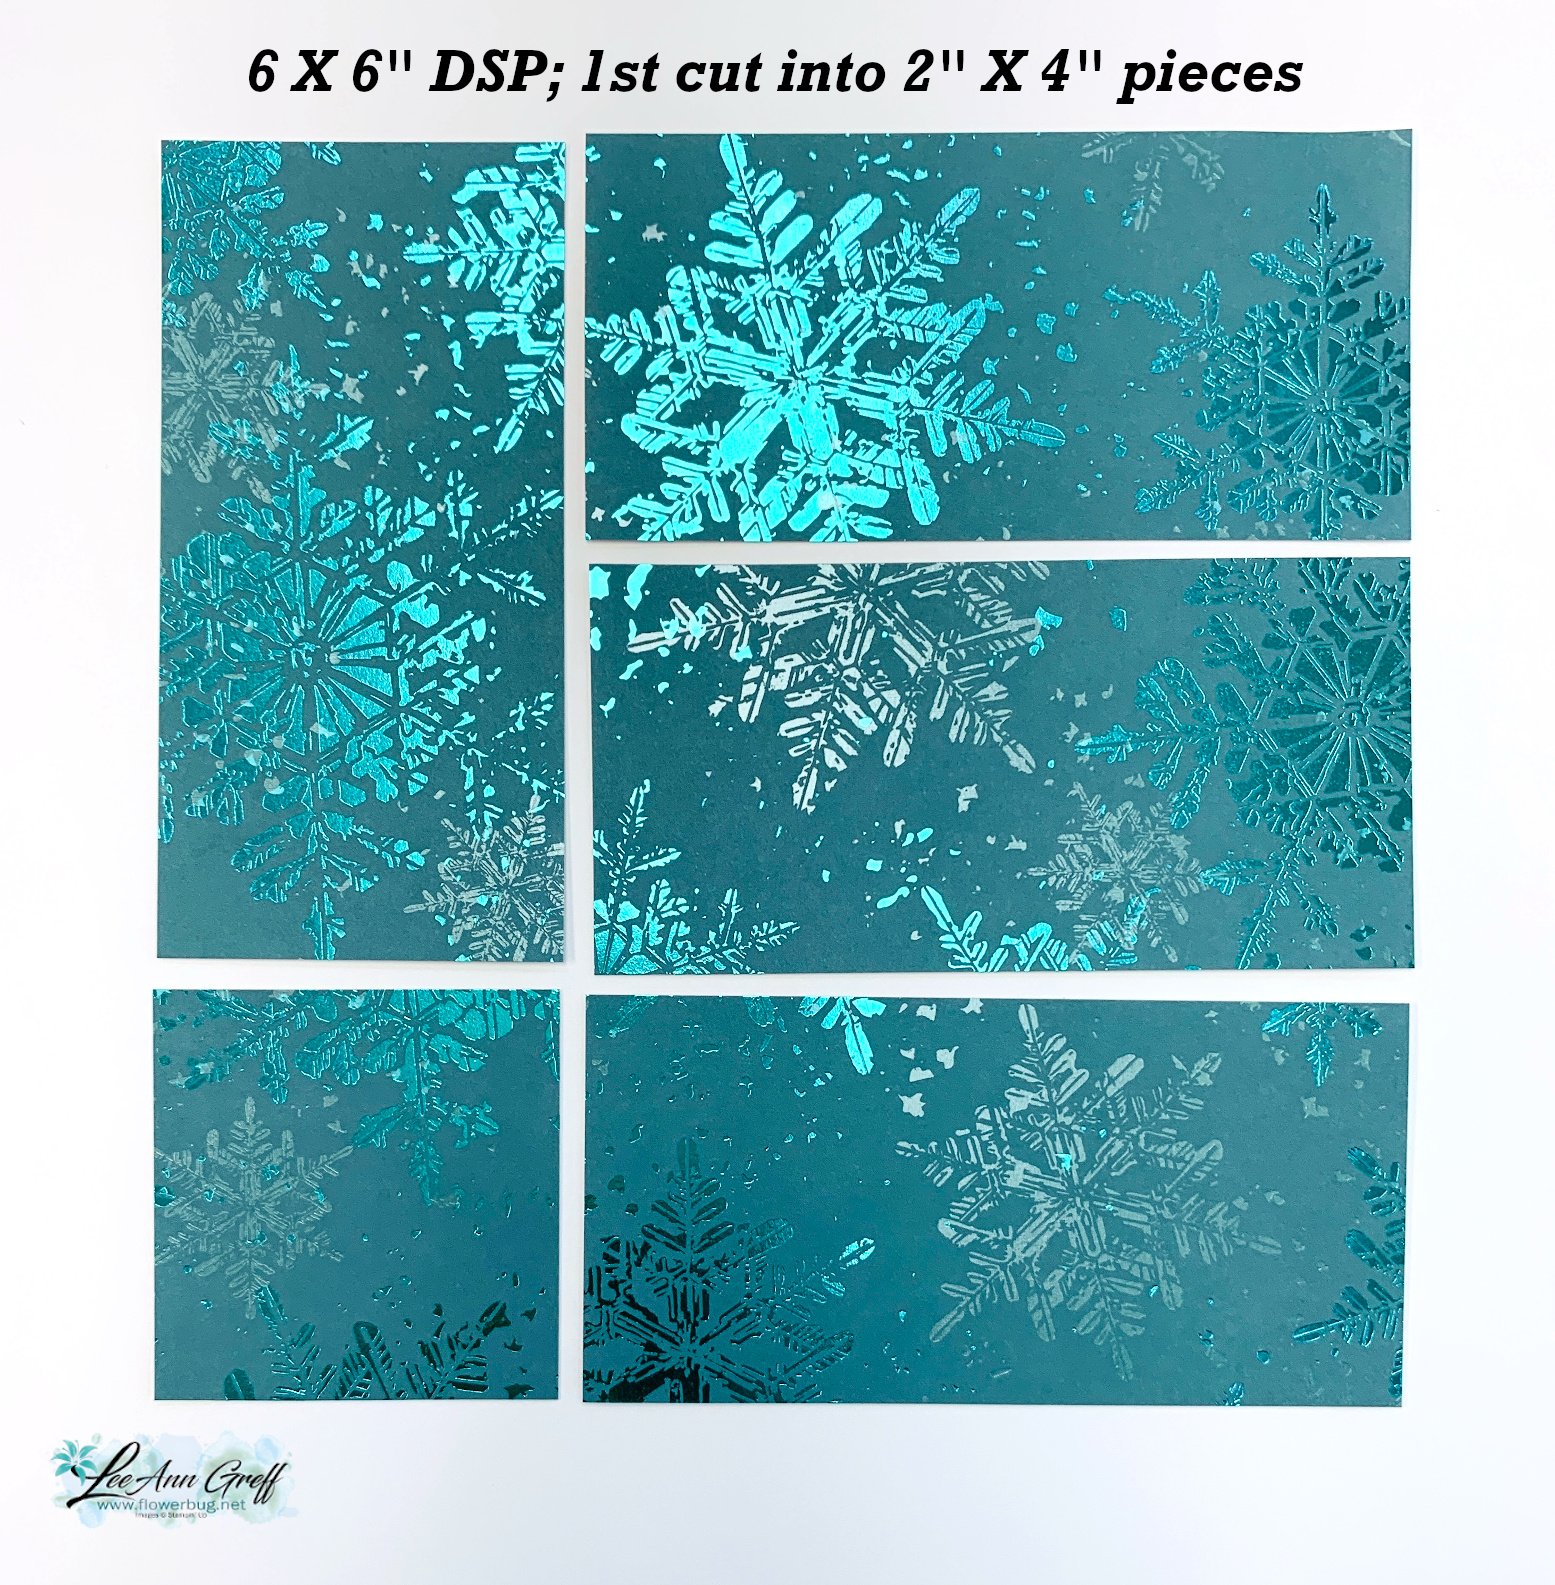
    • You'll start out with a 6" square of designer paper. 
    • First cut is at 2". You're left with a 4" X 6" piece on the right. 
    • Cut the 2" strip into a 2" X 4" piece, leaving you with a 2" square. 
    • Next cut the 4" X 6" piece on the right into three 2" X 4" pieces. 


    See this gorgeous Snowflake Magic specialty paper here.  


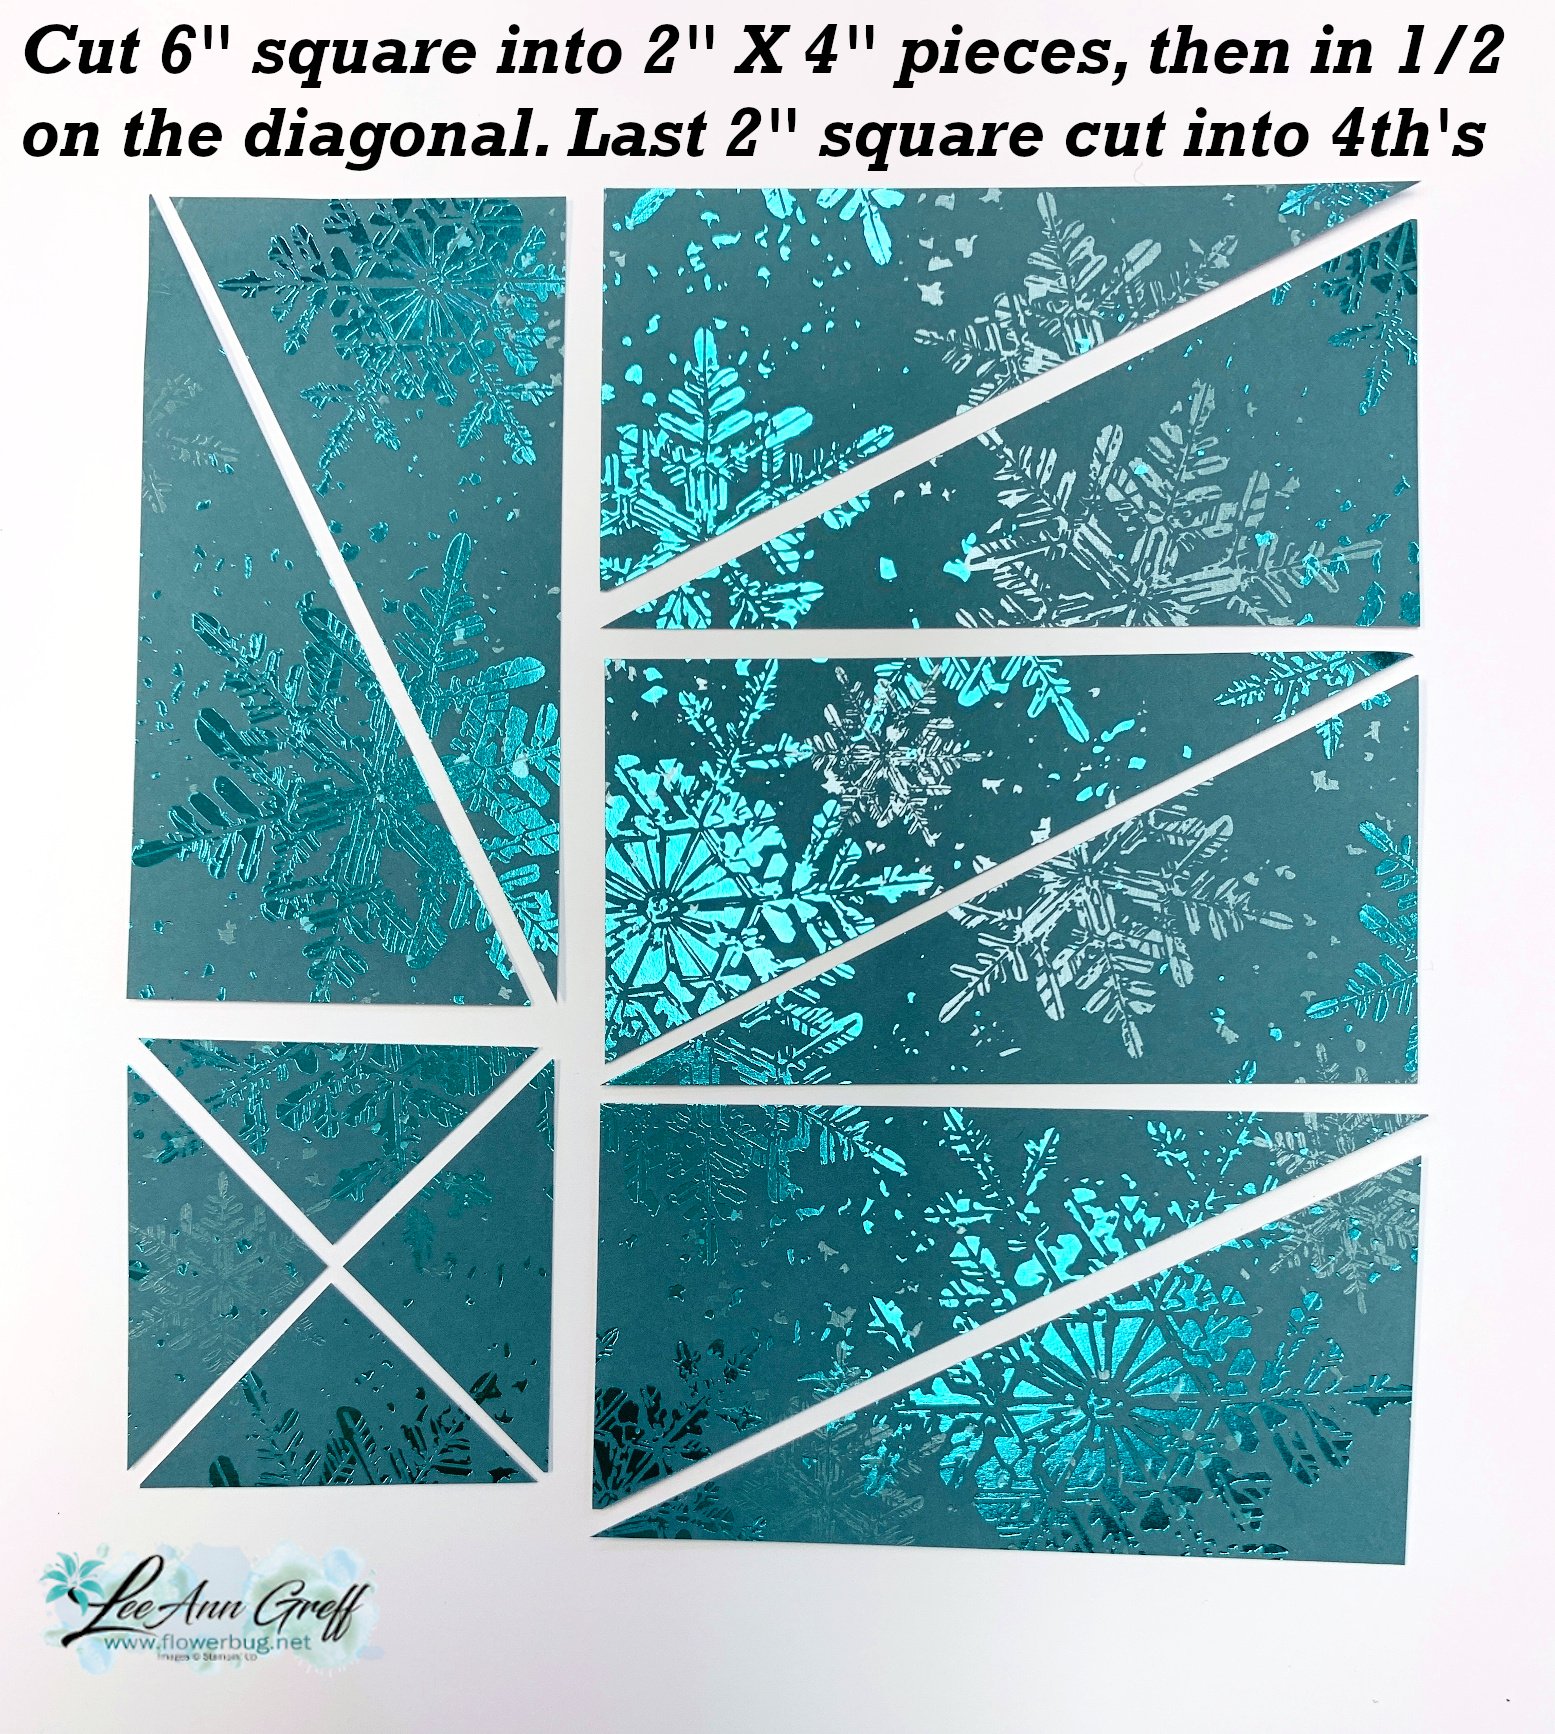
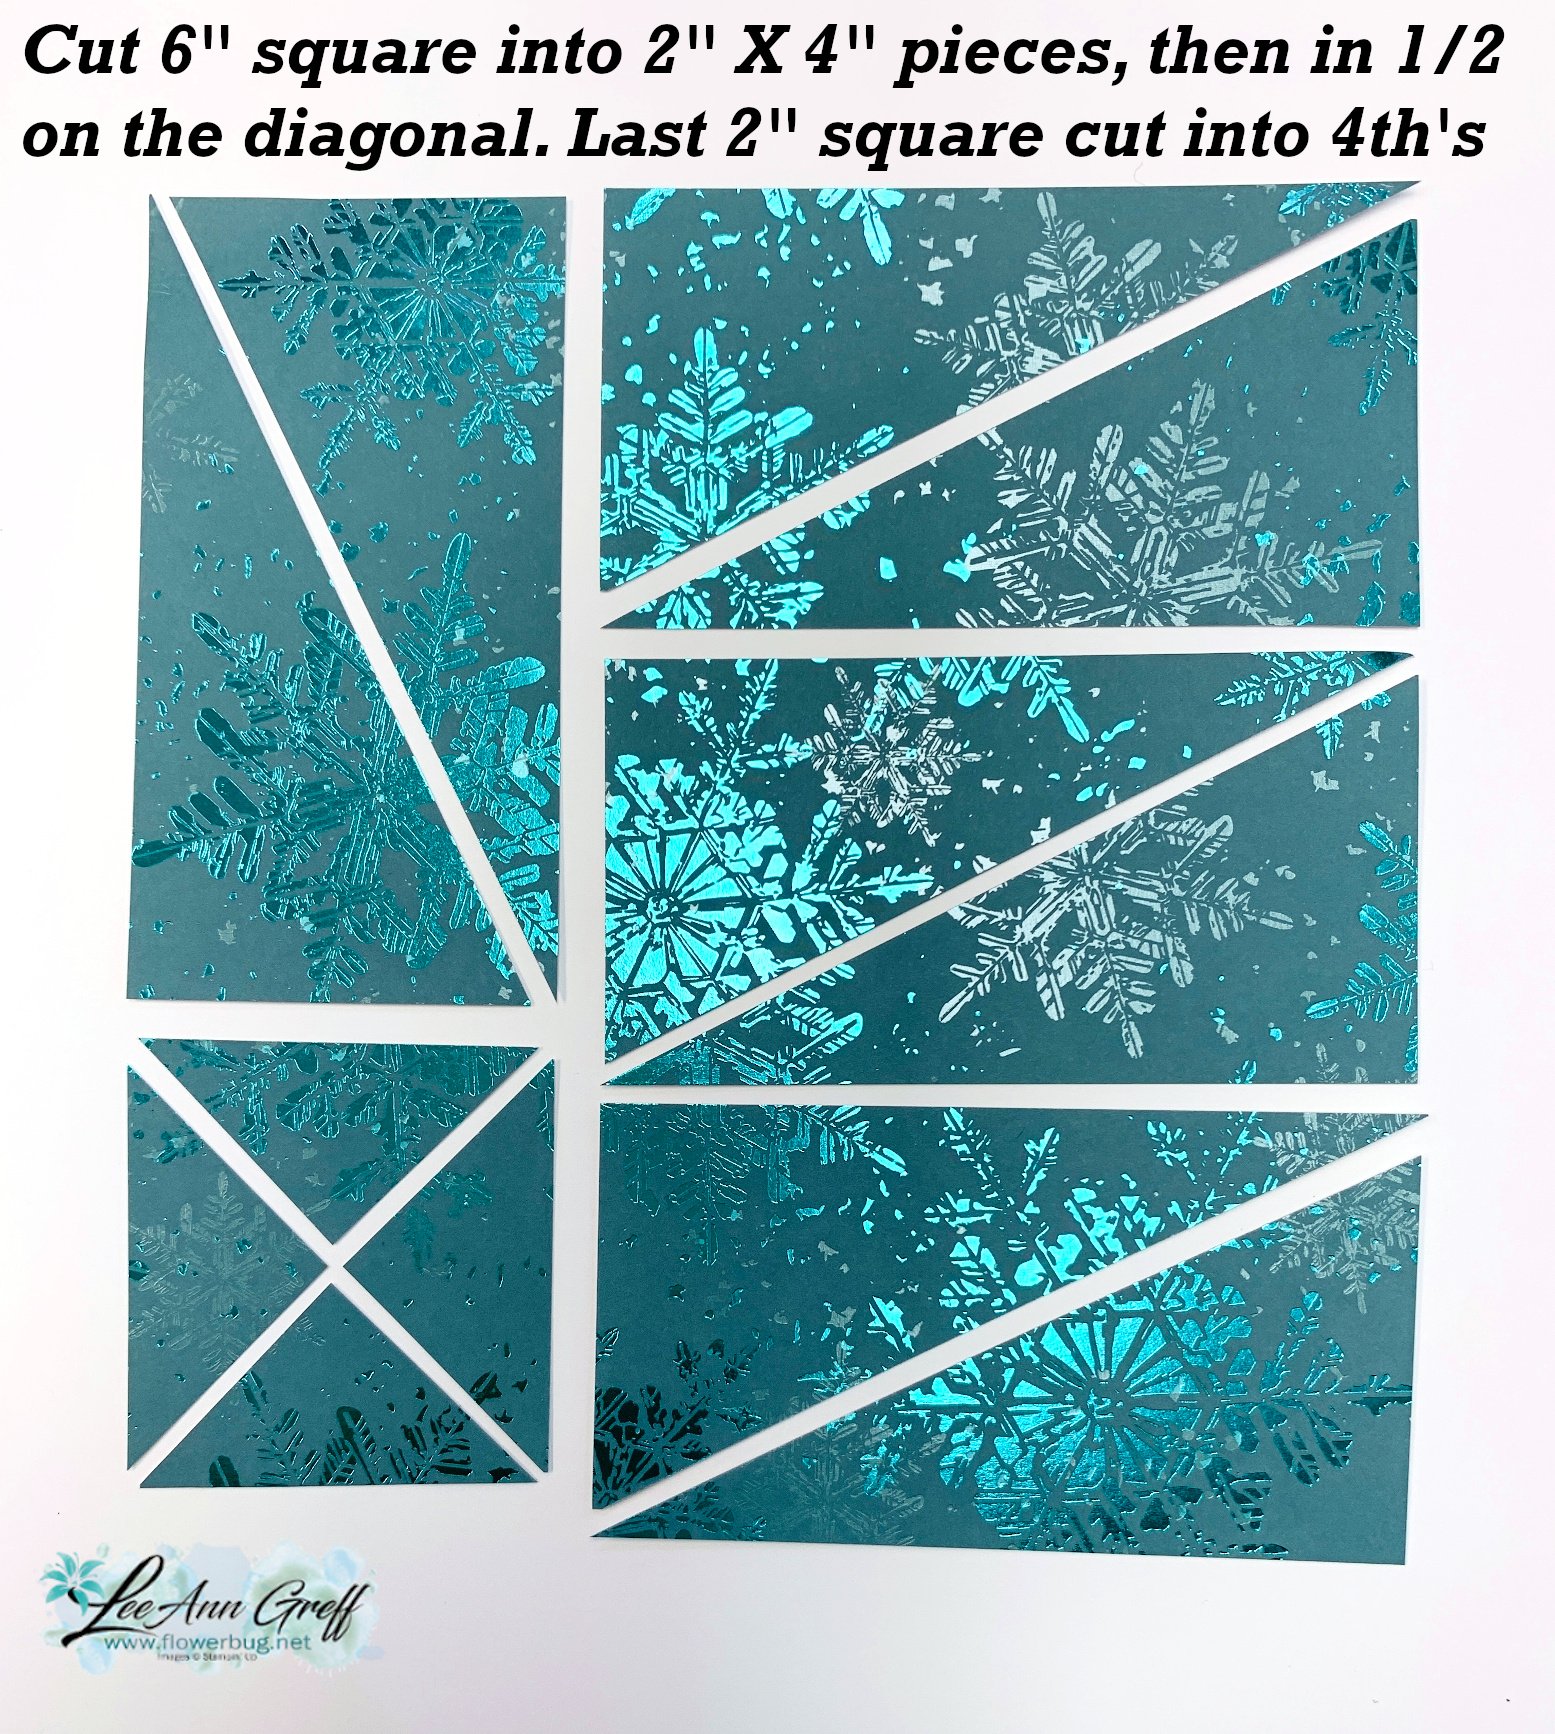
    • Now you'll cut each 2" X 4" strip into two pieces by cutting it in half on the diagonal.  
    • Be sure you cut each one in the same direction.
    • Cut the 2" square in half on the diagonal and then cut each triangle in half.  These pieces are used on the inside of the card.   

    You'll use 4 of the large pieces and two small triangles on each card. 


    *Click here for the free printable project sheet. Download So Very Merry 2 in 1 card


    You can see the So Very Merry stamp set here.  It's seen in our Online Exclusive line.

    Online Exclusives: did you know?? 

    1. Our Online Exclusive products can be ordered by anyone.  The name means that they are only seen online and not in any printed catalog. 
    2. These products may run out at any time. Some will be reordered and others will not. We never know! 
    3. Many will remain in the Online store for up to 1 year before they'll be discontinued. 
    4. Online Exclusives allow Stampin' Up! to offer timely products for seasons and holidays. Most of their other products are in catalogs that are printed over a year in advance!  

    Watch the video tutorial below: 

    ~~~

    October Specials: 

    Amazing Starter Kit choices! 

    Choose one and enjoy the 20% discount on all future orders! Click here

    *current host code: HTHK4TQU or 4GHXYSDQ

    *Get free glitter gems with online orders over $55 (Please use a host code)

    Leave a Reply

    Your email address will not be published. Required fields are marked *


Notice: LeeAnn Greff, Independent Stampin’ Up! Demonstrator, Manager. The content of this website is my sole responsibility as an independent Stampin’ Up! demonstrator and the use of, and content of, the classes, services, or products offered on this website is not endorsed by Stampin’ Up! Copyright 2025