/


Latest Post

Wishes all Around Christmas card with video & free project sheet


I hope you all enjoyed your Thanksgiving holiday weekend. We sure did!  We spent it with our kids – playing games, making puzzles and of course enjoying wonderful food.

~~~

Have you noticed the Wishes All Around bundle in the 2023 Holiday catalog?  

I've always loved wreaths.  In fact I used to collect them and put them up at Christmas time on a big wall in my dining room. 

I thought this Wishes All Around stamp bundle seen here had a wide variety of pretty stamps and wonderful dies. 
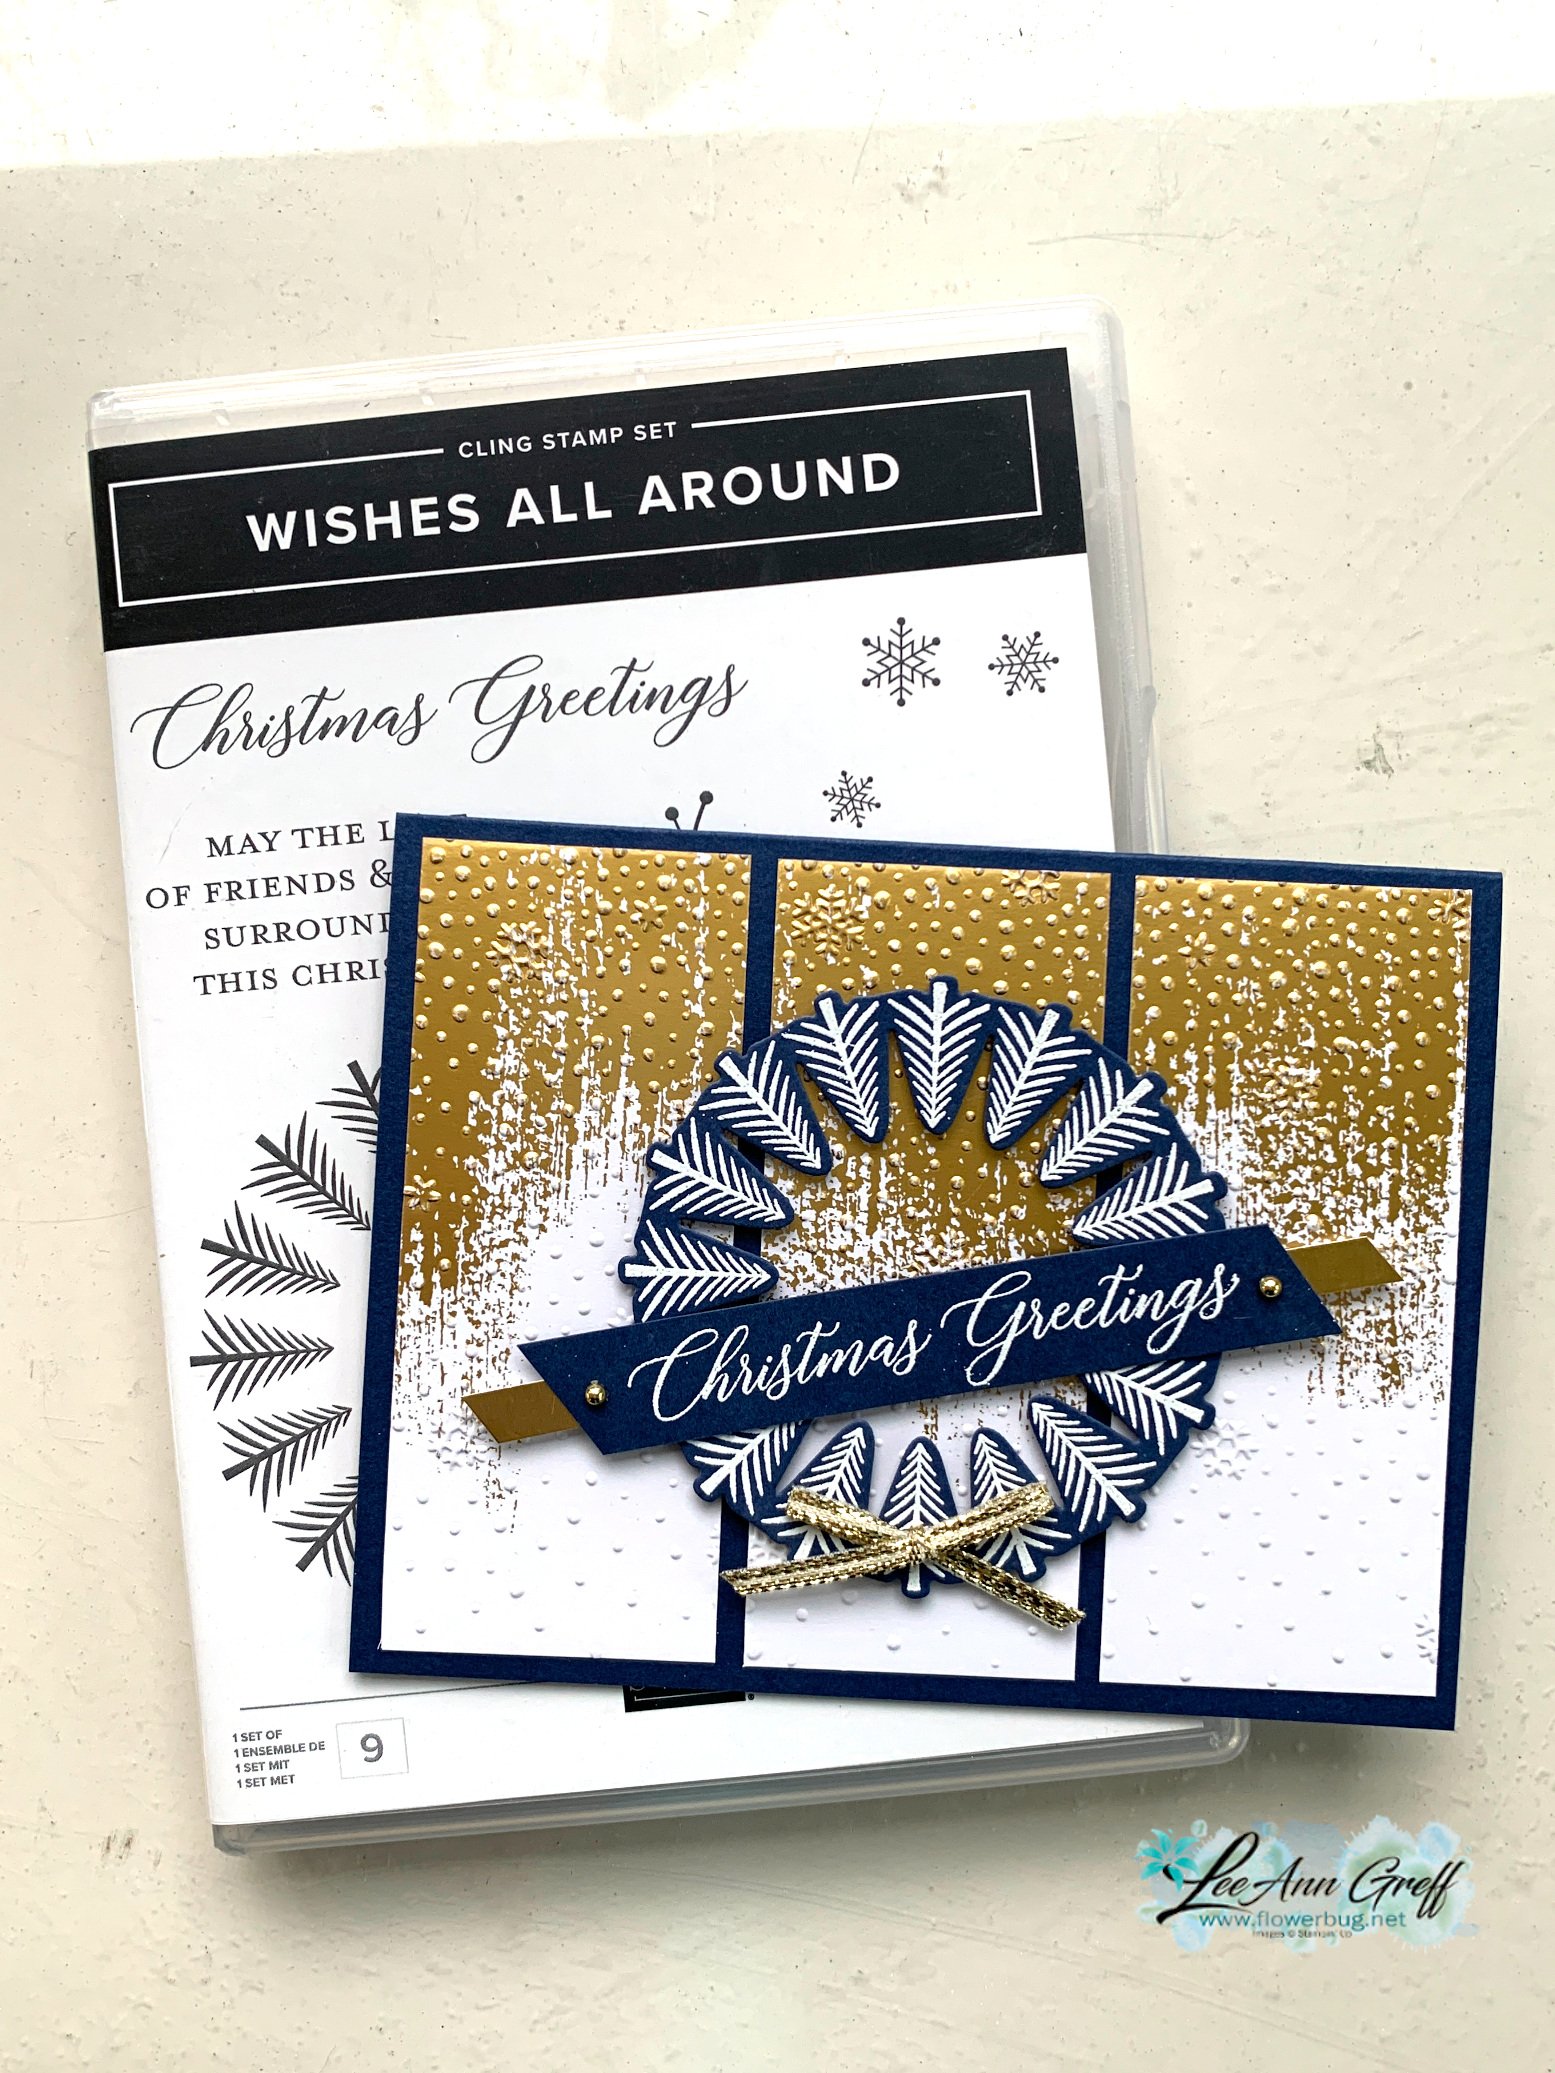
I heat embossed the tree wreath image in White embossing powder and die-cut it with the coordinating dies. I added it onto three cut panels from the Brushed Gold Cards & envelopes; each one cut at 1 5/8" X 4" and added to my Navy card base. These panels are textured with the Snowflake Sky 3D embossing folder.

I love the fact that you can cut the Brushed Gold cards & envelopes into two card fronts; more bang for your buck! 

Below is a photo of all of the card swaps I made.  I truly love these Brushed Gold cards & envelopes. I've found them quite versatile and easy to use. 

Here's a photo of this sweet bundle. As you can see it has three die-cut wreaths, snowflakes, trees and stems/berries. All meant to coordinate with the stamp set. 

I made a second version in the video last week. Which do you prefer?

Bow on top or on the bottom of the wreath?  Gold or white embossed greeting?


Below is the video where I shared this pretty card.  Unfortunately this video has some blurry spots; I hope you can bear with me! 

~~~

November Specials: 

*current host code:  4D2ZDS6Q
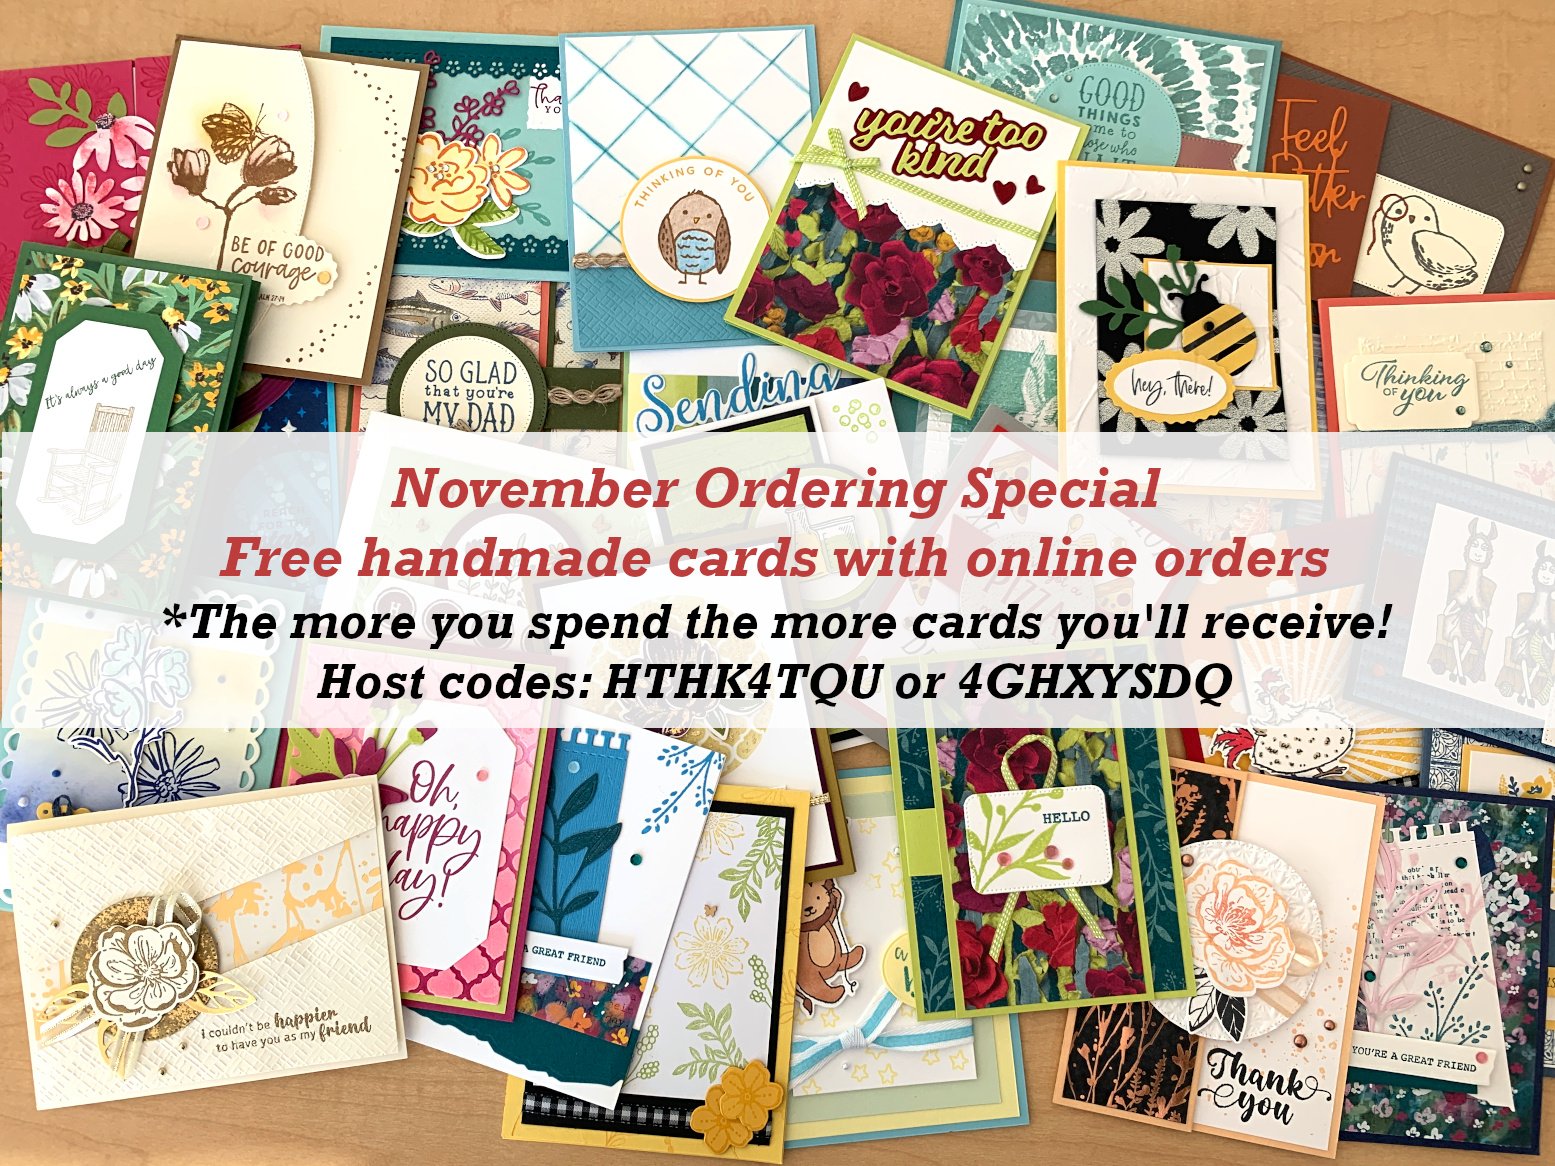
Click on the image below to see the Holiday Last Chance items 
 

All Posts

  • Sunshine Vibes interlocking accordion card; wow!


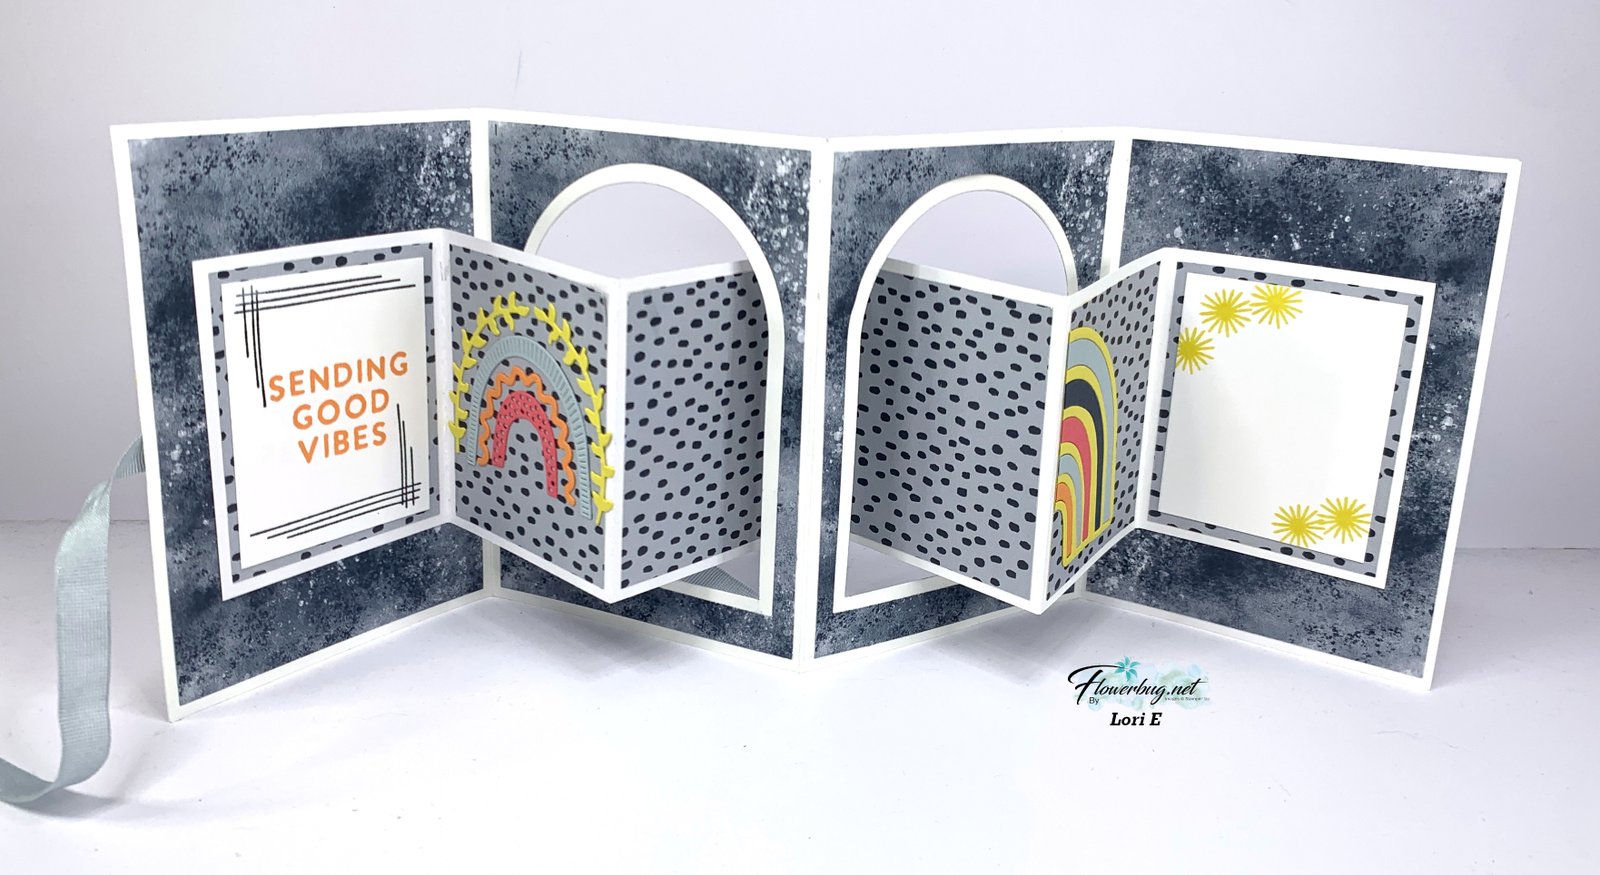
    I'm so excited to share this incredible fancy fold card with you.  Lori went above and beyond for this one!  

    She used the Sunshine Vibes bundle seen here.  She also used the 2025-27 In Color & Boho Vibes designer paper.  I think she added a bit of every new in color here!  

    This bundle and suite is part of the BOGO sale going on right now.  Buy one get another suite item at half price!  

    Here's what the card looks like open….! 

    Just look at all of the die-cuts and layers!  She made 16 of these amazing cards!  

    Here's the back side view: 

    Measurements:

    • Base 12" X 6 1/2" score at 4" and 8", 2nd piece 5 1/2" X 4 1/2" score at 1/2". These are overlapped to create the length. 
    • Accordion is 8 1/2" X 3 1/4" score at 2 3/4" & 5 1/2", 2nd piece is 9" X 3 1/4" score at 2 3/4", 5 1/2" & 8 1/2"
    • Designer Paper – 6 pieces at 2 1/2" X 3", 4 pieces at 3 3/4" X 5 1/4" 
    • Front – Basic White arch 3" X 4 1/4", DSP arch 3 1/4" X 4 1/2"
    • Ribbon – 21" long

    What an absolutely amazing fancy fold she made for us!  Thanks Lori!! 

    ~~~

    June Specials:

    The Suite Sale is on! 

    Buy one get 50% the second item – on all available suite products. 

    Shop here or see products below: 

    ~~~

    Last Chance List has been updated!  see it all here. Don't miss out on the deals!

    ~~~

    Earn free card kits in June with online orders! Get 4 kits with a $50 order and orders over $80 receive all 6 cards. All you need are greetings, gems and adhesives to assemble. 

    Order here 

    ~~~

    Get my Celebratory Sips PDF tutorial free with any online order in June!

    Leave a Reply

    Your email address will not be published. Required fields are marked *

  • 3 more pretty fun fold cards for you with measurements; one is a sneak peek of upcoming product!


    I hope you're enjoying the awesome fun fold cards I've been sharing this week.  My Flowerbugs Team swaps were incredible this month!  Our theme was to make fun fold cards featuring a new In Color. 

    First up today is Candy's card which features Secret Sea with Cloud Cover & Vanilla. 

    She used the Textured Notes bundle seen here.  It's one of my favorites!  She created her own background using the stamps in the set and Secret Sea ink – stamping off first for some. 

    Measurements:

    • 7 1/4" X 5 1/2" scored at 4 1/4"
    • Vanilla panels 2 3/4" X 5 1/4"
    • Cloud Cover 1 1/8" X 5 1/4"
    • greeting die-cut 2 1/4" X 3/4", layer is 2 3/8" X 7/8" 

    The textured panel is done with the Pressed Flowers embossing folder seen here.

    ~~~

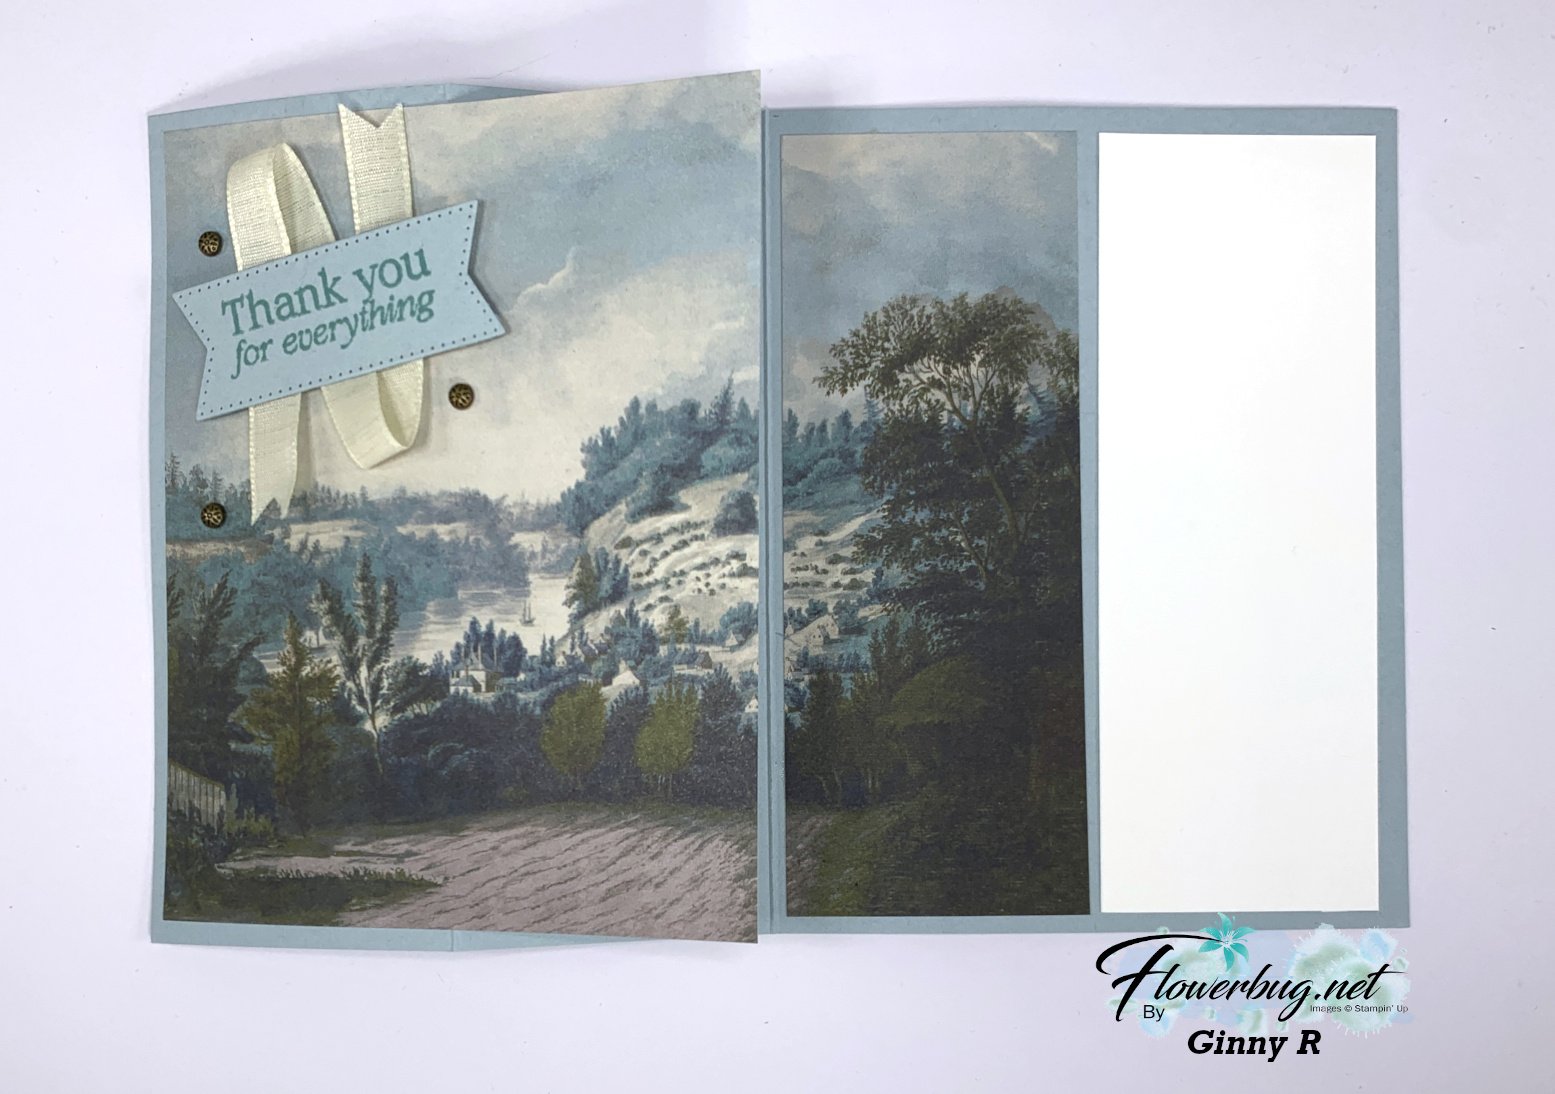
    Next is a lovely card made by Ginny featuring the Beautiful Gallery designer paper seen here.  It's part of our Suite BOGO sale too; in fact the entire suite is included!  

    Her layout shows off the entire scene pictured on the DSP. This fold is perfect for scenic papers! 

    Measurements:

    • Cloud Cover card base 8 1/2" X 5 1/2" scored at 2 1/8" & 4 1/4"
    • DSP – front panel is 4" X 5 1/4", inside is 2" X 5 1/4"
    • White is 2" X 5 1/4"

    Lastly we have a sneak peek of some upcoming product from Kim. She used a suite featured in a Demo event called Creativity Now this month. She was able to pre-order the Peaceful Garden suite items that will be in the upcoming Holiday catalog in September, 2025. 

    Her card is a simple Z-fold that really shows off that front White textured panel.  And look how the die-cut greeting label fits in that embossing panel! *notice those new flower gems….

    She did a neat technique for her greeting panel. She used Secret Sea ink and a Blending Brush over an entire sheet of White card stock. Then she stamped and die-cut the label and the inside sprig from that. Super idea!

    Measurements:

    • card base 8 1/2" X 5 1/2" score at 2 1/8" & 4 1/4"
    • White front is 4" X 5 1/4", inside is 3 1/2" X 4 3/4" 

    ~~~

    June Specials:

    The Suite Sale is on! 

    Buy one get 50% the second item – on all available suite products. 

    Shop here or see products below: 

    ~~~

    Last Chance List has been updated!  see it all here. Don't miss out on the deals!

    ~~~

    Earn free card kits in June with online orders! Get 4 kits with a $50 order and orders over $80 receive all 6 cards. All you need are greetings, gems and adhesives to assemble. 

    Order here 

    ~~~

    Get my Celebratory Sips PDF tutorial free with any online order in June!

    Leave a Reply

    Your email address will not be published. Required fields are marked *

  • 3 fun fold cards celebrating Strawberry Slush!


    I have THREE neat fun fold cards from our June Team card swap.  My Flowerbug's did an incredible job on their fun fold cards!  

    First up is Sharon's card featuring the Cheers & Sips bundle seen here. 

    The top card base layer is scored to creates a box that pops up & supports the front panel. Super neat! 

    She added Fine Tip Glue to her fussy cut drinks for some shine.  To do this you need to let it set awhile to dry. I'd recommend two layers.  If you don't want it to get a bit curvy from the liquid in the glue, add a layer of card stock under it.  

    Her inside greeting is from the Unbounded Love set.  The gems are from the Holographic Resin dots.

    Measurements:

    • Strawberry Slush card base 8 1/4" X 5 1/2" scored at 4 1/4", 5 3/4", 6 1/4", 7 3/4"
    • front CS panel 2 3/4" X 4"
    • DSP 2 pieces at 1 3/8" X 5 3/8", pieces under the greeting are 2 3/4" X 1 1/4", 2 3/4" X 1/4" and inside is 2 3/4" X 1 1/4" 
    • inside White panel 2 3/4" X 4"

    ~~~

    Next is a neat Latch card made by Kathy who used the Sweet Jar bundle seen here. 

    Her colors include Cloud Cover and Strawberry Slush. The Designer Paper is from the Florals in Bloom DSP seen here. 

    The front flap opens up to reveal another panel that she stamped with coffee beans and the die-cut from the Paper Pumpkin add on dies (now retired).

    And the front panel open up too!  

    Measurements:

    • card base 7 1/4" X 5 1/2" scored at 4 1/4"
    • DSP 2 3/4" X 5 1/4"
    • White panels X 3 – 2 3/4" square; inside 4" X 5 1/4"
    • Strawberry Slush square 3"
    • 2 1/2" X 1" scored at 1 1/4" connecting piece

    ~~~

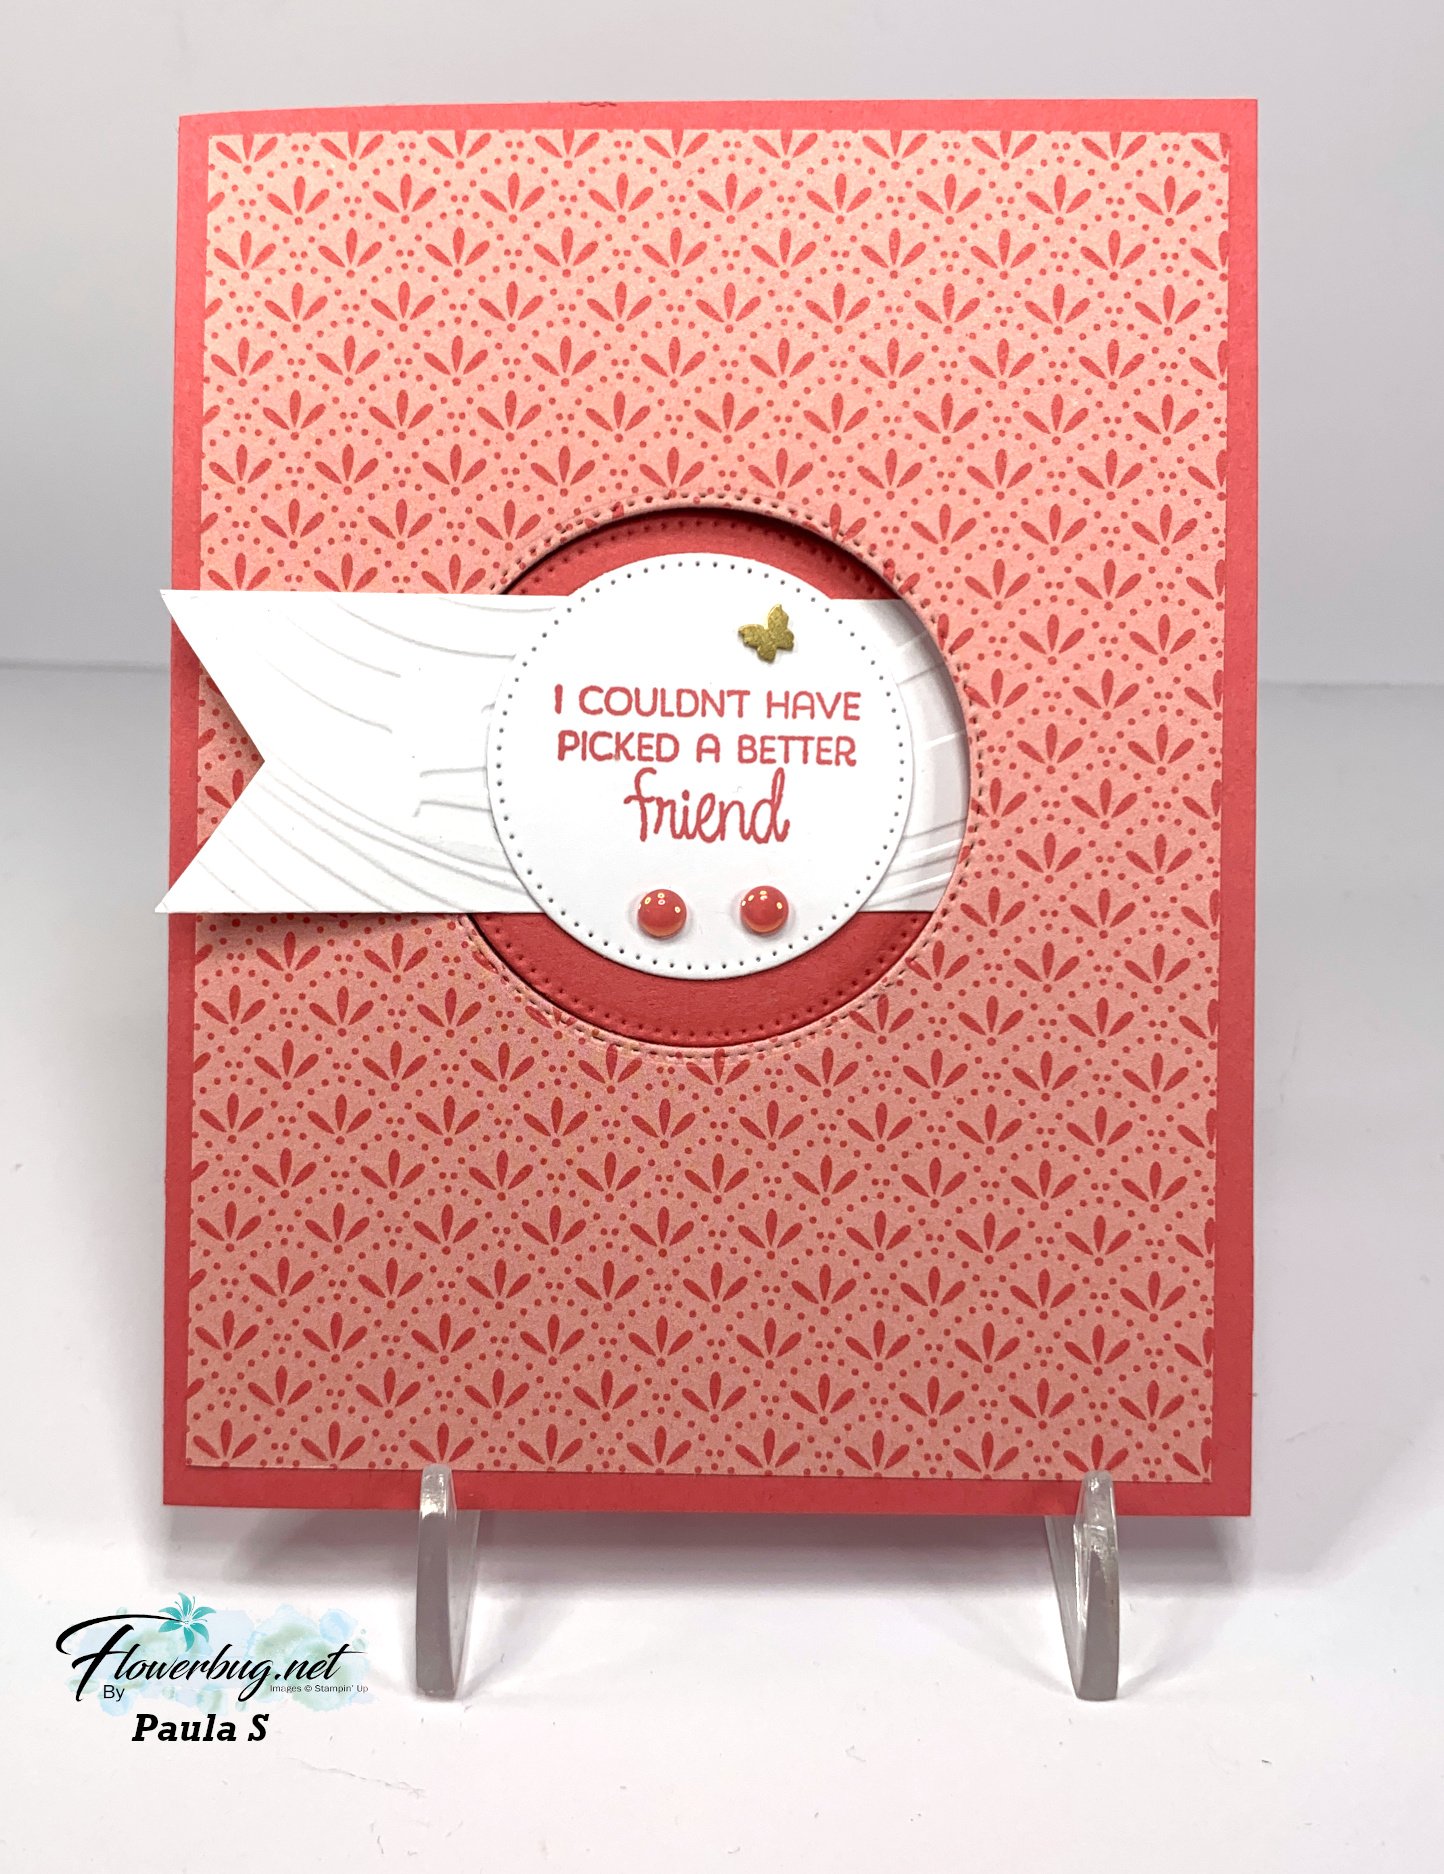
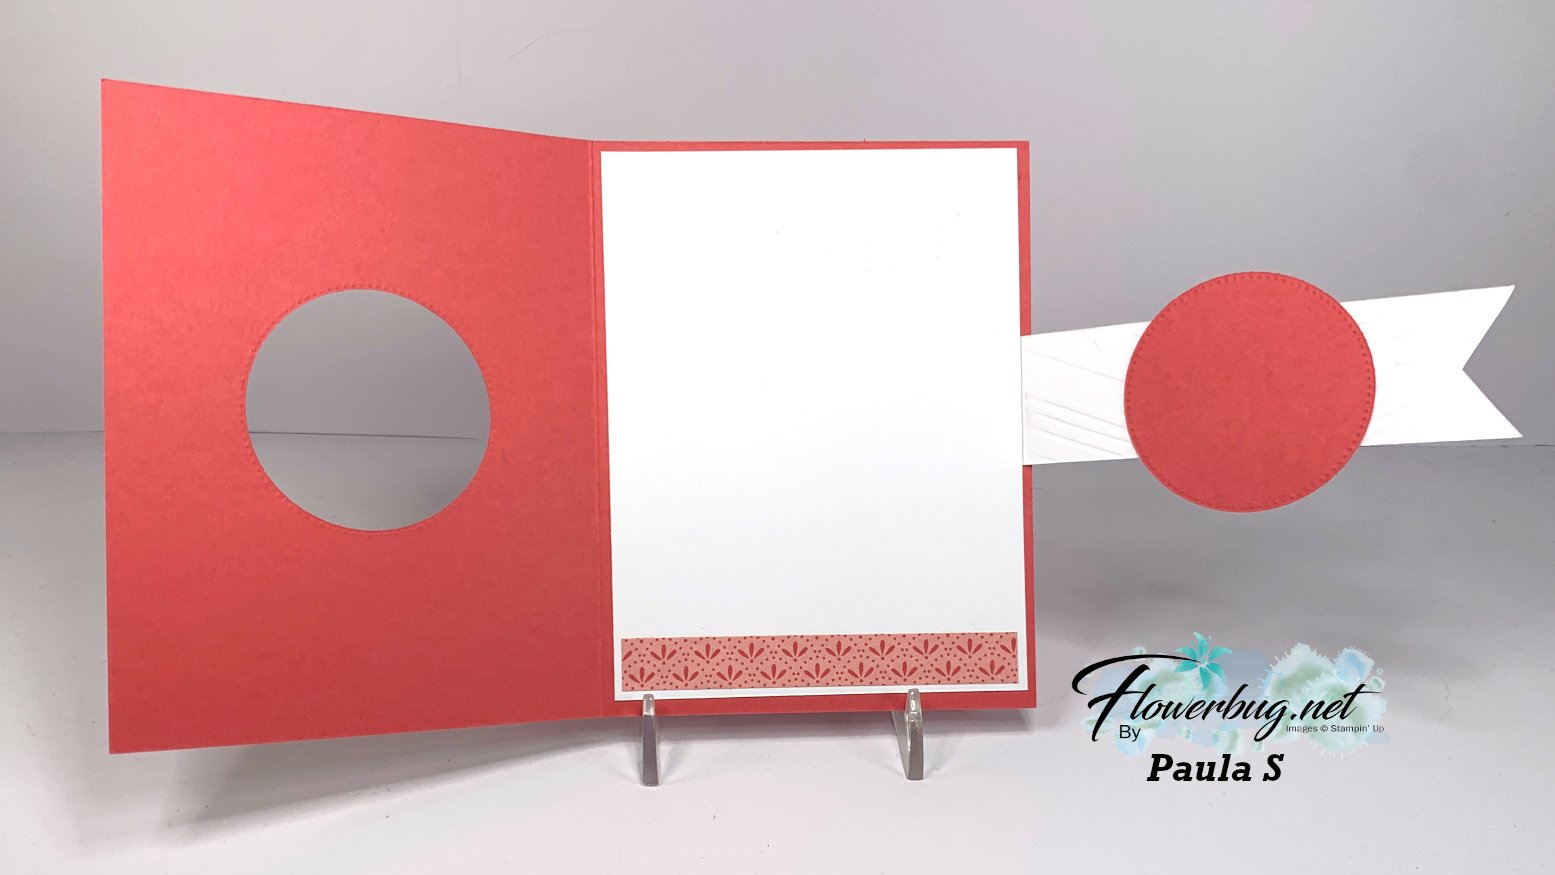
    And now for the final card today. This one was made by Paula and was cased from Heidi Colins.  It's called a Buckle card:

    She used the Floral Impressions DSP on the front and cut a window in the front panels so the buckle could slip in.  

    Products used include the Stylish Shapes dies, Swirly EF, In Color flat pearls, and Brass Butterflies.

    Measurements:

    • Card base 8 1/2" X 5 1/2" scored at 4 1/4"
    • DSP 4" X 5 1/4", inside 3 3/4" X 1/2" 
    • buckle 4 1/2" X 1 1/4" scored at 1/2"
    • largest circle is 2 1/8" but Paula recommends slightly larger

    Here's the final opening: 

    ~~~

    June Specials:

    The Suite Sale is on! 

    Buy one get 50% the second item – on all available suite products. 

    Shop here or see products below: 

    ~~~

    Last Chance List has been updated!  see it all here. Don't miss out on the deals!

    ~~~

    Earn free card kits in June with online orders! Get 4 kits with a $50 order and orders over $80 receive all 6 cards. All you need are greetings, gems and adhesives to assemble. 

    Order here 

    ~~~

    Get my Celebratory Sips PDF tutorial free with any online order in June!

    Leave a Reply

    Your email address will not be published. Required fields are marked *


Notice: LeeAnn Greff, Independent Stampin’ Up! Demonstrator, Manager. The content of this website is my sole responsibility as an independent Stampin’ Up! demonstrator and the use of, and content of, the classes, services, or products offered on this website is not endorsed by Stampin’ Up! Copyright 2025