/


Latest Post

Use your nesting dies to create a designer paper window – video & free project sheet


On last week's Live video I shared a neat way to use nesting dies to create a frame with your double sided designer series paper. 

I chose to feature the Thoughtful Moments DSP with this neat technique. Simply choose two dies that are the same shape and about 1/4-1/2" apart.  Die-cut and then flip over the narrow frame to reveal the opposite side of the Designer Series Paper. It's so neat! 

**This Designer Paper and many more will be on sale starting Tuesday, August 6th! Details will be shared tomorrow. 

The leaf die is from the Friends for Life dies. My nesting dies are called Countryside Corners and can be seen here.
Tip – be sure the color of the opposite side of your paper coordinates with the front. I chose the card base to match the frame – Pretty Peacock. My greeting is in Fresh Freesia. 

Here are both cards shown on the video; the second card on the right has a Lost Lagoon frame & card base.  The White die-cut on the right card is from the Thoughtful Wishes bundle.
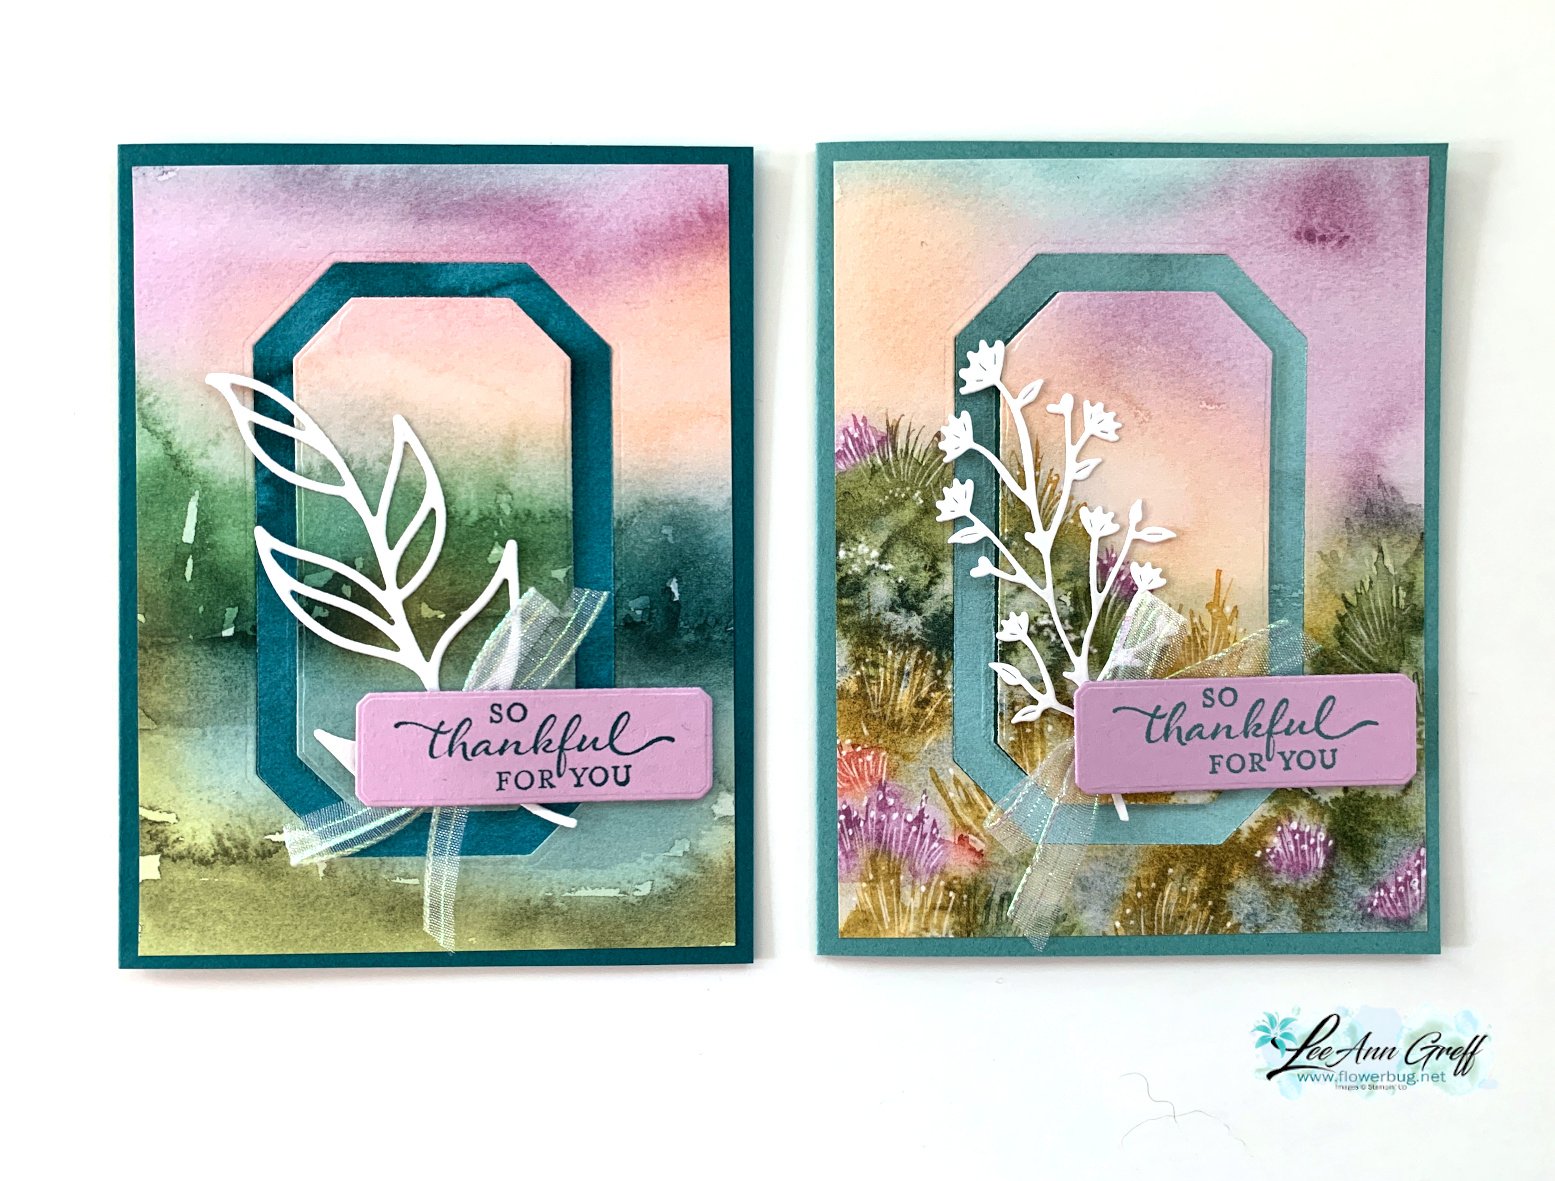
Here's the free project sheet you can download or print: Download Thoughtful Journey Window card

The designer paper for these cards is 4" X 5 1/4" which leaves a 2" strip for another project.  I wanted to share a quick card to use up that leftover piece:
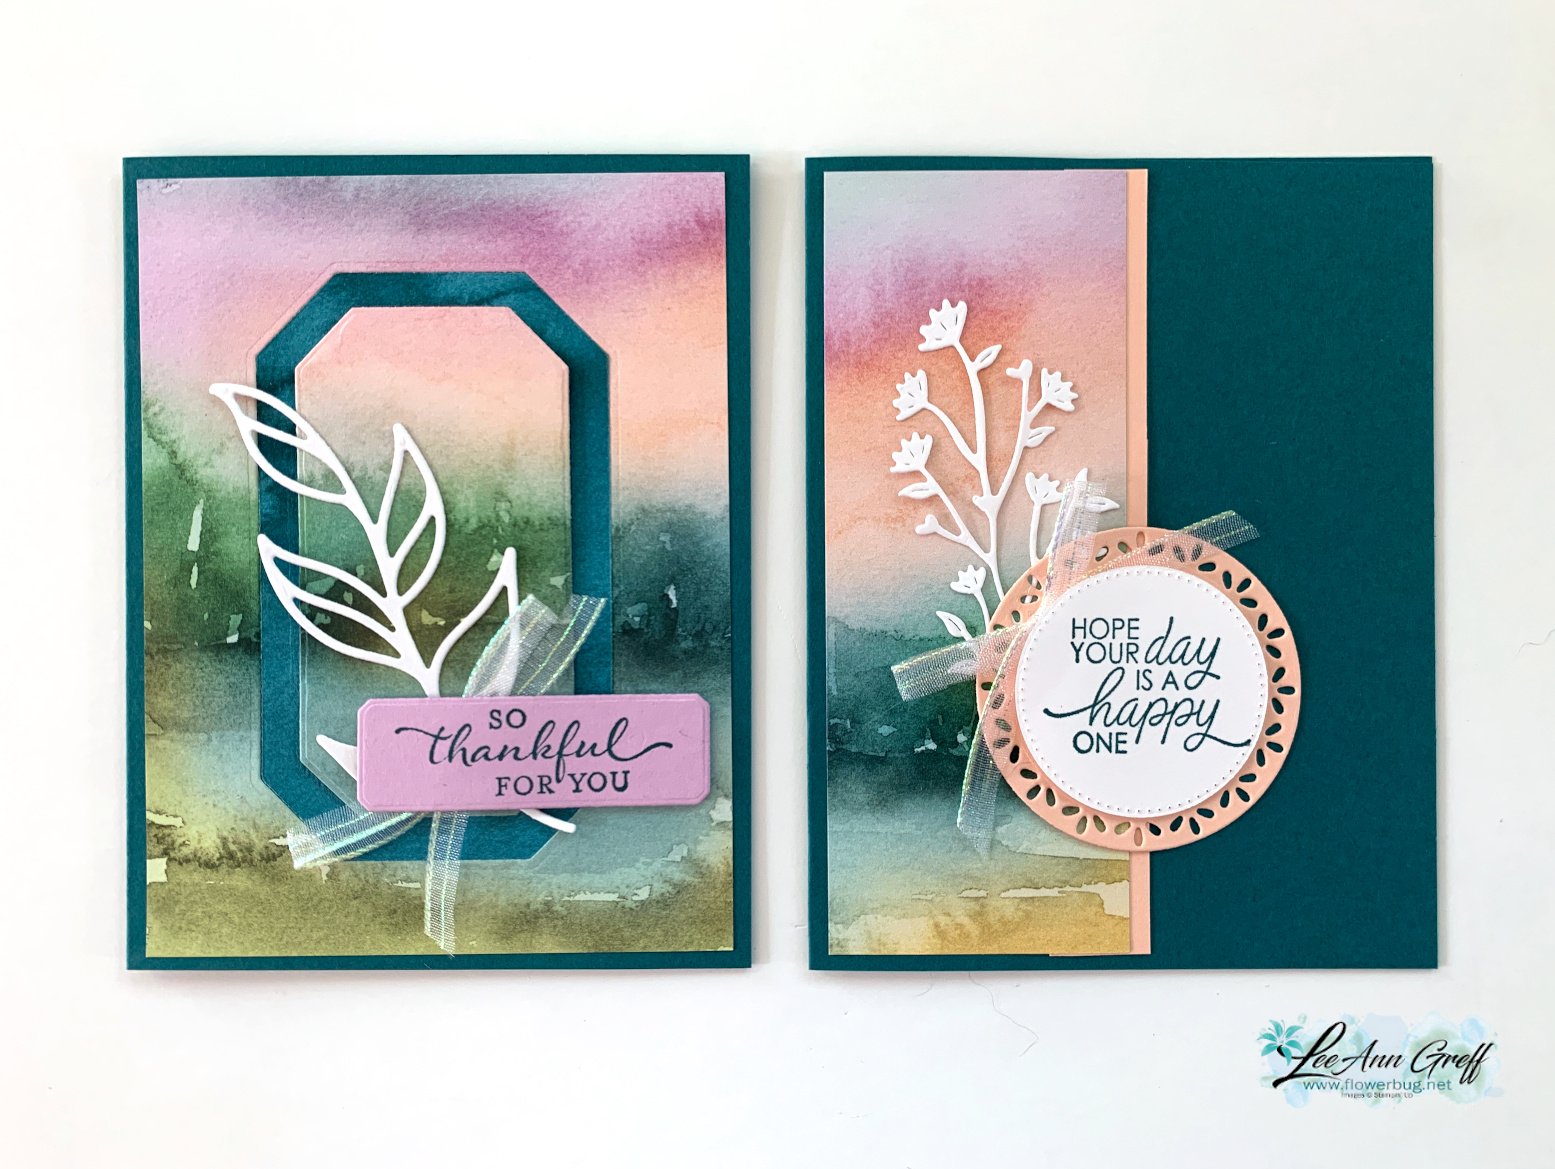
I simply added it to the card base with a coordinating card stock strip on the edge. Then added layering circles for my greeting.

If you're wondering about the ribbon, it's the pretty Iridescent 1/2" striped trim seen here.  I cut it in half to get 1/4" thick trim. It has been unavailable for awhile but it's back now.

Here are all 4 cards I shared in the video you can see here. 

Here's the video below to see how this is done plus another card idea with the beautiful Thoughtful Journey designer paper.  I'll share the second card Wednesday. 

~~~

August Specials:

*current host code link: BDGBJHAE

Redeem your $5 coupon now! 

~~~

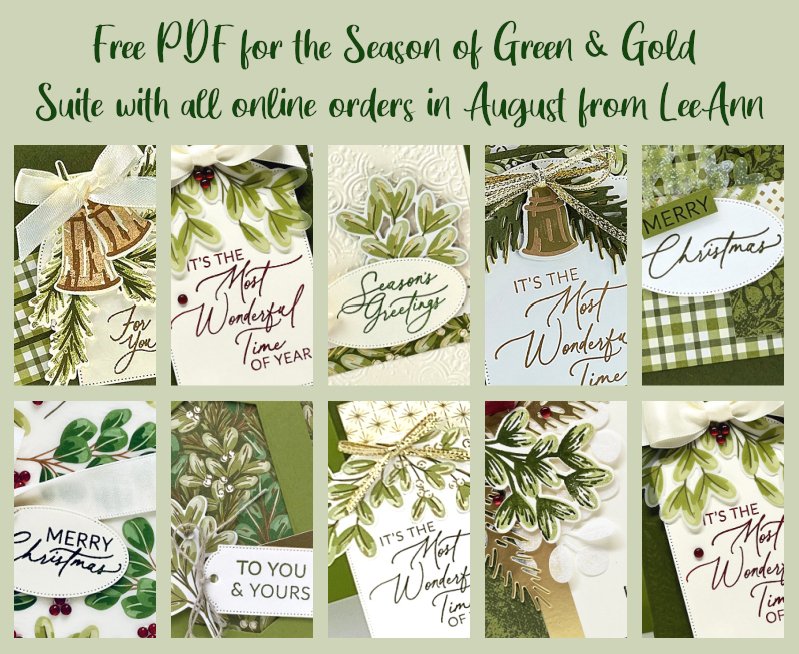
All online orders will receive a free PDF tutorial featuring the

Season of Green & Gold suite
All Posts

  • Get 2 cards at a time with this special card layout & a 6 X 6″ piece of designer paper!


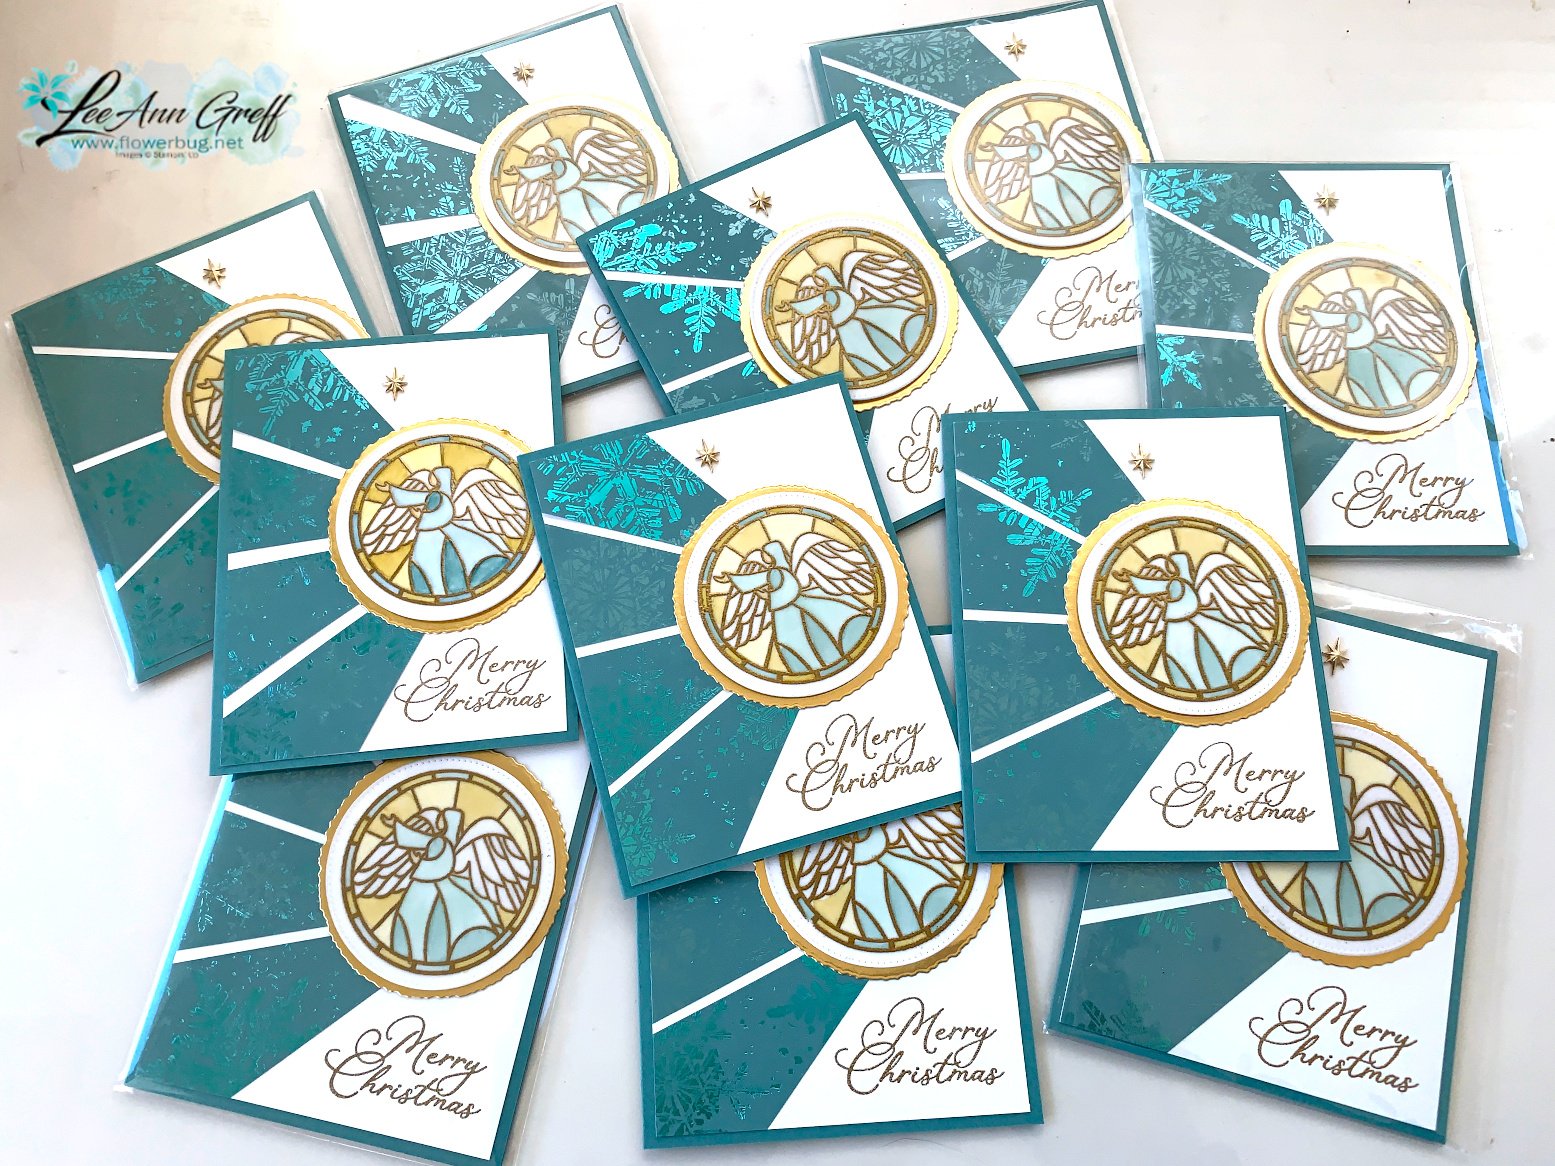
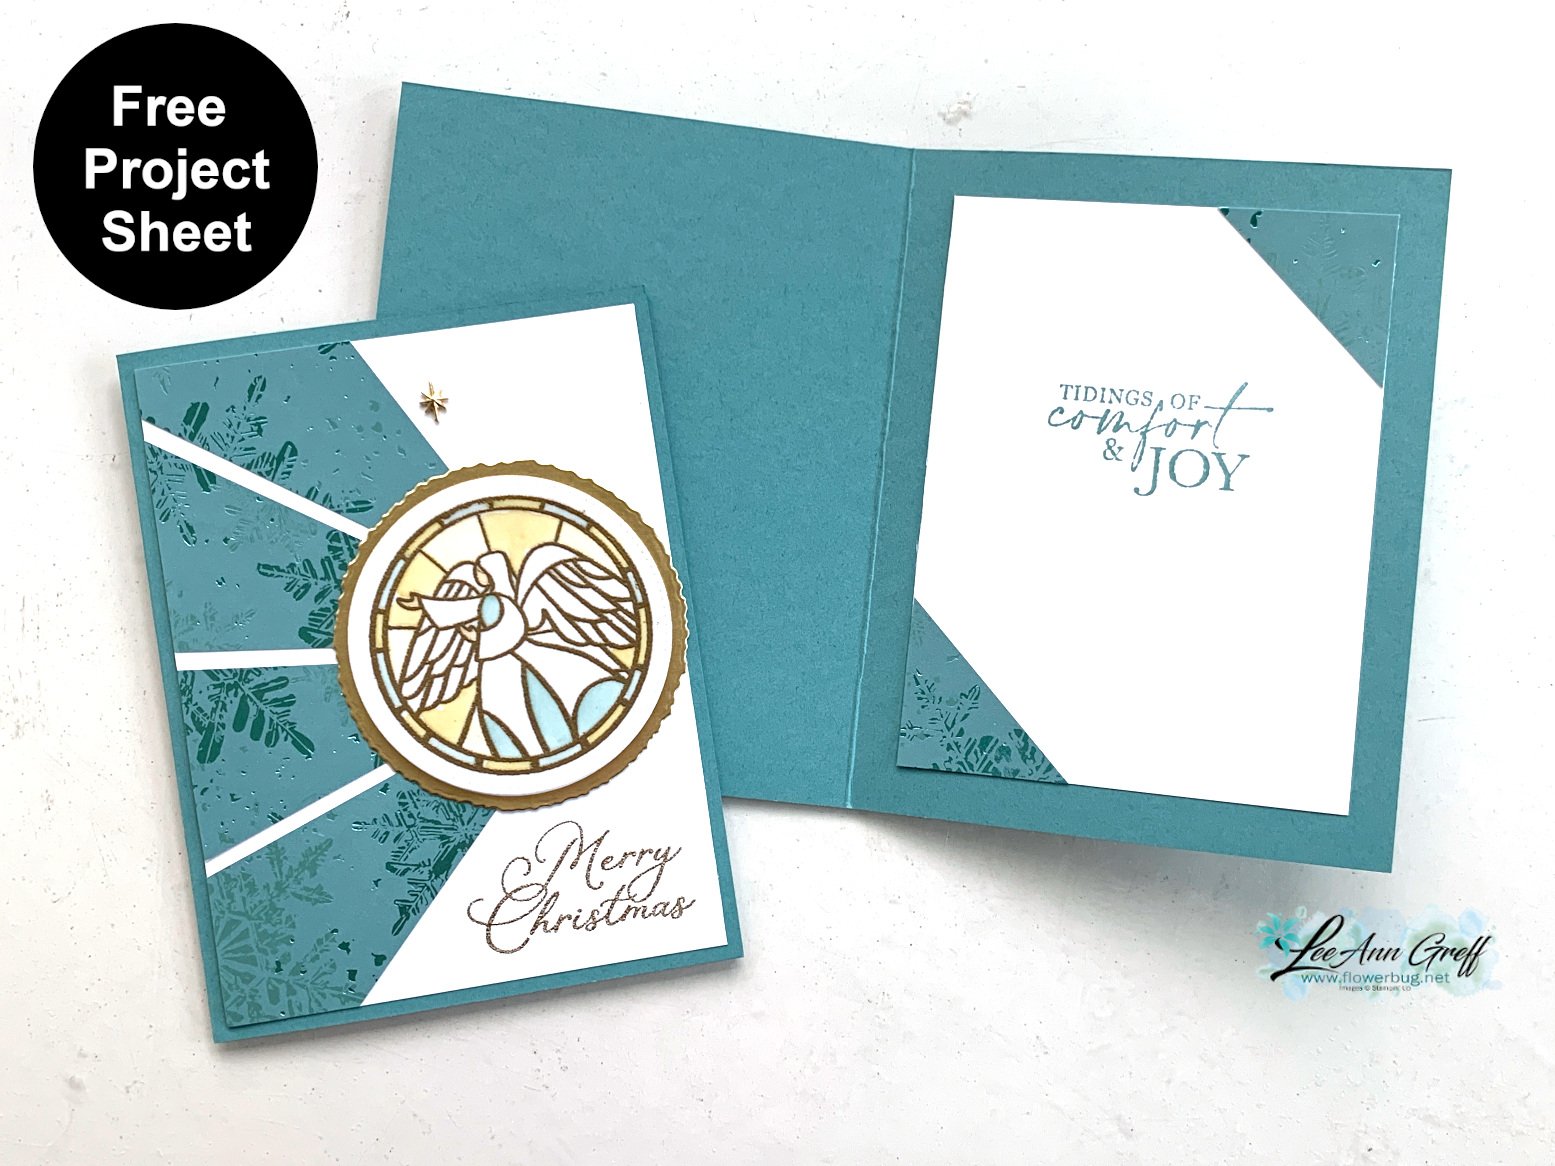
    I shared this card on last week's Live video.  It features the So Very Merry stamp set and the Snowflake Magic designer paper.

    I made a bunch of these cards for our Flowerbug's October Christmas card swap.  You might wonder how I achieved the starburst effect with the Snowflake Magic designer paper.  Keep reading plus watch the video seen here or below!

    Other products used:

    Vellum card stock, Gold Foil paper, Deckled circle dies, Stylish Shapes dies, Blends markers for coloring & Gold heat embossing.

    Here's what the inside looks like. Make note of the little designer paper triangles inside; remember this when you see the cutting templates below.  


    My friend Lyssa Zwolenek inspired these cards and created the template too.  She is super creative and so great about sharing ideas!

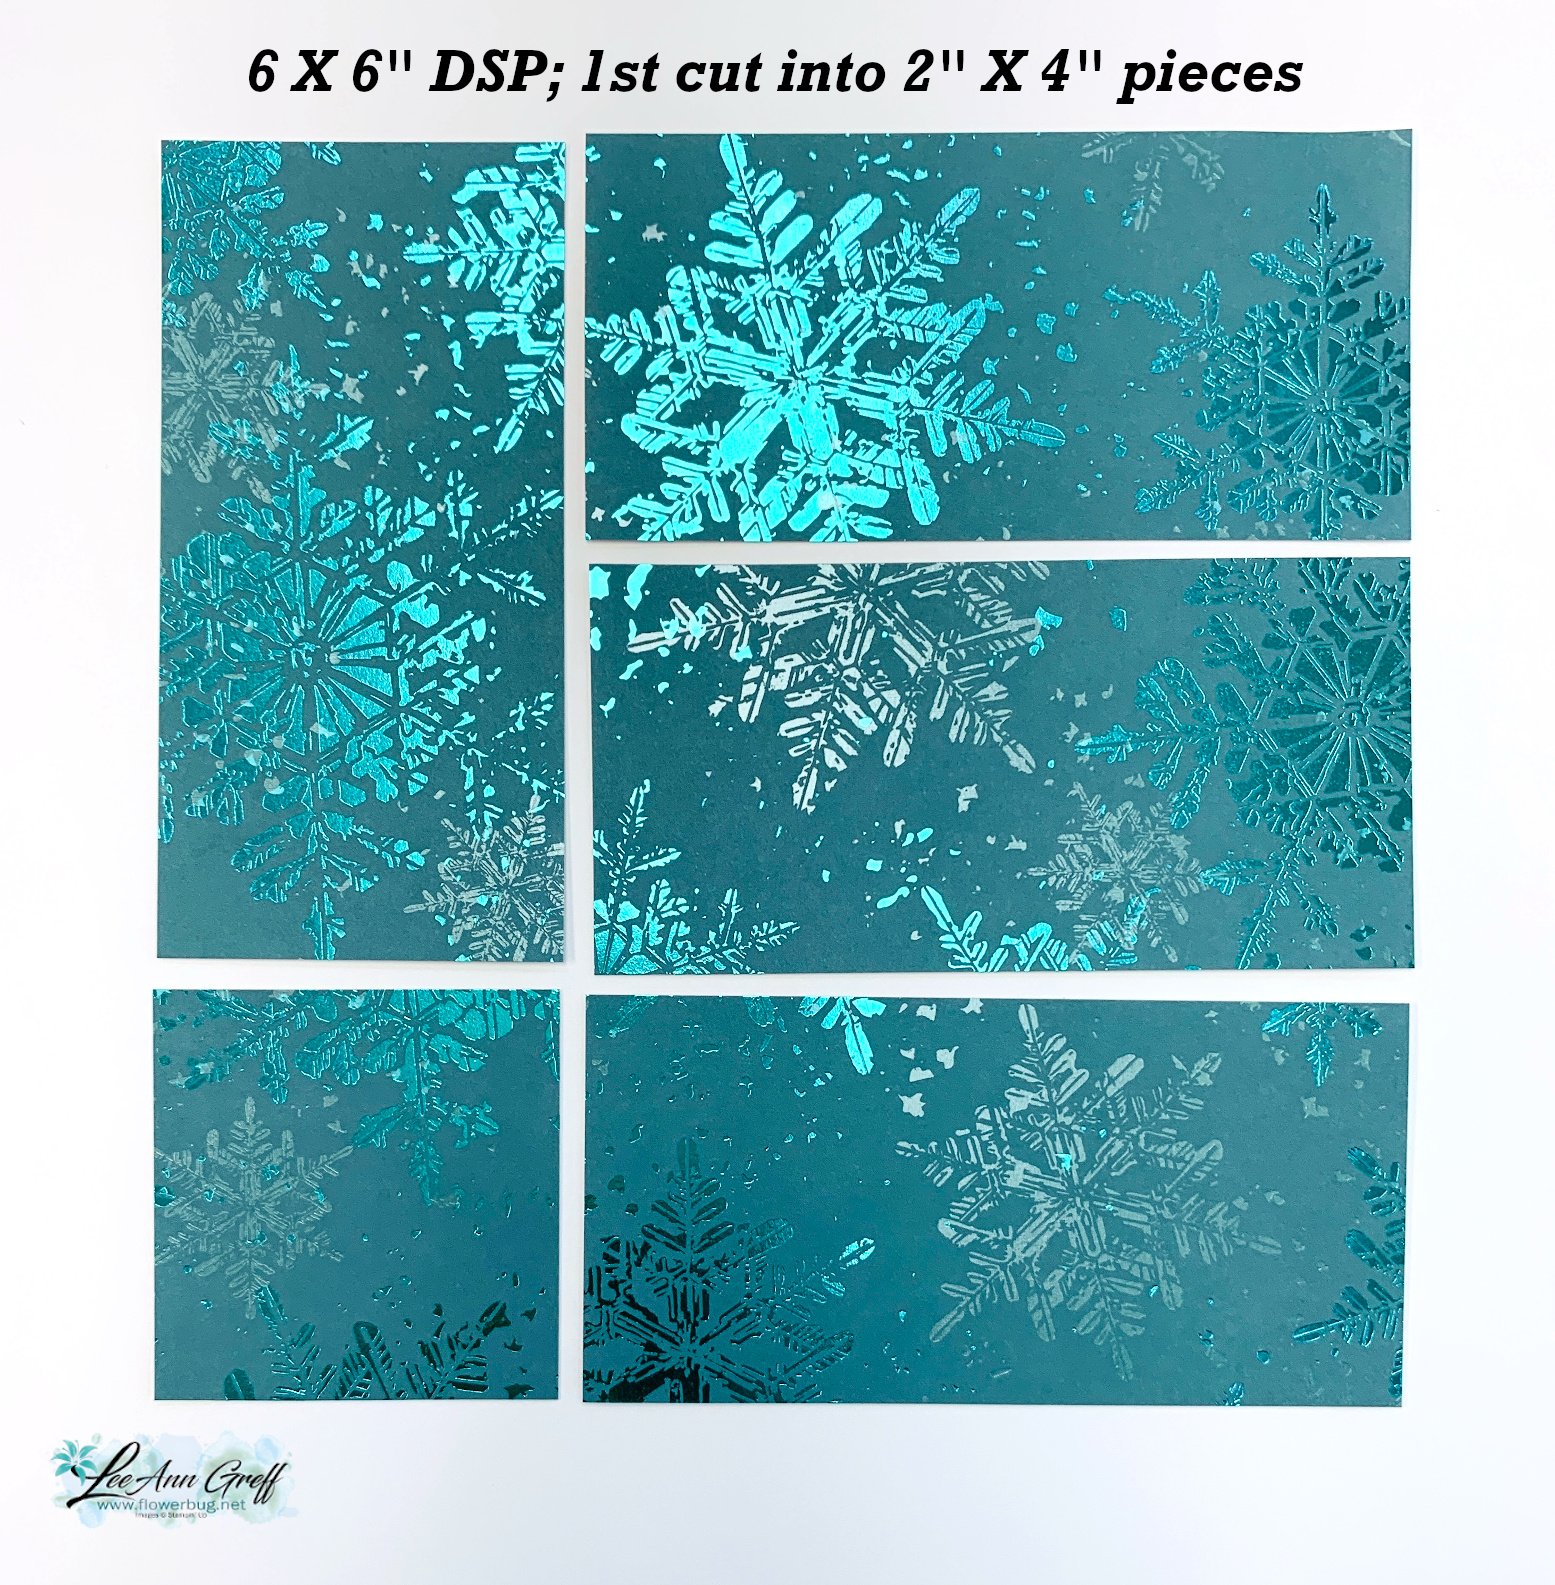
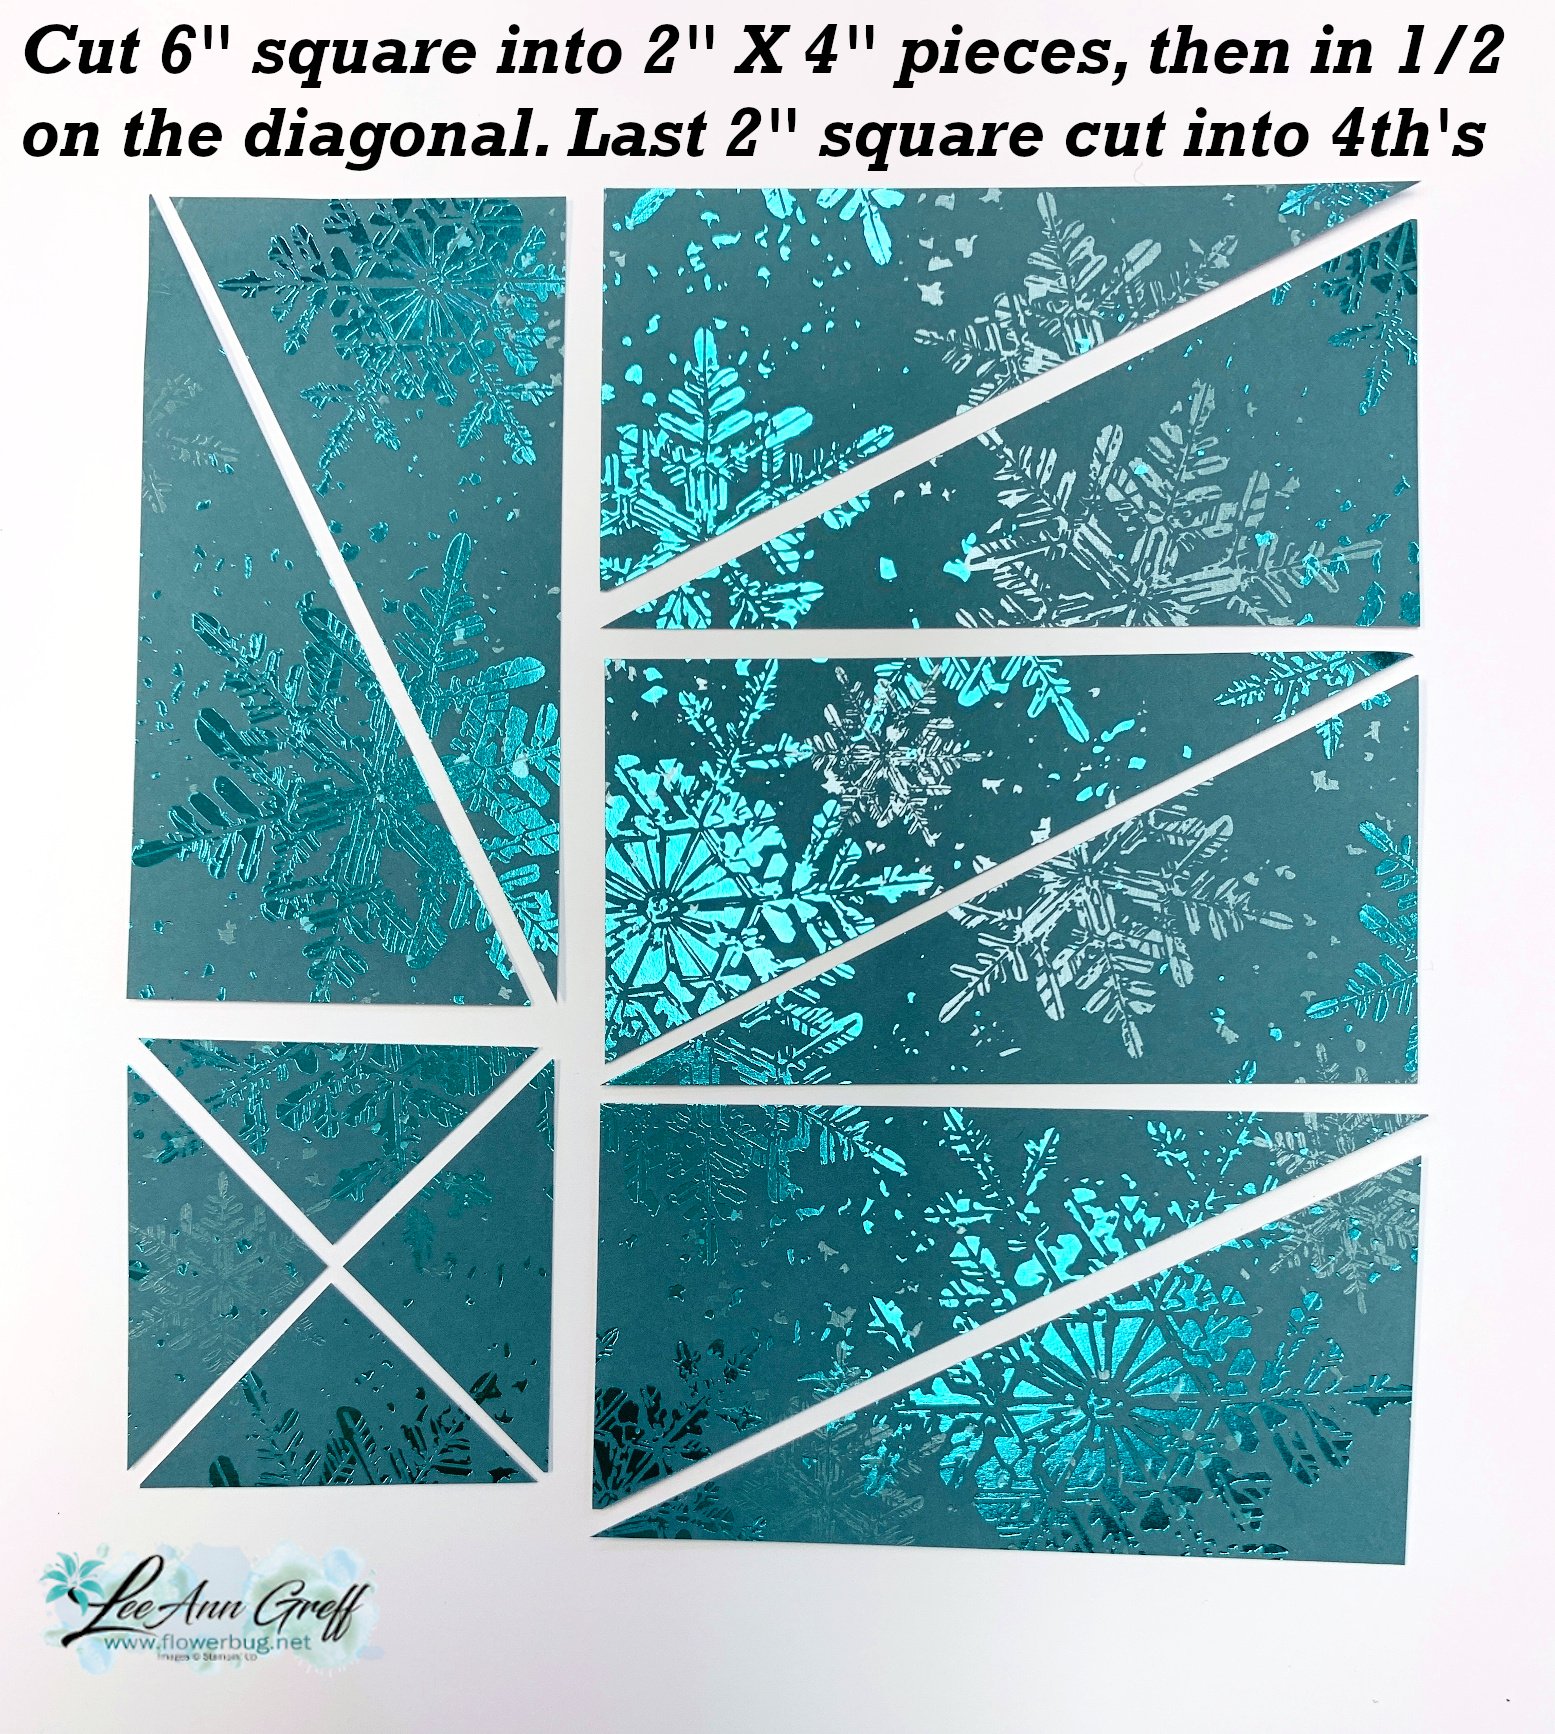
    Below are a few cutting templates for you.  


    Watch the video here or below to see how this is done. 

    Directions:

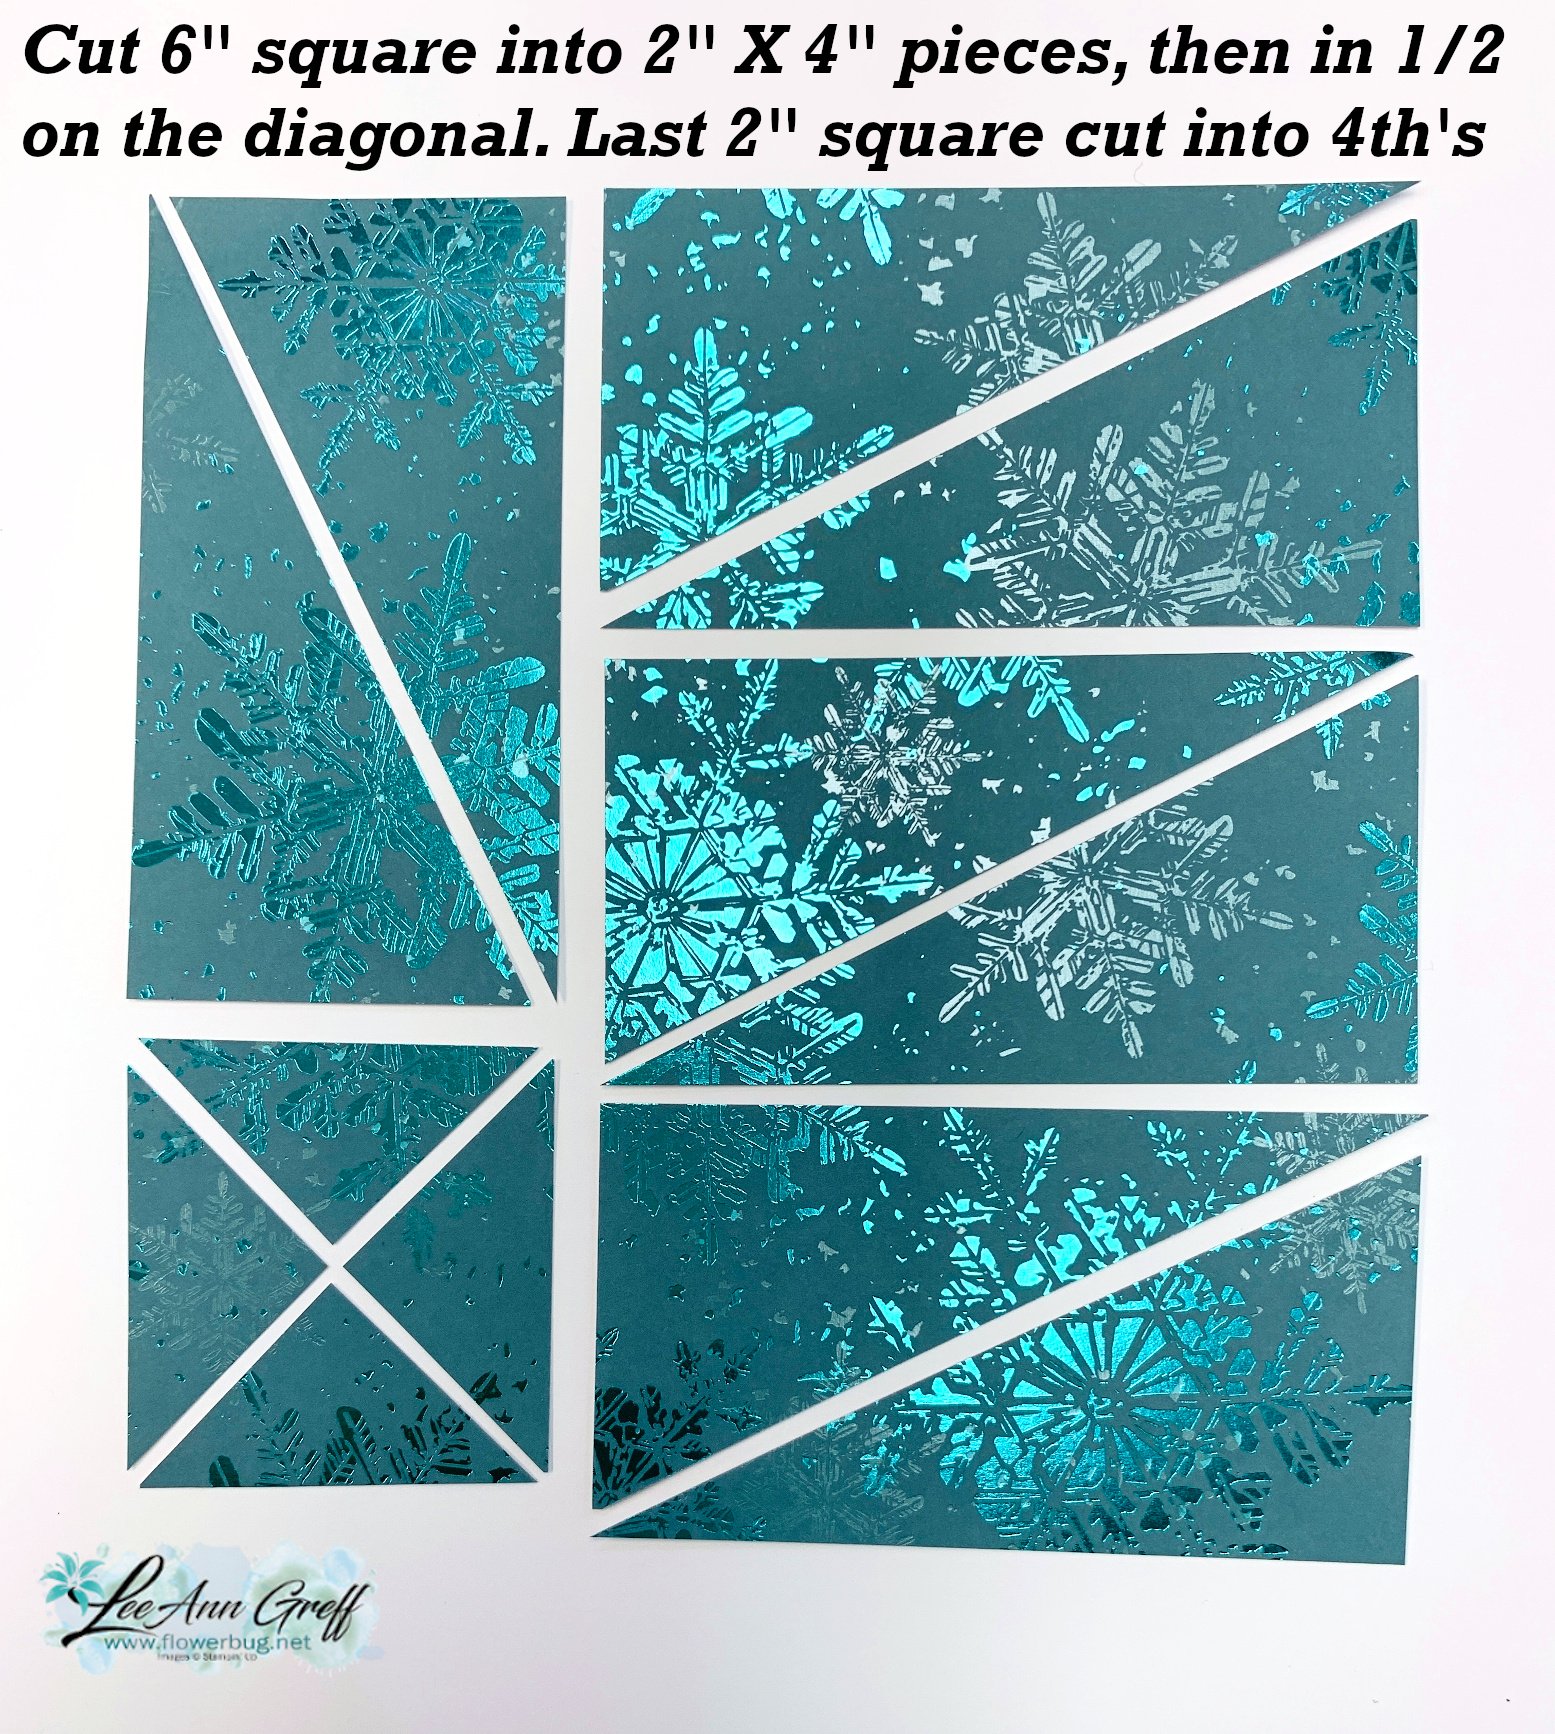
    • You'll start out with a 6" square of designer paper. 
    • First cut is at 2". You're left with a 4" X 6" piece on the right. 
    • Cut the 2" strip into a 2" X 4" piece, leaving you with a 2" square. 
    • Next cut the 4" X 6" piece on the right into three 2" X 4" pieces. 


    See this gorgeous Snowflake Magic specialty paper here.  


    • Now you'll cut each 2" X 4" strip into two pieces by cutting it in half on the diagonal.  
    • Be sure you cut each one in the same direction.
    • Cut the 2" square in half on the diagonal and then cut each triangle in half.  These pieces are used on the inside of the card.   

    You'll use 4 of the large pieces and two small triangles on each card. 


    *Click here for the free printable project sheet. Download So Very Merry 2 in 1 card


    You can see the So Very Merry stamp set here.  It's seen in our Online Exclusive line.

    Online Exclusives: did you know?? 

    1. Our Online Exclusive products can be ordered by anyone.  The name means that they are only seen online and not in any printed catalog. 
    2. These products may run out at any time. Some will be reordered and others will not. We never know! 
    3. Many will remain in the Online store for up to 1 year before they'll be discontinued. 
    4. Online Exclusives allow Stampin' Up! to offer timely products for seasons and holidays. Most of their other products are in catalogs that are printed over a year in advance!  

    Watch the video tutorial below: 

    ~~~

    October Specials: 

    Amazing Starter Kit choices! 

    Choose one and enjoy the 20% discount on all future orders! Click here

    *current host code: HTHK4TQU or 4GHXYSDQ

    *Get free glitter gems with online orders over $55 (Please use a host code)

    Leave a Reply

    Your email address will not be published. Required fields are marked *

  • Beautiful cards made with the Rustic Christmas Countdown kit!


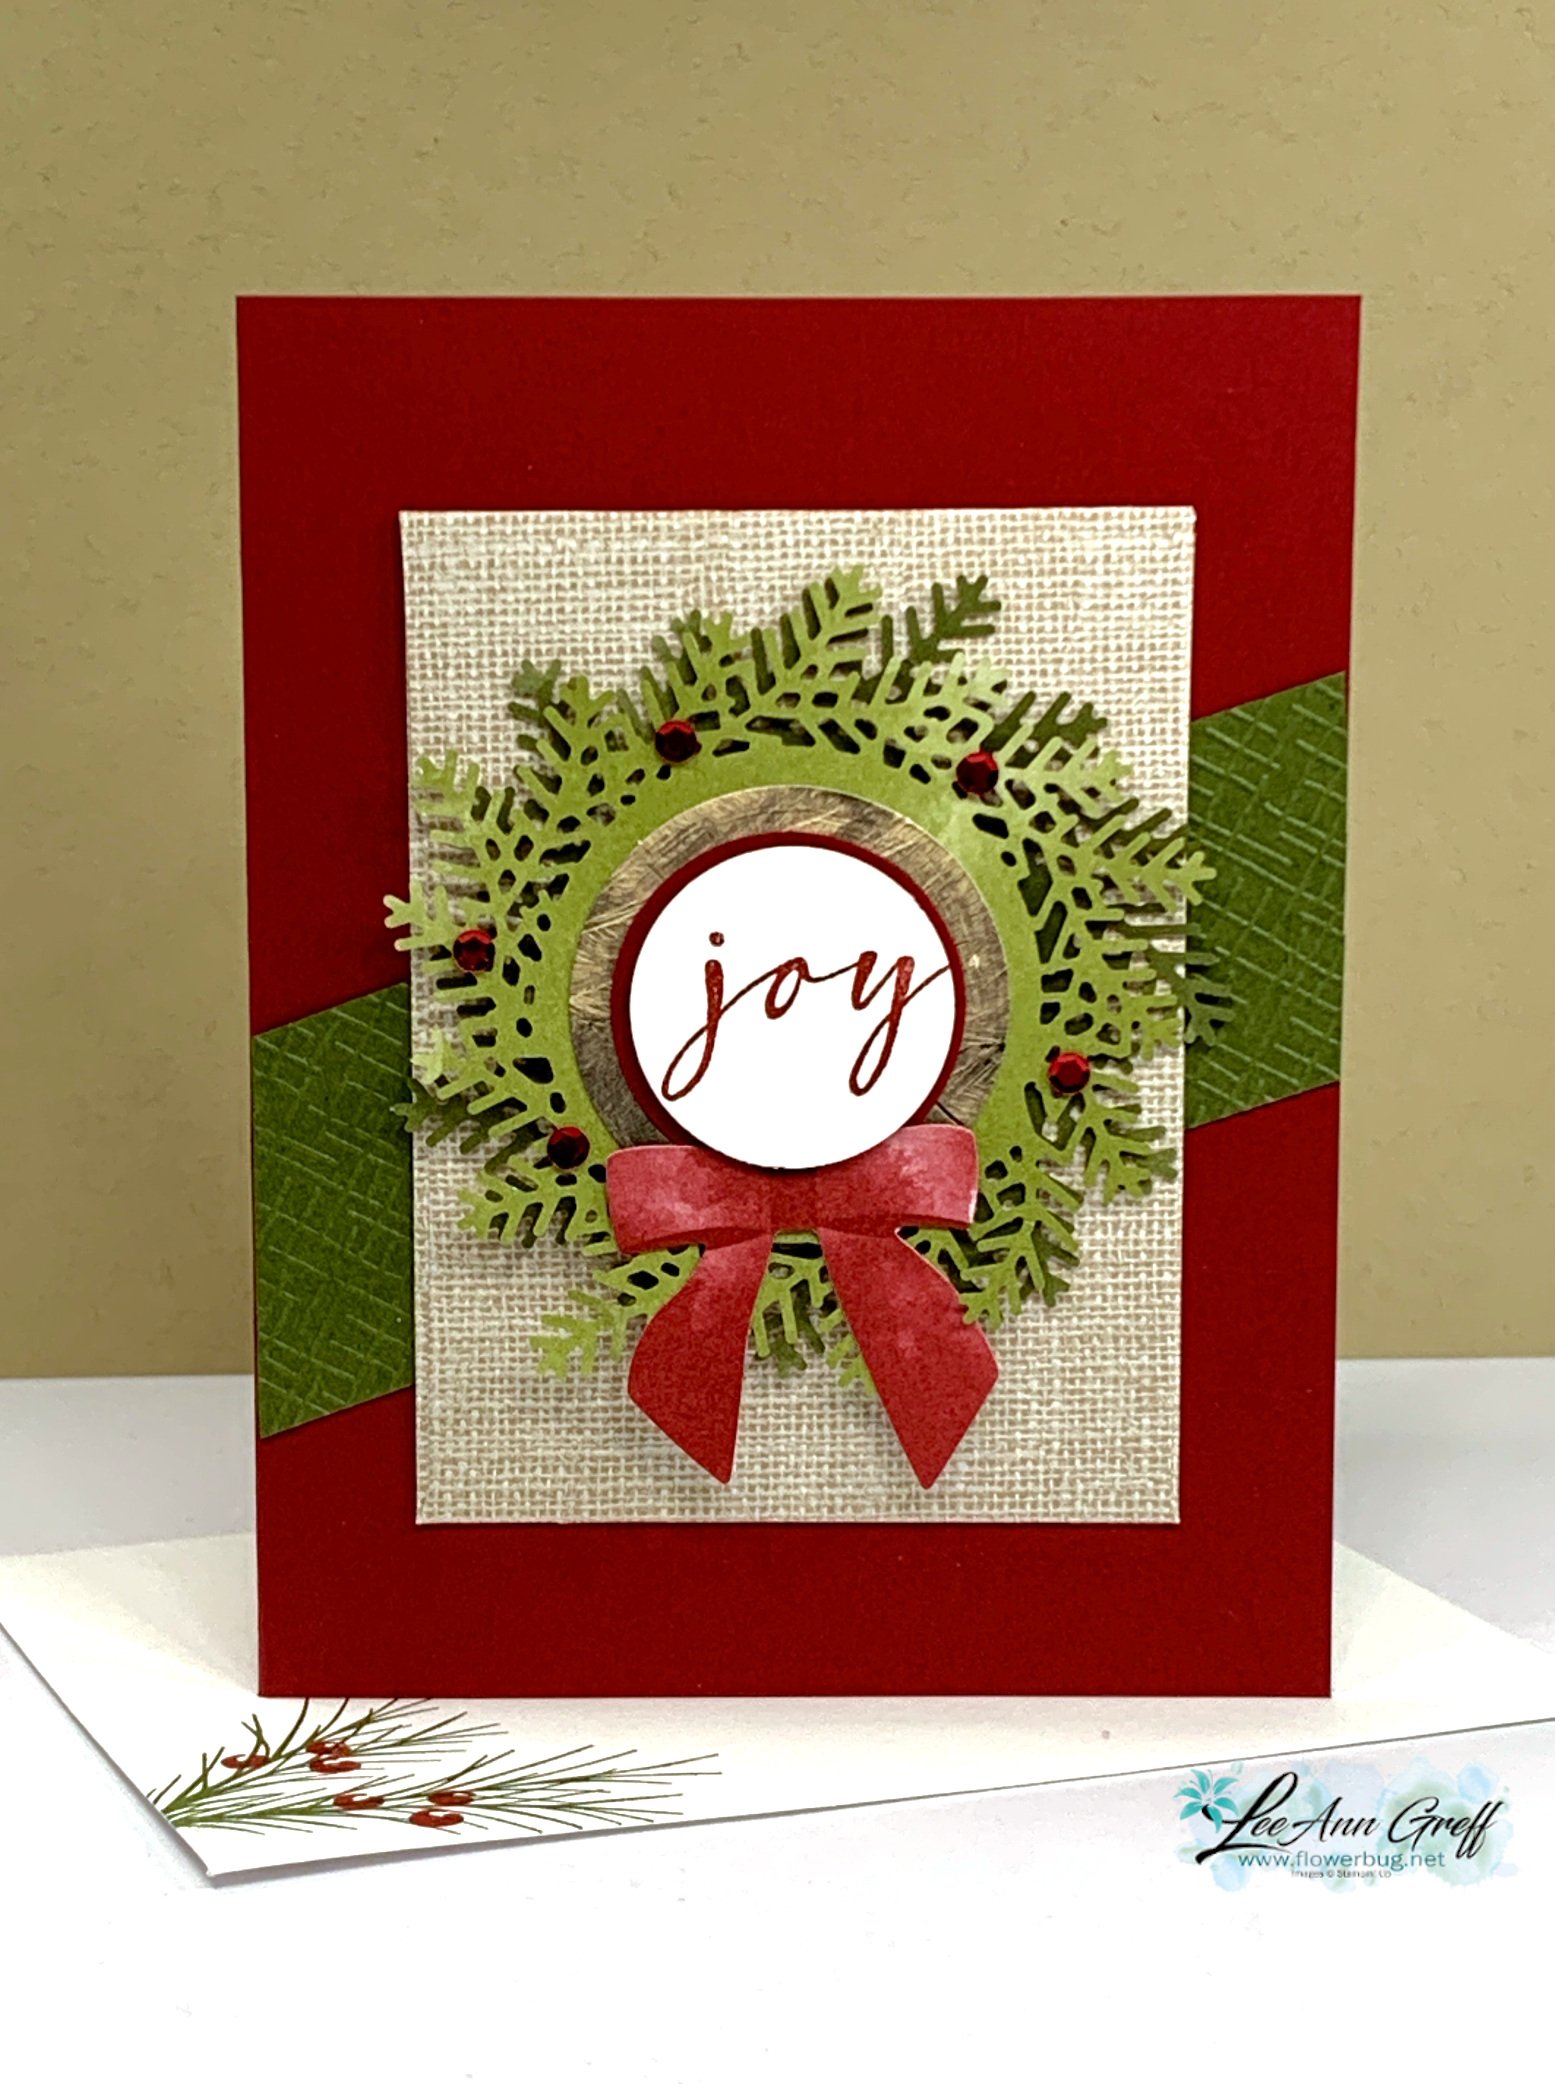
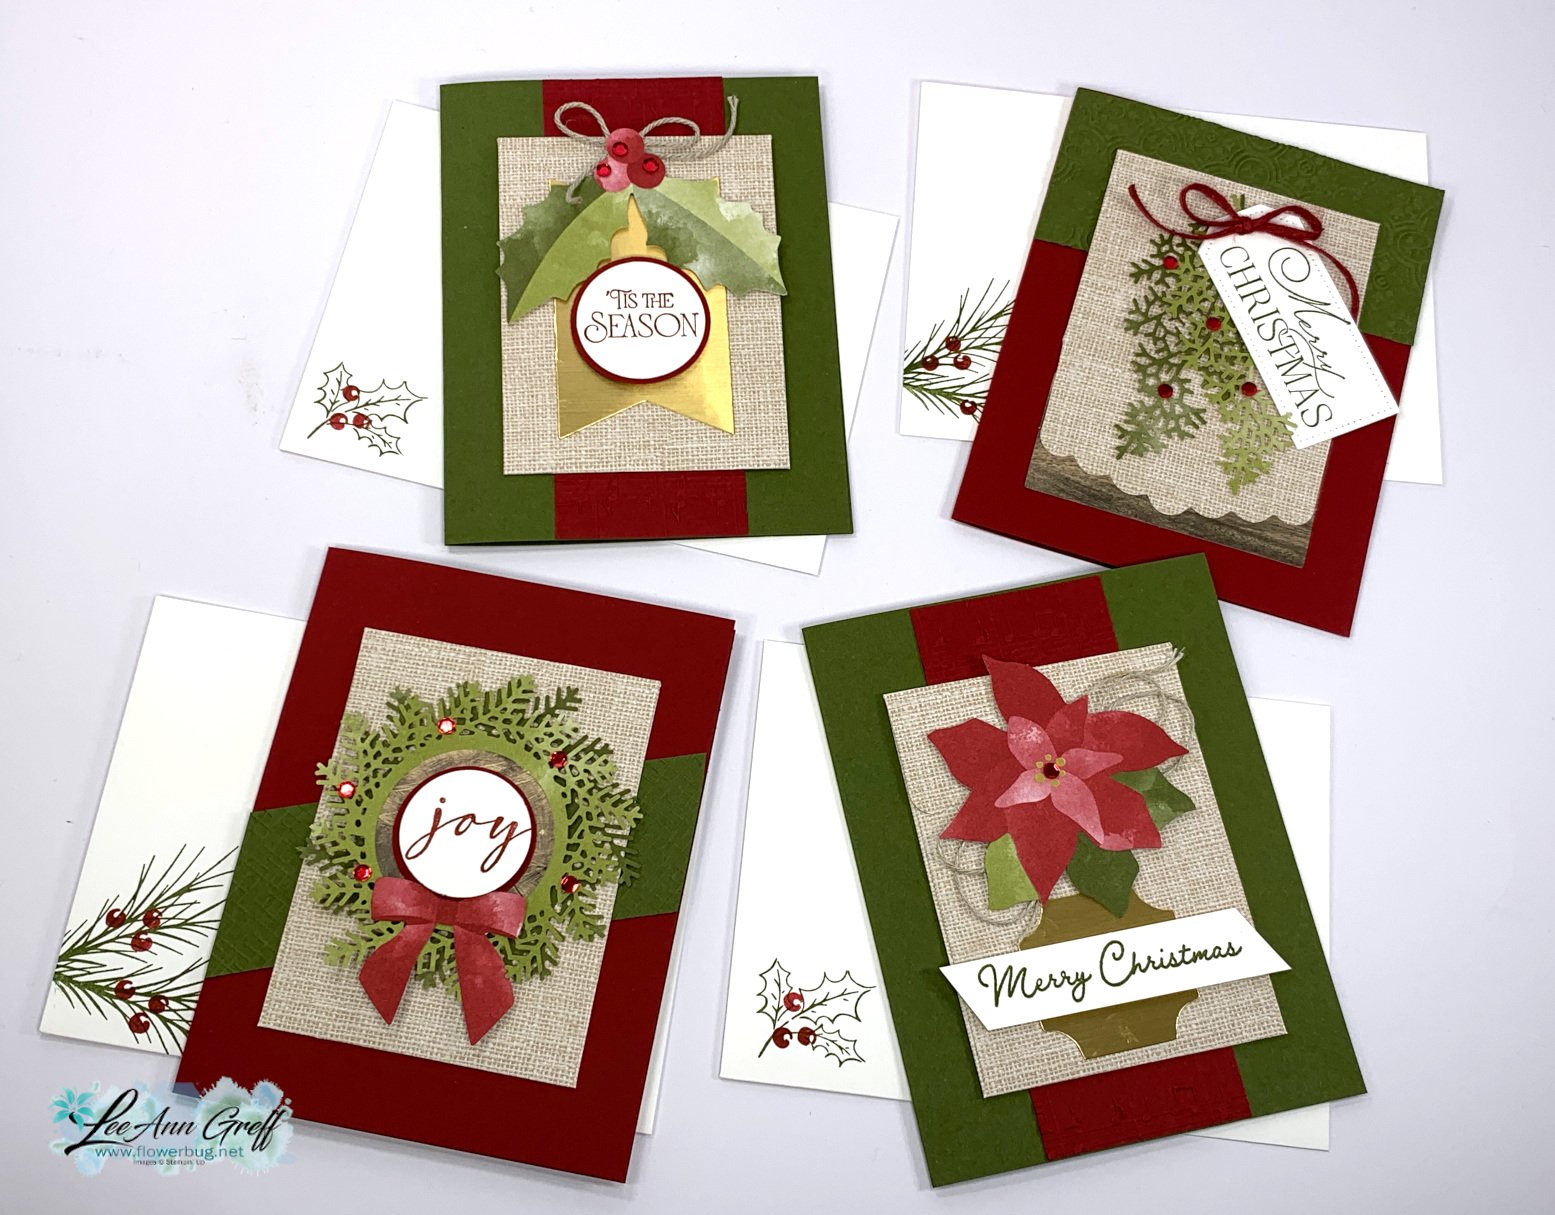
    I created these pretty cards with the Rustic Christmas Countdown kit.  It's meant to be used as an advent calendar but I thought they'd make great Christmas cards. 

    I will not be surprised if this kit sells out soon.  It's gorgeous!  The envelopes for the advent calendar are approximately 3" X 4"; a good size to add a treat inside. 

    I added Mossy Meadow & Cherry Cobbler card bases, some textured strips of the same colors and a few greetings. 

    The greetings mostly cover up the numbers printed on the wood & gold paper elements in the kit. 

    For greetings I used the Brightest Glow (annual catalog) and Beary Cute (Holiday catalog) along with circle punches and Tailored Tags dies. 

    We made these projects at my October Flowerbug's Team meeting. So pretty but super easy!


    You could make up to 25 cards using this kit just by adding card bases, a few layers and greetings.  The red adhesive-backed sequins, Dimensionals, Cherry Cobbler and craft twine all comes in the kit. 


    See this kit here online.  Our Christmas kits can sell out quick; so don't wait too long.  You never know if it will be back in time for Christmas. 

    The kits is gorgeous as an advent project as well!  It also includes the cutest clothespins to close the envelopes. 

    While you're shopping our kits be sure to check out the huge selection of kits in our Kit Collection. These kits are all inclusive and can be the answer to quick, seamless crafting or a fabulous gift for any creative person.  See them all here. 


    ~~~

    October Specials: 

    Amazing Starter Kit choices! 

    Choose one and enjoy the 20% discount on all future orders! Click here

    *current host code: HTHK4TQU or Y7VMN2TC

    *Get free glitter gems with online orders over $55 (Please use a host code)

    Leave a Reply

    Your email address will not be published. Required fields are marked *

  • Heartfelt Hexagon cards with free printable project sheets


    Today I'm sharing a few more cards made with the Heartfelt Hexagon punch bundle. See the first project here. 

    When creating this next card I chose to use the Delightful Floral designer paper seen here. I had a few large scraps in the package and created this card:

    It's a classic layout that's perfect for using up those random pieces of designer paper you might have.  I like to layer one of the pieces to bring in another color layer; Pretty Peacock here. Then I simply added a layered Hexagon punch combined with the pretty Elegant Edge Tag Topper punch. You can see it here online.  

    My Lemon Lime Twist strip is 1" X 3 1/2" which is perfect for that delicate edge.  

    It's quite easy to layer the Hexagon punch.  Punch a second contrasting piece, cut it in half horizontally and add the stamped punched piece to it leaving a small border at the top & bottom.  You can see how this is done in the video below. 

    *Here's the free project sheet for this card; it's printable too!  Download Heartfelt Hexagon & Delightful Floral cards

    ~~~

    Next is an easy card layout featuring designer paper scraps.  This time I chose the beautiful All About Autumn specialty designer paper.  This has been so popular they cannot keep it in stock!  It's currently unavailable but should return the week of October 30th.  

    *Click on this link to get the printable free project sheet: Download Heartfelt Hexagon & All About Autumn DSP

    Here's the new Heartfelt Hexagon bundle. Isn't it great?! See it online here. 

    Below is the video on these cards and another fun fold card. 

    ~~~

    October Specials: 

    Amazing Starter Kit choices! 

    Choose one and enjoy the 20% discount on all future orders! Click here

    *current host code: HTHK4TQU or Y7VMN2TC

    *Get free glitter gems with online orders over $55 (Please use a host code)

    Leave a Reply

    Your email address will not be published. Required fields are marked *


Notice: LeeAnn Greff, Independent Stampin’ Up! Demonstrator, Manager. The content of this website is my sole responsibility as an independent Stampin’ Up! demonstrator and the use of, and content of, the classes, services, or products offered on this website is not endorsed by Stampin’ Up! Copyright 2025