/


Latest Post

Use the Double Wonder Template to make 11 quick cards! Join me Thursday night!


Do you ever planned a stamping session focusing on just a few products? It's easy to get overwhelmed with everything you own.  Using this method is actually quite liberating and fuels the creative process.  I've started doing that more and more often especially when planning my card kits to go.  I pick Stampin' Up! products from the same suite and choose some sketches or layouts for card ideas.  the process is so enjoyable this way!  

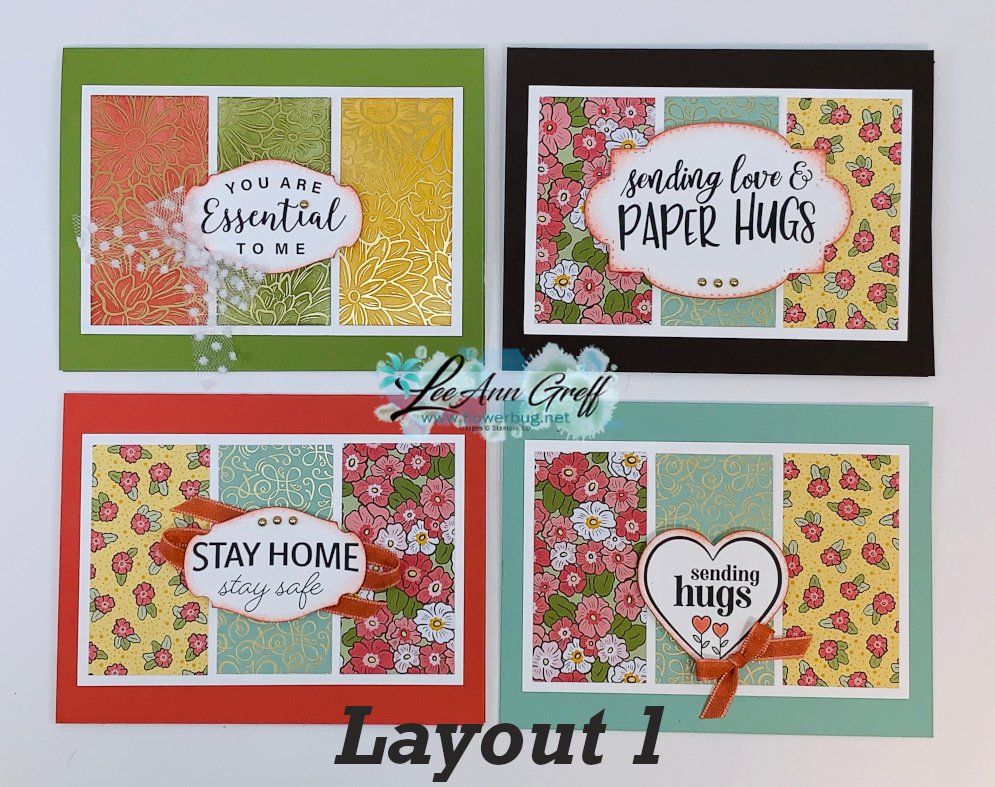
Lately I've been seeing groups of cards using the Double Wonder template and had to try it.  It was originally designed by Shannon West from Stampin' Up!  It's so clever!! You start out with 2 pieces of 6" X 12" designer paper and using the pieces you can quickly have 11 finished cards!

Look at these! I'll be making these cards Live tomorrow night at 7 pm CT. Join me either here on FB or on Zoom.  
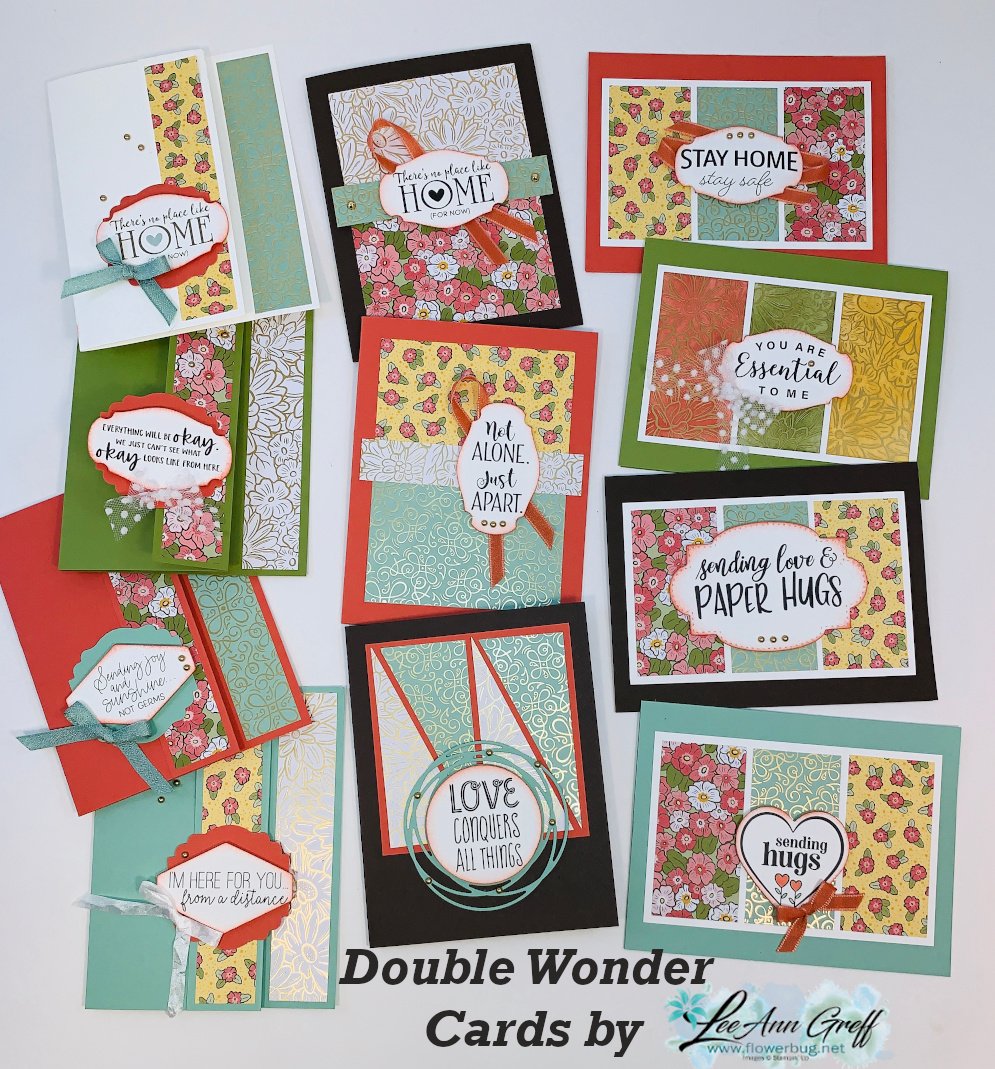
Here are the steps: 

  1. Pick out 2 different sheets of 6 X 12" designer paper and 11 card bases.  Make sure you have some ribbons or embellishments to match.  
  2. Use the template below to cut your designer paper; cutting both at once. 
  3. Grab some scraps of White and coordinating colors for punches/greetings. 
  4. Cut 4 pieces of layering card stock at 3 1/4" X 5" and one 3 3/4" square for the bonus card. (I used White)
  5. Choose a stamp set & ink to coordinate. 
  6. Or use the new Share Sunshine Covid-19 digital download like I did for my greetings. No stamping needed!  You can purchase that here. https://covid19.stampinup.com/products/giving-back-us-ca Price: $12.00 USD
  7. Come back here tomorrow night so we can stamp together.
  8. Or use this link to join via Zoom. *see tips on zoom meetings below  https://us02web.zoom.us/j/88215870191

I chose to use the new Ornate Garden designer paper for my cards.  Anything goes but a non directional design is best; try not to choose a paper that needs to be north and south.  

Below is the template but click here to download the Double Wonder Designer Paper cards & template 

Zoom meeting tips:

  1. You will need access to a camera and/or microphone to participate.
  2. You may need to download Zoom to join; depending on the device you are using. It's free!  
  3. You will be muted when you join to prevent a lot of background noises. 
  4. If you'd like to speak you can un-mute yourself you can do so; or press the spacebar. 

~~~~

Online orders please use this host code for April:

RBXHNWMV

If the order is over $55 you'll get a free Simple Shammy cleaner from me! 

Check out the retiring products below; while supplies last!

All Posts

  • Sentimental Swirls; a super fun stamp set with a Video for multiple card ideas!


    I played with the Sentimental Swirls stamp set on last Tuesday's FB Live video.  Honestly I didn't want to stop!  This set is so friendly and easy to create with.  

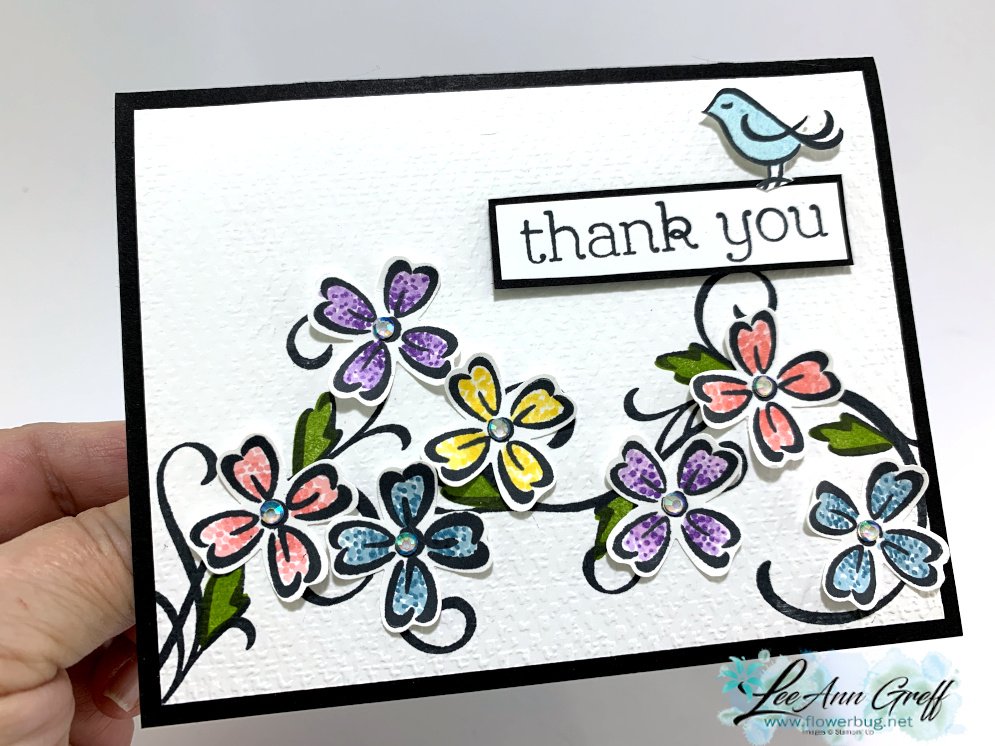
    Here I stamped the swirls and leaves first using Black Memento ink. I added the solid leaf image using Granny Apple Green.  Then added texture with the Tasteful Textile embossing folder. 

    The flowers were stamped on scraps of White paper and colored in with Blends markers. I curled them a bit and added with mini dimensionals.  The bird is fussy cut and added with Dimensionals. 

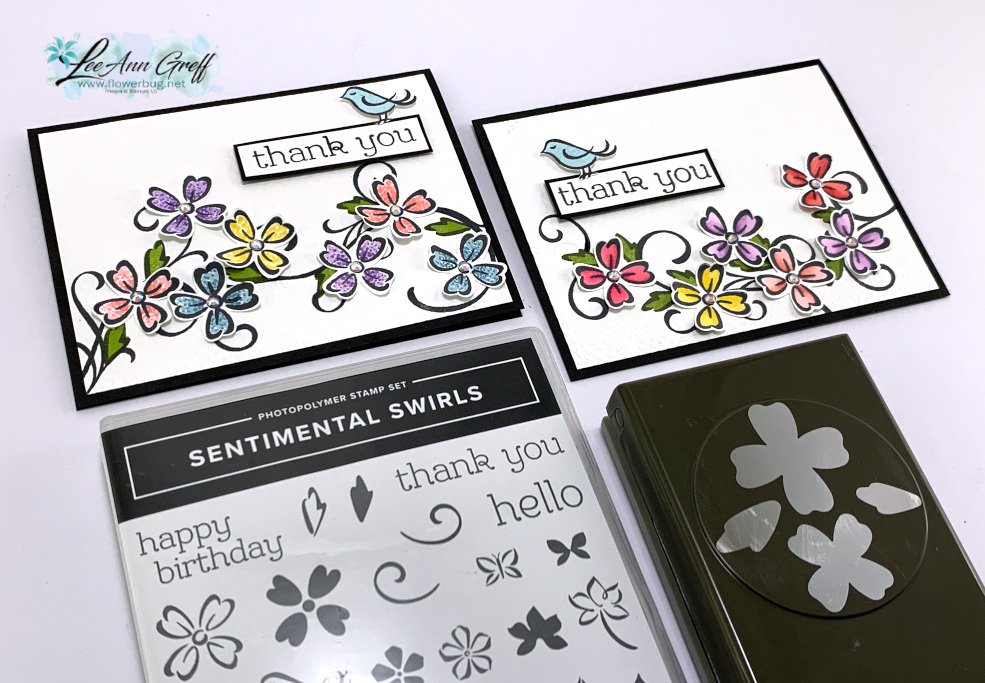
    The card on the left below features the dot coloring technique.  I used the bullet tip of my Blends markers to color the flowers.  Fun technique!  Watch the video below to see it in action. 


    This set coordinates beautifully with the Flowers & Leaves punch in the Annual Catalog.  Below you see both cards along with the coordinating stamp set & punch. 

    I love that this stamp set includes outline & solid images to match.  

    For the next card I again stamped the lovely swirl in Black Memento ink onto a scalloped rectangle from the Scalloped Contours dies.  I added a few sets of leaves here and there among the swirls.  The flowers were stamped on a separate scrap of White and punched out.  

    I sure love the greetings in this set!  Versatile and such cute font.  


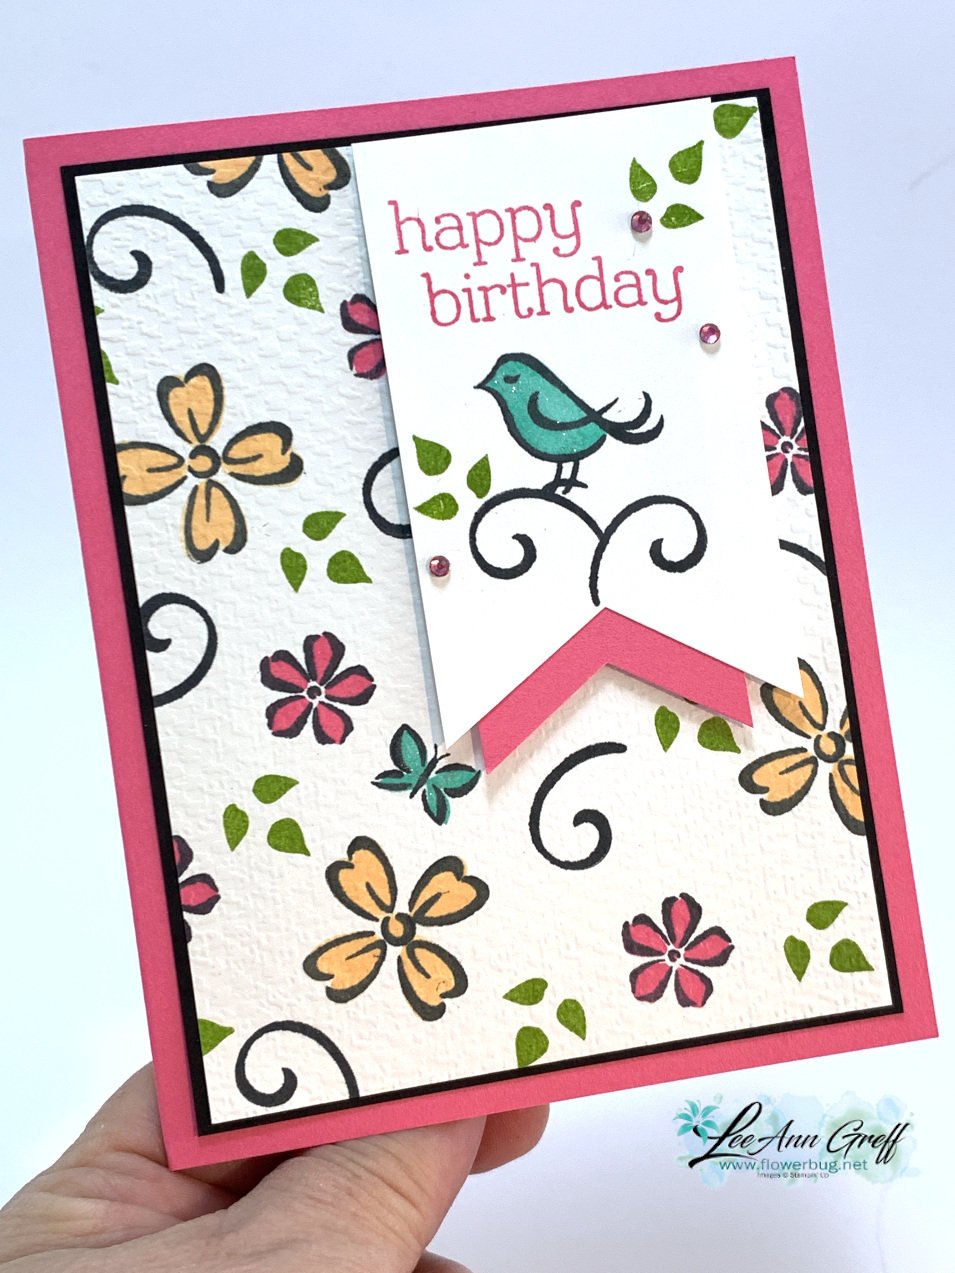
    I also shared this cute card too.  I stamped a scattered background on a piece of White CS before texturing it with the same Tasteful Textile embossing folder.  It is my 'go to' choice for a simple texture.  

    The color here is Polished Pink with bits of Pale Papaya, Granny Apple Green & Coastal Cabana. The White tag is 2" X 3 1/4"  & the smaller Polished Pink is 1 3/4" wide.

    Click on the photo below to watch the video for these projects & more too!

    ~~~

    March Specials: 

    Host codes: FS239K9C

     *click here to order 

    If your order is over $50 you'll receive a free embellishment

    from the Jan-June catalog in your thank you card.


    Annual Catalog Retiring List is out March 23rd!  Deep discounts coming! 

    Don't forget about my loyalty rewards! 

    Click here to download yours and earn a $50 shopping spree!  

    Leave a Reply

    Your email address will not be published. Required fields are marked *

  • How to achieve the Floating Technique? Lots of examples!


    Our current Team creative challenge for my Flowerbug's group is to make a card using the Floating Technique.  It's a fun technique that uses a window sheet or transparency.  

    Here are some of mine I shared on a recent Facebook Live video you can see here. 

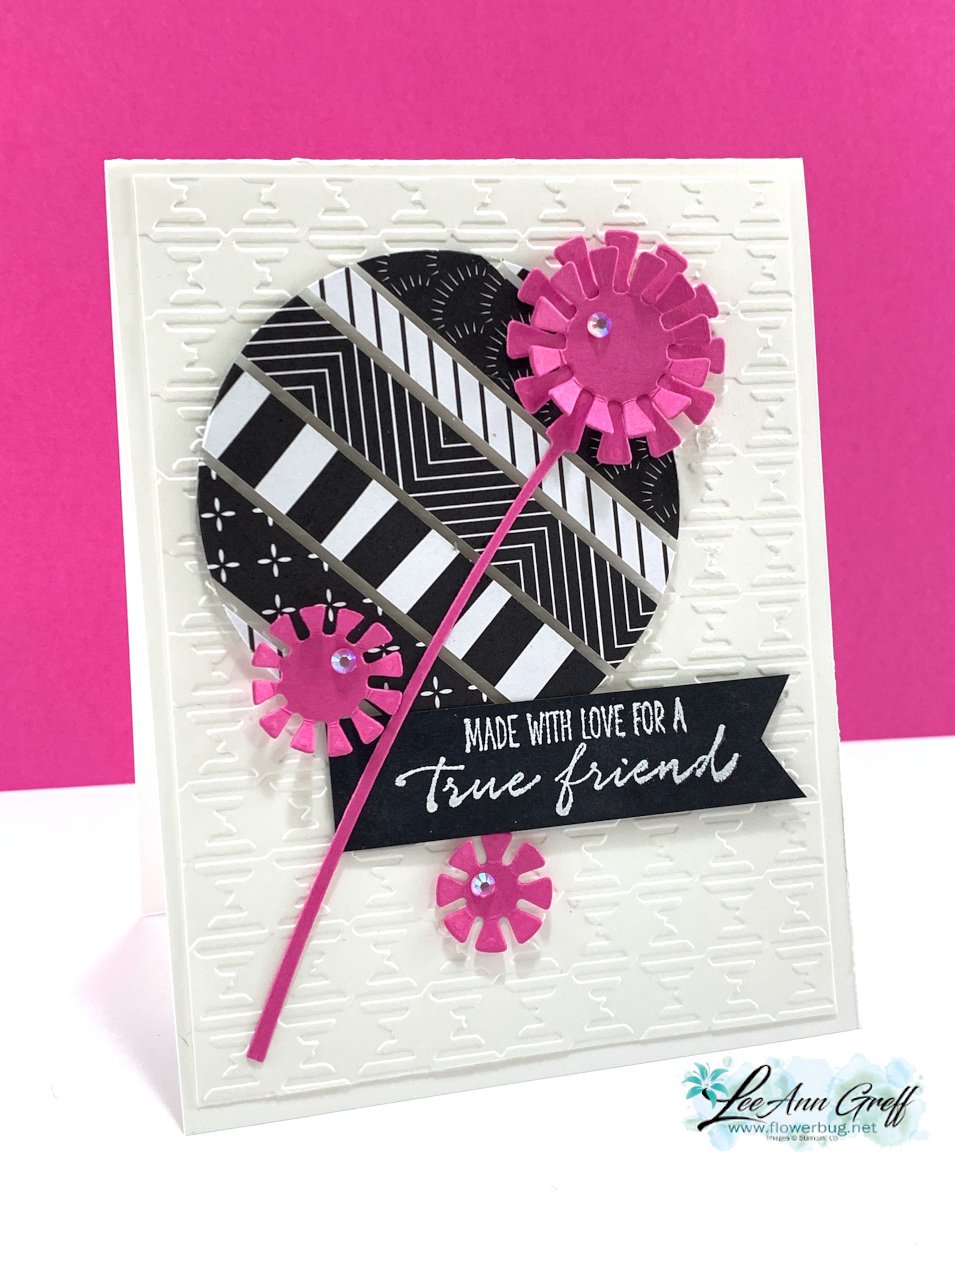
    This first one features Black & White with a 'pop' of color – Magenta Madness in this case. Magenta Madness is retiring next week!   

    I used the Dandy Wishes dies and the Layering Circles dies here.  I adhered a bunch of strips of the All Together designer paper to a window sheet, leaving space between them.  I cut it out with the largest circle in the set and popped it up on a Gingham textured White layer. 

    I added die-cuts from the neat Dandy Wishes dies and a heat embossed image from the Garden Wishes stamp set. This set is in a bundle with the Dandy Wishes dies and on sale in March!  See it here. 

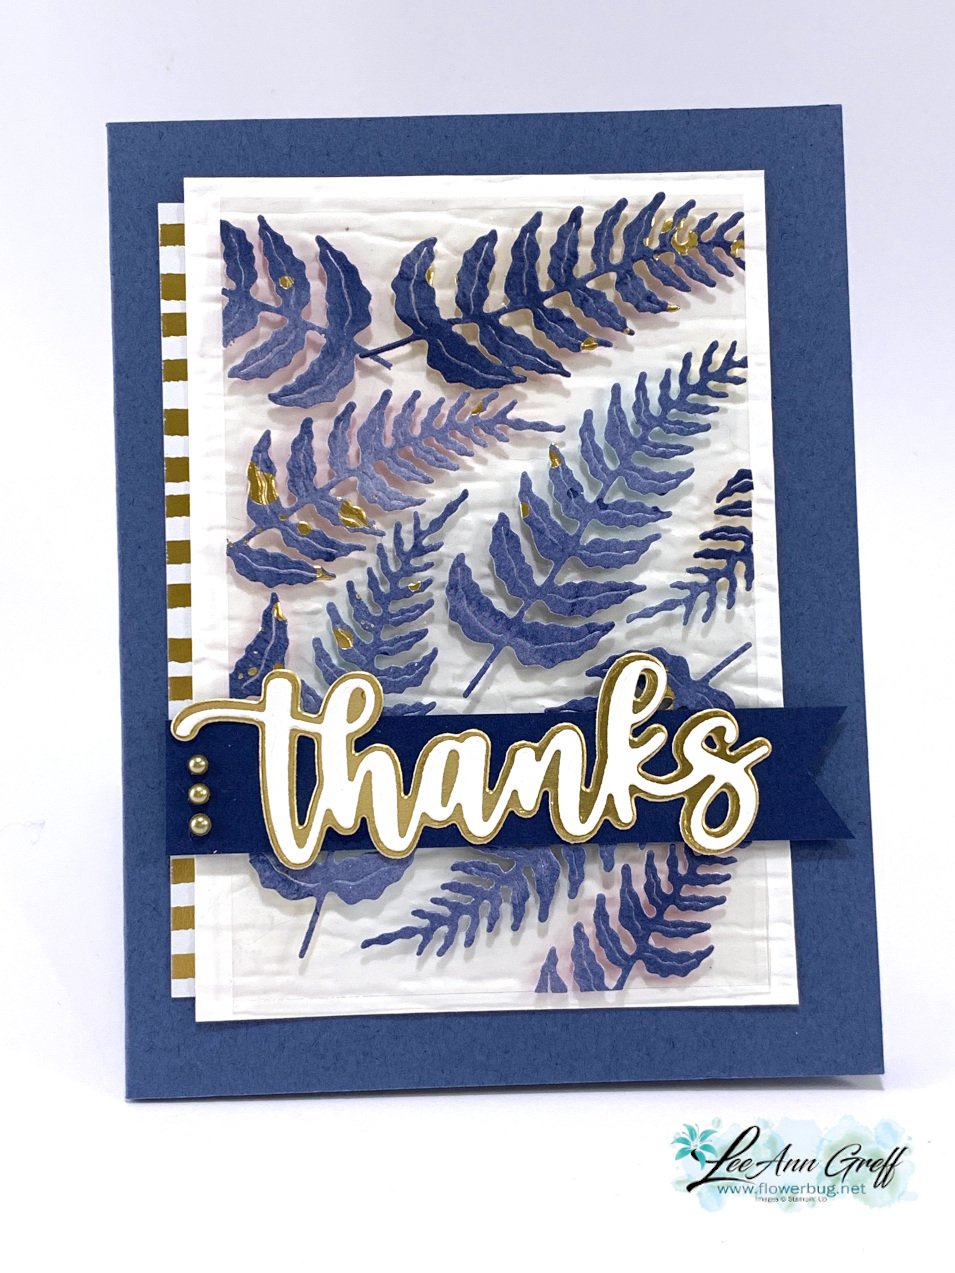
    This next card features Misty Moonlight and the Abstract Beauty DSP.  I cut the feathers from this pretty DSP that has touches of Gold on it using the Iconic dies seen here.  

    For this card the window sheet is a simple rectangle.  After adding the feathers I trimmed off the excess and added it to the card with mini dimensionals.  

    Other details: 

    • the greeting die-cuts are the Amazing Thanks dies seen here.
    • The textured White layer is done with the Bark 3D embossing folder.
    • That strip of gold & white strips is also from the Abstract Beauty DSP. 
    • Colors are Gold, White, Misty Moonlight and Night of Navy

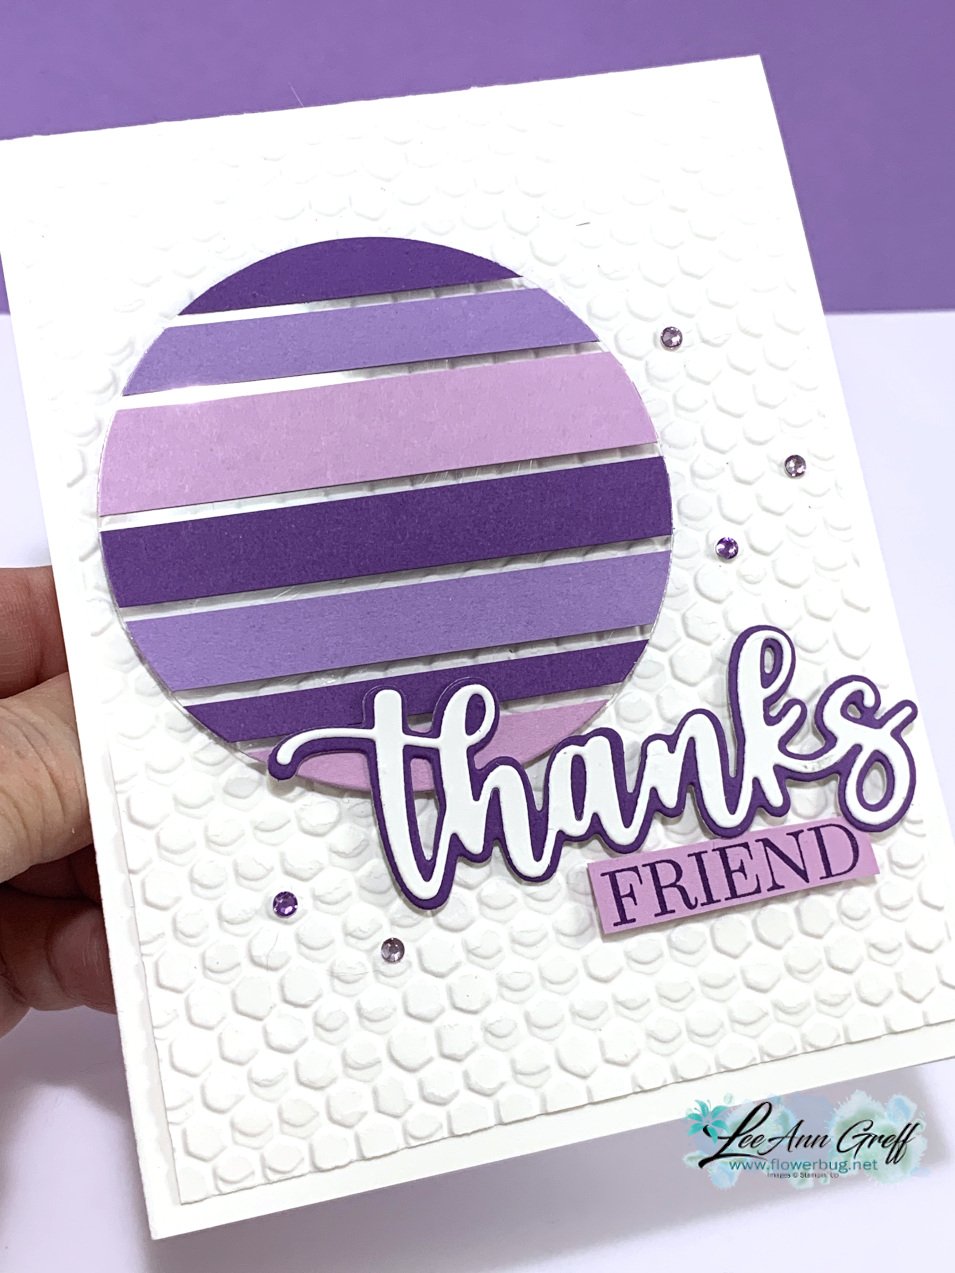
    Next is a card done in purples – Fresh Freesia, Highland Heather & Gorgeous Grape.  

    Details:

    • Layering Circle & Amazing Thanks dies
    • Greeting stamped from Special Moments SAB set
    • Texture is Hive 3D folder seen here 
    • Basic Rhinestone jewels were colored purple with Blends markers 

    This next sample features the Artistic dies along with the SAB Simply Marbelous DSP. 

    Colors are Basic Gray, White & Black; very monochromatic.  The greeting is from Friendly Hello SAB set, heat embossed.  

    Tip; to adhere the finely cut die-cut pieces I used our Adhesive Sheets seen here.  They're the best solution for these types of die-cuts. 

    You can see how I achieved these cards on the link below; just click on the photo to watch. 

    ~~~

    March Specials: 

    Host codes: FS239K9C

     *click here to order 

    If your order is over $50 you'll receive a free embellishment

    from the Jan-June catalog in your thank you card.

    Annual Catalog Retiring List is out March 23rd!  Deep discounts coming! 

    Don't forget about my loyalty rewards! 

    Click here to download yours and earn a $50 shopping spree!  

    Leave a Reply

    Your email address will not be published. Required fields are marked *

  • 2 different card ideas for a ‘Mystery Card challenge’ with Sentimental Swirls with video


    Every few months I offer a 'Mystery Card' challenge to my Flowerbug's Team.  They can opt in to receive a packet from me and I ask that they use some of the pieces in the packet to create a project and share it on our Team page.  They can add anything to the card that they want to. 

    I shared these ideas in the video I made on my weekly FB Live. Click here to watch it. 

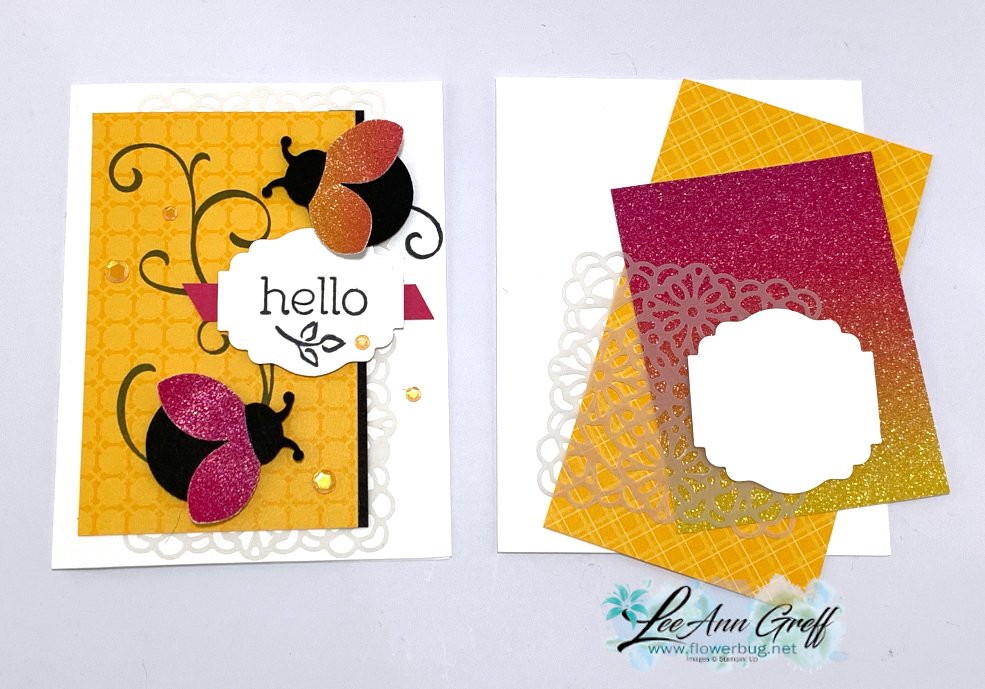
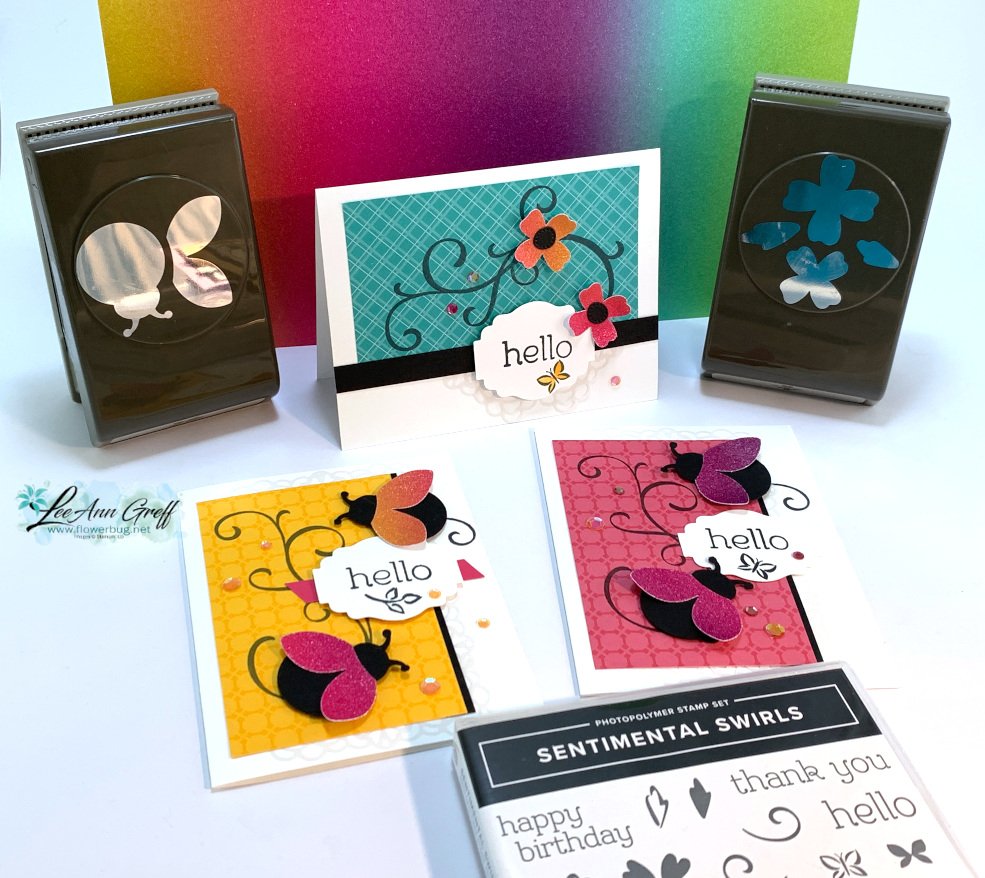
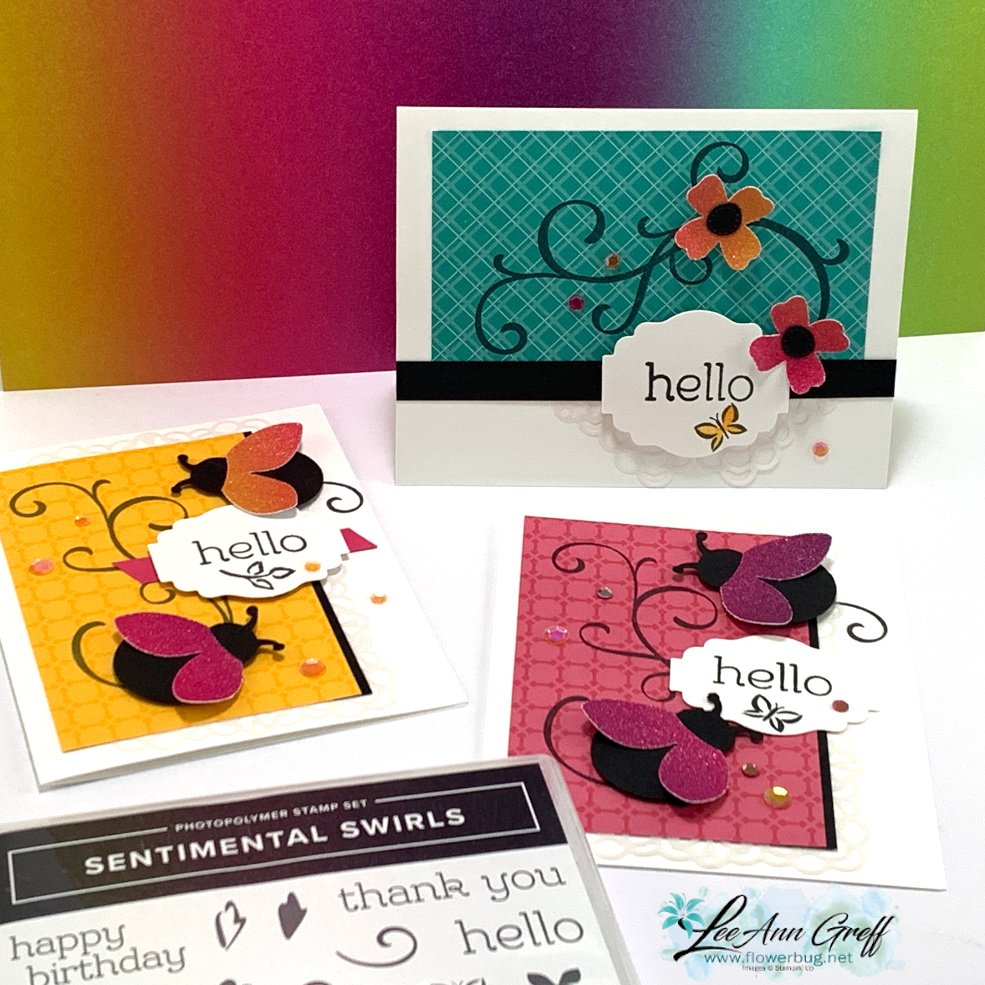
    This time I focused on Brights DSP, vellum doilies, a Label Me Lovely punched piece and our Rainbow Glimmer paper in the annual catalog. 

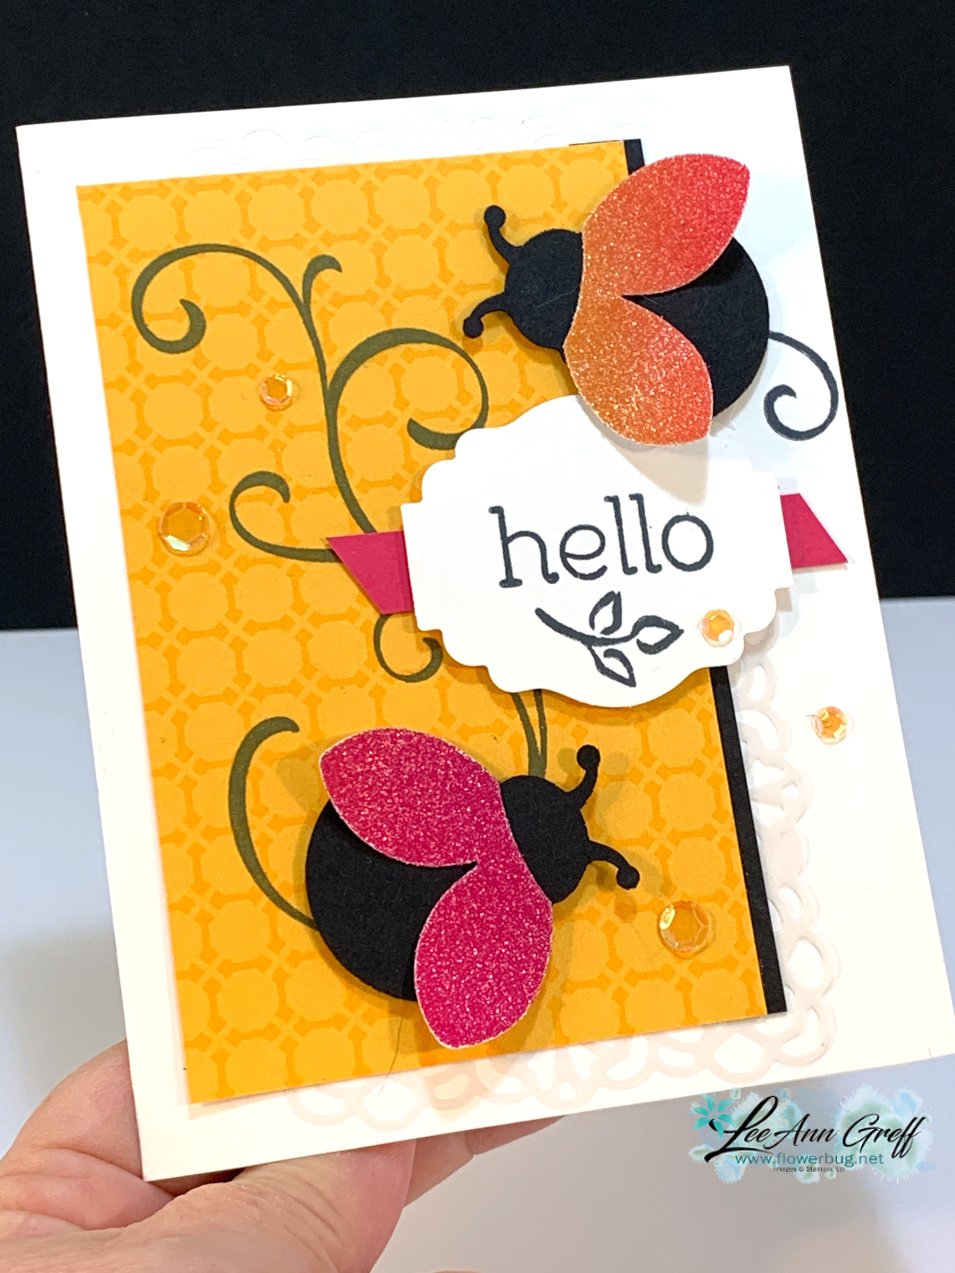
    I pulled out the Sentimental Swirls stamp set seen here for my cards and added Black accents and a strip of Melon Mambo. 

    I've always loved swirl images so this set was an easy choice.  Then add in the cute greetings (most are my 'go to' favorites) and 2-step stamp images and it's a hit! 

    The card base is white, the DSP was Mango Melody and the Rainbow Glimmer paper had pinks & orange tones.  I used the Ladybug Builder punch for Black bodies & glimmer wings.  I cut the vellum doily in half on the diagonal to add it on the upper and lower part of the card.  A few Artistry adhesive-backed sequins finish it off!

    I made a few more with other 'mystery card' packets. This one had Bermuda Bay DSP in it and similar colors of Rainbow Glimmer paper.  I think the bright colors are perfect together!  The orange & pink really pop on the Bermuda Bay! 

    The flowers are from the Flowers & Leaves punch and the flower centers are die-cuts from the Pierced Blooms dies. Here I cut the doily in half again and added both pieces at the bottom, under the greeting. 


    The Rainbow Glimmer paper is in the Annual Catalog and will likely retire next week.  Get it here while you still can. You can see it in the photos above & below.  


    You might wonder where I got that greeting shape.  It's actually the Label Me Lovely punch.  But I altered the size by punching it twice; removing some of it so it was much smaller.  

    To do this easily, I stamp on a scrap of White and punch it out as usual.  Then I adhere a strip of card stock (black in the photo above) to the edge of the punched piece and insert it back into the punch.  The strip of card stock allows me to 'reach' and adjust the punch easily.  

    Which card is your favorite? 

    You'll enjoy the tips & ideas in the video below; click on the photo to watch it. 


    ~~~

    March Specials: 

    Host codes: FS239K9C

     *click here to order 

    If your order is over $50 you'll receive a free embellishment

    from the Jan-June catalog in your thank you card.

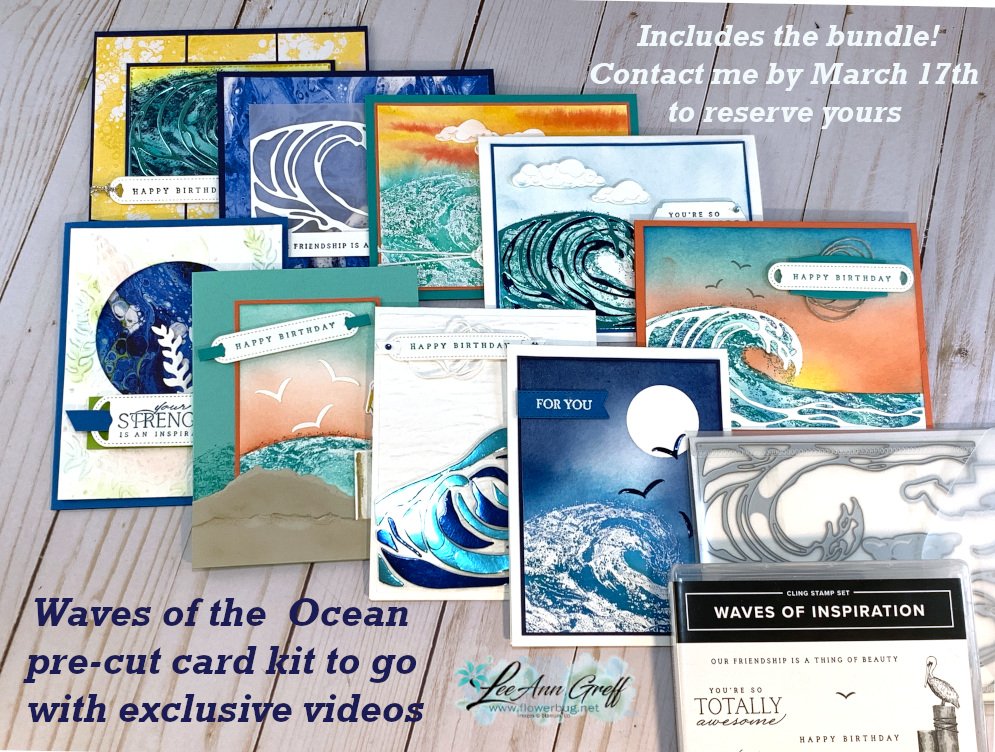
    Email me to opt in for my Waves card kit to go here; it includes the Waves bundle!

    Or the Flowering Fields kit seen here. 


    Don't forget about my loyalty rewards! 

    Click here to download yours and earn a $50 shopping spree!  

    Leave a Reply

    Your email address will not be published. Required fields are marked *


Notice: LeeAnn Greff, Independent Stampin’ Up! Demonstrator, Manager. The content of this website is my sole responsibility as an independent Stampin’ Up! demonstrator and the use of, and content of, the classes, services, or products offered on this website is not endorsed by Stampin’ Up! Copyright 2025