If you've followed me for awhile you may remember I used to do a Punch Art Wednesday post almost every week! I loved creating things with punches. But I've gotten away from that since my business has grown. But I think you'll find some great punch art in these projects!
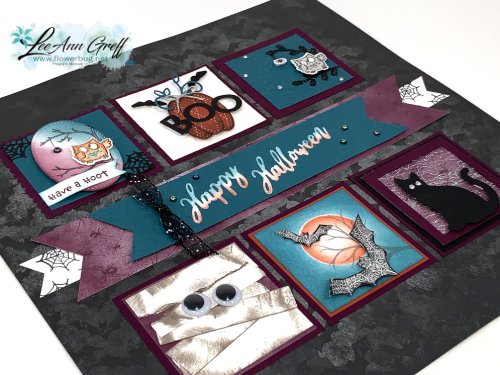
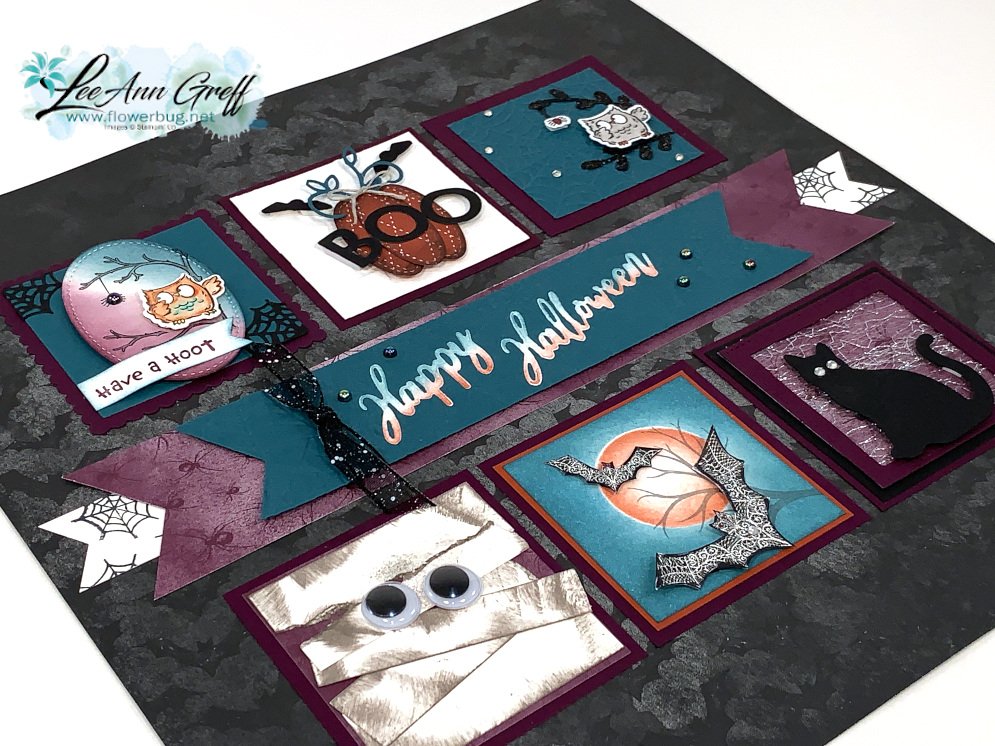
My Flowerbug's Team decided to do a Halloween sampler swap for a home decor piece. We chose to use the Magic in This Night designer paper as our theme & colors. I had enough pieces to create 2 of them. Look at these!
Isn't it incredible? Each so unique and all together create a fabulous home decor piece!
These 3" squares are adhered to a full 12" sheet of the Magic in This Night designer paper. I'll try to give some details on these squares.
I created the banners from the Word Wishes dies in White card stock. I sponged the upper and lower areas with Pretty Peacock & Cajun Craze inks. I stamped spider webs from the Banner Year stamp set on the White strip.
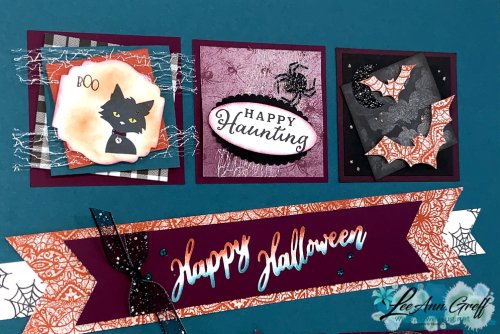
A mummy made from sponged White CS strips, a sponged night sky & masked moon with fussy cut bats from the Designer Paper and a punched cat on a Metallic Mesh ribbon background.
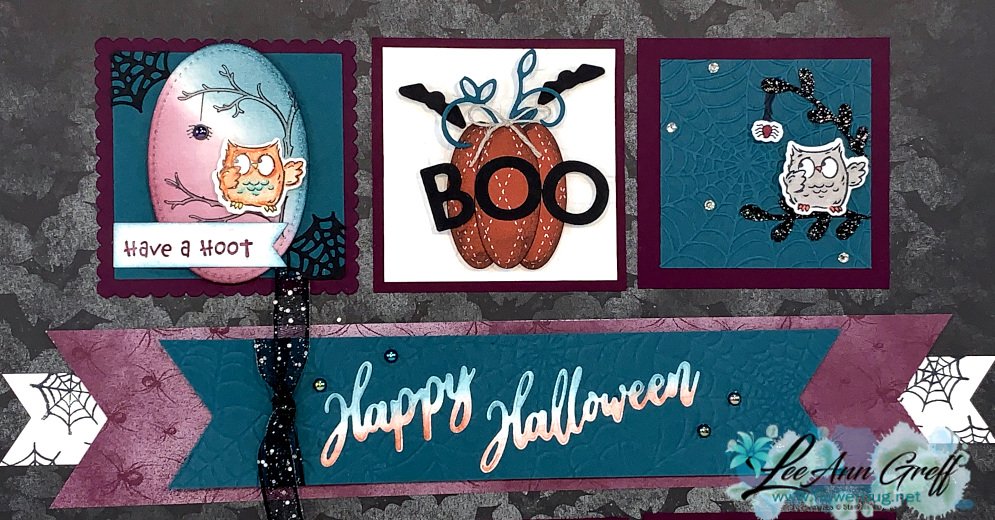
An owl from the Have a Hoot bundle, a punched pumpkin with the Playful Alphabet BOO and another owl on a Cobweb textured background with Black Glimmer branches.
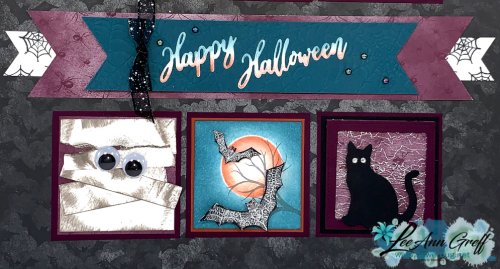
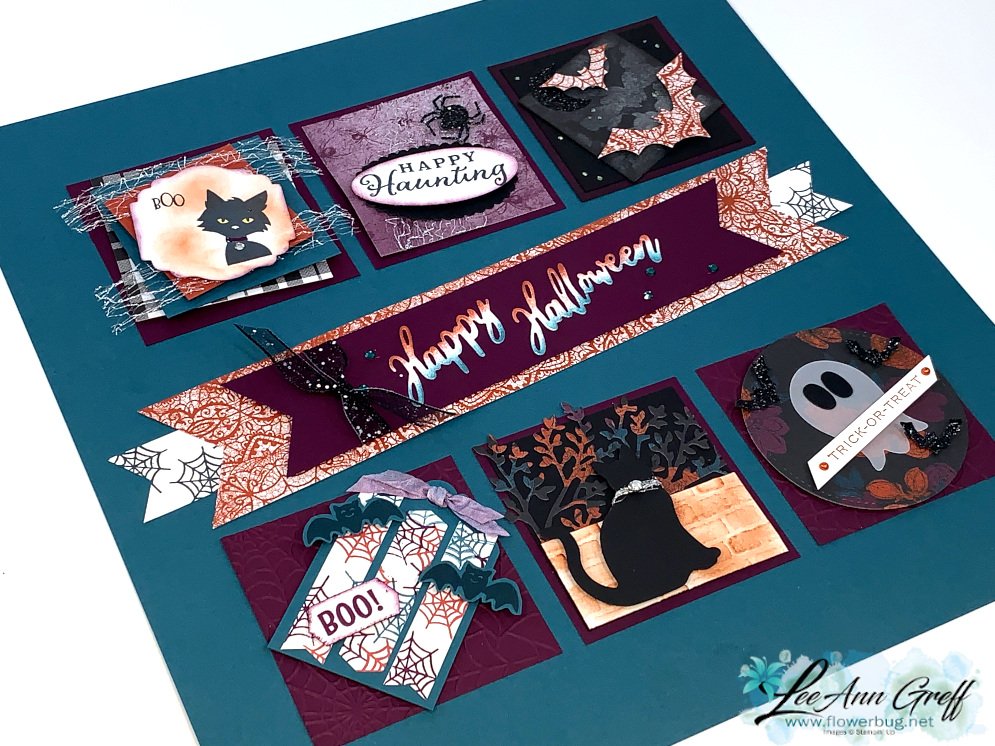
Below is an entirely different sampler!
These sampler squares are adhered to a 12 X 12" sheet of Pretty Peacock card stock.
From left to right; the first one is made with the Ghoulish Goodies stamp set, second is from the Banner Year and far right are bats fussy cut from the Designer Paper.
Left is a tag made with the Banner Year stamp set, the cat is on a die-cut from the Sweet Silhouettes dies & a textured brick 'wall' and last on the right is a punched ghost made with the Tulip punch! The eyes are from the 0's in the Playful Alphabet dies and the greeting from Hallows Night Magic set.
I LOVE seeing what my talented Team members create for our swaps. If you'd like to join my Team we'd love to have you; whether you like to swap or not! Click here to purchase the starter kit! The Get & Go Promotion is a fabulous deal and it ends in just 6 days!! Read about it here.
~~~
Current Host code is HYSHW6QB
Get a free package of All the Trimming embellishments in September with an
online order over $55.
*Remember that if your order is over $99 you should consider purchasing the Starter kit here.
And if it's over $150 you should definitely get the Starter kit.
Order online here
Get my Beautiful Autumn pdf tutorial free with any online order in September!
It includes directions, photos and measurements for 13 cards!
























Leave a Reply