/


Latest Post

Two-Tone Flora with Elegant Borders dies & a FREE project sheet!


In preparing my make & takes for my March Team meeting I knew I wanted to focus on the new Online Exclusives. I looked at the samples online for the Elegant Borders dies seen here and found this card made by Stampin' Up!'s artists:


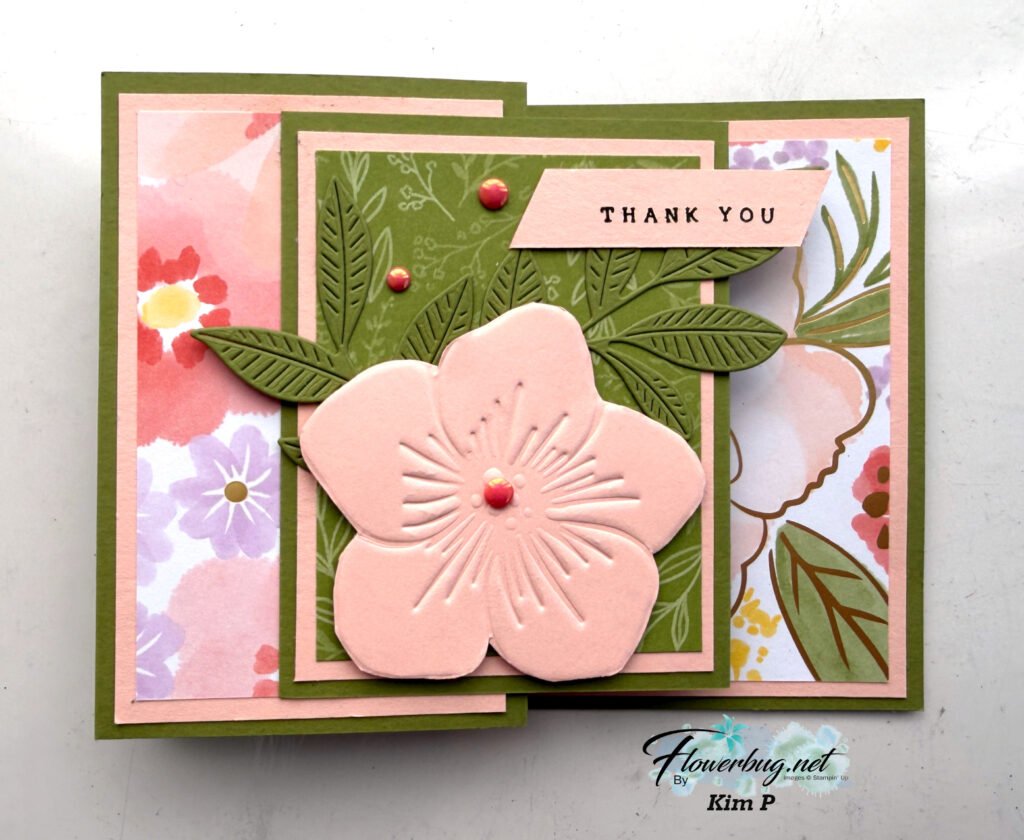
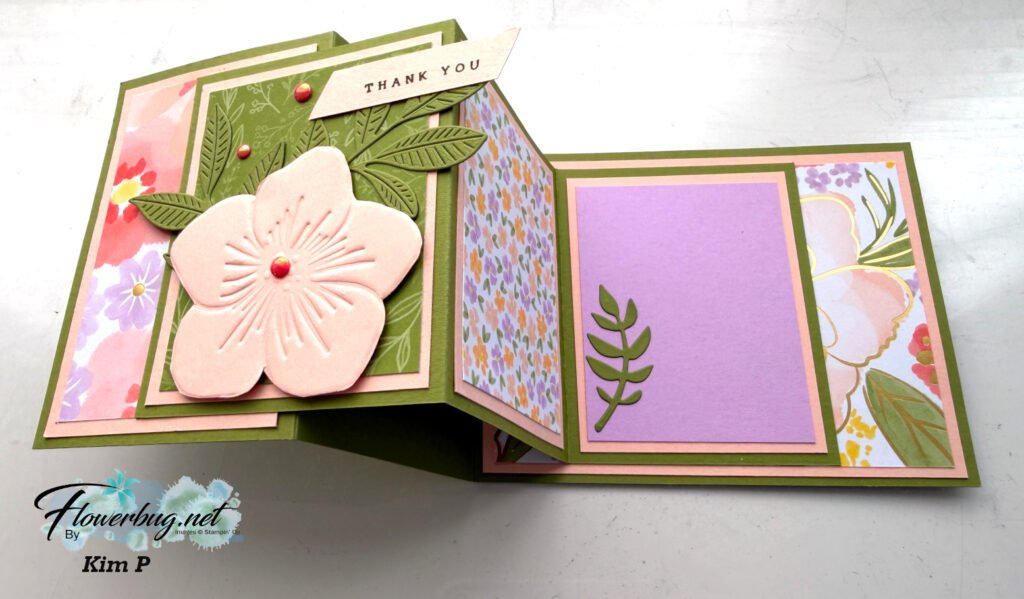
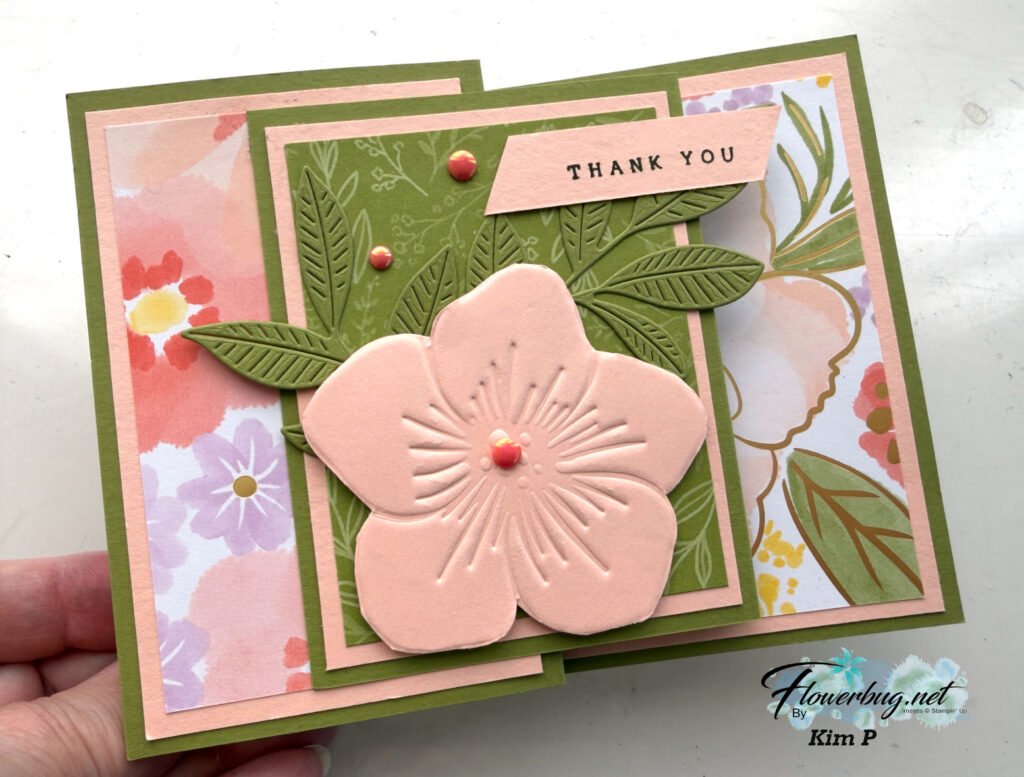
I decided to use the Two-Tone Floral bundle instead of the Pansies and came up with this card: 

Using samples from our printed catalog or online store can make stamping easier. Use a layout, technique or color combo as your inspiration.  My colors include Calypso Coral, Petal Pink, Soft Succulents and Poppy Parade. 

Isn't that elegant border die gorgeous?!   I also used to for the envelope flap edge. See the Elegant Border dies here. 

The upper and lower pieces of DSP are from the Pretty Prints; soon to retire from the Annual catalog.  See it here. 

It includes some of my favorite colors – Bermuda Bay, Blackberry Bliss, Calypso Coral and Evening Evergreen.  

I used the Stamparatus to stamp the die-cut flowers and leaves from the Two-Tone Flora bundle. Be sure to watch the video to see how. 

Download the project sheet.

Measurements: 

  • Calypso Coral card base 5 1/2" X 8 1/2"
  • White 5 1/2" X 4", inside 4 3/4" X 3 1/2", scrap for die-cuts
  • Pretty Prints DSP 5 1/2" X 1" – 2 pieces

In the video below I demonstrate this pretty card. Click here or on the photo below to watch the video.

~~~

March Specials:

See the new Online Exclusives here! 

*current host code: BFE4C2KM

Get a free class kit with online orders over $55 when using the host code above!

Earn free products with my loyalty rewards! 

Click here to download yours and earn a $50 shopping spree!

All Posts

  • Neat fun fold card 3 ways! With free tutorial & video


    We made this special card at my January card clubs. They could choose between 3 colors and themes too!

    I featured the Addressed to You stamp set for all three cards. See the cute ovals & rectangle with the ‘filled in’ images on the right? Those are all part of this unique stamp set! See it here.

    I used the retiring Textured Notes dies seen here. They’re the stitched edge rectangle dies used twice on this card. They are on the last chance list right now and reduced in price too!

    This card opens with a type of flip/flap feel. Here’s how we cut off the tabs on the card base. Once you score your card you’ll make a pencil mark from the top and bottom at 1″. Then trim off the corners.

    My colors include Pool Party, White and either Pretty in Pink, Fresh Freesia or Peach Pie.

    I created a free project sheet for this card with measurements, supplies and step by step directions. Click here to print or download it.

    More details:

    • I used the images that finished the lined oval & rectangle to decorate the inside ‘left’ edge on the cards.
    • We used Blends markers to color in the small images.
    • The DSP is the Beach Boardwalk designer paper for the left edge.
    • The greetings are from the stamp set called ‘The Right Words’ seen here. It’s one of my favorite greeting sets.

    I was in the middle of the video tutorial for this card but the video failed right before I started the project. And I made my last packet. So I do not have a video for it. But hopefully the project sheet above helps you out.

    ~~~

    February Specials

    Product of the Month is the new Painted Illusions 12 X 12″ designer paper

    Get the NEW Stampin’ Positioner FREE when you choose the Starter Kit in February! Click here

    Bonus Days – Redeem your coupons in February!

    February’s PDF of the Month!

    Two NEW kits just released here:

    Check out the Last Chance List; new items are added and available

    while supplies last

    Leave a Reply

    Your email address will not be published. Required fields are marked *

  • A new fun fold card with the Nature Walk suite; wow!


    Karen’s swap card blows me away! I haven’t seen a card fold like this one before and I just love her color choices too.

    Isn’t it beautiful?! Can you tell that the front, main layers are ‘caught’ on the diagonal textured layer on the lower left? That’s what is keeping the flap tucked in.
    This is how it opens:

    Her colors include Cloud Cover, Secret Sea, Old Olive & Basic White. I’ll share measurements below.
    Did you catch the pretty textured layer? That’s the new Stone & Vine 3D embossing folder. And did you notice the ‘wood look’ die-cut in Olive near the greeting? That and the greeting are included the Nature’s Symphony bundle seen here.

    She used the Nature Walk suite for her card which includes gorgeous nature focused products. See it all here.

    Here’s how she finished the inside of her card:

    Measurements as follows:

    -card base 7″ X 5 1/2″ scored at 4 1/4″
    -White 7″ X 5″ scored at 3 3/4″. Make a mark on the shorter end at 1″ from the top and the bottom. Trim off the rectangle to the score line for the front flap
    -Secret Sea front is 3″ square, side is 2 1/2″ X 5 1/4″, the diagonal piece is 2 1/2″ X 2 3/4″ cut in half and inside is 4″ X 5 1/4″
    -DSP front is 2 3/4″ square, side is 2 1/4″ X 5″

    Thank you for creating and sharing this amazing card with us Karen!

    ~~~

    February Specials

    Product of the Month is the new Painted Illusions 12 X 12″ designer paper

    Get the NEW Stampin’ Positioner FREE when you choose the Starter Kit in February! Click here

    Bonus Days – Redeem your coupons in February!

    February’s PDF of the Month!

    Two NEW kits just released here:

    Check out the Last Chance List; new items are added and available

    while supplies last

    Leave a Reply

    Your email address will not be published. Required fields are marked *

  • 2 pretty Nature Walk card swaps


    Today I’m sharing two pretty swap cards made by my talented Team.

    Ginny made this first card with the Nature Walk designer paper and the Nature’s Symphony bundle.

    This card sure makes the DSP shine!

    Joan made this card with the Nature Walk designer paper, the Addressed to You and Prayers & Promises stamp sets.

    She fussy cut the main oval image which is from the Addressed to You set seen here. The greeting is from the wonderful Prayers & Promises set seen here.

    Thanks for the pretty cards gals!

    ~~~

    February Specials

    Product of the Month is the new Painted Illusions 12 X 12″ designer paper

    Get the NEW Stampin’ Positioner FREE when you choose the Starter Kit in February! Click here

    Bonus Days – Redeem your coupons in February!

    February’s PDF of the Month!

    Two NEW kits just released here:

    Check out the Last Chance List; new items are added and available

    while supplies last

    Leave a Reply

    Your email address will not be published. Required fields are marked *


Notice: LeeAnn Greff, Independent Stampin’ Up! Demonstrator, Manager. The content of this website is my sole responsibility as an independent Stampin’ Up! demonstrator and the use of, and content of, the classes, services, or products offered on this website is not endorsed by Stampin’ Up! Copyright 2025