I used an easy technique on the window and tire rims. See how they're a soft white? Using our White Craft ink pad, I grabbed a bit of White ink with a blender pen and colored these areas. You can add more color if you'd like it whiter, but I like the almost opaque look.
Note one card has presents and the other a tree in the truck bed. These are stamped on a separate piece of White paper and fussy cut before adding to the truck.
I created two options for my Club members; a birthday or a Christmas card. This Truck bundle has a wide variety of stamps & greetings. I did use the Happy Birthday image from the Enjoy the Rhythm set and the inside Christmas greeting from the Brightest Glow stamp set.
Click on this link to download or print the free project sheet. It includes photos, supplies, measurements and step by step directions. Download Oct 23 Trucking Along window card
We held out Team card swap Saturday and I want to share some of these awesome swaps they made. Our theme was to use new catalog products. This swap was ‘shoebox’ style so we made each other’s cards in person. I love shoebox swaps!
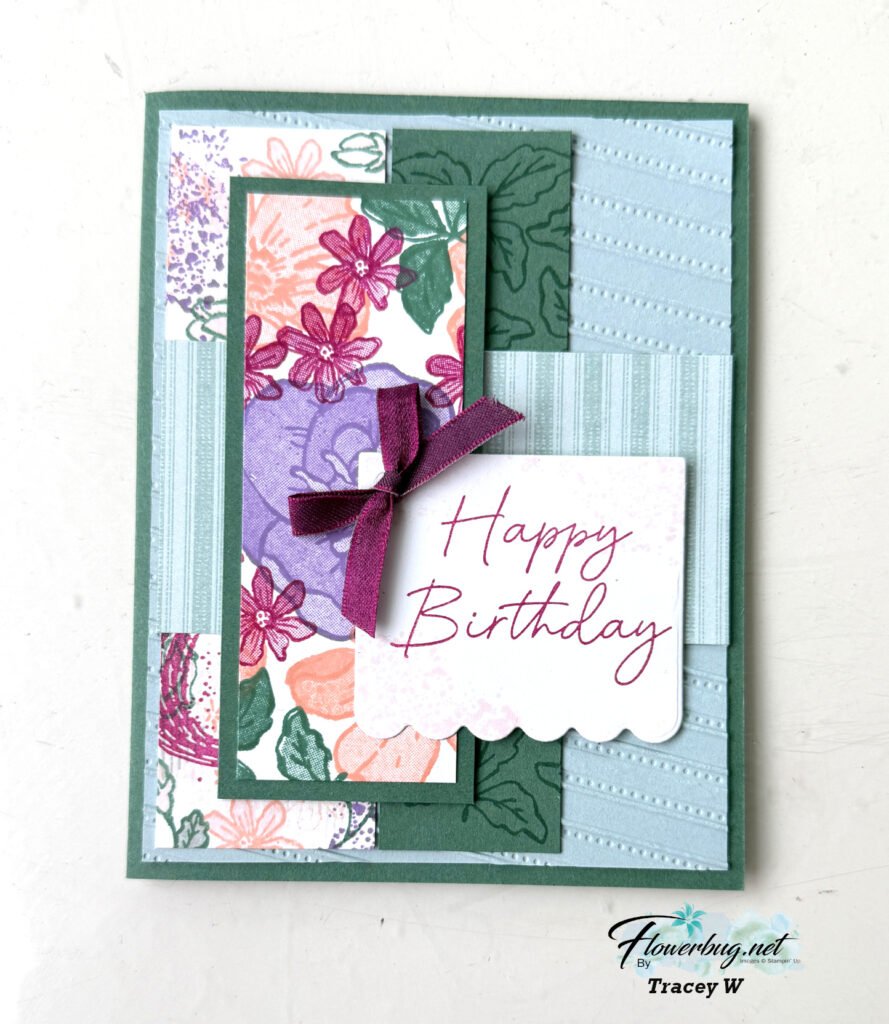
Tracey created this special card using the new Peaceful Pine in color. She paired it with Cloud Cover and Berry Burst here.
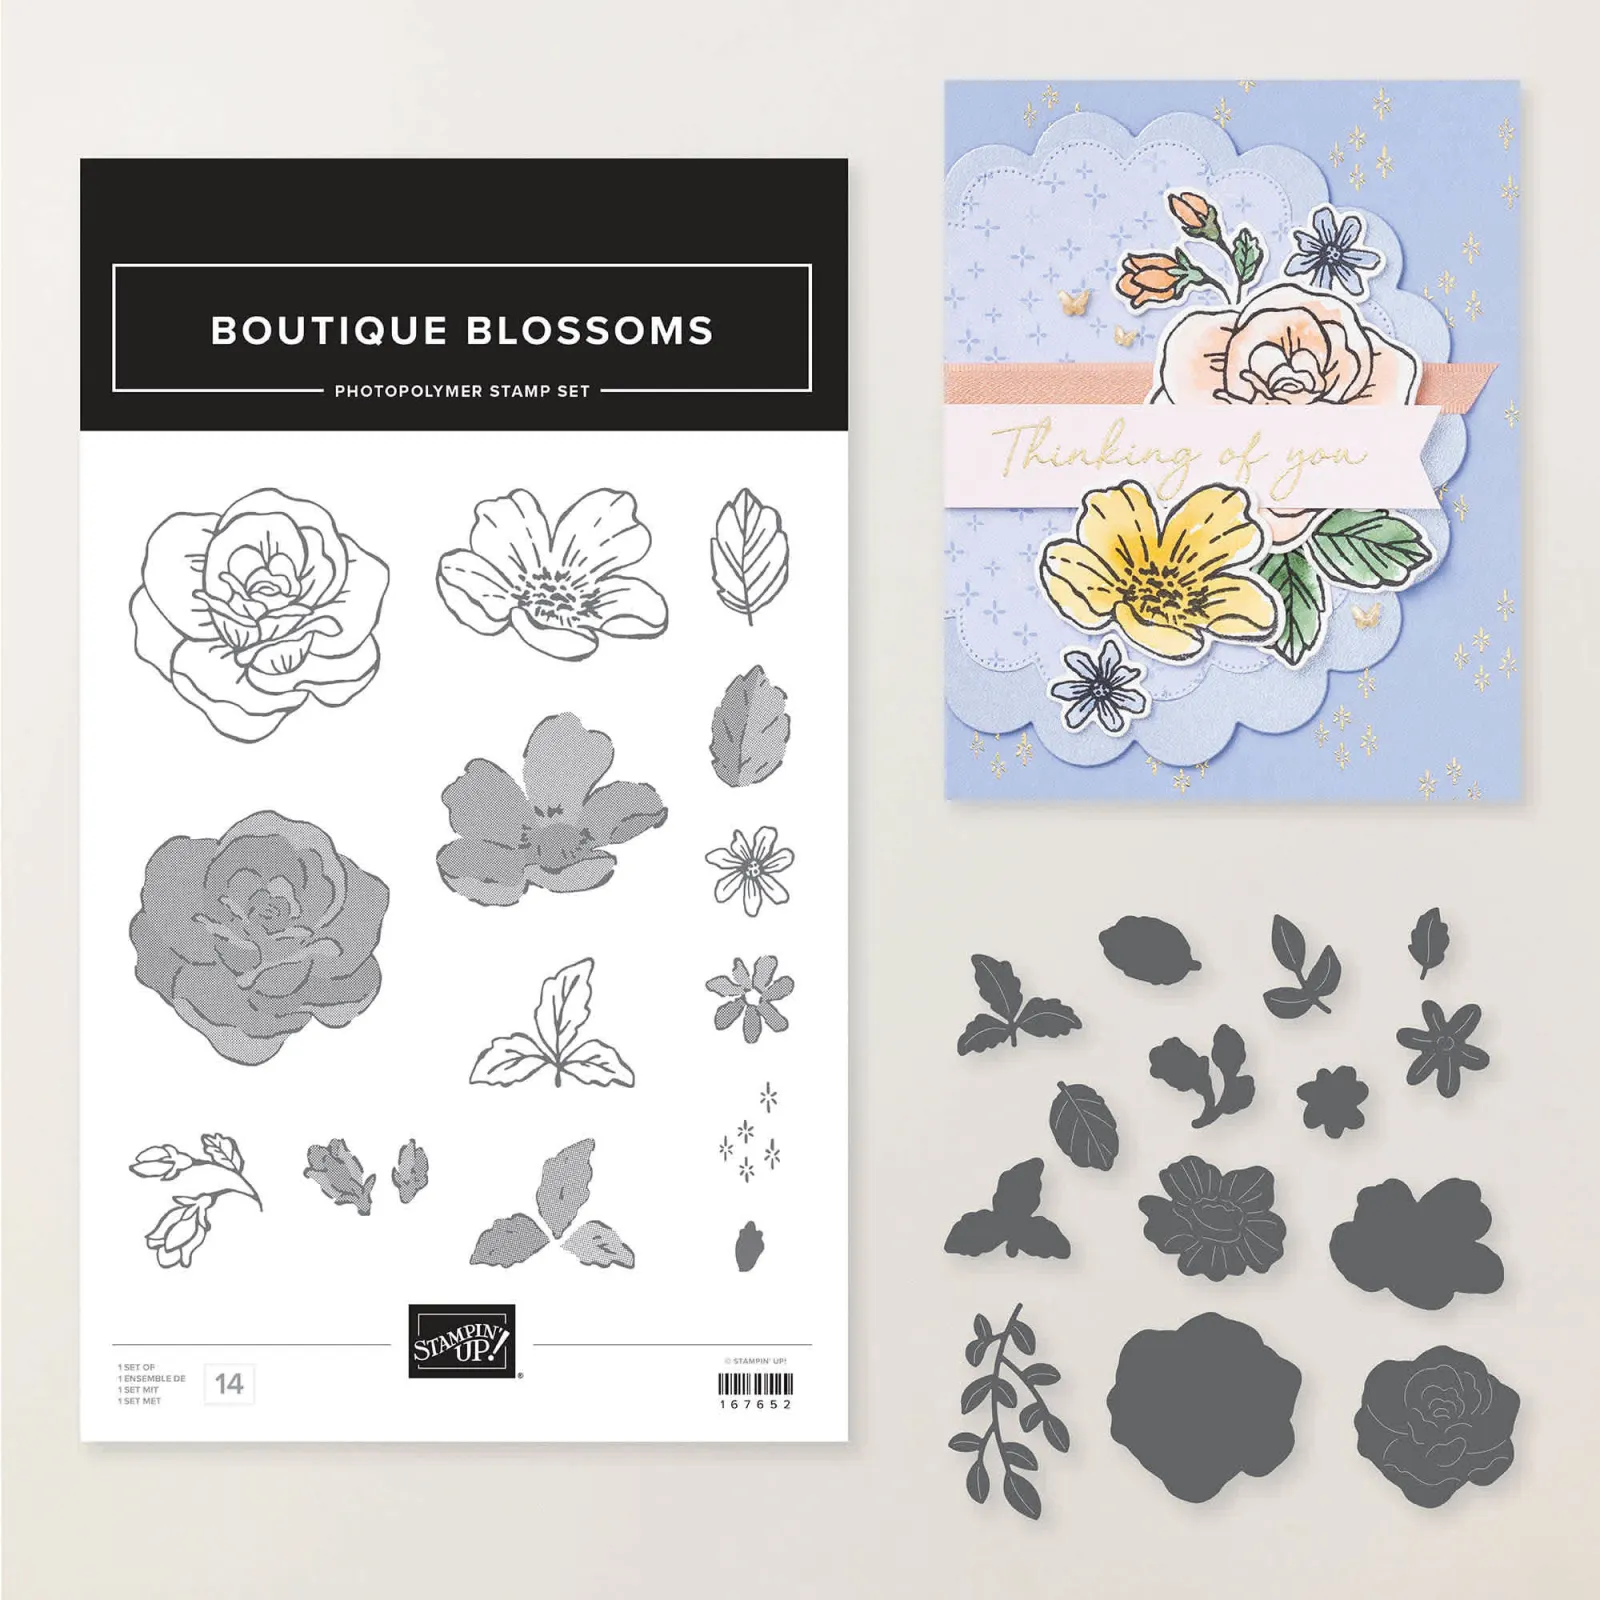
Look at that stamped panel; it is NOT designer paper! She stamped it because she loves to create with our stamps. And she finds it fun to create unique color combos too. She used the stamps from the Boutique Blossoms bundle seen here.
The Heirloom Boutique suite is one that Stampin’ Up! says will remain current for a year! I love knowing this; it helps when you join swaps and post projects for customers.
Card Base 8 1/2″ X 5 1/2″ score at 4 1/4″ Flaps – center is 3″ X 5 3/4″ score at 3/4″, 1 1/2″, 4 1/4″, 5″ top & bottom flaps 3/4″ X 5 3/4″ score at 3/4″, 1 1/2″, 4 1/4″, 5″ Inside panel of DSP 2 1/2″ X 5 1/4″ DSP – middle is 2 3/4″ X 2 1/2″, top & bottom 1/2″ X 2 1/2″, left & right 1/2″ X 5 1/4″, sides 1/2″ X 2 3/4″, corners 1/2″ square
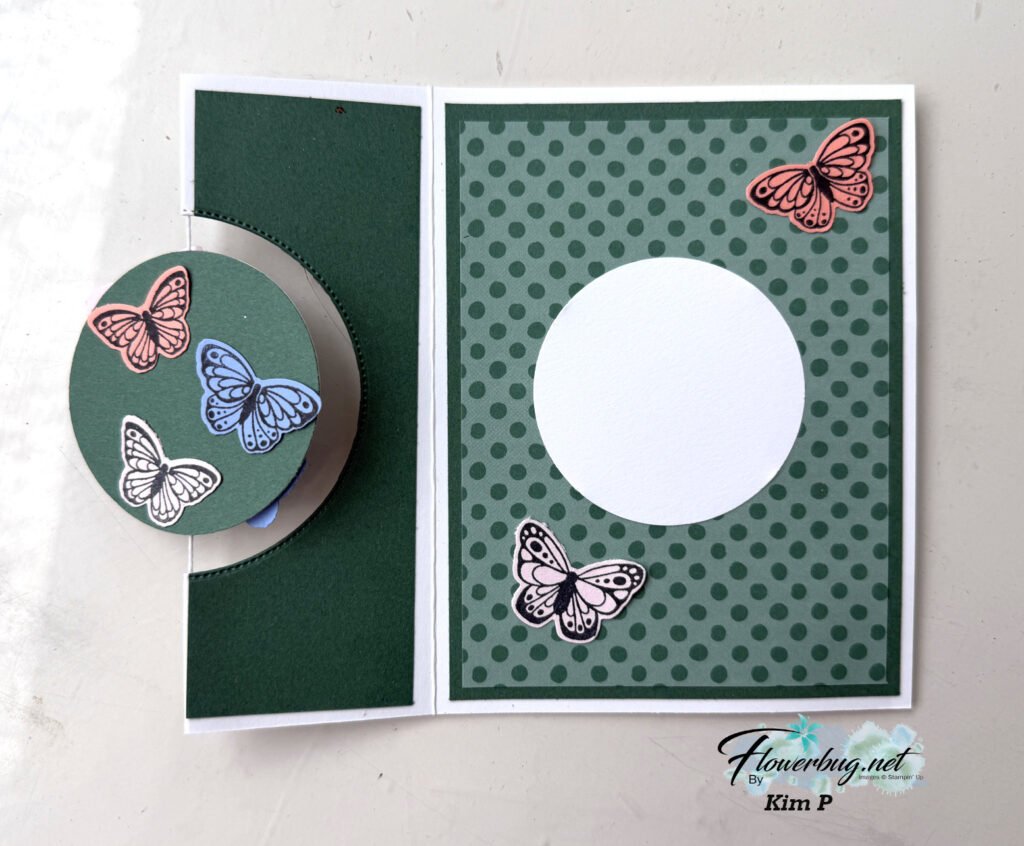
Her card is a spinner card using Baker’s Twine. It’s fun to set up a card like this so when the recipient removed the card from the envelope the circle spins. You simply wind it up before inserting it in your envelope. So cool!
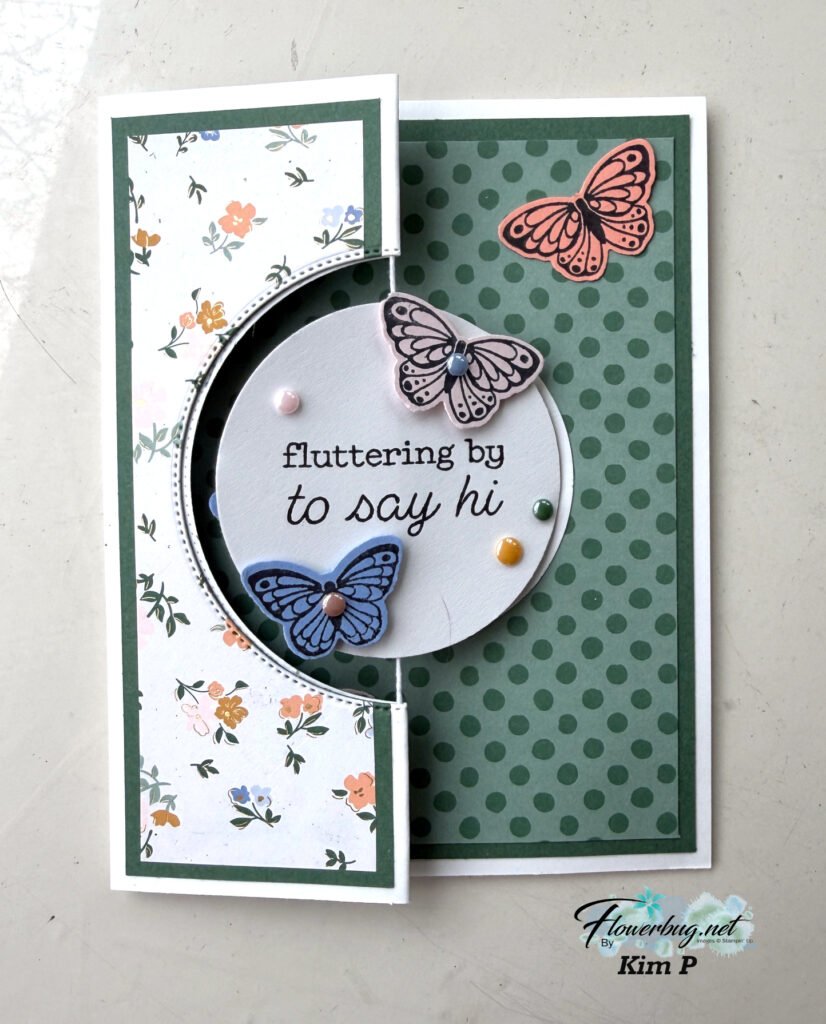
We added stamped & punched butterflies all over this card; using the newest In Colors. The inside polka dot DSP panel is from the new Painted Patterns 12 X 12″ DSP seen here.It’s available in most of our color families!
Before the string is added to the crease of the fold you’ll cut the larger circle from the front. She has so many layers on her card; it can be tricky to get the circle die-cut ‘cut’ through the layers. We ran it back and forth the Cut & Emboss machine but it did cut!
It’s an amazing card Kim!
~~~~~
Need a few new things from the Summer Catalog? Be sure to tack on one of the Product of the Month choices for just $5 (once the order is over $75).
And if you’re already at $75 bump it up to $100 and earn a FREE Mystery Box from me! I have a few left and they’re stocked up with recently retired Stampin’ Up! products valued at over $200! Shop here.
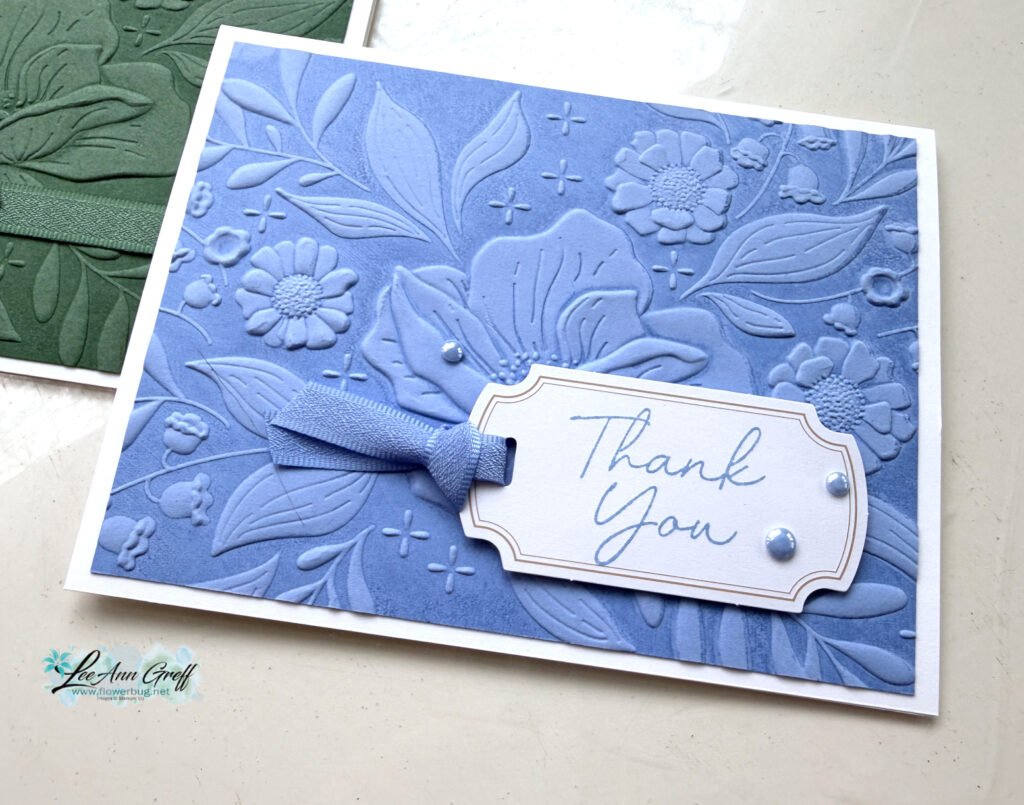
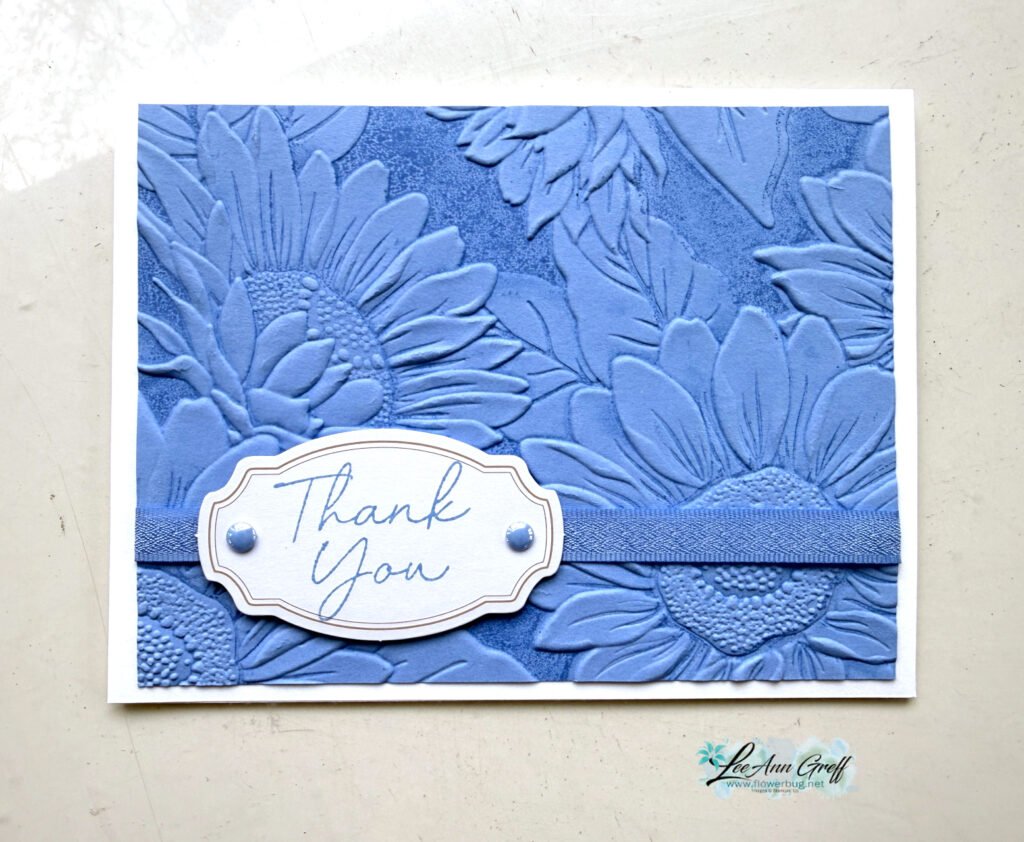
Yesterday I shared one way to use ink on an embossed layer. Today I’m sharing another.
Look closely at the card below. See how there are two different colors on this textured surface? I shared how to do this on last week’s video (see below).
This is the Floral Spray 3D embossing folder seen here. It just ran out of stock and may be a month or more before it returns. Please add your email so you’re notified when it’s back.
Here’s how to do this: I inked the smoother side of my folder (the textured areas are recessed) with Hydrangea Hue ink. I then placed my CS on the opposite side of the folder, closed it and ran it through my Cut & Emboss Machine. It leaves the raised areas with the original CS color and the rest darker. It’s truly beautiful.
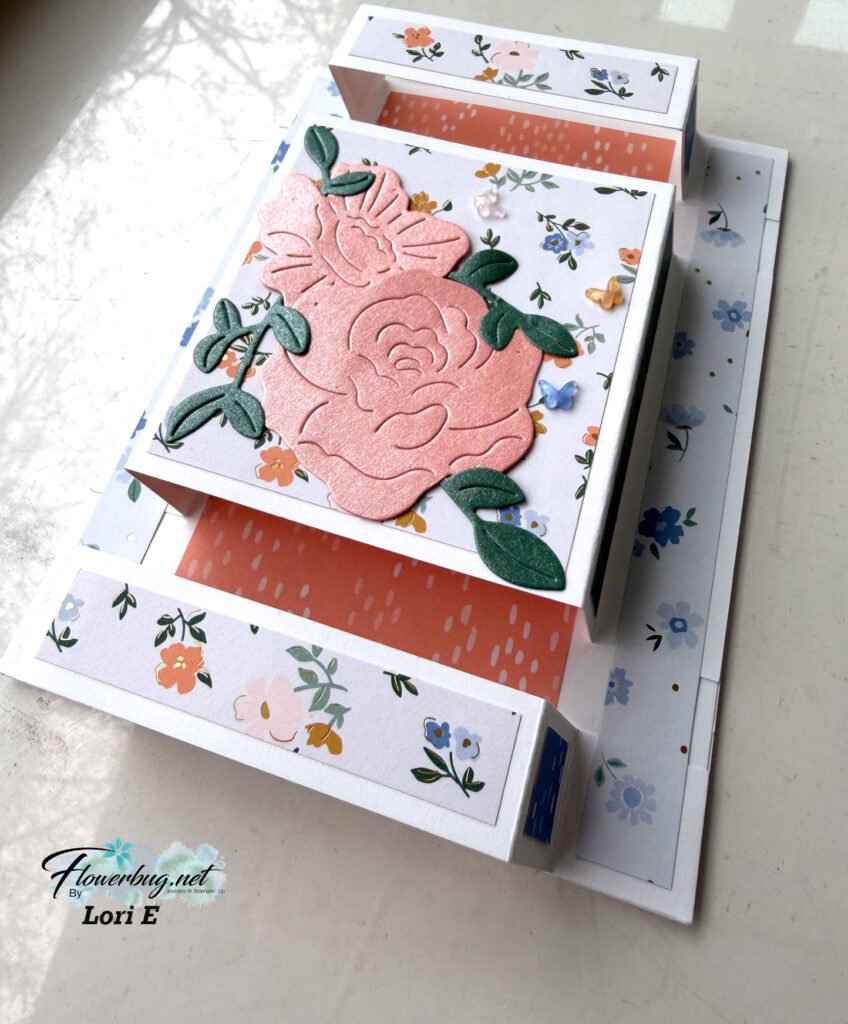
Here are both cards; with the addition of Peaceful Pine:
Below is the video tutorial where I share how to achieve this technique. I hope you watch it and try it!
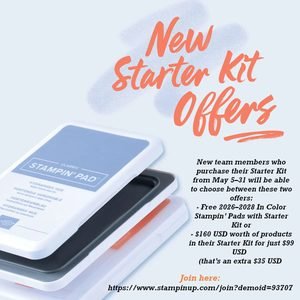
Want our BEST DEAL on Stampin’ Up! products? Well that is always the Starter Kit.
Right now you get to choose from 2 options with the $99 kit. Get either all 5 new Magnetic Ink pads or an extra $35 in product of your choice. That makes it $160 in products for just $99 plus free shipping. It’s a no brainer! Click here.
There are so many benefits to joining as a Stampin’ Up! Demonstrator.
First of all you get 20-25% off all future SU purchases. Second is a favorite of many – you can see and pre-order new products before anyone else. Third – be on my Flowerbug’s Team! We have a wonderful group of talented, kind and sharing people!
Thinking about joining my team? New demonstrators now get 50% off their first Paper Pumpkin kit—which is a great way to try this monthly crafting subscription! It’s just one of the perks of getting started.
Notice: LeeAnn Greff, Independent Stampin’ Up! Demonstrator, Manager. The content of this website is my sole responsibility as an independent Stampin’ Up! demonstrator and the use of, and content of, the classes, services, or products offered on this website is not endorsed by Stampin’ Up! Copyright 2025


Leave a Reply