/


Latest Post

The Hello, Irresistible card kit to go is here!


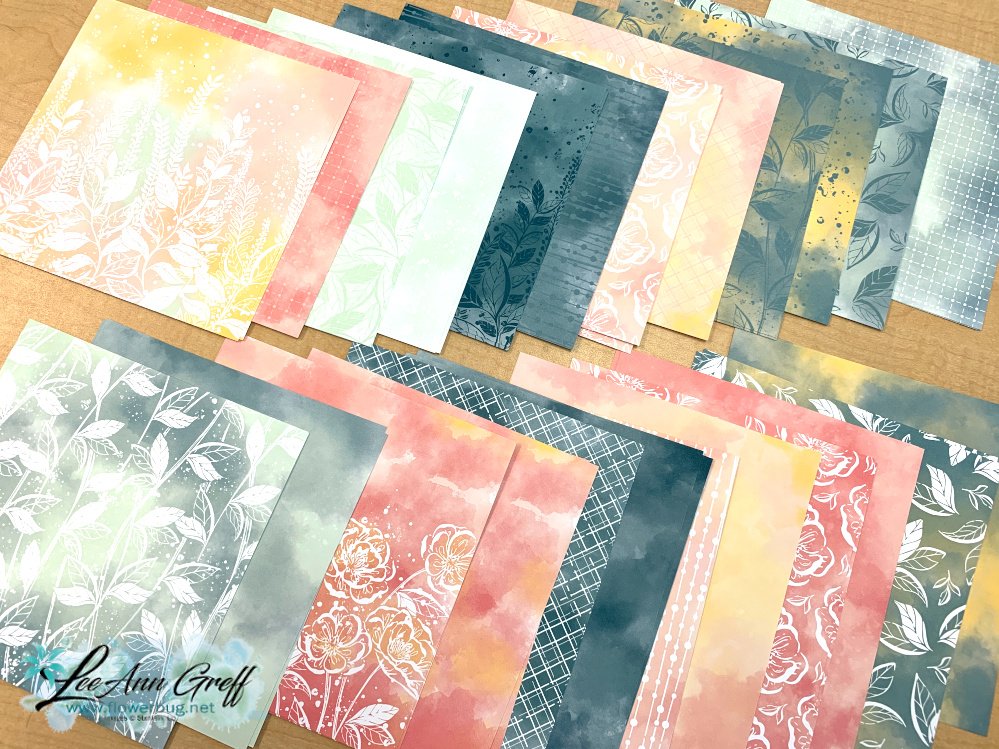
I had to use the new Hello, Irresistible designer paper for my March card kit to go.  It's absolutely gorgeous with fresh spring colors plus deep, rich tones too.  

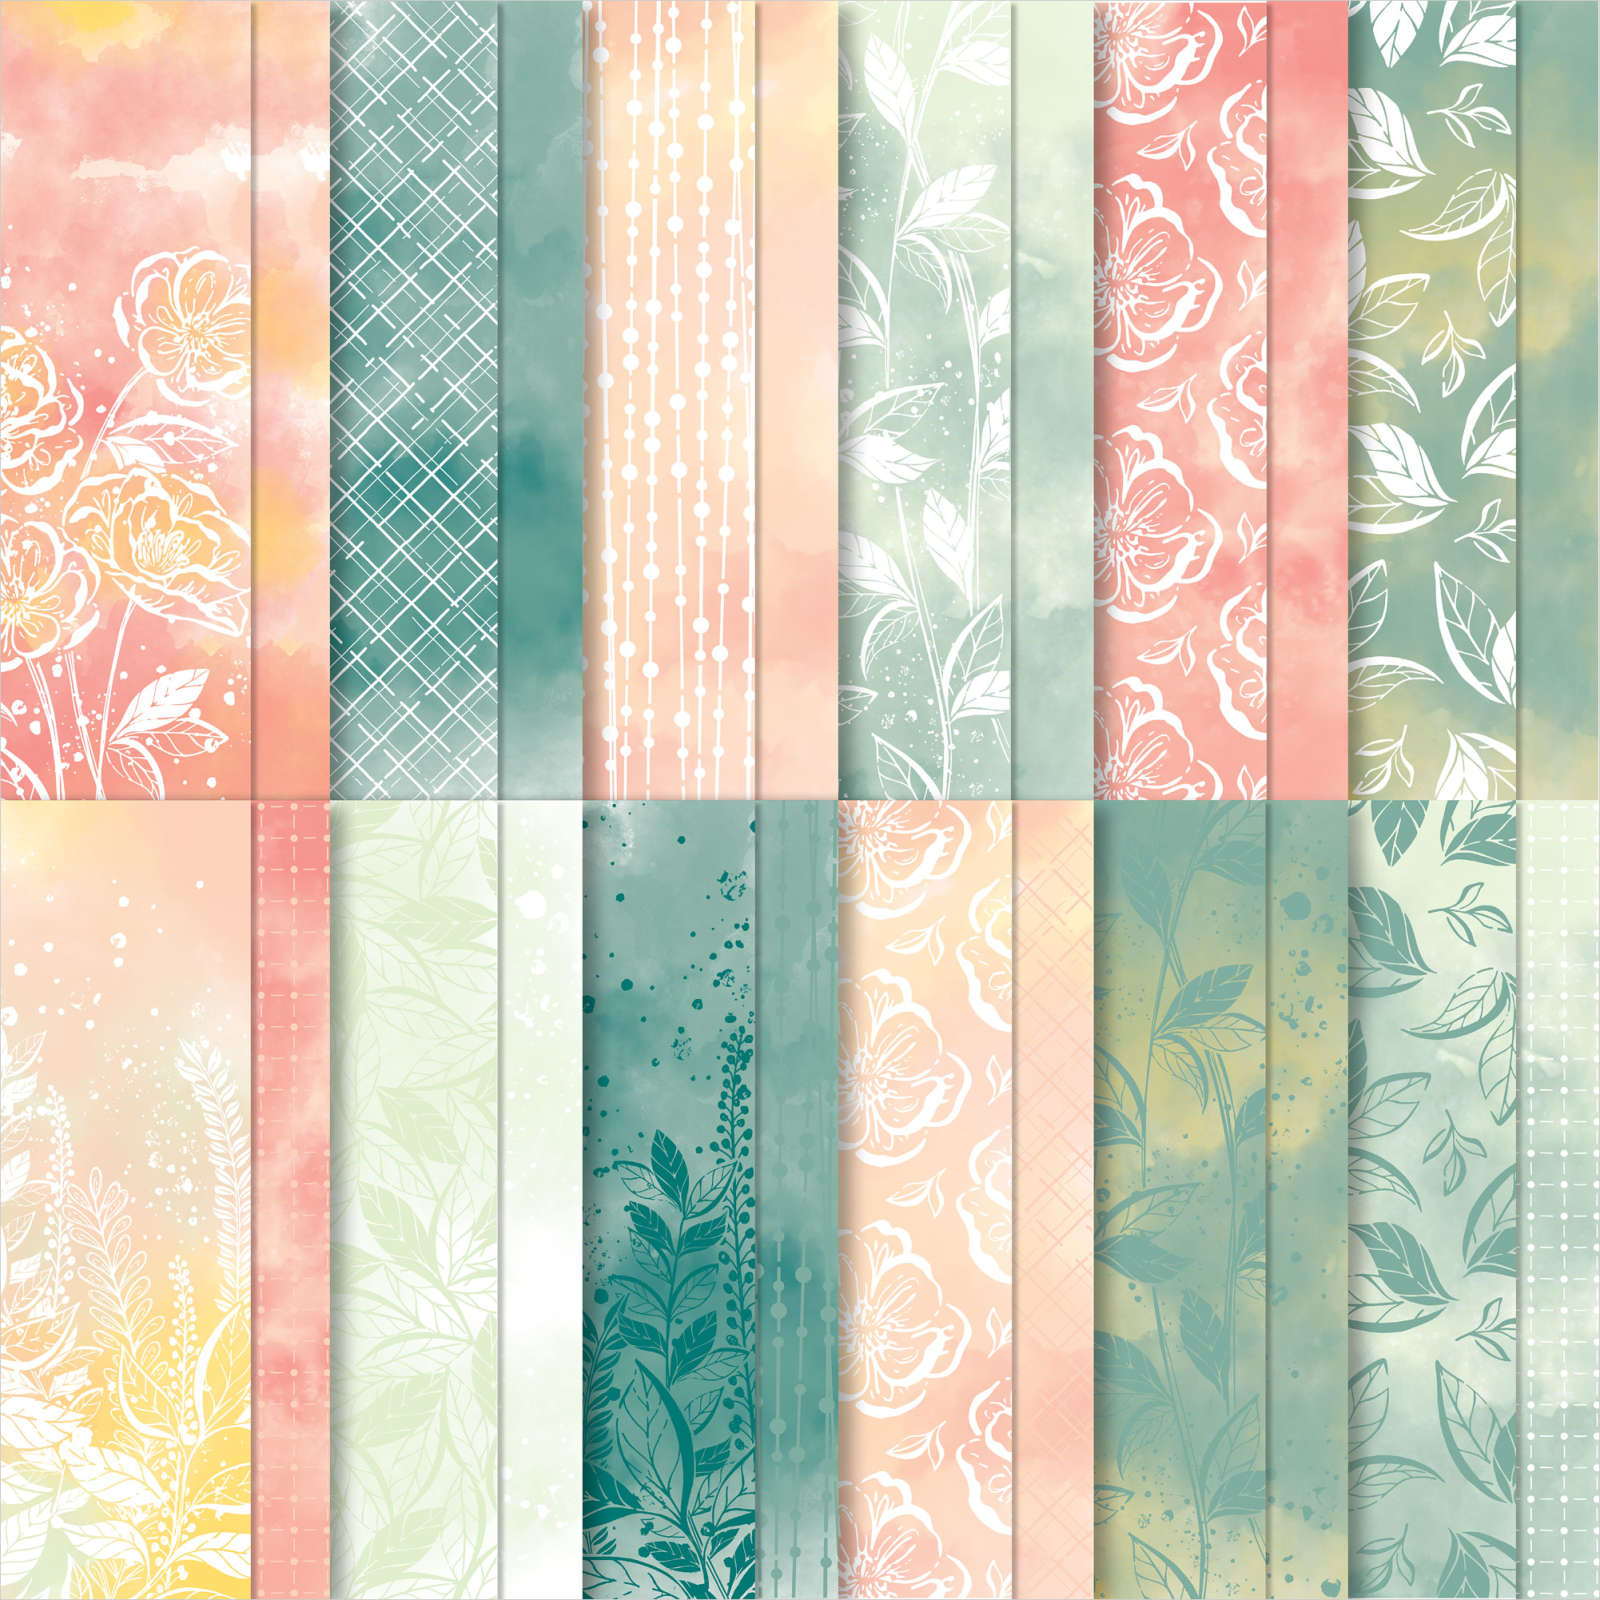
The colors include Daffodil Delight, Flirty Flamingo, Lost Lagoon, Petal Pink, Pretty Peacock, Soft Sea Foam.

*Did you see that Lost Lagoon and Pretty Peacock are included?  Stampin' Up! shared that we ARE getting a Color Refresh with the new Annual Catalog in May. We'll know which colors are retiring on March 29th.  

4 of the 5 designs are fun folds in this kit including an explosion and a shaker card.  It was difficult to get a good photo.  But they are gorgeous in real life!


This pre-cut kit to go includes the 10 pre-cut cards & all elements, 1/2 pkg. of the new Hello, Irresistible DSP, a share of White Glittered ribbon and In Color Opal Rounds. The PDF tutorial is free!  That's $20 in product plus the 10 pre-cut cards for just $28. Reserve your kit to go here.    *This is the kit my monthly subscribers will receive. 

Or choose the PDF only for $15 here. 

Be sure to opt in by March 19th to get this kit to go. The PDF will be emailed to you immediately after payment from my Shopify site.  The pre-cut card kit & products will be delayed due to the DSP is out of stock.  It will be sent to you in early April. 

You will need a paper trimmer (to cut your new DSP), adhesives, greeting images and a few ink pads.  I used the Irresistible Blooms stamp set for greetings but you can substitute others if needed. 

Add on the Irresistible Blooms stamp set or bundle at 10% off!  Message me here for that option and I'll send you an invoice for it all. 

I have another new kit to go available in March – the Rain or Shine fun fold card kit.  See that here.   Get both and save $$.*Add on any other card kit with it and save on shipping costs!  Go here to see them all.  


~~~

March Specials:

See the new Online Exclusives here! 

*current host code:  TMJXFR2T or BFE4C2KM

Get free Pastel Sequins with online orders over $55 when using the host code above!

Earn free products with my loyalty rewards! 

Click here to download yours and earn a $50 shopping spree!

All Posts

  • Wow! Halloween Scenic cards with Life is Beautiful stamp set with video!


    I am pretty pleased of these two cards I shared on Facebook Live yesterday.  I've been wanting to make some spooky Halloween cards with my Life is Beautiful stamp set and think they turned out amazing, IF I do say so myself!  

    This first one features a bright, white moon with a halo of purple around it.  I used a 2" circle punched 'mask' and sponged the Rich Razzleberry and Pacific Point background.  You can get my easy sponging tips in the video below. 

    Here I created a window scene with the Stitched Rectangle and Plaid Builder dies.  I share my quick method of creating this window in the video below. 

    I LOVE creating scenes with sponged backgrounds and the Life is Beautiful stamp set is perfect for it!  I used the following inks on the card above: Pacific Point, Rich Razzleberry, Black, Craft White and Pretty Peacock. 

    Do you like the White clouds?  I used the same image on the ground as I did on the clouds.  Love the versatility of this stamp! The pumpkins and greeting are from the Banner Year stamp set. 

    The colors above are Smoky Slate, Black and Pumpkin Pie.  I used a bit of Magic in This Night DSP, the Cobweb embossing folder and Plaid Builder, Stitched Rectangles and Ornate Frames dies.  The little birds are from the Mountain View stamp set. 

    I hope you enjoy watching the video below!  

    ~~~

    Current Host code is HYSHW6QB

    Get a free package of All the Trimming embellishments in September with an

    online order over $55. 

    *Remember that if your order is over $99 you should consider purchasing the Starter kit here.

    And if it's over $150 you should definitely get the Starter kit.  

    Order online here

     Get my Beautiful Autumn pdf tutorial free with any online order in September!


    It includes directions, photos and measurements for 13 cards!


    Leave a Reply

    Your email address will not be published. Required fields are marked *

  • Customize your cards with the Playful Alphabet!


    Who doesn't like a customized card WITH your name on it!  You won't find that at Hallmark!  Use the Playful Alphabet dies to create a one of a kind card. 

    I made this for my granddaughter Eliza. She is almost 7 and loves anything with her name on it. 

    The color palette was chosen by the designer paper Playing with Patterns.  It's full of bright, unique colors and patterns.  In fact, behind her name is a piece of the paper.  The gradation of colors sure fits the card well doesn't it?  

    I used the Stitched Nested Label dies.  I cut out the letters from the White die-cut and popped that up over a strip of the DSP.  I added some Seal Plus to the bottom edge and pressed my ribbon onto that in small loops.

    Her favorite color is turquoise; just like mine!  I chose two pieces of Designer paper for the card front and separated them with a strip of Crushed Curry.  You can see these products below in my store. 

    ~~~

    Current Host code is HYSHW6QB

    Get a free package of All the Trimming embellishments in September with an

    online order over $55. 

    *Remember that if your order is over $99 you should consider purchasing the Starter kit here.

    And if it's over $150 you should definitely get the Starter kit.  

    Order online here

     Get my Beautiful Autumn pdf tutorial free with any online order in September!


    It includes directions, photos and measurements for 13 cards!


    Leave a Reply

    Your email address will not be published. Required fields are marked *

  • Quarter Diagonal cards; watch on FB Live tonight!


    If you're like most stampers you have a LOT of Designer Paper stocked up.  I've been on a mission to use mine up and help you with ideas to use yours too.  There's always more we want; so here's a way to use some so you don't feel so bad about purchasing more!  Ha! 

    Below are the cards we're making tonight on Facebook Live – Stamp with Me.  It's the 2nd and 4th Monday nights each month at 7:30 pm CT.  Join me here. 

    Be sure to follow my FB page so you get notified when I'm live.  

    I chose to use the Magic in the Night designer paper; seen here in our Halloween DSP in the 2020 Holiday catalog.  I love the colors of Pretty Peacock, Cajun Craze, Black, Blackberry Bliss and White.  And as you can see some of the designs are not all Halloween!  

    The greetings and die-cuts are from the Celebration Tidings Bundle seen here.  I love that it has multiple holidays and these dies are amazing! 

    Here's how you create the diagonal layers; it's so easy! 

    For 2 cards, cut 2 pieces of Designer paper (or card stock) at 4" X 5 1/4". Then cut each in half on the diagonal. Next put those pieces back together on your paper trimmer to reform the full piece (just placing; not gluing) and cut on the diagonal in the other direction. Now you'll have 4 triangle shaped pieces from one 4" X 5 1/4" piece.
    I chose two coordinating pieces of DSP that would work on all 4 sides and that makes 2 full card fronts.

    For the card below I chose to use the Gilded Autumn specialty DSP.  The colors here are Early Espresso, Cajun Craze and Vanilla. 


    ~~~

    Current Host code is 7VPEDARH

    Get a free package of All the Trimming embellishments in September with an

    online order over $55. 

    *Remember that if your order is over $99 you should consider purchasing the Starter kit here.

    And if it's over $150 you should definitely get the Starter kit.  

    Order online here

     Get my Beautiful Autumn pdf tutorial free with any online order in September!


    It includes directions, photos and measurements for 13 cards!


    Leave a Reply

    Your email address will not be published. Required fields are marked *


Notice: LeeAnn Greff, Independent Stampin’ Up! Demonstrator, Manager. The content of this website is my sole responsibility as an independent Stampin’ Up! demonstrator and the use of, and content of, the classes, services, or products offered on this website is not endorsed by Stampin’ Up! Copyright 2025