/


Latest Post

The Christmas Scottie bundle isn’t just for Christmas! Check out this HAPPY birthday card & video!


We made this adorable birthday card at my September card club classes.  I wanted to showcase this stamp & punch bundle but I wasn't ready to make a Christmas card yet. I came up with this fun birthday card:

Isn't it fun!  It truly is a 'Happy' card perfect for anyone; male, female, kids or adults!  I shared the step by step 'how to' in a recent FB Live video seen here. 
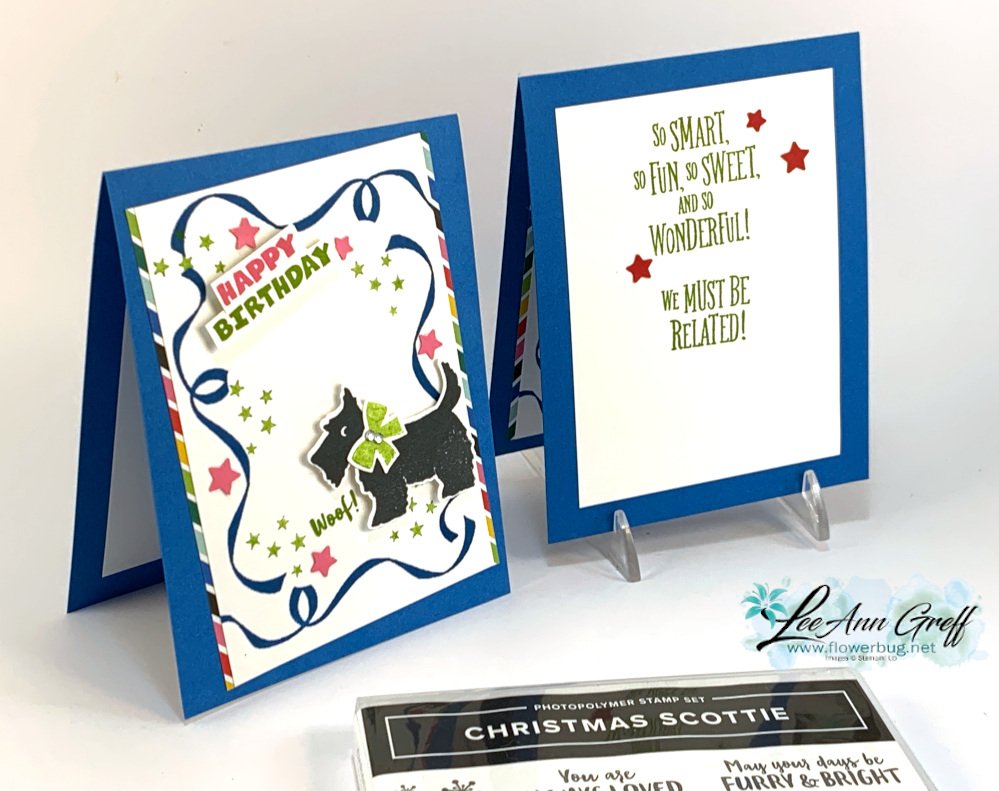
My favorite part of this card is the fun ribbon & star border.  And it's super easy too.

Measurements:

• Pacific Point 4 1/4" X 11" scored at 5 1/2"
• White front 3 1/2" X 5", inside 3 1/2" X 4 3/4"
• White scraps for the dog, bow & greeting
• Polished Pink & Real Red scraps for stars
• Celebrate Everything host DSP 1/2" X 5"

Supplies include:  

  • Inks – Black, Pacific Point, Granny Apple Green, Real Red & Polished Pink
  • Card stock – Pacific Point, White, Polished Pink & Real Red.  Celebrate Everything host DSP
  • Other – Witch Hat Builder punch for stars, Scottie dog punch, paper snips, Basic rhinestone jewels, punched stars are done with the Witch Hat punch
  • Greetings are from the Christmas Scottie & the Grand Kid set.

Besides this card I shared another CUTE Waterfall card in the video.  I just love this bundle!! See it here.

Click on the photo below to see the video.  Or click here. 

~~~

September Specials


New weekly deals come out on September 1st, 8th, 15th & 22nd! 

Order online here

Host code links: KSAEED9Y or JPJ4FKYJ

Get free cards from me with online orders!

Earn free products with my loyalty rewards! 

Click here to download yours and earn a $50 shopping spree!

All Posts

  • Friendly Hello pre-cut card kit to go; limited quantities!


    I had a few extra Friendly Hello stamp sets and Designer Paper left from last season's Sale-a-Bration promotion so I created a class to go with them.  Look at these 8 fun fold cards!

    This kit includes the new Friendly Hello stamp set, a 6 X 12" package of Friendly Hello designer paper and the 8 pre-cut card kit.  You'll also get the PDF tutorial free.  

    Opt in for this kit to go here.  Or if you already own the stamp set & designer paper get the PDF tutorial here.  

    You will need the following items to make the cards like mine:  

    • inks (Black Memento, Granny Apple Green)
    • adhesives, paper snips, paper trimmer
    • coloring mediums (Blends markers or watercolor pencils)
    • Ribbons and all pre-cut pieces are included in the kit (rhinestones are not included)

    Remember that I have limited quantities of this kit. They will be mailed out Priority Mail at the end of June.  

    ~~~

    Last Chance List is out!  


    Kits Collection BOGO – buy 1 get 1 50% off!  

    Host codes: Y23VZ9UC

     *click here to order 

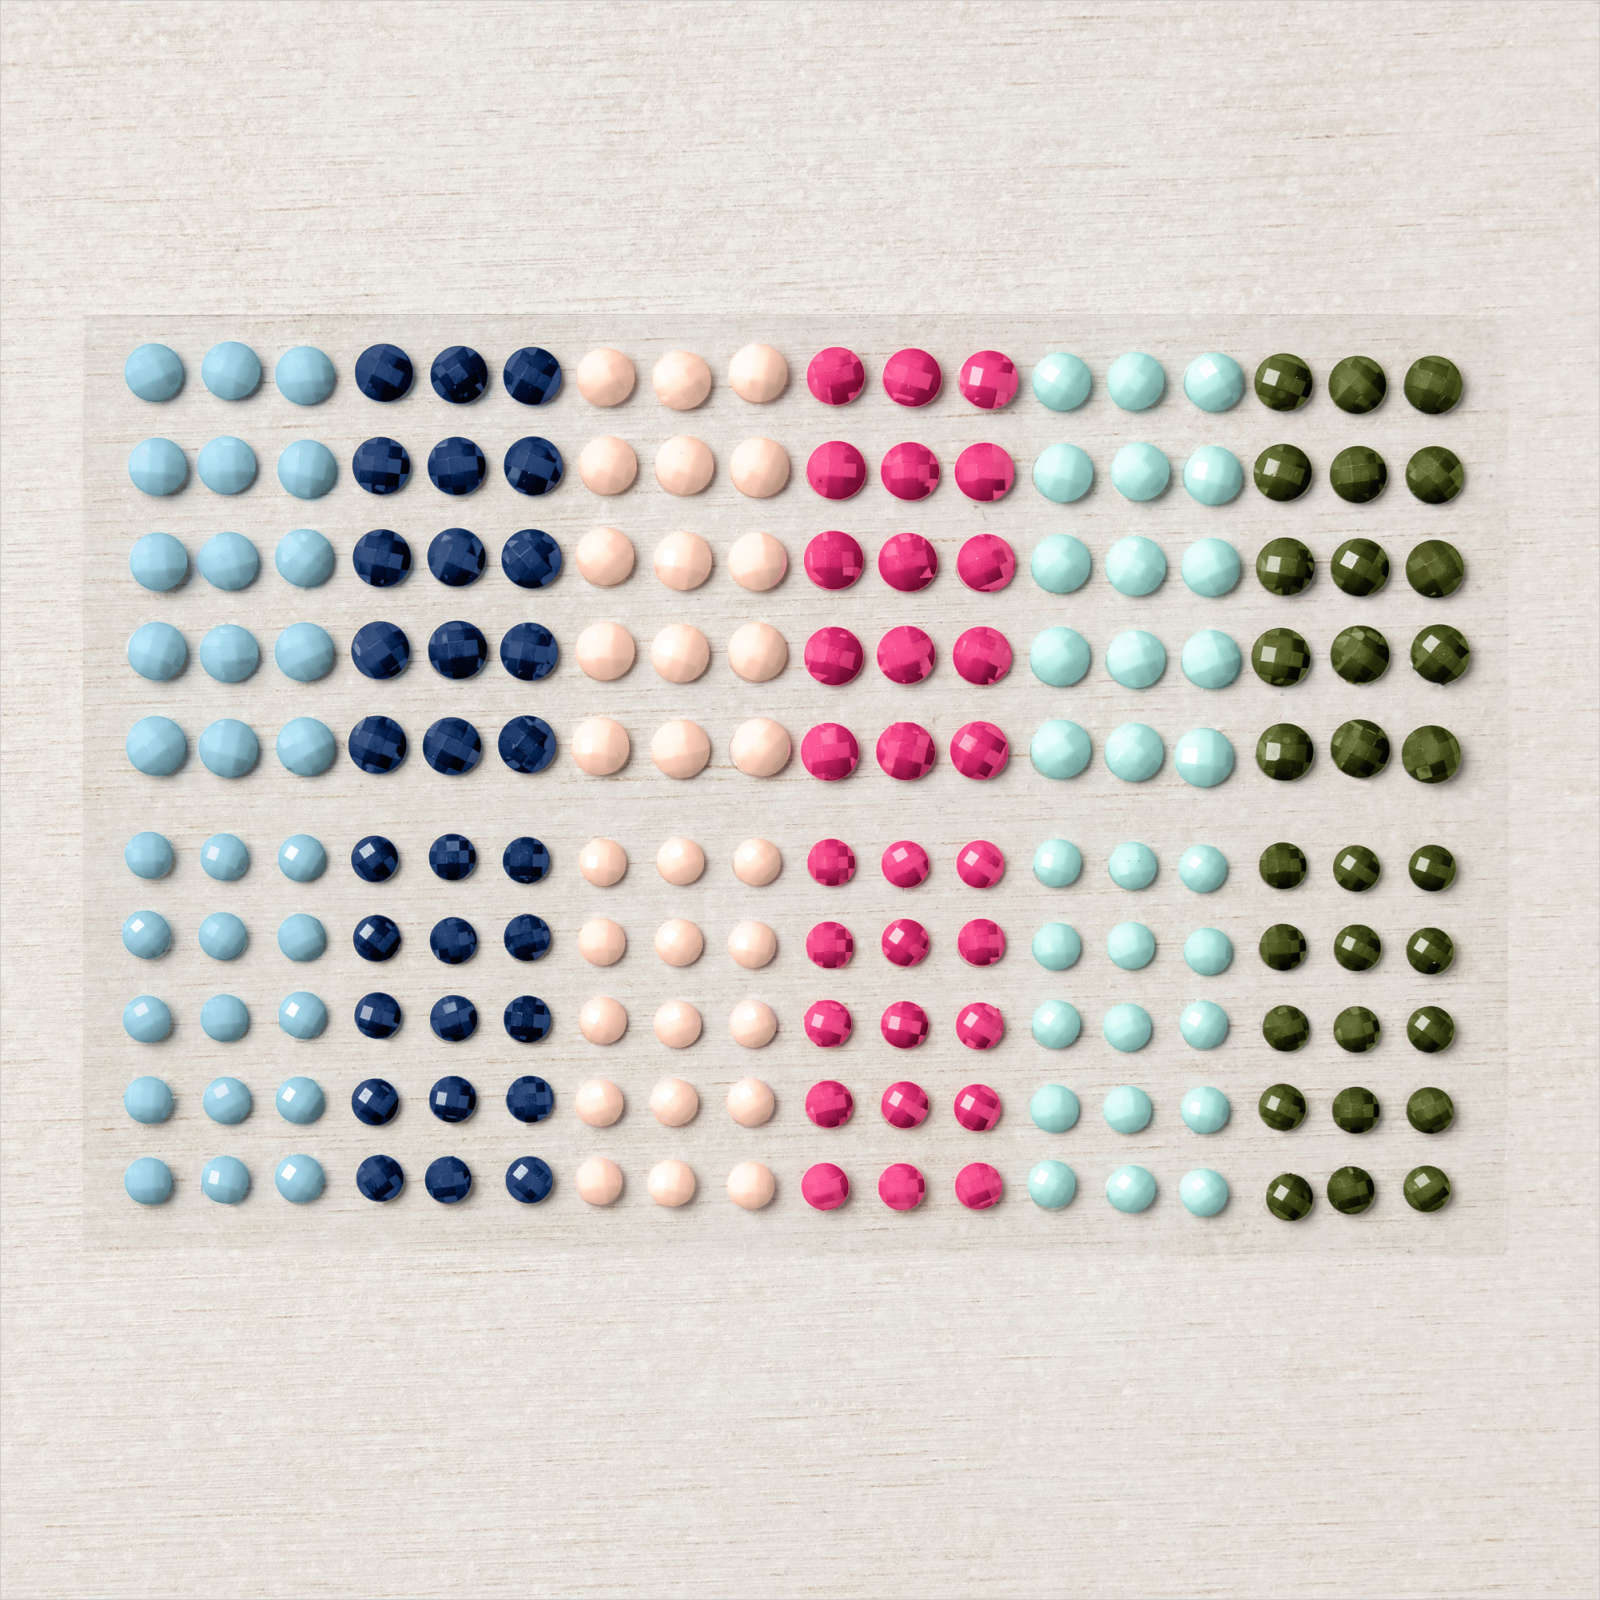
    If your order is over $50 you'll receive a set of Solid Faceted Gems from me.

    Earn free products with my loyalty rewards! 

    Click here to download yours and earn a $50 shopping spree!  

    Leave a Reply

    Your email address will not be published. Required fields are marked *

  • He’s the Man fun fold card; Facebook Live tonight!


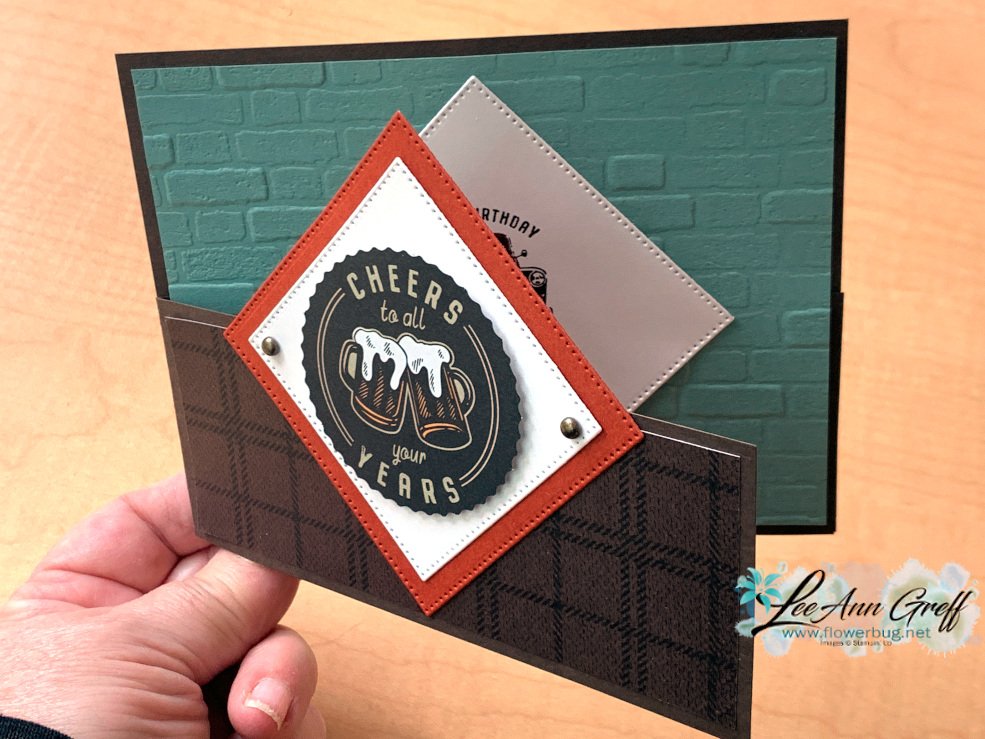
    Here's the card  we're making tonight for Stamp with Me Live. It's at 7:30 pm CT here.
    Gather some supplies and create along with me.
     
     
    I used He's the Man DSP; no stamping on the front.  I used the die-cuts included in the special He's the Man designer series paper.  I love this paper with the two sheets of fun elements we can use for card making or scrapbooking.  
     
    It's a fun fold card with the bottom half opening up to reveal the same angled square piece as the front. These are from the Stylish Shapes dies seen here.  This set of dies is all stitched in squares, circles and banner shapes!
     
    Measurements:
    • Card base 5 1/2" X 4 1/4", & 2 1/4" X 11" scored at 5 1/2"
    • embossed back is 5 1/4" X 4"
    • Squares 2 3/4" & 2 3/8"
    • DSP 5 1/4" X 2"
    Other products used:
    Dies are Stylish Shapes; Brick embossing folder & Rustic Metallic adhesive-backed dots.
     
    The stamp is from the He's All That bundle; the arrow is another element from the Designer Paper seen here. 
     

    Join me here where I'll share a few more cards made with this layout. 

    ~~~

    Last Chance List is out!  


    Kits Collection BOGO – buy 1 get 1 50% off!  

    Host codes: Y23VZ9UC

     *click here to order 

    If your order is over $50 you'll receive a set of Solid Faceted Gems from me.

    Earn free products with my loyalty rewards! 

    Click here to download yours and earn a $50 shopping spree!  


    Opt in for my New Catalog Designer Paper Share

    It's $26 plus shipping

    Leave a Reply

    Your email address will not be published. Required fields are marked *

  • Glimmer Paper meets the Slim Card dies for a big WOW!


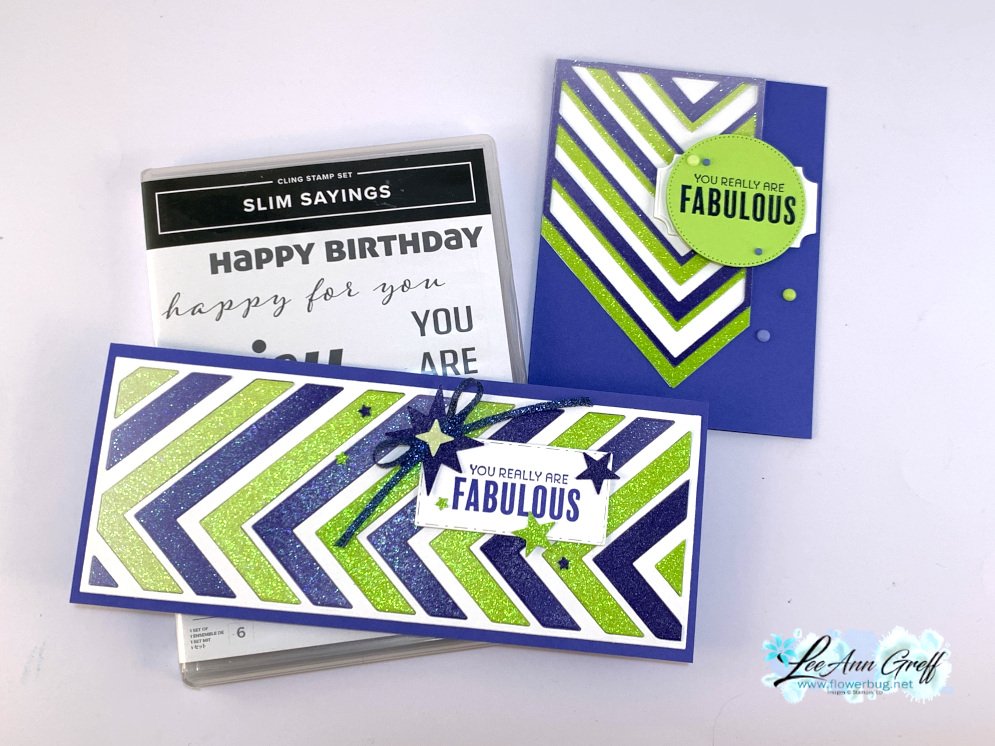
    I hope you're not tired of the Slim line cards I've been sharing this week.  I've been having a lot of fun making them with the Slim Card dies and the Slim Saying stamp set.  

    I shared these striking cards on FB Live Tuesday: 

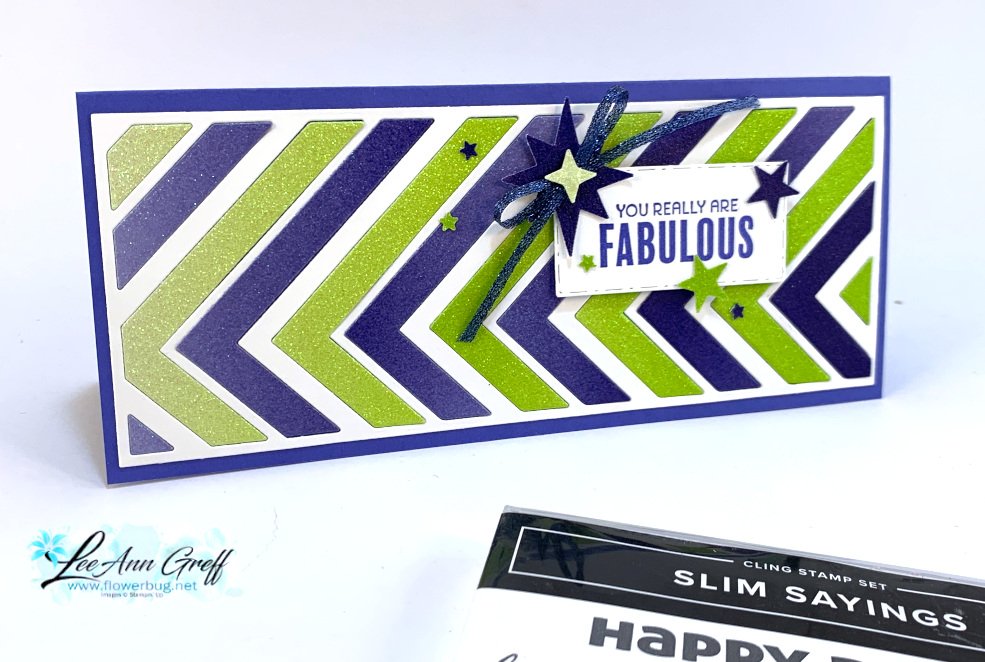
    I wanted to use the new 2022-24 In Color glimmer paper, I knew it would show off it's ombre' effect nicely with the Slim Card dies.  I chose to use the 2 in colors of Parakeet Party with Starry Sky.  

    The Slim Sayings bundle is retiring this month and available while supplies last.  BUT the Slim Card dies are on sale now at 50% off!  See them here.  It's a better deal to get the Slim Card dies separately from the Slim Sayings stamp set even though they are available in a bundle.  

    Measurements:

    • Card base 8 1/2" X 7 1/4" scored at 3 5/8"
    • White layer for the die-cut 3 1/2" X 8 1/2"

    I had to cut the colored glimmer paper twice since it's in 6 X 6" size and the die is about 8 1/2" long.  I also used the Picture This dies for the greeting label and the Starlit punch for the glimmer stars; also punched from the In Color Glimmer paper.  

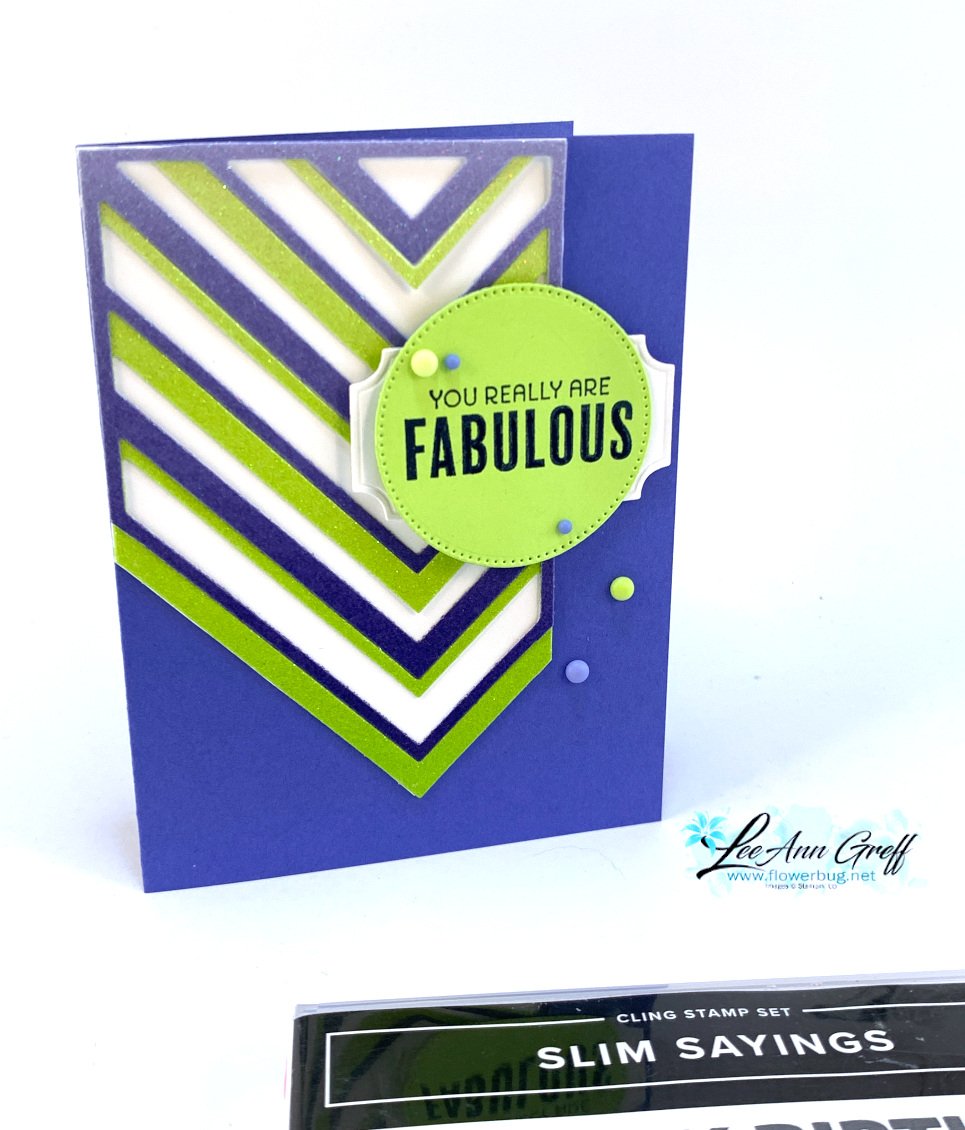
    I saved the outside pieces from the chevron glimmer paper and made this card: 

    I just couldn't throw it away and decided it could be used for a second card.  I adhered the two colored pieces to a piece of White card stock and trimmed off the excess before adding it to a card base of Orchid Oasis.  

    You can watch the video here or click on the photo below to watch it.  Don't forget to subscribe to my YouTube channel and my Facebook page here. 

    ~~~

    Last Chance List is out!  


    Kits Collection BOGO – buy 1 get 1 50% off!  

    Host codes: Y23VZ9UC

     *click here to order 

    If your order is over $50 you'll receive a set of Solid Faceted Gems from me.

    Earn free products with my loyalty rewards! 

    Click here to download yours and earn a $50 shopping spree!  

    Opt in for my New Catalog Designer Paper Share

    It's $26 plus shipping

    Leave a Reply

    Your email address will not be published. Required fields are marked *


Notice: LeeAnn Greff, Independent Stampin’ Up! Demonstrator, Manager. The content of this website is my sole responsibility as an independent Stampin’ Up! demonstrator and the use of, and content of, the classes, services, or products offered on this website is not endorsed by Stampin’ Up! Copyright 2025