/


Latest Post

Christmas themed fun-fold swaps


Last Friday I started sharing last month's fun fold cards made by my talented Flowerbug's Team members. Here are a few more 

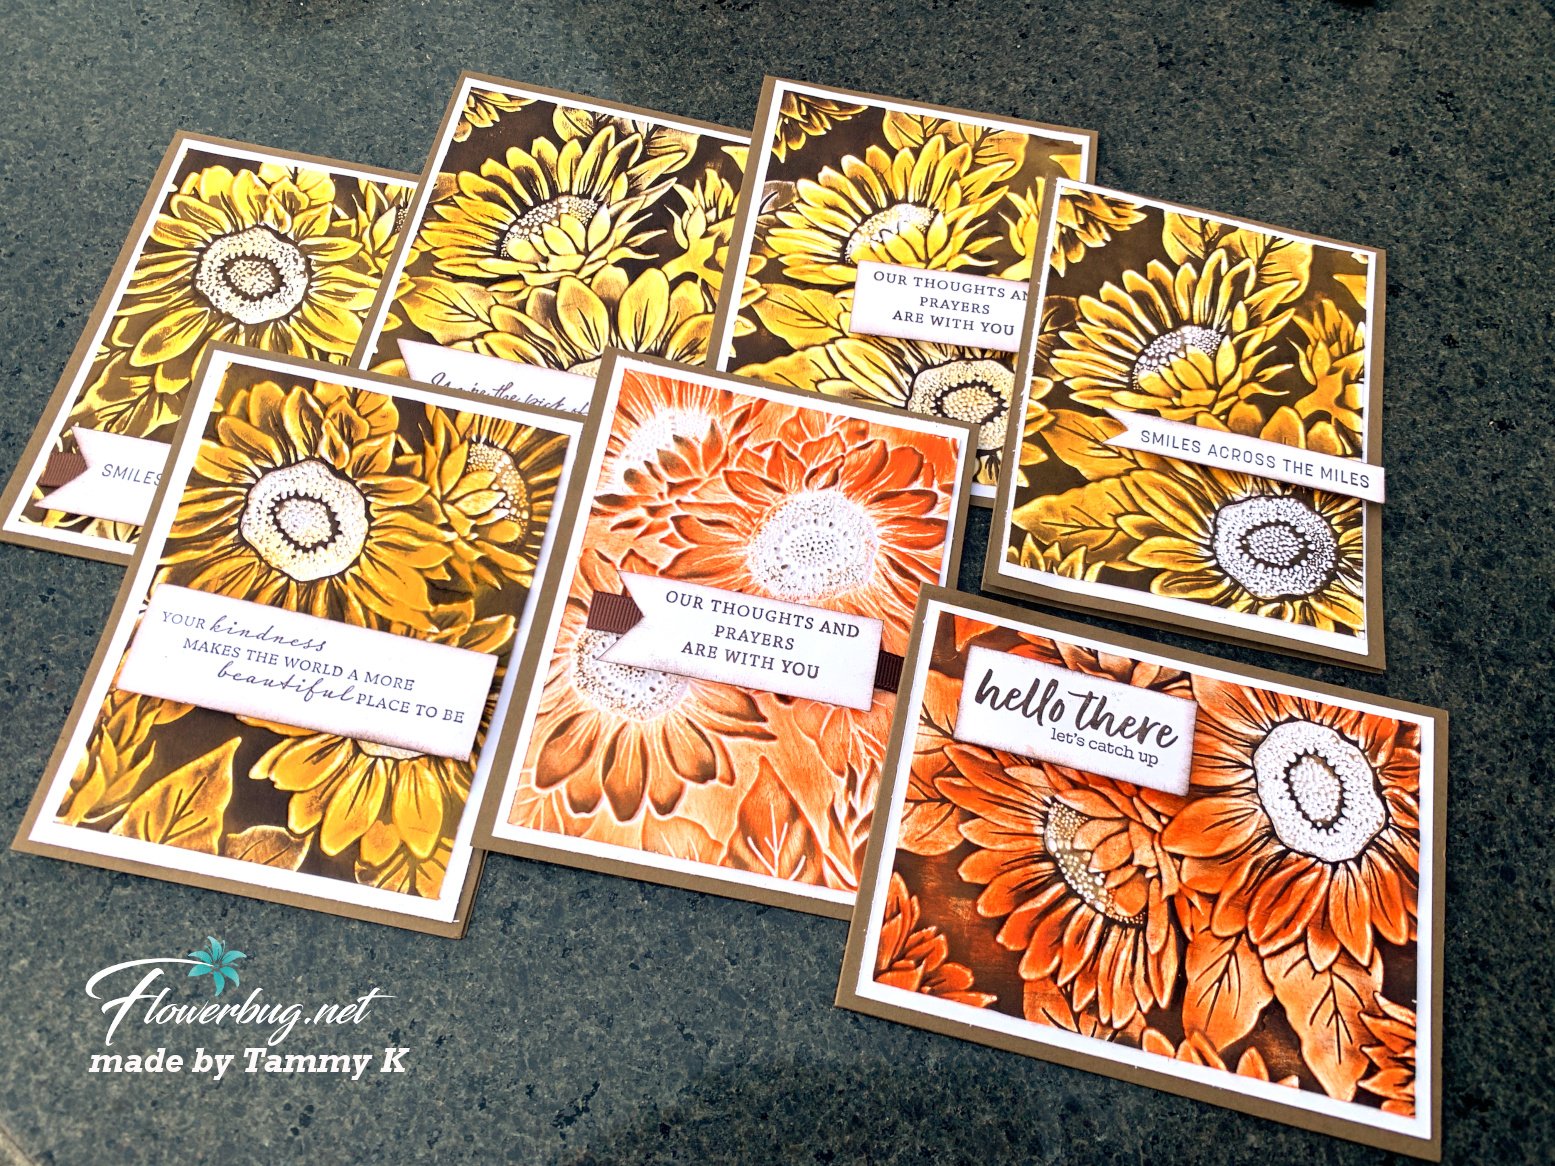
Jacki created this one using the Brightly Gleaming Specialty Designer paper and the Beautiful Autumn stamp set. It's a latch card!

Sept Jacki Brightly Gleaming

Once you add the layers to the card front you'll use the Classic Label punch to create the window for the latch to catch into.  

Measurements:

  • Night of Navy card base 4 1/4" X 9" scored at 5 1/2"
  • DSP 3 3/4" square on the front; 1 1/4" X 4" on the inside right edge
  • Pretty Peacock 4" square ont he front and a thin strip on the right inside edge
  • Latch – Navy 2" X 3 1/2" scored at 1/2"
  • Vanilla latch 1 3/4" X 2 3/4", inside is 4" X 5 1/4"

Sept Jacki Brightly Gleaming

Here's another card made by Paula featuring the Little Treat Box dies and the Wrapped in Christmas stamp set.  

Sept Paula Poinsettia

She cut the treat box dies into separate pieces (Garden Green & Vanilla) for her card front.  It also opens up to reveal a gift card holder inside. Lots of texture with the Winter Snow embossing folder too!  

Sept Paula Poinsettia

Measurements:

  • Garden Green card base 5 1/2" X 4 1/4"
  • Very Vanilla 5 3/8" X 4 1/8" 
  • Real Red 4 1/2" X 10 3/4" scored at 3/4", 4" and 7 1/4" 
  • Poinsettia Place DSP 4 1/4" X 3" 

Stop back again for more Fun Fold cards!  I have lots more to share! 

~~~

October Specials!

Current Host code is MJK7R2CU

Designer Paper Sale; click here!

October 2020 Paper Pumpkin - Joy to the World

Get a free package of Adhesive Backed Snowflakes in October with an

online order over $45. 

Adhesive backed snowflakes

All online orders will receive my Tutorial of the Month featuring the Poinsettia Petals suite!

Poinsettia Petals projects

All Posts

  • Look at these gorgeous Sunflower cards


    My friend Tammy shared these gorgeous cards she made with the Sunflower 3D embossing folder.  

    She was inspired by the card we made at Club in August.

    I shared how to do this technique on this video.  Or see it below. 

    This Sunflower 3D embossing folder has been out of stock twice already and it’s in low inventory again!  You can see it here. Get it while you can!  Online Exclusive products are while supplies last….. 

    SUNFLOWER 3D EMBOSSING FOLDER


    Below is the video tutorial for this technique.  It works with any ink colors you can dream up! 

    ~~~

    September Specials

    ~~~

    September free dimensionals

    ~~~

      To see all of the new Online items click here.  Or download & save the Download Online Exclusives flyer 

    Get a free project tutorial with any online order in September! 

    Gathering Together graphic


    Leave a Reply

    Your email address will not be published. Required fields are marked *

  • Add color to the Sunflower 3D embossing folder. Wow!


    You’ve likely seen lots of cards made with the new Sunflower 3D embossing folder but have you seen any like this?!  

    Sunflower embossed cards

    We made this card at my August card clubs and it was a big hit!  Turquoise might not be a traditional color but it sure is pretty!  This technique will work beautifully with yellows & oranges too.

    We started by embossing a white layer of card stock with the embossing folder. Then using the debossed side, added Coastal Cabana ink to the petals with a sponge dauber.  

    Next we did the ‘direct to paper’ technique – rubbing our ink pad directly onto the embossed card stock – with Pecan Pie ink.  After that we did the same with Early Espresso ink.  This picked up the fine details in the embossing.  Gorgeous!!

    This Sunflower 3D embossing folder has been out of stock twice already and it’s in low inventory again!  You can see it here. Get it while it’s available!  Online Exclusive products are while supplies last….. 

    SUNFLOWER 3D EMBOSSING FOLDER

    Get the free project sheet for this pretty card here.  Click on the following link to print or download it.  Download Multicolored Sunflower card

    Below is the video I made showing this technique.  I hope you watch it.  Don’t forget to follow me on YouTube here or Facebook here.  

    ~~~

    September Specials

    September free dimensionals

    ~~~

      To see all of the new Online items click here.  Or download & save the Download Online Exclusives flyer 

    Get a free project tutorial with any online order in September! 

    Gathering Together graphic


    Leave a Reply

    Your email address will not be published. Required fields are marked *

  • Changes are coming!


    Stampin’ Up! announced a few upcoming changes last week.  I mentioned and explained them in this video.  

    1. First up is the change in the type of stamps they’ll be offering.  Currently we have both red rubber/cling and clear photopolymer.  Starting in November all new stamps will be clear photopolymer.  

    Craft Stamps, Clear Stamps, Decorative Stamps & Cling Stamps

    Why? They are having difficulty sourcing the product needed to produce cling or red rubber stamps.  In addition they are not selling as well as photopolymer do.  It seems most people like the clear stamps; my customers have mentioned this to me too. 

    So for stamp sets from the current Annual and Holiday catalog here’s how it works going forward.  Once they run out of stock of the cling stamps they’ll switch over to clear photopolymer.  

    2. Next is the packaging.  Because most stamps will be in photopolymer after November they will be in new packaging – clear sleeves.  These will be approximately 5″ X 9″ in size.  They are phasing out the DVD cases.  However they will continue to offer them in 4 packs like they currently do.  See them here.  They will also offer bulk packs of the new thin sleeves as well.  

    3. The die-cut sleeves will change too and will be the same as the stamp set sleeves. They’ll now have photos of the dies on the cover like you see below. 

    2025 new packaging

    4.  Lastly they are discontinuing our Stampin’ Write markers. The Blends markers are outselling these by far. And because they were originally intended to be used to color directly on red rubber stamps (as well as coloring) they won’t be needed for this.  

    In my opinion I love coloring with the Blends so much I would never use these for coloring. They leave lines on larger images where the Blends do not.  They color so smoothly!  

    STAMPIN' WRITE MARKERS COLLECTION

    All of our Stampin’ Write markers are now on the Last Chance list and will be available while supplies last.  If you love them I’d grab some while you can. See them here.  

    ~~~

    August Specials

    Lots of In Color products are discounted in August!!

    Go here to see them all. 

    Get a free card class with any online order over $55 during August!

    Order online hereAugust free classThe last chance list has new products! See them here. 

    Leave a Reply

    Your email address will not be published. Required fields are marked *


Notice: LeeAnn Greff, Independent Stampin’ Up! Demonstrator, Manager. The content of this website is my sole responsibility as an independent Stampin’ Up! demonstrator and the use of, and content of, the classes, services, or products offered on this website is not endorsed by Stampin’ Up! Copyright 2025