I love the abstract designer paper pieces she added to her White layer. Then to make sure the greeting was the focal point she added the top square of DSP. Perfect! This is a great example of taking leftover pieces of coordinating DSP and layering them up. A great way to use scraps!
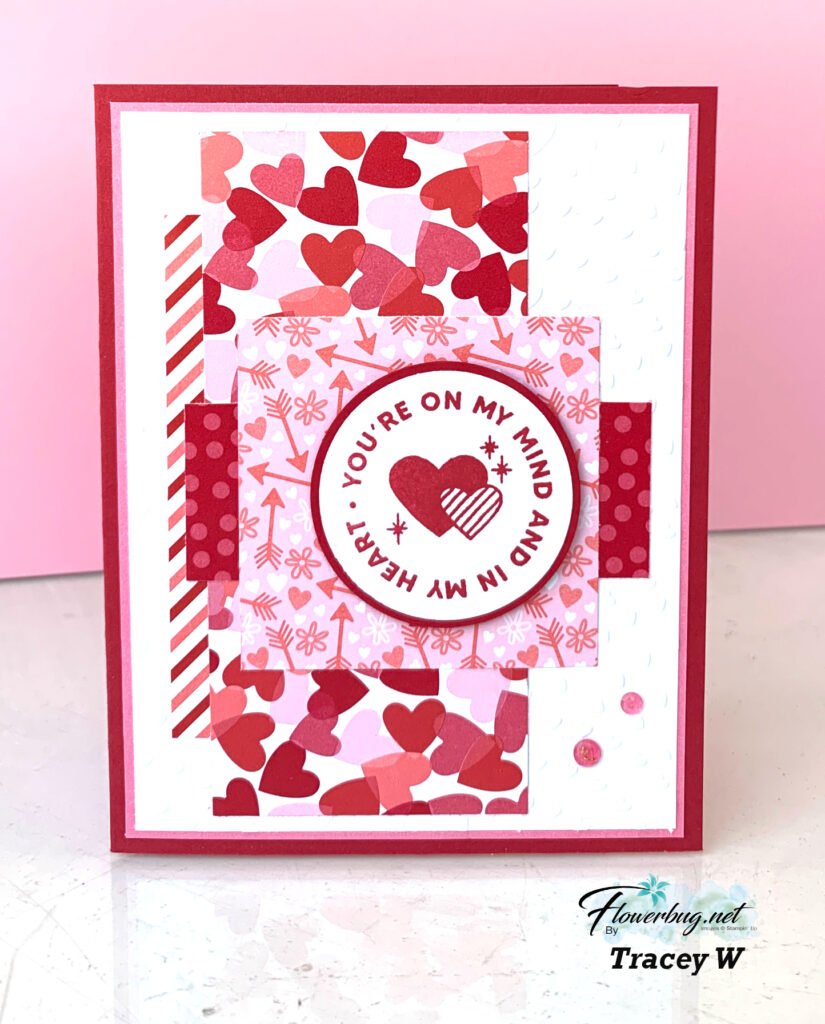
She used the Encircled with Love stamp set seen here along with the 1 3/4″ & 1 7/8″ circle punches. Her colors include Real Red, Flirty Flamingo with White which she got from the pretty designer paper.
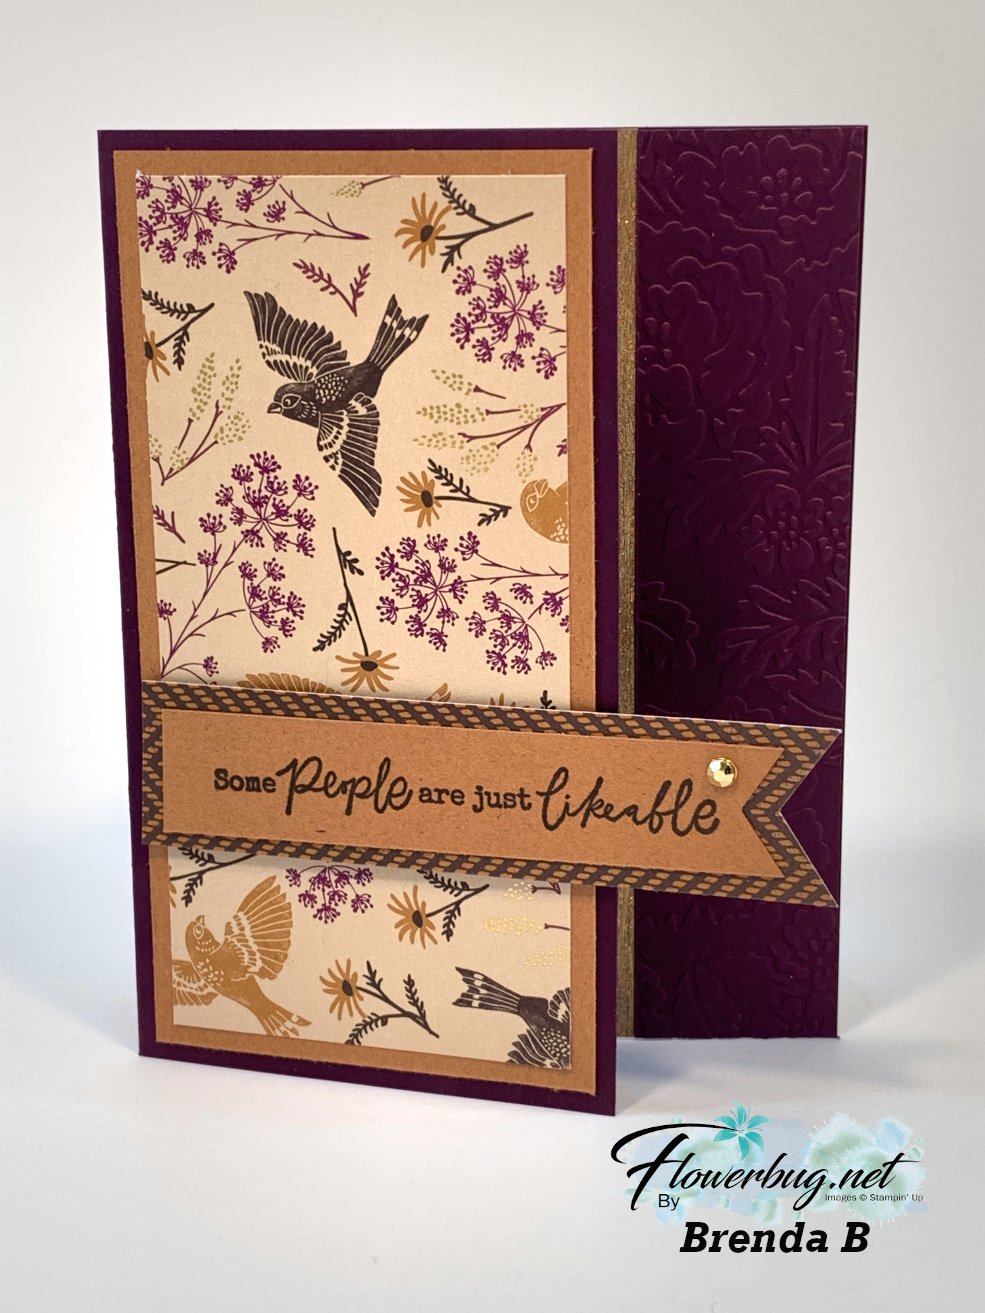
There really isn't a better word for the Blackberry Beauty specialty designer paper. Gorgeous just fits.
Today I'm sharing two fabulous card ideas made by two of my Flowerbug Team members.
First is Annette's pretty card. I think my favorite thing is how she made the amazing designer paper the star of the card. You don't need to add much to make a card shine with this Blackberry Beauty paper! See it here.
She added a stitched rectangle die-cut in Blackberry Bliss for her greeting, heat embossing it with Gold embossing powder. That thinner strip of Gold foil brings your focus back to the greeting. I love the 3 Elegant Faceted gems on the left too.
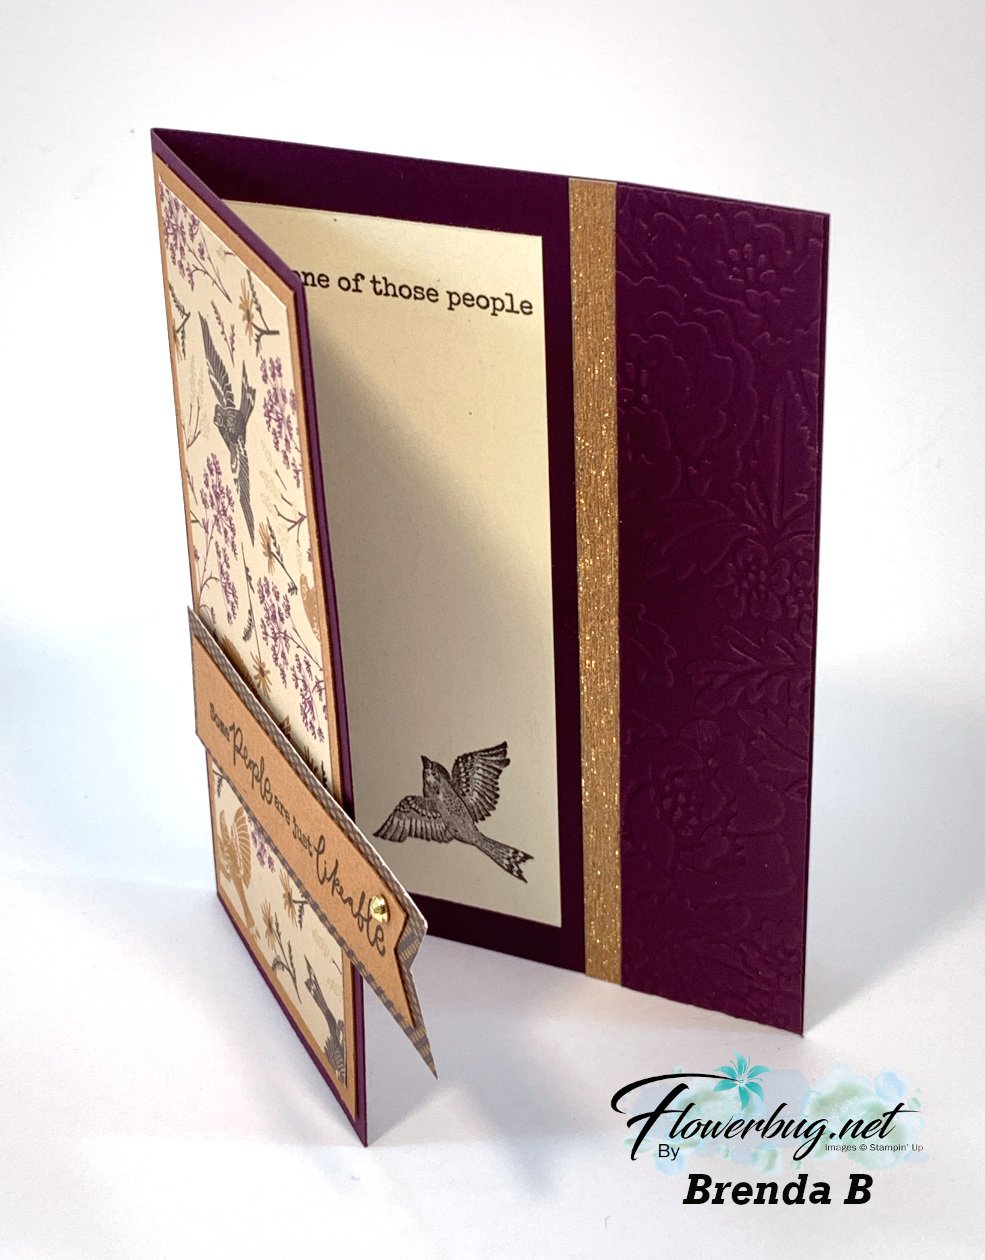
She trimmed off 1 1/4" off the right edge of the card base and textured it with the Pretty Flowers embossing folder. Then she adhered it back onto the 'inside' of the card.
I like how she layered the greeting strip with another piece of this designer paper. Look at the added detail of the thin strip of Brushed Gold paper.
Pretty & Iridescent Whimsy & Wonder Team card swaps!
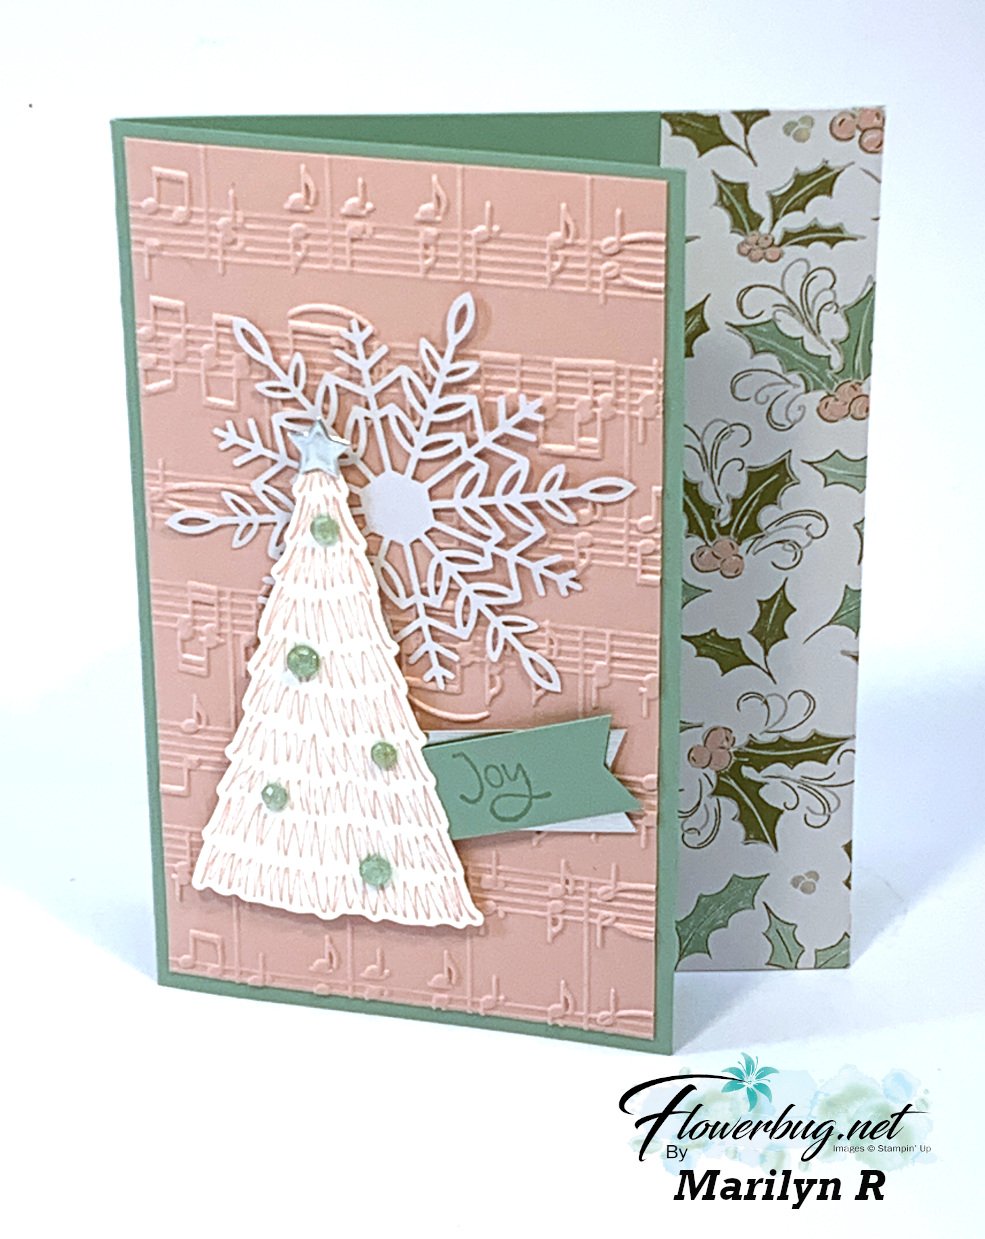
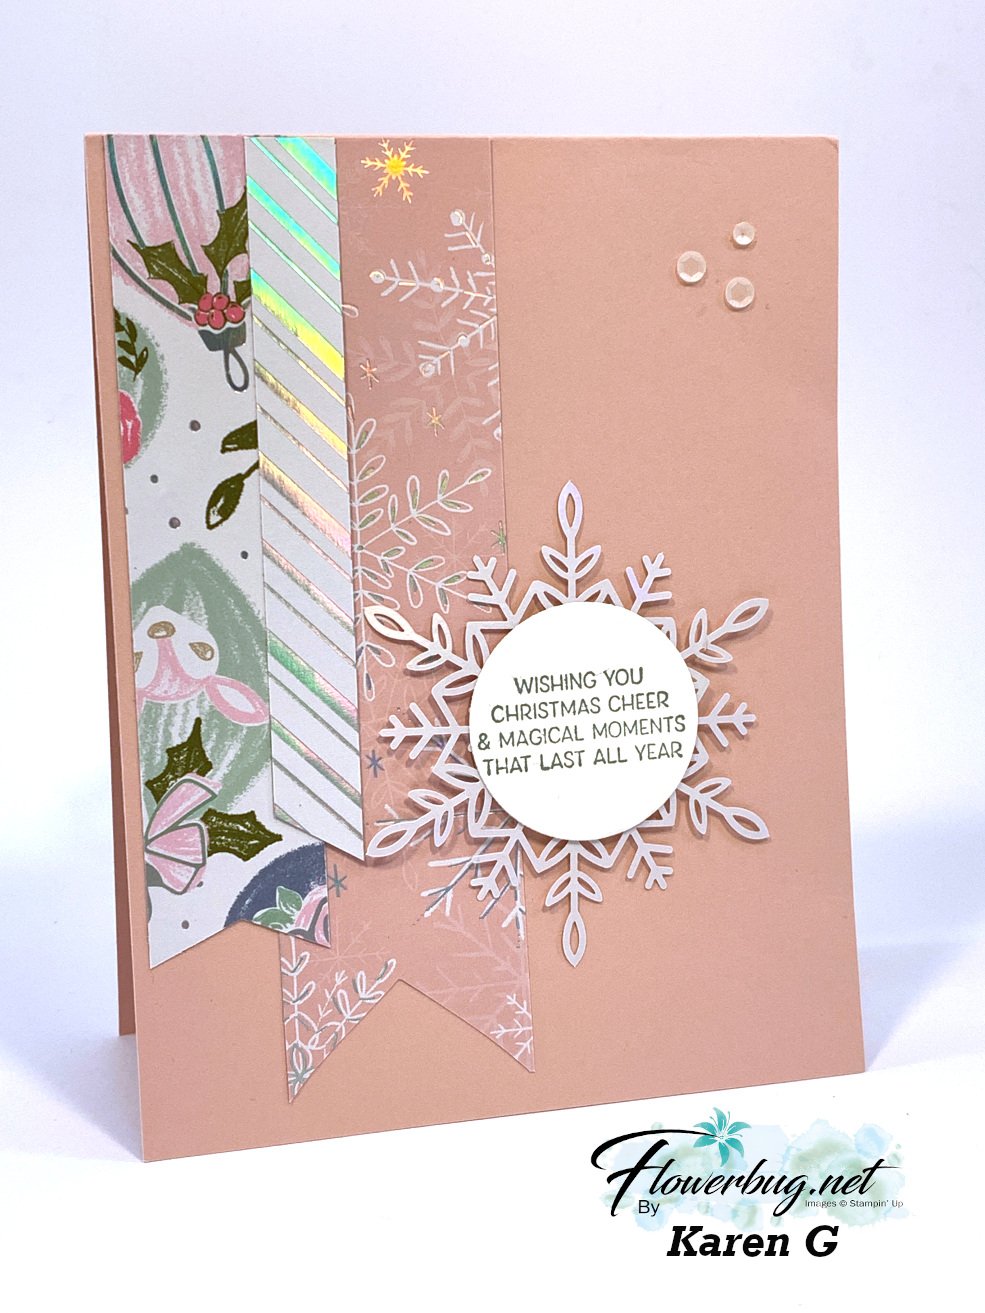
Check out these pretty cards made with the Whimsy & Wonder specialty designer paper and the Whimsical Trees bundle.
This first one was made by Marilyn. She trimmed off an inch on the right side of her card front so it shows off the pretty Whimsy & Wonder specialty paper.
These cards are so fun and interactive. You will be so proud to give one of these. One of my favorite things about this type of shaker card is that it isn't thick so it requires no extra postage.
1st step: add a white punched deer from the Deer Builder punch popped up with a Dimensional.
2nd: Insert into your clear envelope and add a good pinch of Subtle Shimmer sequins.
3rd: Fold the envelope over tightly to keep the sequins on the side of the DSP you want. Secure the flap.
Here's a photo of the back of the shaker part. You can see the back side of the designer paper and where I folded the clear envelope over to secure. A small cello bag would also work here.
After the shaker part is done just add your frame over it securing with adhesive. Add to the card and finish!
Here's a version featuring the Whimsy & Wonder specialty designer paper; it works wonderfully here. The card base and ink are Mint Macaron. The greeting is from the Peaceful Deer stamp set and the die-cut is from Tasteful Labels dies.
Notice: LeeAnn Greff, Independent Stampin’ Up! Demonstrator, Manager. The content of this website is my sole responsibility as an independent Stampin’ Up! demonstrator and the use of, and content of, the classes, services, or products offered on this website is not endorsed by Stampin’ Up! Copyright 2025


Leave a Reply