This week's Stamp with Me Live video featured a window technique using dies. The 2nd & 4th Monday of the month I offer a 'Stamp with Me' Live on my FB page here. Be sure to follow my page so you get notified!
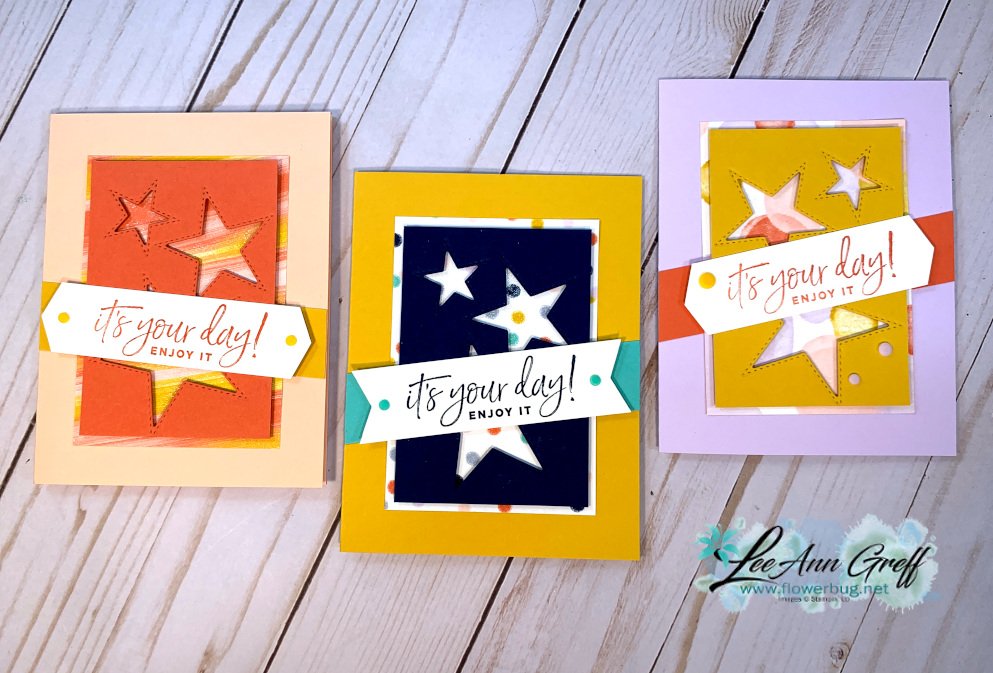
My original card idea came from the Holiday catalog and used the Love of Leaves dies. But I switched it up to use the Stitched Stars dies with the Playful Patterns designer series paper for these fun cards:
I used the smallest three star dies to create 'windows' in my card stock. Then I popped them up over the Playful Patterns designer paper. Add a greeting and another card stock strip and you're done! So quick & easy!
Watch the video below to catch all of the tips and see the original cards too.
Measurements:
Card stock for window 4 1/4" X 3 1/4"
Designer Paper 4 1/2" X 3 1/2"
Greeting strips 3/4"-1" X 4" wide
You can see these items in my store when you click on the links:
It includes directions, photos and measurements for 12 cards!
All Posts
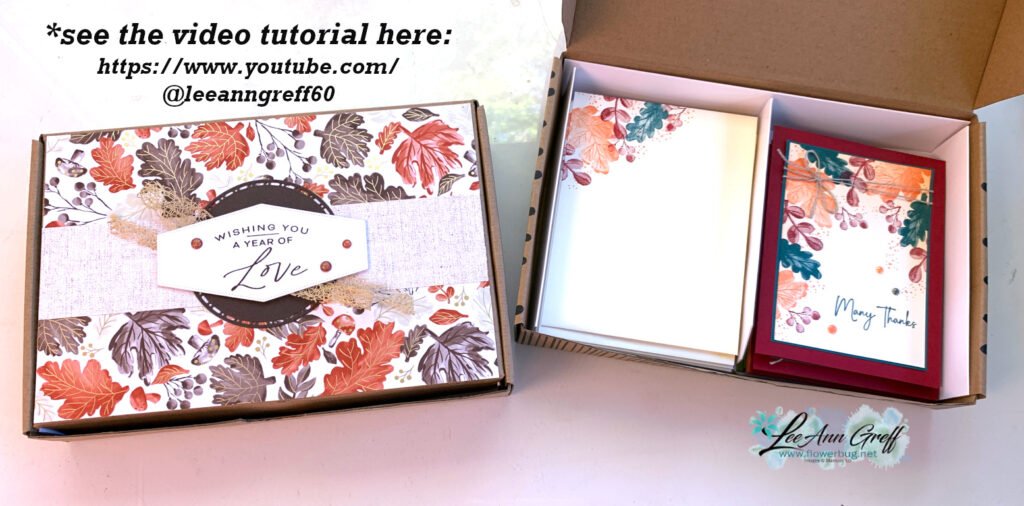
Easy box to gift or store cards in with free project sheet
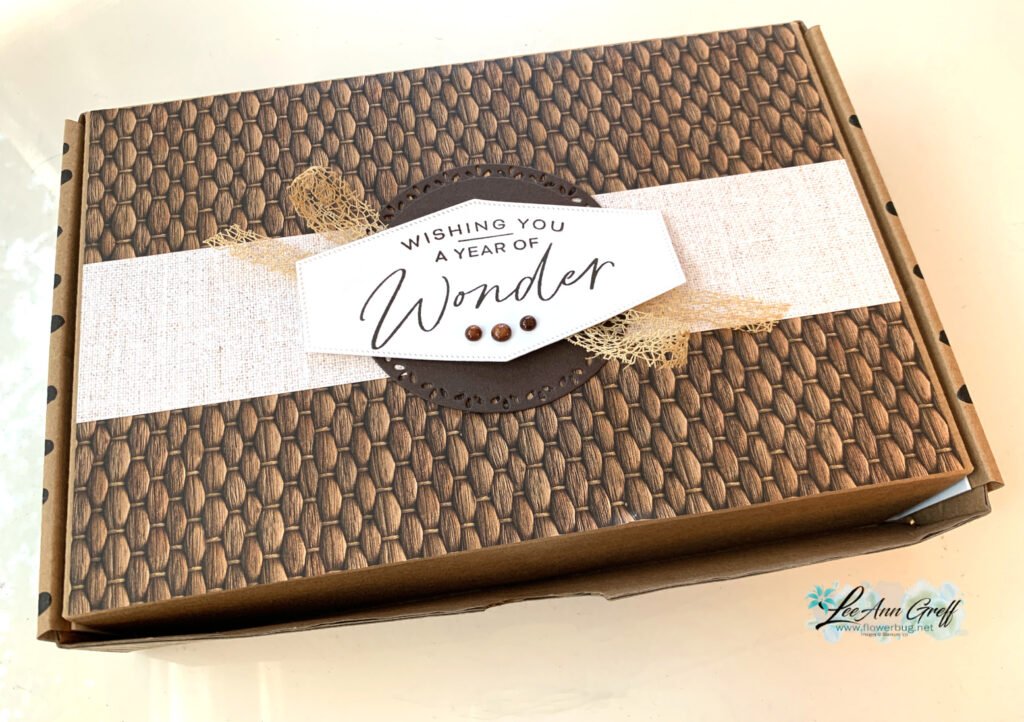
I’m thrilled to share this fabulous box to gift or store hand made cards in. It starts with a box from our Kit Collection. They’re sturdy and look what you can do with one!
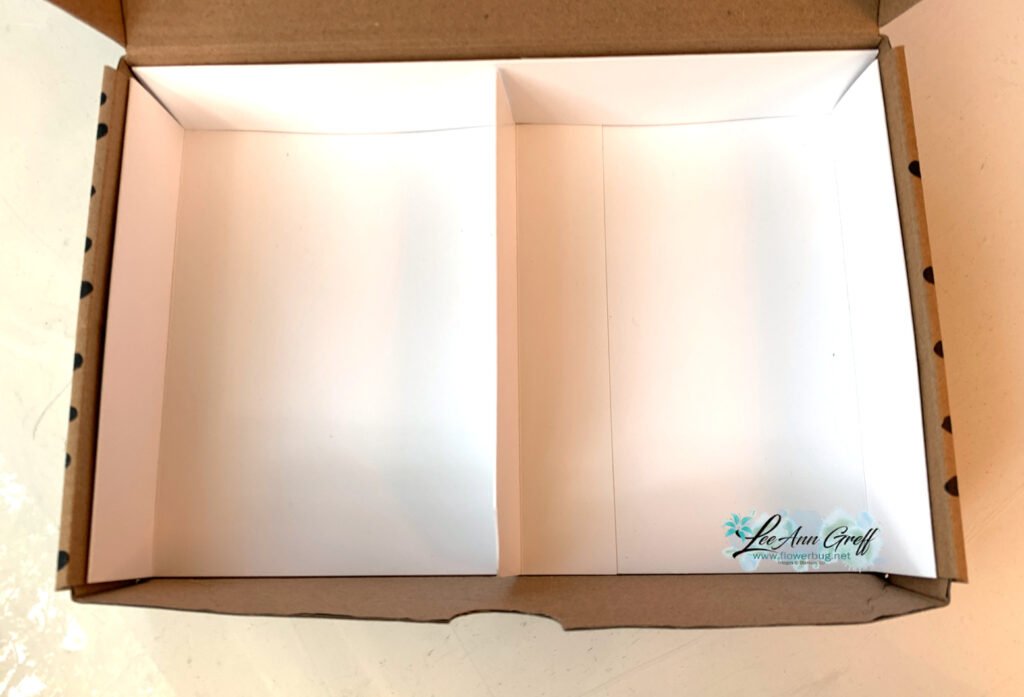
I shared how to make this on last week’s Live video. I know many of you have purchased kits from Stampin’ Up! and hopefully have a few of these saved. The inside organizing sections are made with the thin card board from our designer paper packs. Recycle!
I created a free project sheet so you can replicate this at home. I truly hope you do! Click hereto download or print this project sheet and also watch the video below to see how it’s made and see my tips for success too.
I love making cards with my 5 at a time templates. Making the most of my card stock gives me a great deal of satisfaction. I hope you’ll save these templates and use them in your own crafting.
Below is the template I stamped on; it’s slightly smaller than the one I used for layering. I often use this or the larger one for the neutral layers inside my cards.
Tip: I recommend making your first cut vertically at 4 3/4″. Then cut the left 3 pieces into 3 1/2″ layers. Once you cut all 5 pieces you’ll have one small piece left for a greeting or for punching.
Next is the template for layering the above ‘stamped’ pieces on. It’s just slightly larger – 1/8″ so it’s quite a narrow margin.
The above template has even less waste! It’s so nice to get 5 layered card pieces from 2 sheets of 8 1/2″ X 11″ card stock. Please save these templates!!
In the past when I made cards with these templates I stamped before cutting the 5 pieces apart. This was a bit tricky to stamp in the right place. This time I cut my pieces before I stamped on them. *Always start with your greetings!
As you can see I made sure I stamped three pieces landscape and two vertical. This isn’t necessary but it does change your cards up a bit.
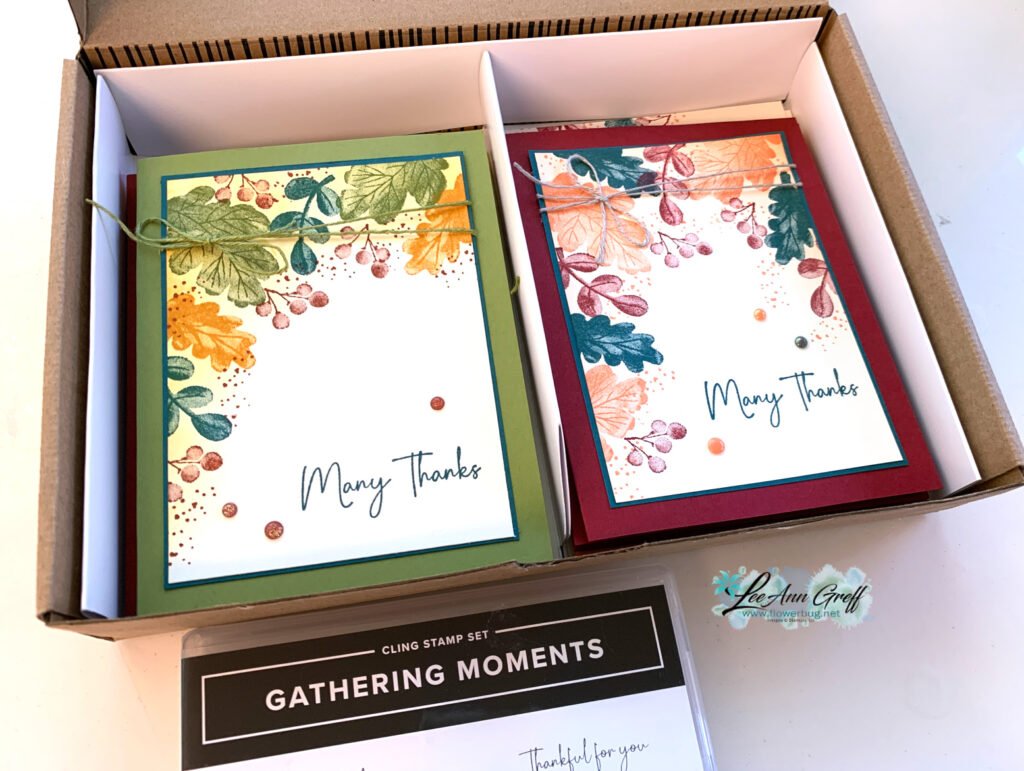
I used Cherry Cobbler, Timid Tiger; and Pretty Peacock here. I like adding Pretty Peacock and Cherry Cobbler to my fall cards. The stamp set is called Gathering Moments seen here.
Tip on stamping – always stamp the greeting image first. Then start with the largest image and work your way down to the smallest to fill in any gaps. It’s okay to overlap your images.
As you can see I blended a light wash of Timid Tiger over the stamped leaves. This softens the appearance and truly enhances your stamping.
Here you can see the stamped pieces added to the larger layers from the 2nd template above.
These were made simply with no punches or die-cuts. Sometimes it’s fun to just stamp and create. You can easily add the greetings on another layer (punches or die-cuts) to add more dimension.
I’ll share my second set of cards using this template later this week. And I’ll also show the fabulous card box I made to gift them in!
See how pretty they are once they’re added to the card bases and gems and twine have been added.
Notice: LeeAnn Greff, Independent Stampin’ Up! Demonstrator, Manager. The content of this website is my sole responsibility as an independent Stampin’ Up! demonstrator and the use of, and content of, the classes, services, or products offered on this website is not endorsed by Stampin’ Up! Copyright 2025




















Leave a Reply