/


Latest Post

Still more incredible Fun Fold Team swap cards!


We had sooo many fabulous fancy fold cards at our February Team swap!  I've been sharing a few each day this past week. Please look back to see them all; I'm sharing measurements for each one!

Jacki made this stunning Pinwheel Tower card featuring the Nature's Sweetness Suite: 

Her colors include White, Pebbled Path and bit of Gold foil & Vellum. She also added gold pearls and Gold Elegant Trim. The texture is made with the Exposed Brick embossing folder.  The greeting is from the Charming Sentiments bundle.

See the Nature's Sweetness suite here; it's huge & filled with beautiful stamps, textures & die-cuts. 
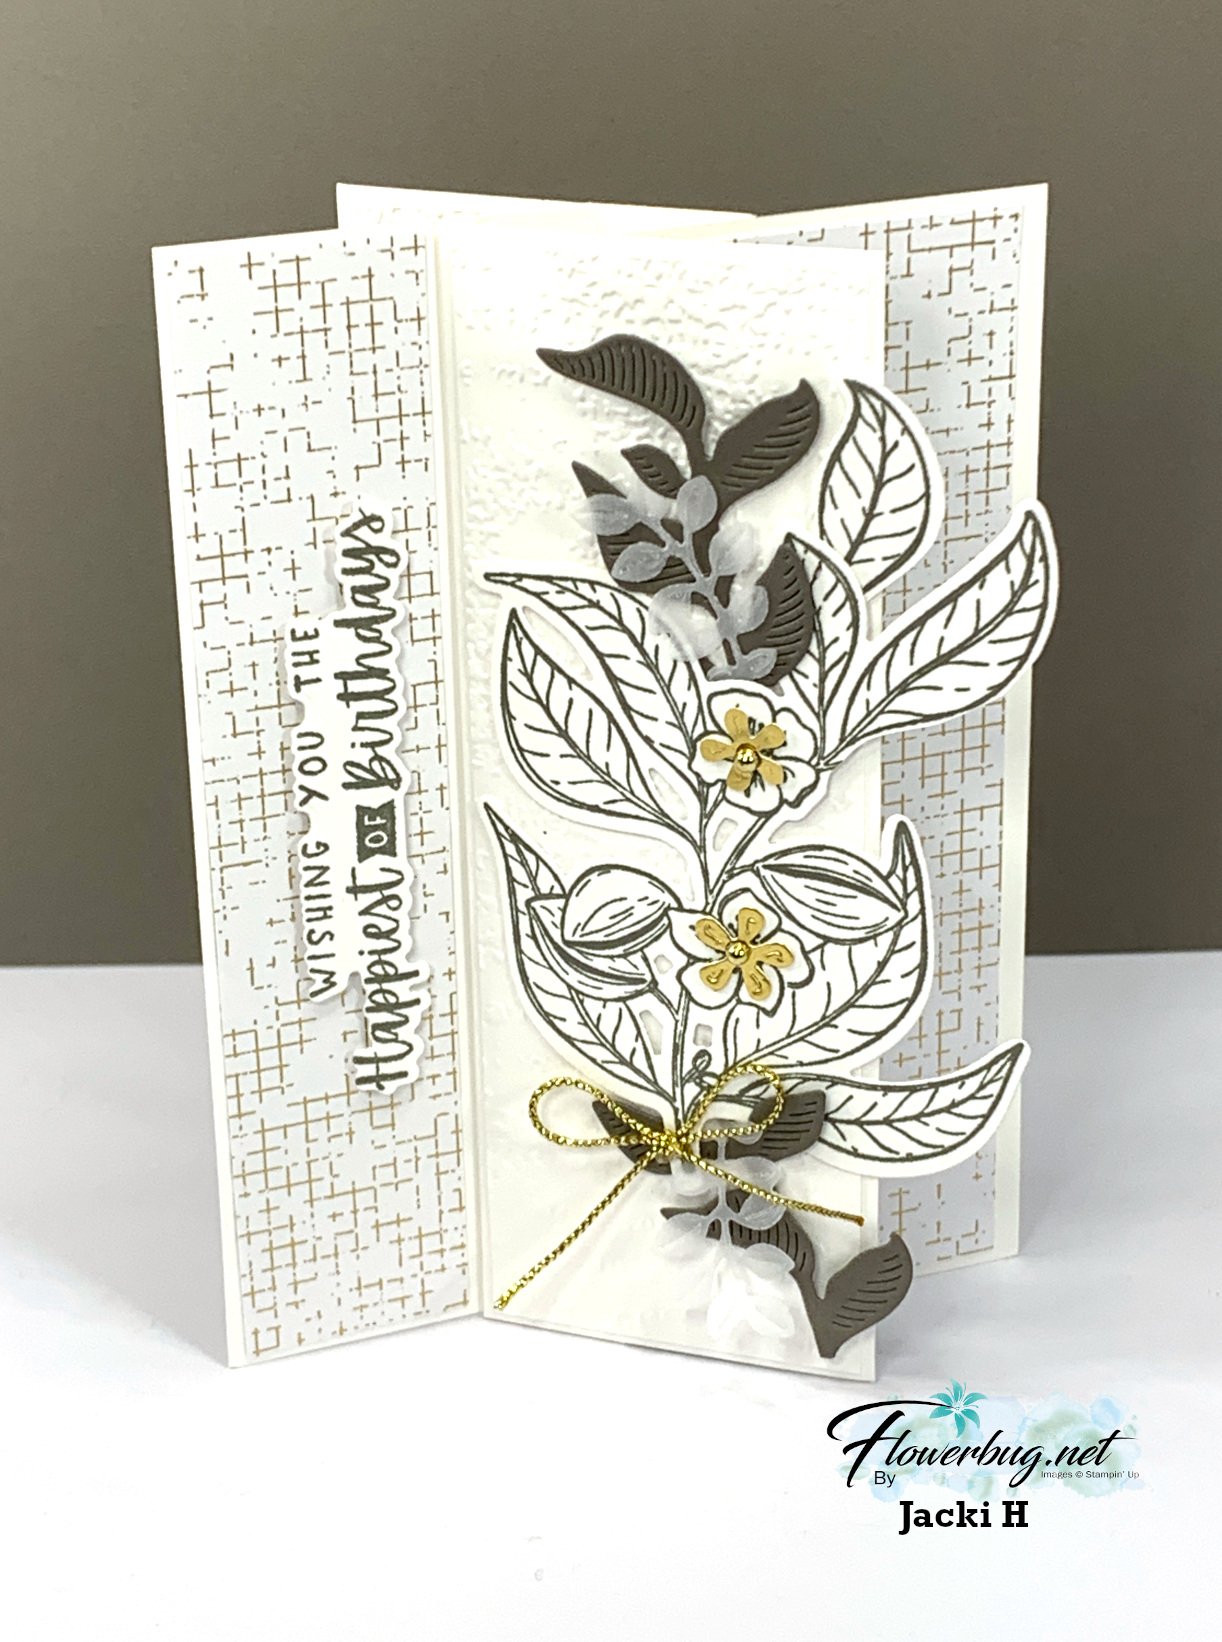
The picture doesn't do it justice; it's simply stunning! If you haven't made one and want to know how check out this video I shared a while back. 

Measurements:

  • Center box is 3 1/4" X 4 1/4"; scored at 1/4", 1", 1 3/4", 2 1/2" 
  • 4 pieces at 2" tall X 4 1/4" 
  • Designer paper layers are 1 1/8" & 1 7/8" – 2 each of 2 patterns

Next is another incredible card made by Jonna who chose the Gone Fishing bundle seen here.  
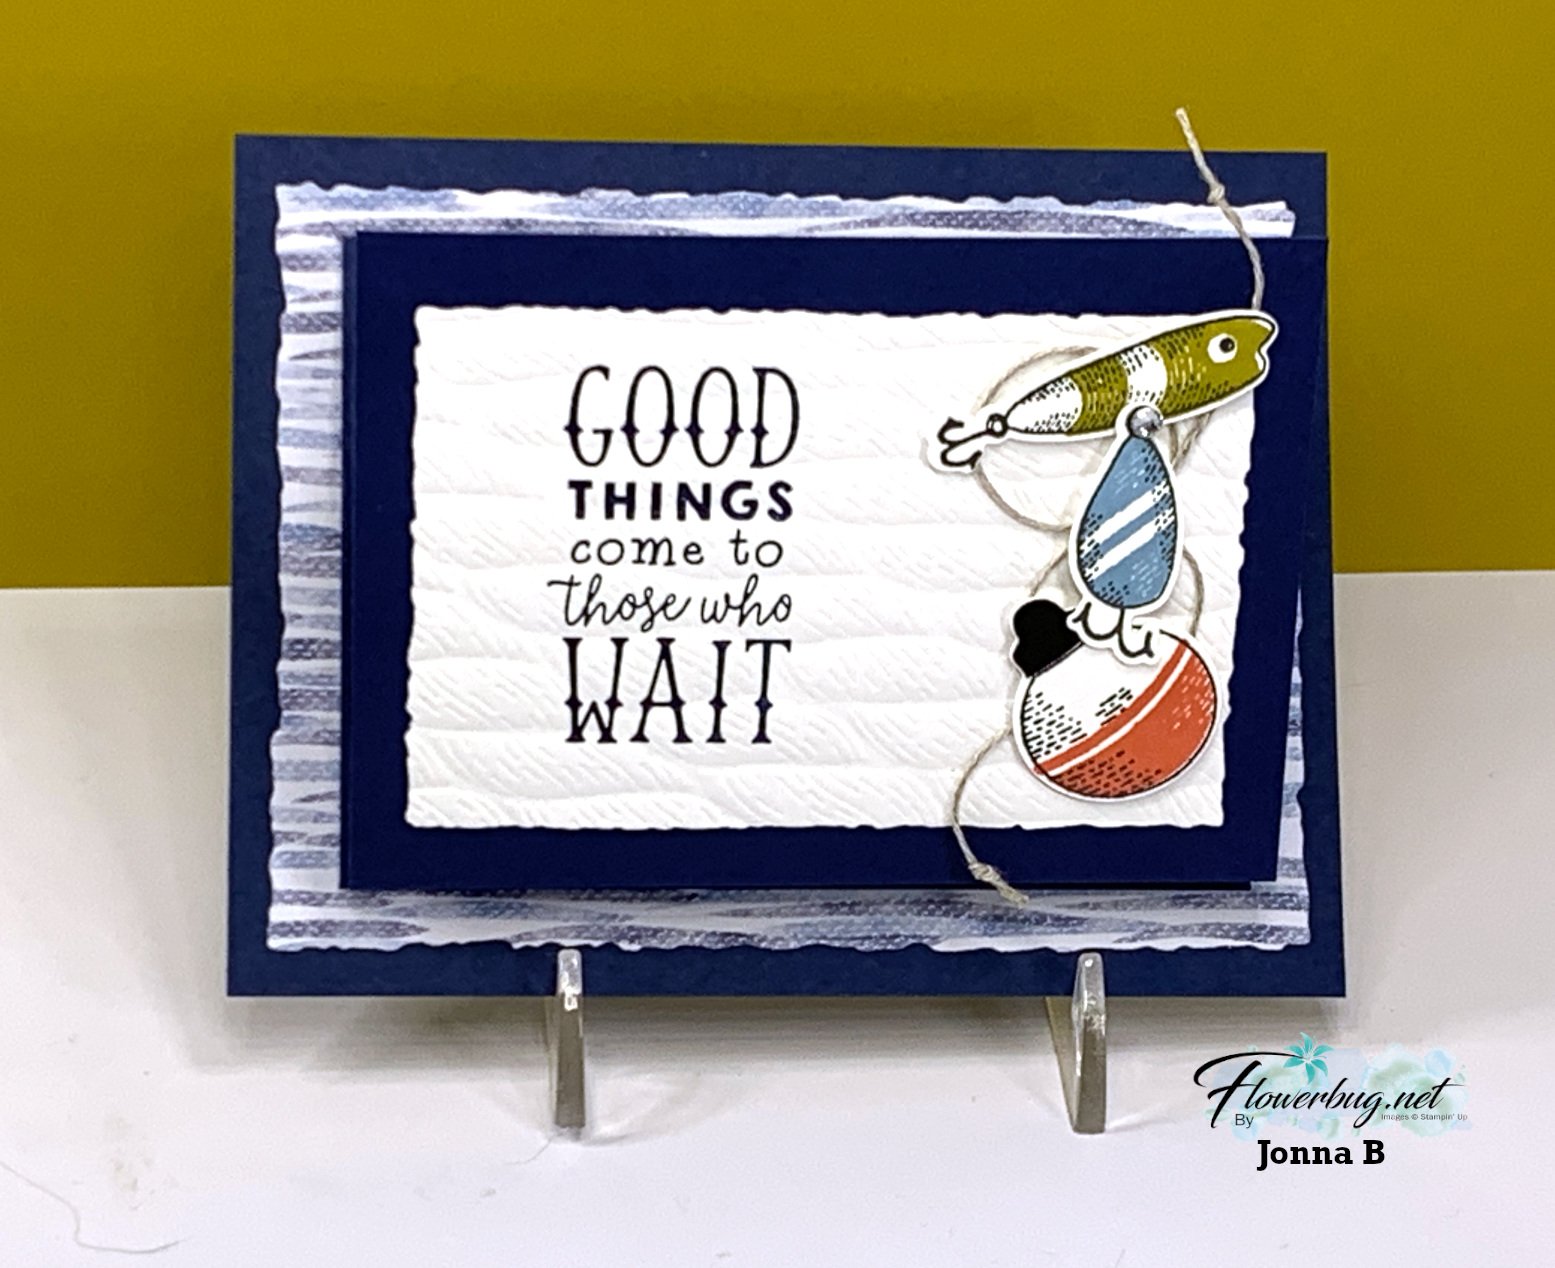
She paired it with the Let's Go Fishing designer paper & Twisted Rope 3D embossing folder. This is an entire suite in the Annual catalog and could retired in April. See it all here. 

When you open up her card it's a gift card.  What a great men's card idea!  

Measurements:

  • Navy card base 5 1/2" X 4 1/4", folded layer is 4 1/2" X 9 3/4" scored at 3 1/4" & 6 1/2"
  • Designer paper – striped on front is cut with the Deckled Rectangles – finished size is 5 1/8" X 3 3/4", inside gift card is 4 1/4" X 2 1/4"
  • White front – Deckled Rectangle die-cut is 3 7/8" X 2 5/8" finished, center white is 4 1/4" X 3" 

~~~

Oh; this one is so beautiful!  Tracey made this one with the One Horse Open Sleigh designer paper. 

This fold is my absolute favorite way to show off our scenic papers!  the card base has one extra score line and you cut your paper into pieces from left to right so when the card opens it's a full scene! 

I LOVE her heat embossed greeting; it's fussy cut into multiple pieces and added with mini dimensionals; what a fabulous effect!  The texture on the front left panel is the Exposed Brick 3D emboss folder seen here. 

Measurements: 

  • Misty Moonlight card base 8 1/2" X 5 1/2" score at 1 1/2" & 4 1/4", second textured layer is 1" X 5 1/4"
  • Designer paper is 6" X 5 1/4" tall. Cut from left to right at 2 3/4" & 4"
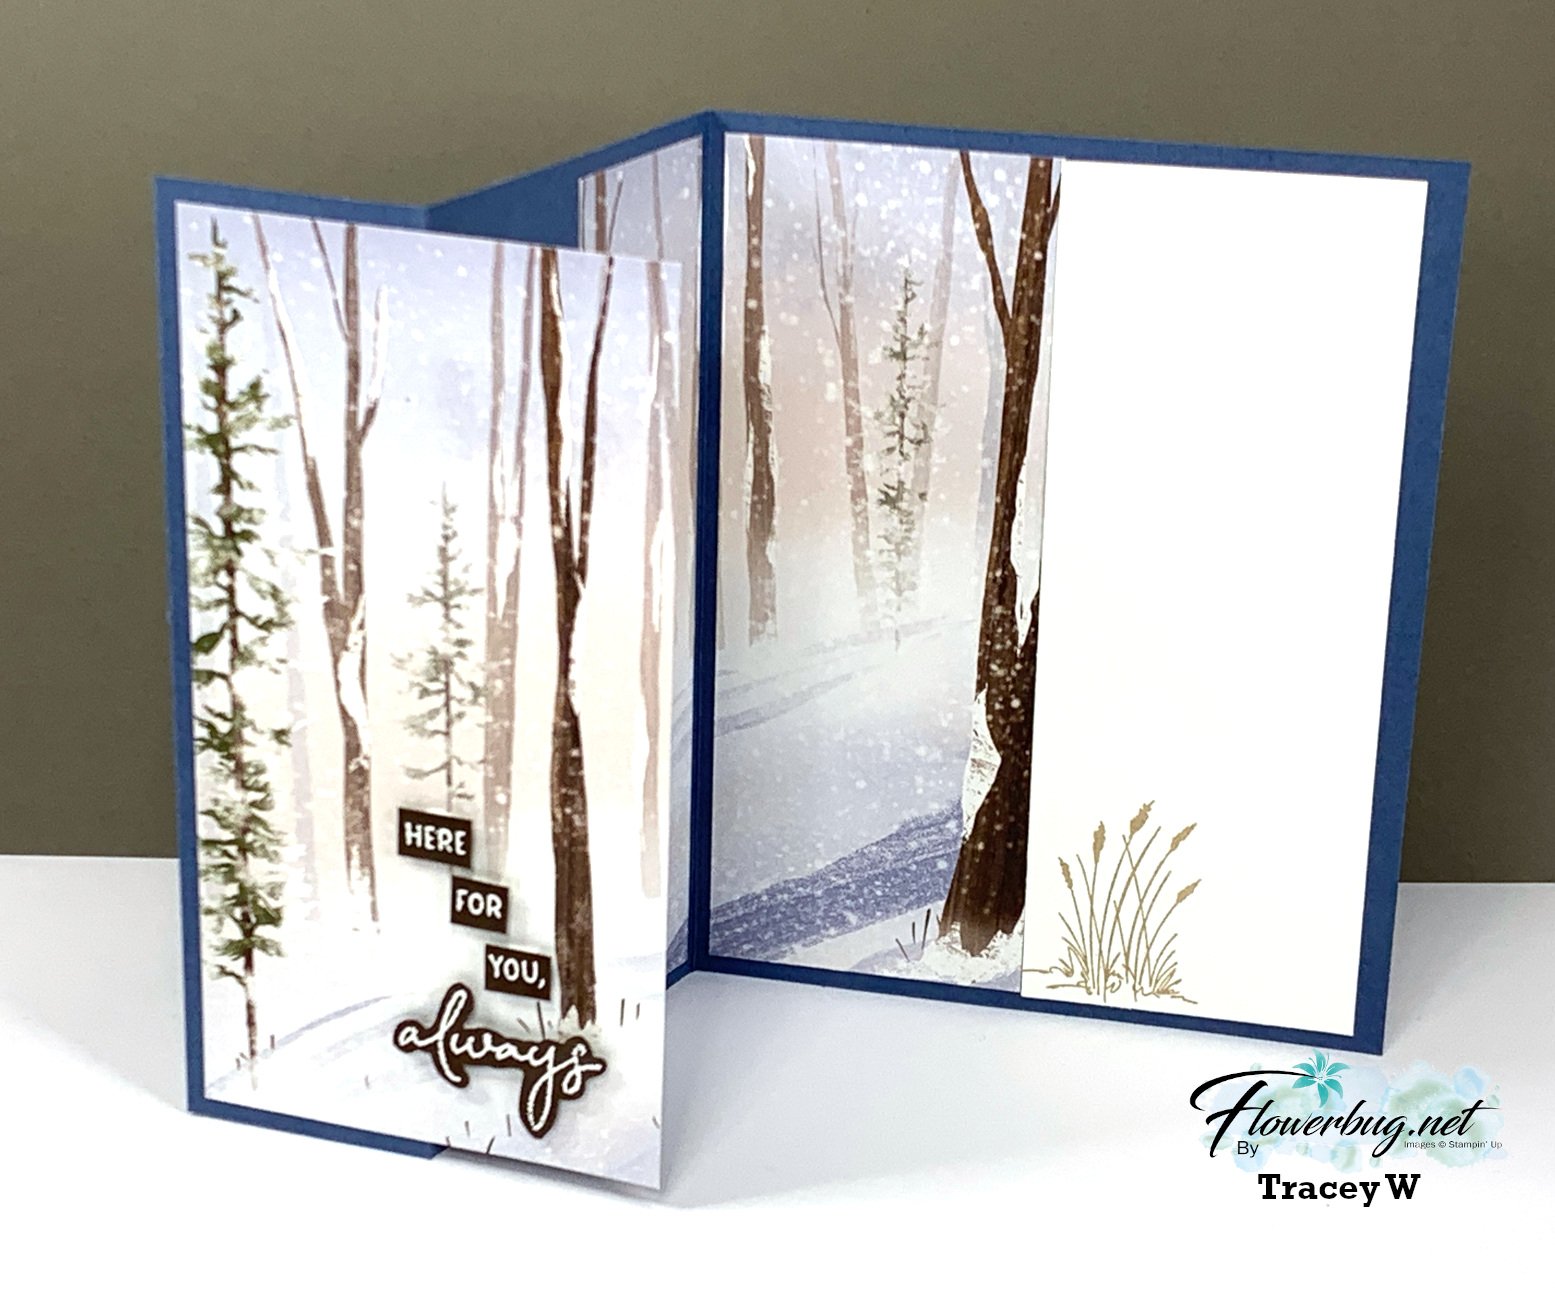
This pretty paper was available online but is sadly gone now.  *Our Online Exclusives are available while supplies last.

I shared how to make this card on a video a few months back. See it here. 

*Stop back in for more fancy fold swaps tomorrow! 

~~~

February Specials: 

Earn FREE products with your Stampin' Up! purchase during

Sale-a-Bration! *click here

*current host code link: 6SUH2MUQ

It's the best time to get a pre-paid Sale-a-Bration subscription

& earn free Sale-a-Bration products!  

~~~

Get a free Gold Foiled cards & envelopes kit

with online orders over $55 in February

All online orders in February will receive this free Nature's Sweetness tutorial with 8 projects!

All Posts

  • Window cards for tonight’s FB Live; stamp right along with me!


    Here are the cards for tonight's FB live projects.  Monday night's videos are designed for you to stamp right along with me.

    Gather some supplies, pre-cut your pieces and join me here at 7: 30 pm CT.  The measurements are below.

    For the card above I used the Flowers for Every Season designer paper and the Tasteful Labels dies.  There are two separate pieces of Misty Moonlight and White CS below the DSP panel.  The greeting is from the Lovely You stamp set. 

    I used the Lovely You stamp set in Magenta Madness and Just Jade.  That pretty texture is the Dainty Diamonds embossing folder. The window is made with the Label Me Lovely punch seen here. 

    I had to use my new favorite stamp set Forever Fern for this window card.  I stamped the same leaf image repeatedly in Misty Moonlight, Cinnamon Cider and Crumb Cake.  Love blues and browns together!  The circle is a 2" punch and the pretty label die is the Tasteful Labels again. My favorite set of label dies now! 

    Measurements:

    • Card base 5 1/2" X 8 1/2"
      Main window layer 3 1/2" X 4 3/4"
      Layered piece 3 3/4" X 5" (the Magenta card has a tighter layer; 3 5/8" X 4 7/8")

    Use Designer paper, stamped or textured card stock and assorted dies or punches for your windows; layer them if you'd like.

    Supplies:

    • Punches – Label Me Lovely, 2" circle, Medium Daisy, Confetti Flowers Border punches
      Designer series paper – Flowers for Every Season
      Ink & Card stock – 2020 In colors, Crumb Cake & White
      Dies – Tasteful Labels
      Stamps – Forever Fern, Lovely You
      Other – jewels, embossing folder, dimensionals, sponge


    Join me tonight when I make these three cards! 

    ~~~

    Are you planning a nice sized order soon?  If so choose the best deal in the catalog and pick any bundle of your choice FREE!  

    Get my Lovely You pdf tutorial free with any online order in June


    It includes directions, photos and measurements for 10 cards!


    June Host code is 7H2FW9FG

    Get a free pkg. of Elegant Faceted Gems from me if your order is over $55. 

    Order online here


    Leave a Reply

    Your email address will not be published. Required fields are marked *

  • Control Freaks New Catalog Blog Hop


    It's time for our monthly Freak's blog hop!!  Our focus today is the new Annual Catalog.  We have lots of amazing projects to share with you using brand new products. 

    You may have arrived from Tami's blog; I'm sure you loved her projects!  Or maybe you just started here.  To see all 12 posts be sure to click on the icon at the bottom of each post. 

    It's been so fun to play with exciting new products from the 2020 Annual Catalog!  Are you ready for some glitz & shine?

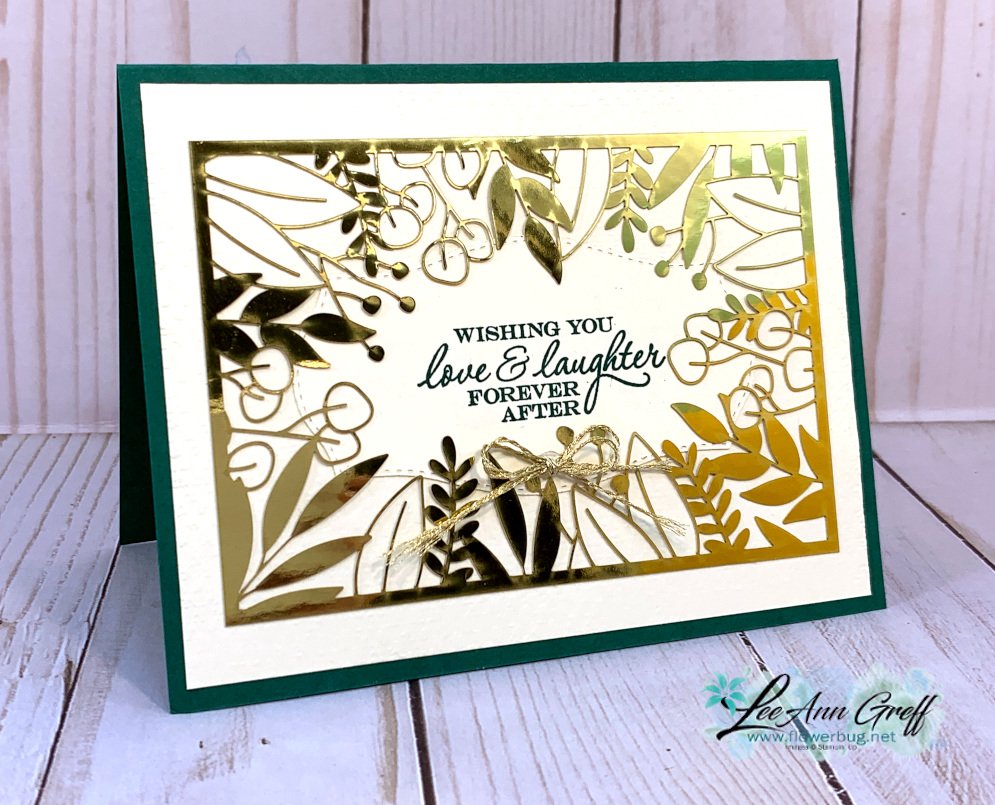
    I chose to play with the Forever Gold Laser-cut Specialty Paper today.  It's part of the Forever Greenery suite of products.  You can see it best on page 152 of your annual catalog. It has 6 sheets; 3 each of 2 single sided designs. One side is gold and the other is white which you can color, spritz or sponge.  I chose to use the gold sides for my projects here.  

    You can see the details & measurements for each one under the photo. 

    I chose to use jewel toned card stock for each card; I think it looks rich & regal with these colors.  The card above is Blackberry Bliss with Very Vanilla.  The pretty golden leafy medallion is all one piece; just punched out from the pack.  I added a 1" X 4 1/4" strip of Vanilla under it and a stamped die cut above with a few metallic pearls.  The stamped image is from Dandelion Wishes and the die is from the Stitched So Sweetly dies. 

    This card is Shaded Spruce with Vanilla.  It's hard to see but the large 4" X 5 1/4" vanilla is textured with our Tasteful Textile embossing folder. The greeting is stamped on a die from Tasteful Labels using the Heart to Heart stamp set.

    Once I had these pieces adhered I could add the laser cut piece on top. I added a bit of liquid multipurpose adhesive to the edges and a few leaves and it's done!

    The laser cut card front pops out so easily from the rest in the sheet. No fussy cutting or die-cutting with these! 

    This is probably my favorite one of the three. This laser-cut piece is delicate and leafy; it leaves a perfect area for a greeting in the stitched center. The card is Night of Navy with a 2" strip of the World of Good designer paper across the middle. 

    I stamped the 'Always' greeting (Field of Flowers set) on a 1 1/2" X 2 1/4" piece of Very Vanilla card stock and sponged the edge with Misty Moonlight ink.  The 'In My Heart' greeting is embossed with Gold embossing powder on Misty Moonlight card stock and punched out with the Classic Label punch. 

    Did you spy the cute little flowers on this card?  They're from the new Confetti Flowers Border punch. Each one has a Metallic pearl on it.  

    I hope you enjoyed seeing these pretty cards with the beautiful Forever Gold Laser-cut Specialty Paper.  If you like shine and glitz you'll love it! 

    ~~~

    Thanks for stopping in to see my projects.  Now you're off to see what Cindy has to share.  I know you'll love it; I always do.


    Leave a Reply

    Your email address will not be published. Required fields are marked *

  • One more Forever Fern card with video; in my favorite colors!


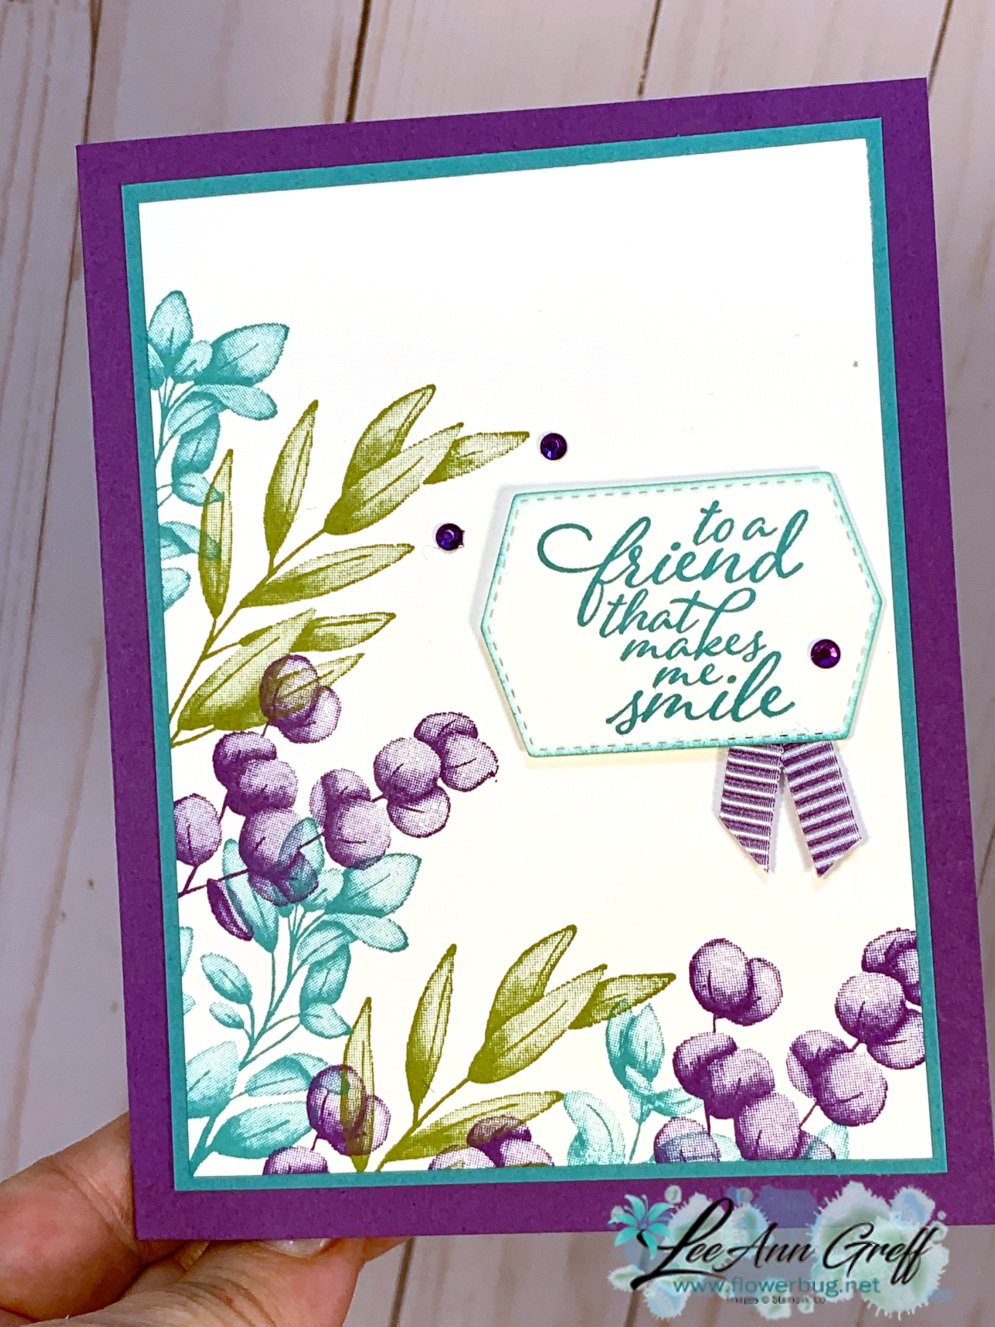
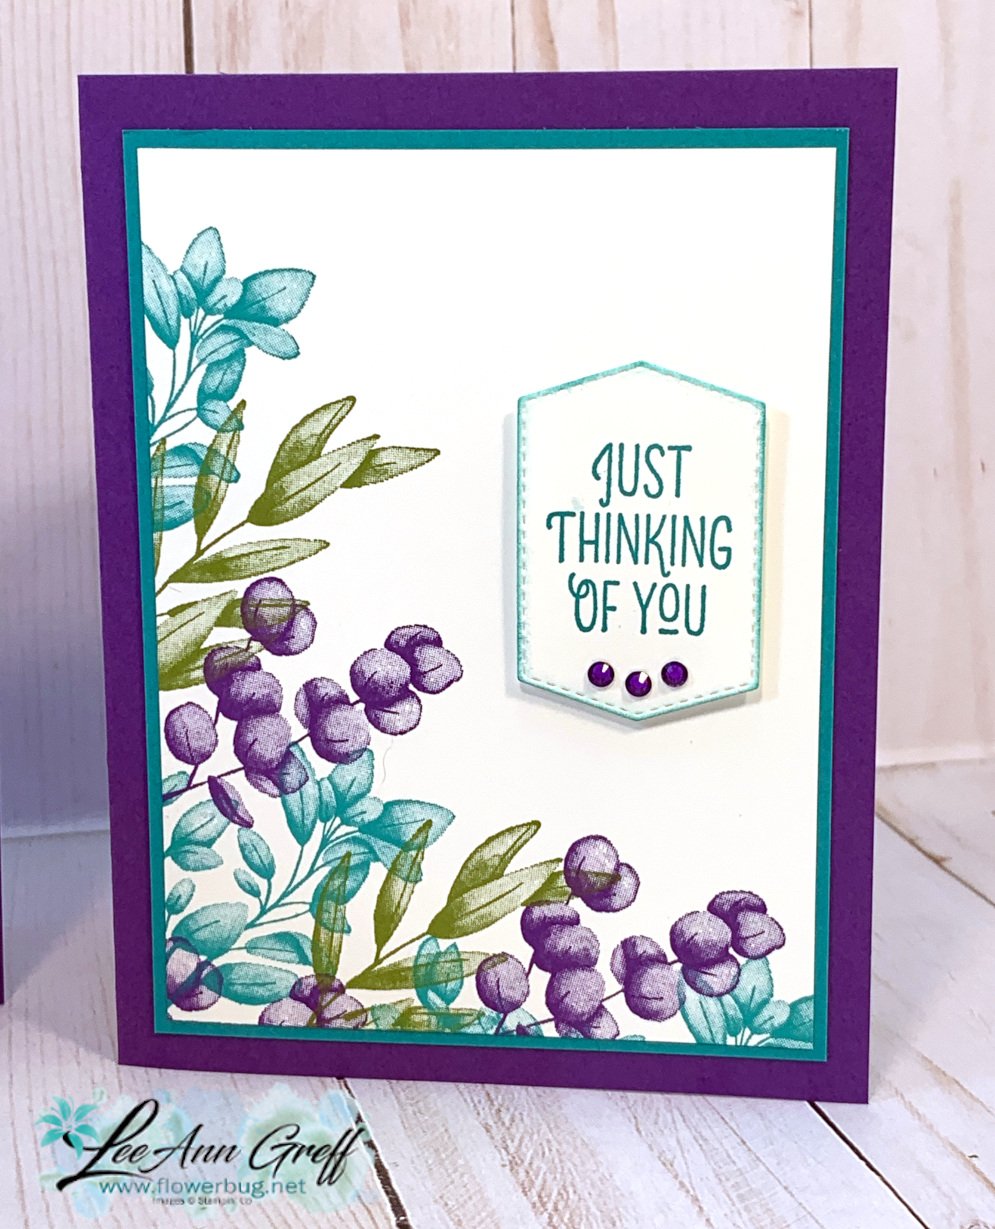
    As I've said before I cannot get enough of this stamp set.  And when it's in some of my favorite colors too, well it hits all the high points in my stamping world.  

    We made these pretty cards at my June card clubs.  Simple stamping at it's best!!

    The colors here are Gorgeous Grape, which is gorgeous!, Old Olive and Bermuda Bay.  The pretty die is from the Tasteful Labels set of dies seen here. 

    This stamp set really makes you feel like an artist.  These Distinktive stamps are absolutely amazing!  I cannot say enough about how much I love them.  Even when you stamp over the images it doesn't matter as they appear somewhat translucent.  

    Watch this quick video to get the details and catch some great tips. 


    ~~~

    The new catalog is here!!! 

    Get my Lovely You pdf tutorial free with any online order in June


    It includes directions, photos and measurements for 10 cards!


    June Host code is 7H2FW9FG

    Get a free pkg. of Elegant Faceted Gems from me if your order is over $55. 

    Order online here


    Leave a Reply

    Your email address will not be published. Required fields are marked *


Notice: LeeAnn Greff, Independent Stampin’ Up! Demonstrator, Manager. The content of this website is my sole responsibility as an independent Stampin’ Up! demonstrator and the use of, and content of, the classes, services, or products offered on this website is not endorsed by Stampin’ Up! Copyright 2025