/


Latest Post

Stamp with me! Tonight: Thursday, April 2nd at 8 pm on Facebook Live


Sadly, my April events are all cancelled due to the current pandemic.  I haven't had a month without seeing my stamping friends in many, many years!  We're having virtual clubs instead this month but it just won't be the same!

I know many of you are in the same situation so I decided to do a weekly 'Stamp with Me' Facebook Live on Thursdays at 8 pm CDT. It's a virtual stamping class. Join me Thursday night, April 2nd here on my FB page.  


We'll be making these 3 cards plus a bonus technique I'll demonstrate. Remember you don't have to use these exact products!  You can easily substitute other paper, stamps etc.

If you don't have the Magnolia Lane designer paper you can use any other paper you own instead.  It will be fun to see what everyone uses; we'll share our projects with each other afterwards. 

Here are the supplies and measurements so you're ready to stamp with me:

Measurements:

  • Card bases; one White 5 1/2" X 8 1/2", two of Mossy Meadow 4 1/4" X 11" 
  • Designer Paper – two designs cut at 4" square. Cut one  on the diagonal in half.  For the other, make a mark at 1 1/4" from the upper right and also from the lower left. 
  • Good Morning Magnolia stamp set

Extras: (it might look like a long list; but it's mostly accessories) 

  • Black Memento & Petal Pink inks
  • Blends markers – Petal Pink, Light Mossy Meadow
  • one large oval die-cut (largest Stitched Shape oval die or cut a rectangle at 2 1/2" X 3 1/2") 
  • a 1 1/2" White circle and a Petal Pink Pretty Label punched piece. (You can easily substitute any shapes here) 
  • Champagne rhinestones 
  • Petal Pink ribbon
  • Sponge dauber for Petal Pink ink 
  • Mini glue dots
  • Dimensionals 

~~~~

Two April ordering specials:

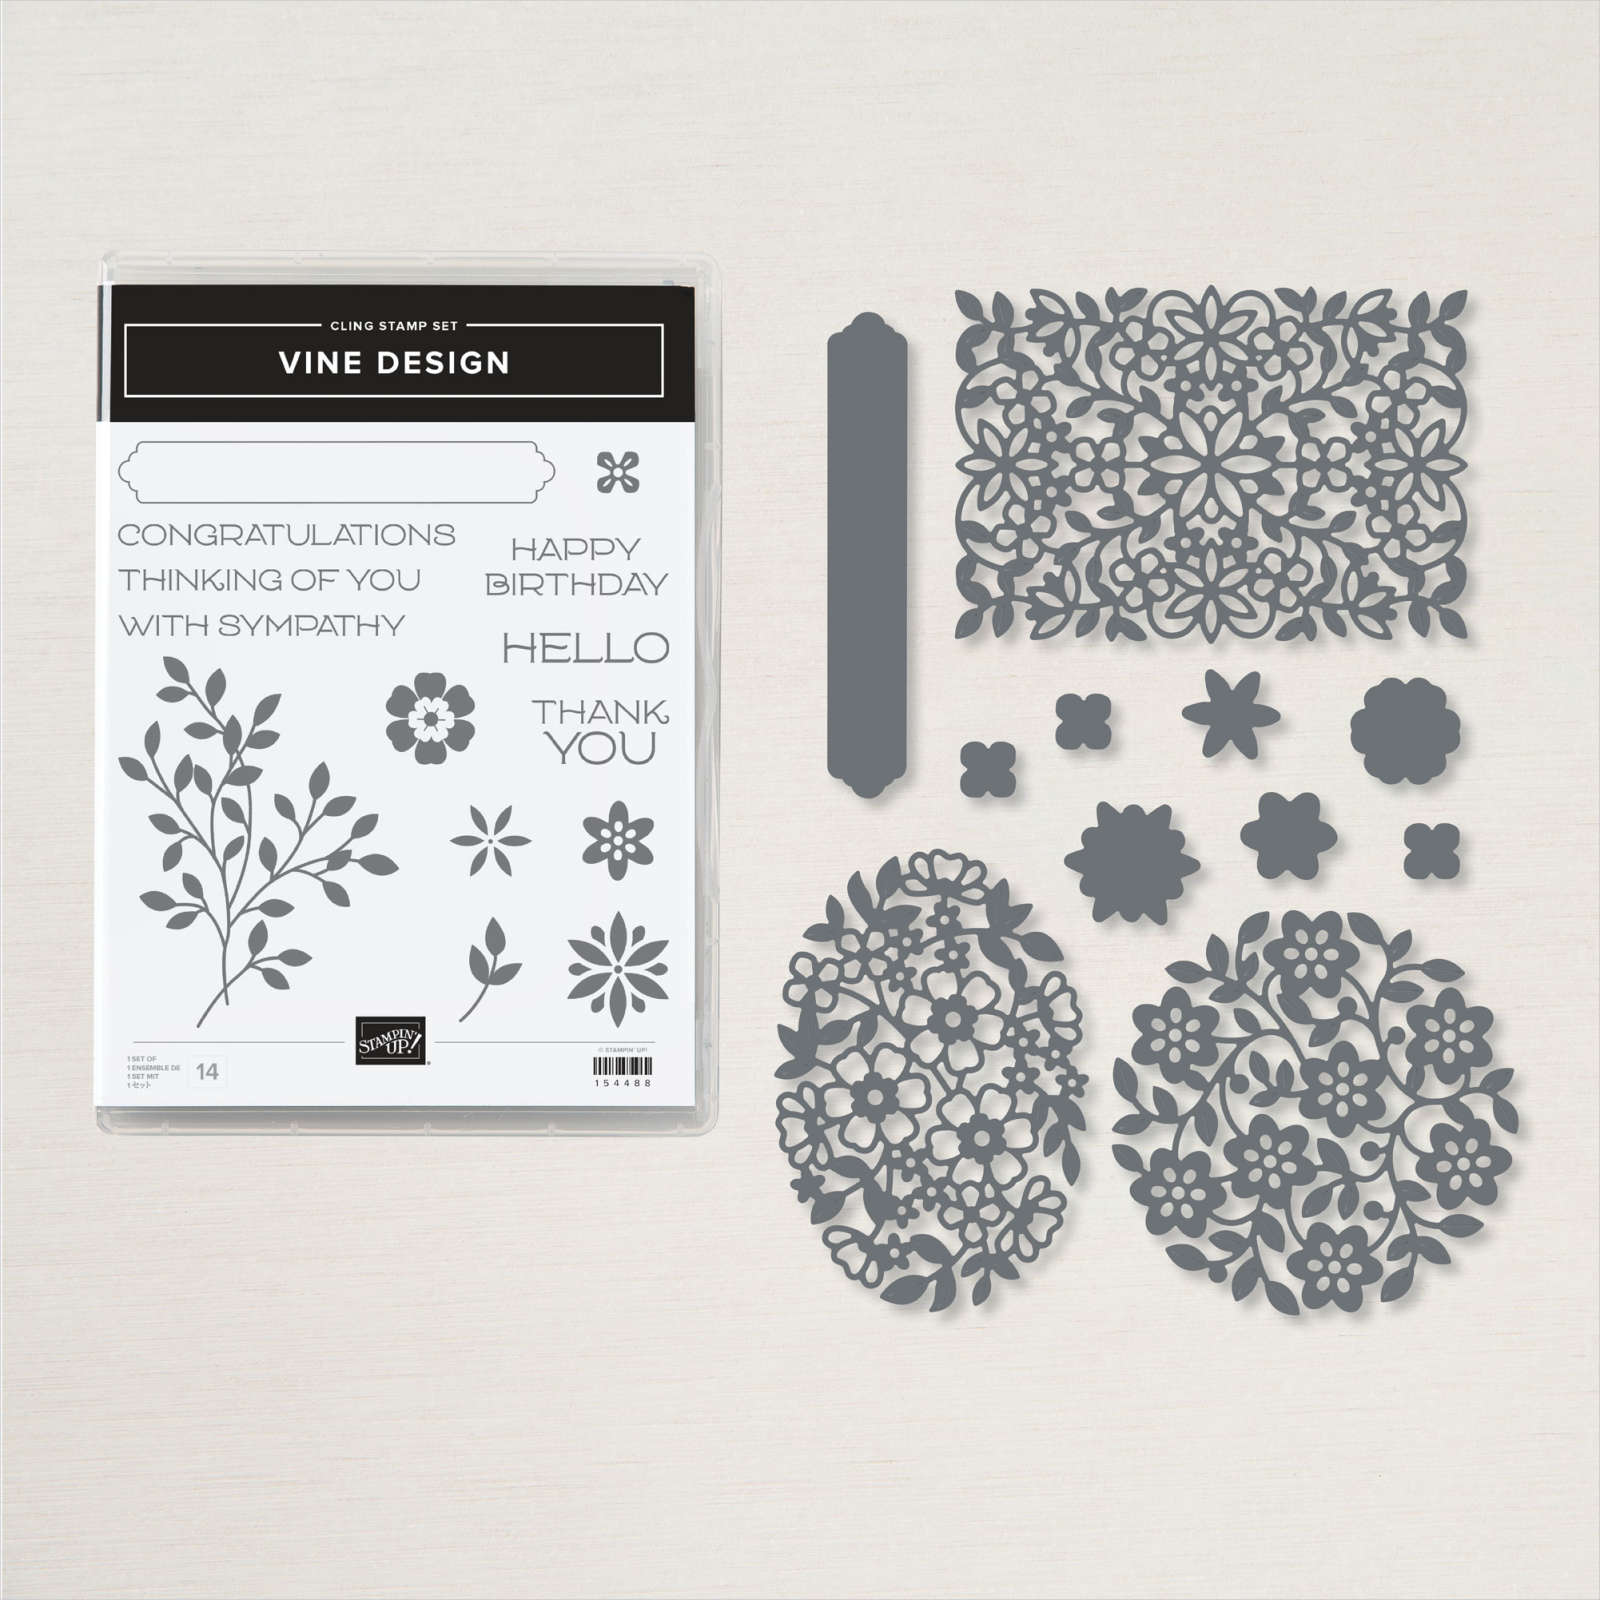
All online orders in April will receive my tutorial of the month; with 16 cards

featuring the Ornate Garden products seen here.

Orders between $55 and $99 will receive a free Simple Shammy!

Use this host code for April: MMM4SXSB  

~~~~~

Or….

Join my $1000 party! 

The first 10 people in April to order over $100 using this exclusive party host code 49HFZ6G3 will get a free Little Ladybug cards class that includes the stamp set and a 4 cards pre-cut kit! 


All Posts

  • All Around Wreath for Christmas


    Have you noticed the All Around Wreath bundle in the annual catalog? Click here; it's quite the gem!  So many occasions are covered in the greetings and die-cuts.  

    Marilyn made this pretty Christmas themed wreath for our Team Christmas card swap. 

    She chose to use two shades of green here; Mossy Meadow with Pear Pizzazz along with a few touches of Gold.  The pears are heat embossed in Gold powder as well as the shimmery thread.  

    Other details:

    • The greeting is die-cut with the Hippo & Friends dies seen here
    • The Vanilla layer is textured with the Pinewood Planks embossing folder
    • She used the same wreath die-cut but in two colors, separating them slightly on the card. 

    ~~~

    November Specials!

    Current Host code is GRC9VVUU


    All online orders receive my FREE Curvy Celebrations 22 project PDF Tutorial! 


    Leave a Reply

    Your email address will not be published. Required fields are marked *

  • Retro style circles layout; super easy! Catch the Live video tonight!


    Tonight at 7:30 pm Central Time I'm sharing how to make these retro style circle cards on Facebook Live.  Click here to join me.   You can also see this video below!

    Basically you need three sizes of circle dies or punches for the start of this layout.  Cut them in half and layer together with the edges meeting on one side. Adhere and add a long greeting between the two. 

    Watch how on my FB Live replay!

    Measurements:

    • 5 1/2" X 8 1/2" card base
    • 3 1/2" X 4 3/4" Whisper White; the greeting strip is about 5" long and either 1/2" or 3/4" wide depending on your greeting image.
    • 1" X 5 1/2" horizontal strip
    • Circles from the Stitched Shapes dies are the largest three circles. 

    You'll want ink, stamps and embellishments that coordinate with your Designer Paper.  Remember you could use card stock instead of DSP. 


    Products used:

    • Designer papers – Heartwarming Hugs, new Classic Christmas & Snowflake Splendor
    • Stamps – Tree Angle, Snowflake Wishes & Curvy Christmas
    • Colors – Real Red & Olive, Seaside Spray & Night of Navy, Sahara Sand & Cherry Cobbler  
    • Other: Stitched Shapes dies, Curvy Dies & Pick a Banner punch

    ~~~

    November Specials!

    Current Host code is GRC9VVUU


    All online orders receive my FREE Curvy Celebrations 22 project PDF Tutorial! 

    Leave a Reply

    Your email address will not be published. Required fields are marked *

  • Curvy Christmas & the Postage Punch


    Check out this easy card using the new Curvy Christmas stamp set and the Postage Punch!  

    It's super simple! Here's how I made it:

    1. Stamp the curvy trees image on the White CS using Shaded Spruce ink.  Color the trees with a Light Shaded Spruce Blends marker.  Add a tiny star using Cherry Cobbler ink on one tree. Adhere it to the Cherry Cobbler layer and to the main card.
    2. Punch out three pieces of Classic Christmas designer paper with the Postage Punch seen here.  Adhere to the White CS. 
    3. Stamp the greeting in Cherry Cobbler ink on a 1/2" strip of White CS.  Punch the ends with the Banners Pick a Punch. Add it to the card with mini dimensionals. 
    4. Finish with a few Holiday rhinestones. 

    You can see this stamp set here; it's only available through January 4th.  And the Classic Christmas Designer Paper is here while supplies last. 

    Remember that everyone who orders any of these products or places an online order with me in November will receive a free 22 project PDF tutorial featuring the Curvy Celebration products! 


    ~~~

    November Specials!

    Current Host code is GRC9VVUU


    All online orders receive my FREE Curvy Celebrations 22 project PDF Tutorial! 

    Leave a Reply

    Your email address will not be published. Required fields are marked *


Notice: LeeAnn Greff, Independent Stampin’ Up! Demonstrator, Manager. The content of this website is my sole responsibility as an independent Stampin’ Up! demonstrator and the use of, and content of, the classes, services, or products offered on this website is not endorsed by Stampin’ Up! Copyright 2025