Who doesn't love free!? There is a bonus stamp set added to every order over $300 during Sale-a-Bration this year. It's called Punch Party & is available to both customers and demonstrators too! One thing I love about Stampin' Up! is that us demonstrators enjoy the same perks as customers!
I was able to pre-order this set during December; another favorite perk of being a Stampin' Up! Demonstrator.
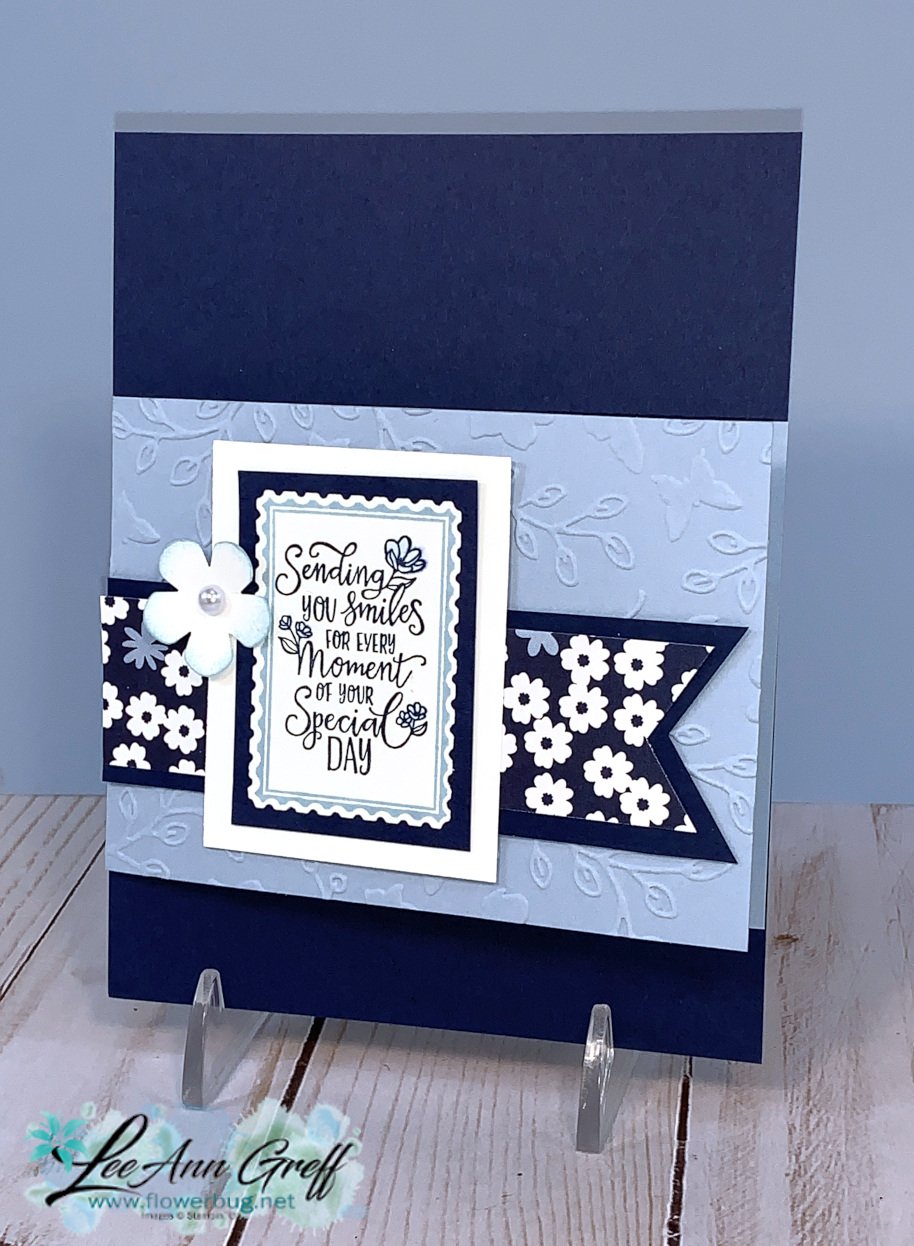
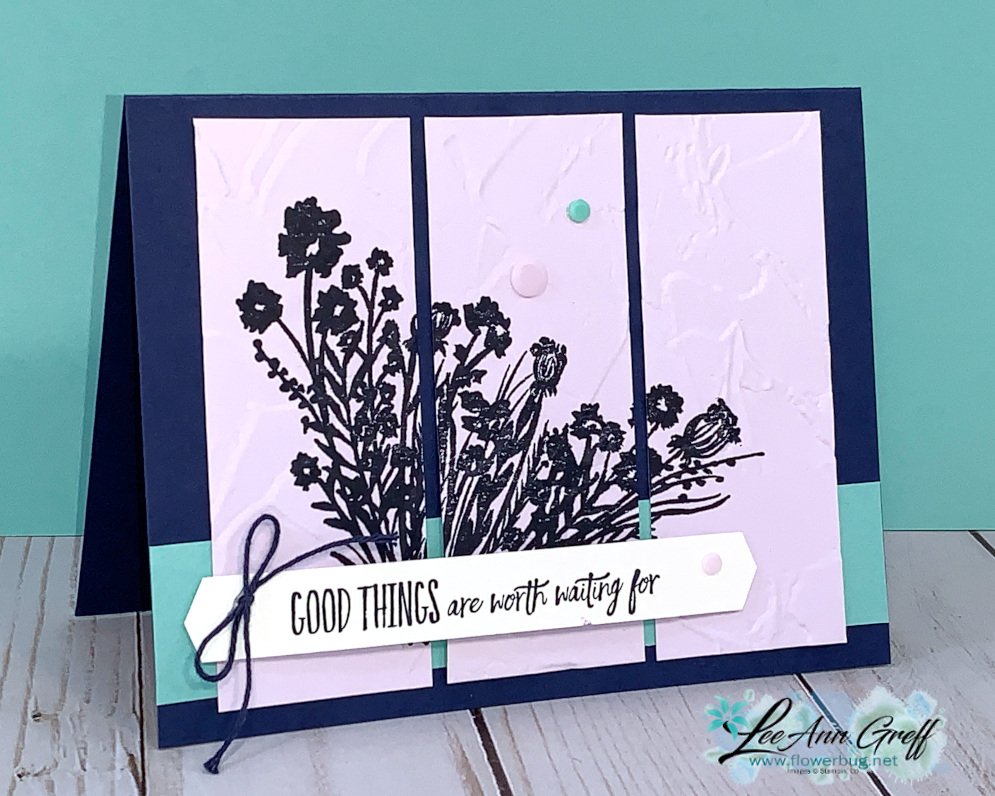
Details:
- I also used a new and FREE Designer Paper called Paper Blooms here. The colors are Seaside Spray with Navy & White. I use this pretty color combo often.
- Can you tell it's a fun fold? The Seaside Spray is 3" X 8 1/2" scored at 4 1/4". I added texture with the Meadow Moments embossing folder. The Navy layer is a quarter sheet 5 1/2" X 4 1/4".
- I punched a white Small Bloom punch and added a pearl to the center. It's sponged for a bit of color.
- The main image is stamped and punched out with the Rectangular Postage Punch.
Here's a close up of this lovely stamped image.
Have you considered purchasing the Starter kit and enjoying a discount on your Stampin' Up! products? It's so rewarding to be a part of this fabulous company in multiple ways!
Here are my top 10 reasons!
1. Enjoy the discount of 20% off all products!
2. Early release and preordering!
3. Extra income while doing something you love!
4. Access to the Stampin' Up! website!
5. My exclusive team Facebook page, FB Lives, and in-person get togethers.
6. Fun team swaps for ideas. Monthly challenges & prizes.
7. Exclusive Facebook Page with Stampin' Up!
8. My team training and one-on-one training to help you get started and continue successfully! There is no limit on the training- it's as much or as little as you want!
9. Earn Stampin’ rewards towards products you love, by hosting in-person and online workshops!
10. Share your love of Stampin’ Up! products with others as you build your business with Stampin’ Up! and ME, your team leader!
So, why wait? Join my Flowerbugs team here!
Choose the Starter Kit for $99; pick out $125 in product of your choice!
During Sale-a-Bration you get 5 packs of NEW 6" Designer Paper FREE!
Go here to read about it
~~~
Current Host code is JQAFYSUW
Order online here
Get a package of 200 Pastel Pearls from me with an online order over $50 using the host code above.
*If your order is over $150 do not use the code; you'll still receive a gift!
Below are the Multipurpose Glue stands we're making. They're $6 each and available in my Shop here.


Leave a Reply