She used the Stitched Rectangle dies for her front layers, the Snowflake Splendor designer paper on the left and the Snowflake Wishes bundle for the stamps & die-cuts. Note the pretty Glimmer snowflake! Our Balmy Blue Glimmer paper is gorgeous!
She used Pacific Point ink on the greeting and the faint snowflakes in the background were done by stamping off a few times to get a lighter hue.
Measurements:
Balmy Blue 4 1/4" X 8 1/4" scored at 5 1/2", stitched rectangle die-cut is 3" X 4 1/4"
Whisper White inside 4" X 5 1/4", stitched rectangle die-cut is 2 5/8" X 4"
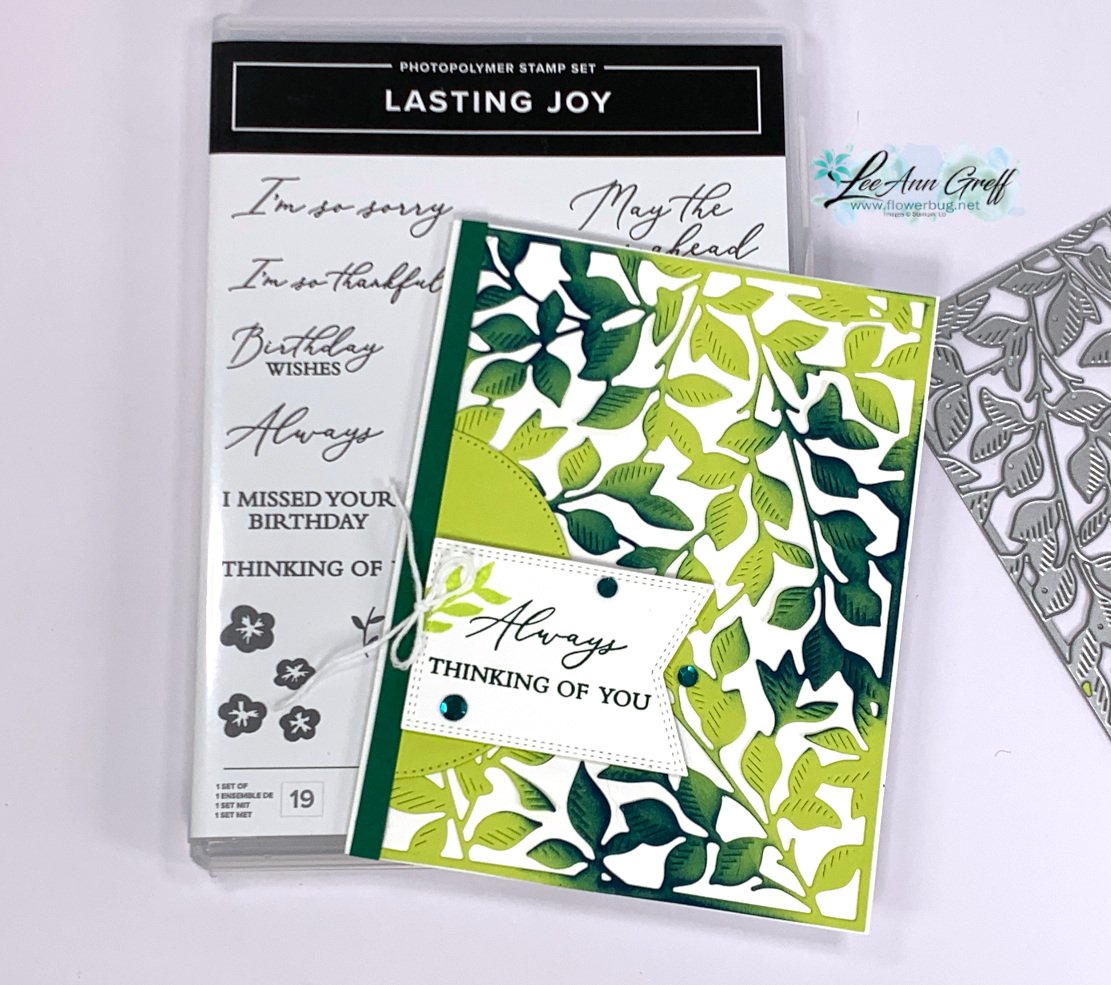
It's a double-decker fun fold card. It might look hard but it sure isn't! All you need to add is a simple box between the middle layer and the inside back of the card. Watch the video here to see how it's done.
Using our Blending Brushes I added the three colors (Tahitian Tide, Brilliant Blue & Gorgeous Grape) to a piece of White cardstock. I then used the Garden dies to die-cut it out. I adhered this to the back of the card base before adding the 'box' to create the double-decker fun fold card.
I created a second colorful die-cut so I could add extra details to the cards.
I think it's stunning. Don't you love the pretty blending of the greens? I simply added one color to the finished die-cut. I cut it out from Lemon Lime Twist cardstock and added Pretty Peacock ink with a blending brush in a few areas. Easy!
I was surprised that the finished color (after adding Pretty Peacock to Lemon Lime Twist) was close to Shaded Spruce. Who knew?! So I added a 1/4" strip to the left edge of the card to bring in that color and also stamped the greetings in Shaded Spruce too.
Tip: Adding your colors in two or more ways to your project gives them a cohesive look. For example if I use green card stock I will add a layer of green or a stamped image. If you struggle with choosing color combinations stick with just two colors. Or better yet try a monochromatic card – add one color to a neutral like white, browns or black.
I added a stitched circle to the left side to anchor the greeting. Both of these dies are from the Stylish Shapes dies; they're a must have!See them here.
It features the Earthen Textures stamp set & dies bundle. Unfortunately the dies are in low inventory so they may be unavailable soon. But they'll be back I'm sure. You can see them here.
I'm not quite ready for fall yet but I do love this color combination of Pecan Pie & Pretty Peacock. A little touch of gold adds some elegance with the Gold Distressed paper and Festive Pearls. I added more detail with a stitched edge with the Stitched with Whimsy dies. That notebook die-cut edge is from the Gorgeously Made dies seen here.
And here's a very simple version with a similar layout:
I didn't even add any bling or embellishments to this one. I think it needs something… maybe gold pearls?
I stamped the vase in Pecan Pie on Basic White and die-cut it out. Then added another die-cut of the handles from our Gold Distressed paper. The greeting is heat embossed with White embossing powder on Pretty Peacock card stock.
The nice thing about this layout is you can get 5 card fronts from one 8 1/2" X 11" paper when using my 5 at a time layouts. See them here on this post.
You can see more Earthen Textures cards on the video here. Don't forget to subscribe to either my FB page here to join in the Live's each Tuesday morning. Or follow me on YouTube here.
Notice: LeeAnn Greff, Independent Stampin’ Up! Demonstrator, Manager. The content of this website is my sole responsibility as an independent Stampin’ Up! demonstrator and the use of, and content of, the classes, services, or products offered on this website is not endorsed by Stampin’ Up! Copyright 2025


Leave a Reply