/


Latest Post

Simple & fun card sketch with Honeybee Home


Do you ever use card sketches to get inspired?  I love them!  I find most of them on Pinterest. 

We use card sketches & color combos on my Flowerbug's Team group for challenges & inspiration.  It's so fun to see the different projects everyone comes up with. This is the sketch we're using now:

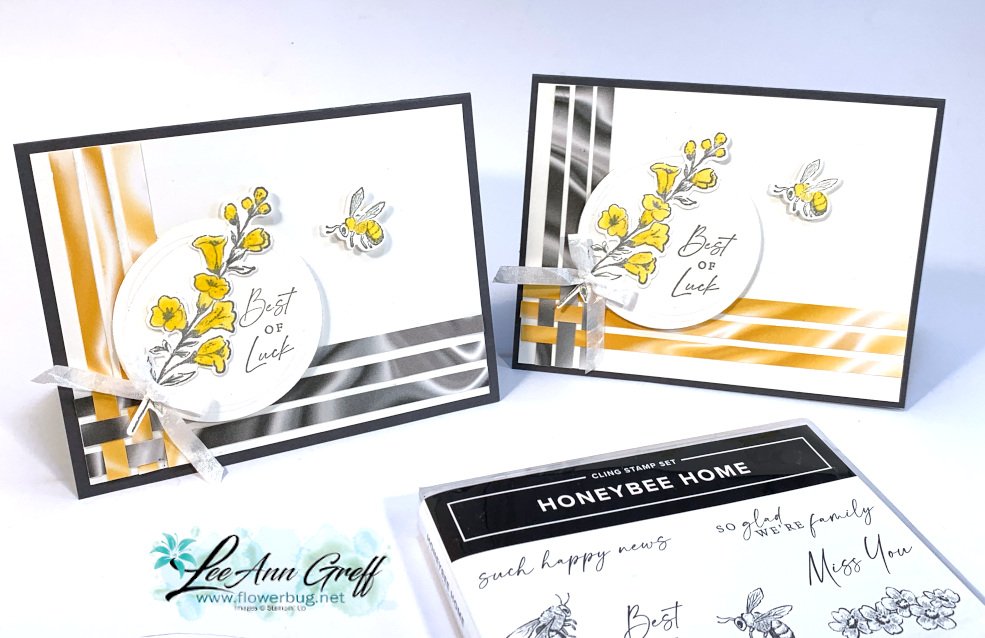
I used it as inspiration to create this card with the Honeybee Home bundle and the Simply Marbelous designer series paper. 

It's such an easy sketch to use.  Some are using card stock, others designer paper and one used ribbon!  

My card is Basic Bray with Bumblebee accents.  Gray & yellow are beautiful together.  In fact one of my bathrooms has these colors! 

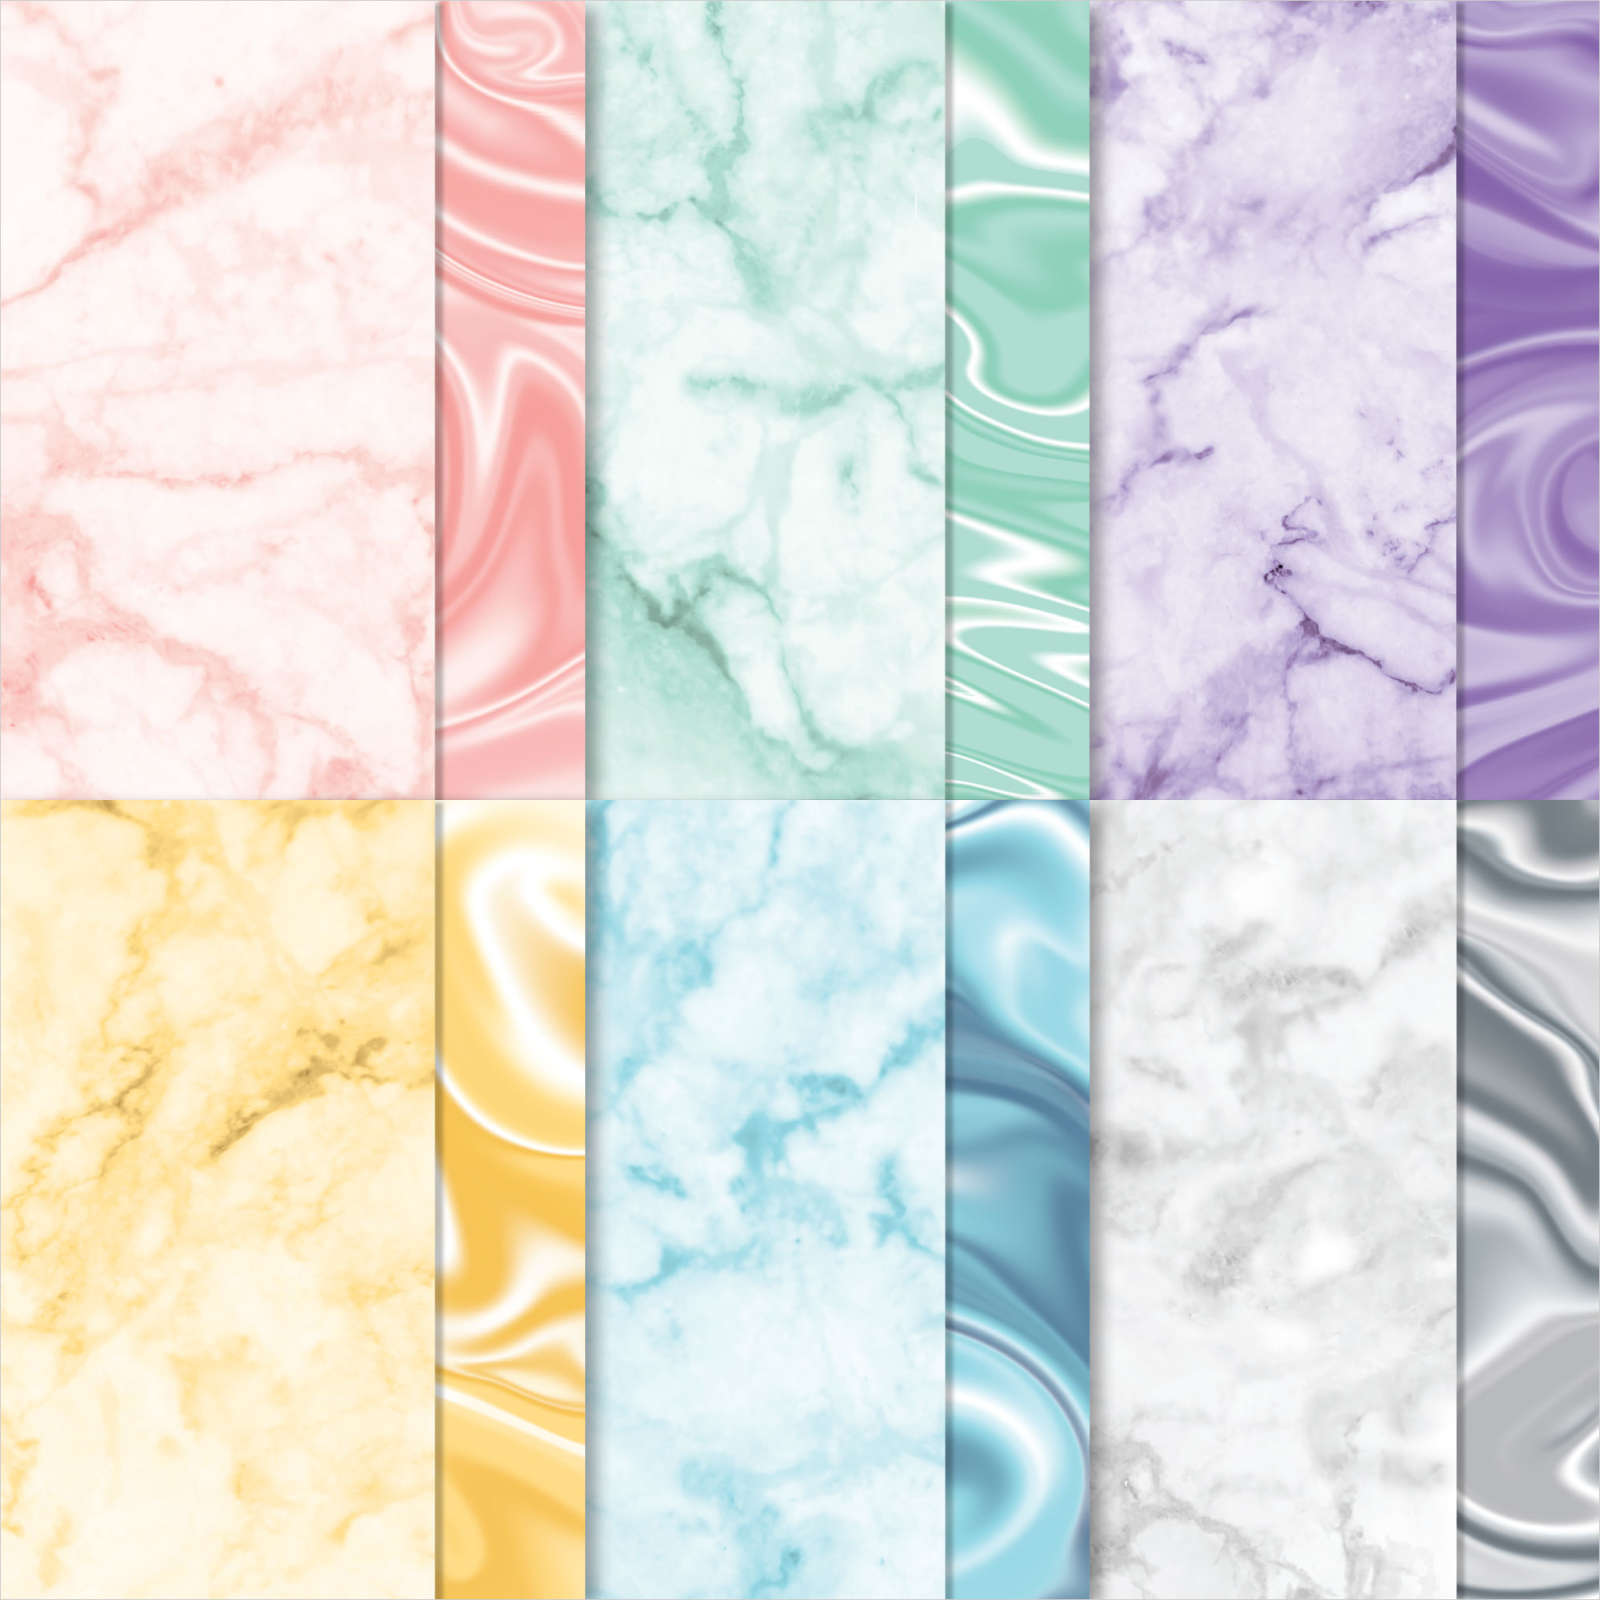
The Simply Marbelous designer paper was my color inspiration.  This 6 X 6" DSP is free with a $50 Stampin' Up! order through the month of February; or while supplies last.  See it here. 
On the video I share my tips on placing these 1/4" strips.  It's a little tricky but entirely doable!  

The greeting and flower die are placed on a circle die-cut from the Beautiful Shapes dies seen here.  
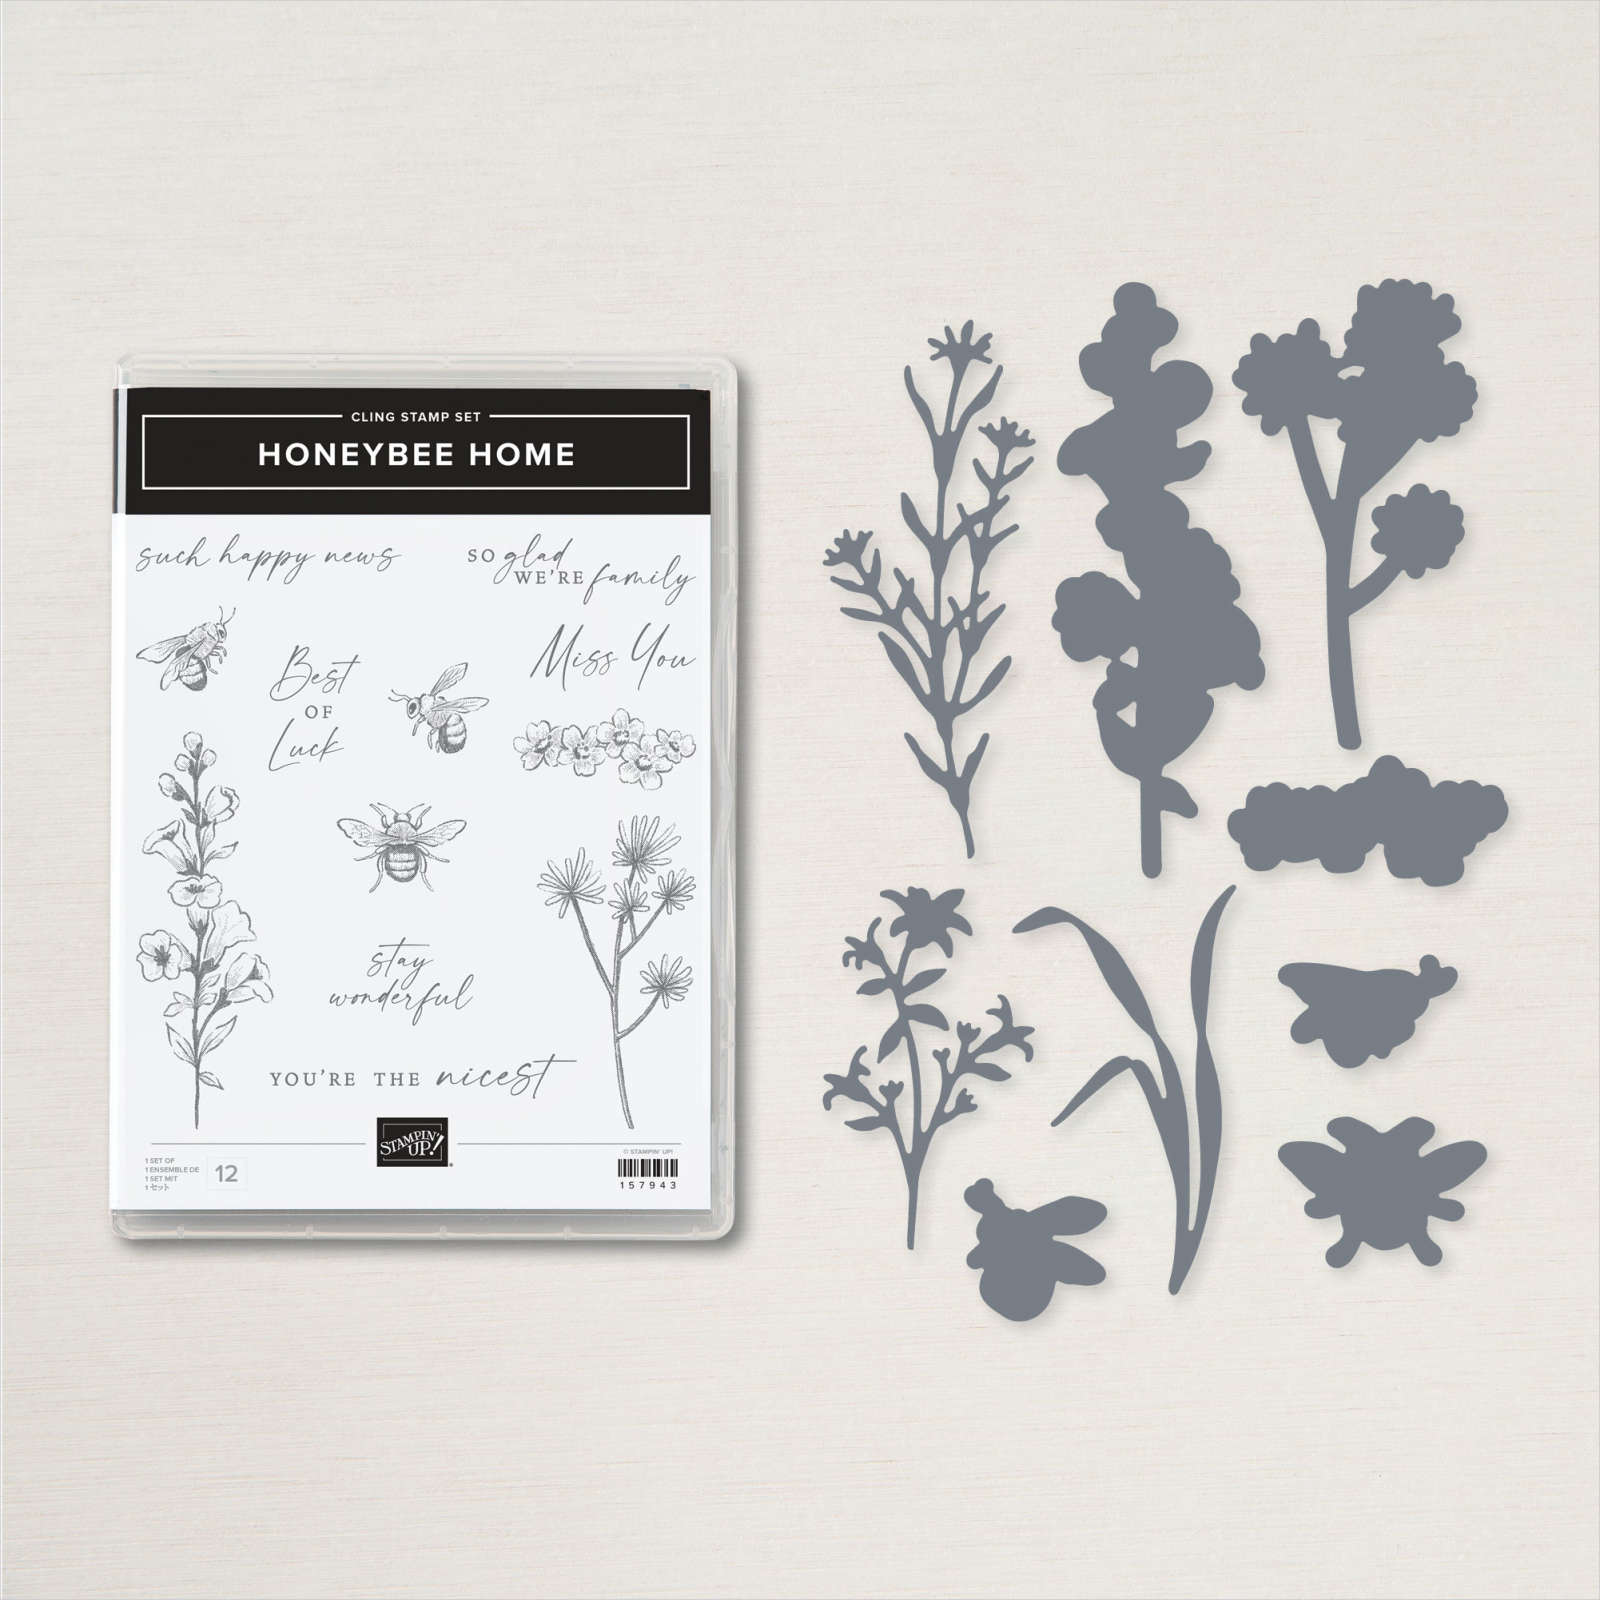
See this Honeybee Home bundle here.  The stamp set has pretty images & greetings and the dies work great as silhouettes! 
~~~

 Hot Deals in February:

Choose $125 in product PLUS any 2 stamp sets free in February!

It's just $99. Get FREE shipping too!

Click here to get yours.


Host codes:  S9WGFH9Z or 3WCHFFUW

 *click here to order 


Use the host code above & get a free Easel Calendar kit

& the Gingham embossing folder with a $55 order in February, 2022! 


Get a free calendar kit with any size order in February!
All Posts

  • 3 remarkable card ideas with the Mountain Air bundle


    Continuing my Masculine swap share this week all of today's cards feature the Mountain Air stamp set seen here & Majestic Mountain dies seen here.  My Flowerbug's Team did an incredible job on their swaps; I hope you've been enjoying the ideas. 

    First is a clever card made by Jacki.  She created quite the special camping scene! 

    Her colors include Evening Evergreen, Crumb Cake, Early Espresso & black with a bit of yellow on the camper.

    That adorable camper is from the Tree Lot dies – one of the Sale-a-Bration choices in July & August.  See it here.  It's free with any $100 Stampin' UP! order.  *Remember that our Sale-a-Bration items are while supplies last…..

    She masked her mountains and blended on a pretty skyline in blue & purple.  

    Did you catch the 'curtain' in the camper?  That's our Black & White gingham ribbon!!  And the hitch is done in Silver foil.  

    ~~~

    Next is another special card made by Tracey.  I really like how she created a smaller scene than we usually do; almost like a picture in a frame.  Out of the box thinking!  

    Her colors are Crumb Cake, Old Olive, Pacific Point & Early Espresso.  Stamping the greeting repeatedly on a strip is another unique way to add a greeting but not a separate greeting image.  

    She colored her stamp with markers to get the blue water on the same stamp as the small trees.  She masked the trees and stamped a 2nd time to get more water.  So smart!  

    ~~~

    Next is my card.  I wanted to do a 'Triptych' card – this is where you have three separate panels creating a scene.  

    Details:

    • I stamped the mountain & trees images all on one piece of White CS using the Stamparatus. It measured 4 1/2" X 3 1/4" and after stamping they are cut to 1 1/2" wide.
    • I used Evening Evergreen, Soft Succulent & Gray Granite ink.  I stamped the same 'tree' image a second time in Soft Succulent, but I moved the card stock up and over a bit so it wasn't directly above the first set.  
    • I sponged Evening Evergreen on the bottom and Balmy blue on the top, masking the mountains a bit so they stayed white.  
    • The large White layer is 5 1/4" X 4" and is textured with the Timber 3D embossing folder. 

    Here's the Mountain Air stamp set; as you can see it is a scene builder set which is a favorite type of set for me. This one is special because it's a reversible set which means one side features a silhouette and the other side is a detailed image. Fun & versatile!  

    Cards for men can be hard for some of us to make so I hope you're enjoying the 'manly' cards I'm sharing all this week! 

    ~~~

    July Specials

    Get free items here in July & August during Sale-a-Bration! 


    Host code: RMFKDE3G


    Get a free card class in the mail with a $55 order from July 1-30th.

     *click here to order 

    Earn free products with my loyalty rewards! 

    Click here to download yours and earn a $50 shopping spree!

    ~~~

    Get my Holiday Designer Paper share; contact me here  

    Leave a Reply

    Your email address will not be published. Required fields are marked *

  • 3rd set of WOW Masculine swap cards by my Team!


    I have another set of incredible swap cards made by my Flowerbug's Team.  Our theme in July was masculine cards and the cards are out of this world creative!  I'm sharing a bunch each day this week. 

    First up is a card made by Candace.  She really went outside the box with her background strip idea.  The various widths & lengths of strips are a clever & unique way to set up her aquatic scene.  

    She used the 'Whale Done' stamp set and the coordinating Whale punch.  That neat 'seaweed' is from the Delicate Edges dies seen here.  

    Her colors are unique but sure work well together!  They are Soft Sea Foam, Evening Evergreen, Soft Succulent & Orchid Oasis.  Great job!!


    Next is Becky's fun 'sailboat' card.  She used the Let's Set Sail Bundle seen here.  

    Her colors are Night of Navy, Parakeet Party & Sahara Sand.  The DSP is from the Sun Prints.  It's a fancy fold too!  

    Notice her clouds on the background?  She used the Friends are Like Seashells stamps for those!  So clever! 

    Measurements:

    • The card base is 4 1/4" X 11" scored at 5 1/2". 
    • The long strip is 1 1/2" X 11" scored at 2 3/4", 5 1/2" & 8 1/4" and is adhered only at the two end pieces.  
    • The squares are 1 3/4" & 2" in size.  

    Next is a wonderful card made by Monica.  She used the Dragonfly Garden stamp set & coordinating Dragonflies punch.

    Details:

    • Her colors include Soft Suede, Soft Succulent & Evening Evergreen.  She textured the various strips using the new Painted Posies 3D embossing folder. 
    • The strips are all 4 3/4" long but vary in width from 5/8" – 1 1/4" all adhered to a 4" X 5 1/4" piece of White CS.  Again, strips to the rescue for a unique background idea; perfect for men.  
    • The greeting die-cuts are from the Stitched Rectangle dies. 
    • The dragonfly is stamped on Vellum and punched out. But she stamped it again on a piece of the Texture Chic specialty DSP for the center.  So it has gold details on it! 

    Stay tuned for more masculine card ideas tomorrow and all this week!  

    ~~~

    July Specials

    Get free items here in July & August during Sale-a-Bration! 


    Host code: RMFKDE3G


    Get a free card class in the mail with a $55 order from July 1-30th.

     *click here to order 

    Earn free products with my loyalty rewards! 

    Click here to download yours and earn a $50 shopping spree!

    ~~~

    Get my Holiday Designer Paper share; contact me here  

    Leave a Reply

    Your email address will not be published. Required fields are marked *

  • 2nd set of my Team’s awesome masculine swap cards


    Yesterday I shared 4 of my Flowerbug's Team manly card ideas for our July card swap.  Today I have three more.  I'm so proud of them; it's obvious they really did their best to make incredible swaps.  

    Today's first card was made by Candy. She used the Wildlife Wonder stamp set & Grassy Grove bundle seen here.   

    Her colors include Soft Suede & Mossy Meadow.  Here are some tips on how she achieved this amazing card:

    1. Die-cut the tree & grass silhouette from White CS using the Grove dies. Trim to 5" X 3 3/4". 
    2. Stamp the bear on the background White layer (51/4" X 4")
    3. Stamp the grass image on the bottom of the die-cut.  
    4. Use the trio of trees image to stamp all over the 'foiliage' area of the die-cut using Mossy Meadow ink, stamping 1st, 2nd and 3rd generation of ink.  
    5. Use a blending brush to add more green as needed. 
    6. Sponge color to the edges of all layers. 
    7. Distress the edges with the side of your scissors. 
    8. Use a Soft Suede Blends marker to color the trunks.  
    9. Adhere the die-cut over the bear image. Add to the card base. 
    10. Stamp & add the greeting layer. 

    Amazing, right?!!  So proud of you Candy!  


    Next is another incredibly detailed card made by Roxann.  She used the Beauty of Friendship stamp set seen here. 

    I love her corner details but the layer of vellum that softens her stamped trees background is amazing!  It gives an ethereal or foggy feel to the scene.  She used Mossy Meadow with Early Espresso ink & card stock.  

    I love the triple tag detail on her greeting.  I believe that is from the Mini Pocket Envelope dies.  Such a unique & special card. 


    Lastly for today is a pretty scenic card made by Deloris.  She used the Grassy Grove  bundle seen here.

    Her colors include Old Olive, Soft Suede, White and a bit of blue for her sky.  I believe she used Blending Brushes for that soft background.  

    Here's what's included in the Grassy Grove bundle.  

    There are a lot of die-cuts here; in fact everything on the front is a die-cut!  The ground, trees & deer are all from the Grove dies.  The greeting is from Peaceful Moments and that die is from the All That dies.  

    All are incredible cards for the men in our lives and I couldn't be prouder of them!  

    Stay tuned for more masculine card ideas tomorrow and all this week!  

    ~~~

    July Specials

    Get free items here in July & August during Sale-a-Bration! 


    Host code: RMFKDE3G


    Get a free card class in the mail with a $55 order from July 1-30th.

     *click here to order 

    Earn free products with my loyalty rewards! 

    Click here to download yours and earn a $50 shopping spree!

    ~~~

    Get my Holiday Designer Paper share; contact me here  


    Leave a Reply

    Your email address will not be published. Required fields are marked *


Notice: LeeAnn Greff, Independent Stampin’ Up! Demonstrator, Manager. The content of this website is my sole responsibility as an independent Stampin’ Up! demonstrator and the use of, and content of, the classes, services, or products offered on this website is not endorsed by Stampin’ Up! Copyright 2025